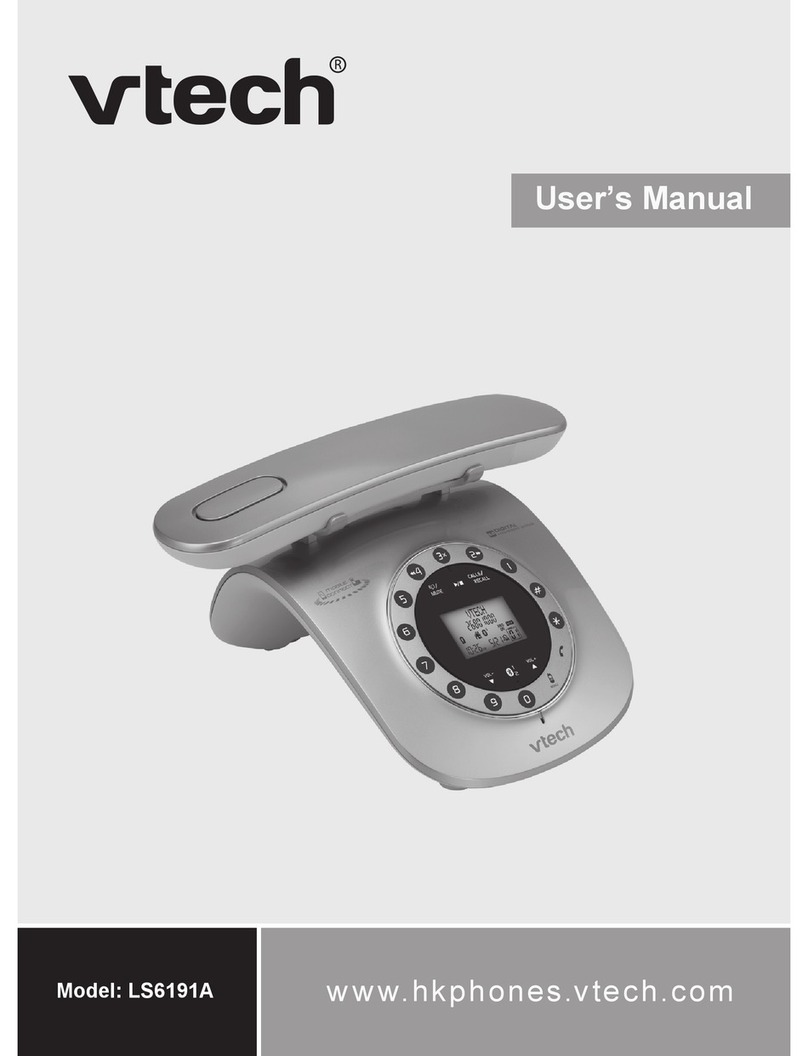
V-tech VT 1911 User manual

1vrm
VTECH COMMUNICATIONS LTD.
Is a trademark of VTECH COMMUNICATIONS LTD
...
a member
of THE VTECH GROUP OF COMPANIES.
Distributedinthe U.S.A. byVTECHCommunications,11035 SW 11th Street Bldg,B. Suit
270 Beaverton,OR, 97005.
Distributed inCanada by VTECH Electronics Canada Ltd., Suite 200
-
7671 Alderbridge
Way Richmond, B.C. V6X
1Z9.
Copyright 1996 for VTECH COMMUNICATIONS LTD..
Made inChina
91
-5059-1
0-00
ISSUE
0
DIGITAL 900Ml
CORDLESS
Pl
MODEL
VT
19.
[VT~]
VTECH COMMUNICATI(
ONE
f
DIGITAL
9OOMHZ
CALLER
10
MODEL
VT
1911
S
LTD.

...............................................................................................................
Page
..............................................................................................................
1
2
...............................................................................................................
3
FCC
4
........................................................................
7
......................................................................................
9
.........................................................................................................
11
.........................................................................................................
14
15
............................................................................
16
..........................................................................................
17
BASIC
OPEFATION
...................................................................................................
19
.........
...................
ADVANCEDl'FUNCTIONS
..
...........................................................
..
20
........................................................................................................
CID With CAIWaiting 20
........................
.....................................................................................
Switching Calls
..
20
..........................
..............................................................................
TemporayTcjne
...
20
..................................................................................................
Programmin' The Ringer 20
F
.....................................................................................................
Changing R ger Types 20
.
....................................................................................................
Turning
Off
he Ringer 21
.................................................................................................
Checking
The
RingerType 21
......................................................................................................
CLRIDEL Key Function 21
.............................................................................................................
Advanced D;?ling 21
...............................................................................................................
CID-CALLE ID
25
CID-CALLE ID
................................................................................................................
25
..............................................................................................
Receiving a Storing Calls 25
.............................................
i
Dialing Fro CID Memory
..........................................
25
........................................................................................................
Out Of Are :Calls 26
................................................................................................................
"Private" Ca s 26
...........................................................................................................
Transmissio Error 26
'
..........................................................................................................
Reviewing mbers 27
...............................................................................
SPECIAL
M
SSAGE INDICATION
29
...............................................................................................
IN CASE
08
DIFFICULTY
32
TECHNICA SPECIFICATIONS
.......................................................................................
34
t

Congratulations! You havepurchased
one of the mostsophisticatedcordless
telephonesonthe market! The VTech
VT 1911 has been designed to offer
a new standard in cordless telephone
technology.
Unlikemostother cordlessphones, the
VTech VT 1911 digitizes your voice
using advanced ADPCM digital voice
coding to provide noiseand distortion
free performance. In most conditions
youwillnotbeable totellyou are using
a cordless phone. Gone are the
annoyancesof static, interferenceand
having to 'listen to other people's
conversationsonyourcordlessphone.
The VTech VT 1911 scrambles your
voice before it transmits it. This allows
youthesecurityof knowingthat noone
can tune in and eavesdrop on your
conversations.
The VTech VT 191
1 decodes and
displays name and number Caller ID
(CID) informationwhere available and
when subscribed to. The alpha-
numeric display will show both the
name and numberof the calling party.
Upto
24
namecharactersor 11phone
numberdigitscan be displayedon the
LCD.
With the VTech VT 1911, the usercan
easily answer a call by pressing and
key other than the OFF, MUTE or
VOLUME Keys. Inaddition,thehandset
keypad and LCD illuminate while the
handset rings to signal an incoming
call. This is very useful in a dark
environment.
The VTech VT 191
1
also provides a
SPECIAL
one-way PageIFind.pressingthe base
PAGE key will cause the handset to
ring in a manner which distinguishes
it from normal incoming ringing. This
can be used to alert the handset user
or to simply locatethe handset in the
event that it is misplaced.
The VTech VT 1911 uses special
memoryin both the base and handset
which is not susceptible to power
failures. This provides permanent
storageof all speeddial numbers,CID
information as well as the base and
handset security codes.
When aspare battery isinstalledinthe
base unit,theVTech
VT
1911usesthis
batteryto provide operationalbackup
in case of power failure. In this way
you have access to all normal phone
functions during a total power outage.
Calls can still be placedand received
without interruption. Morethan
5
hours
backup will be possible with a fully
charged battery in the base unit.
The VTech VT 191
1also informsyou
that another extensioniscurrentlyoff-
hook on the same phone line. The
phonewill also alert you when you are
Out of Range even when you're not
using the phone!
900
M
Fully
C
and Bi
mg.
Digitall
nicatio
Name
2 row
matrix
50 CIC
Backlii
Backlit
20
lot:
for 20
10 Ch
channc
Out-of,
hands
mode.
Remo\
Spare
unit.
Compl
of pow
instalk
r
rFATURES
z
Operation.
~'talLink between Handset
with ADPCM voice cod-
$crambled Voice Commu-
I
umber CID display.
12 character 5x7 dot
pha-numeric LCD.
pemories.
,CD on the handset.
landset keypad.
en Programmable Memory
igit Phone Number.
~nelOperation with auto
eelection.
'ange indication while the
I
is in use or in standby
le handset battery pack.
ttery charger in the base
1
p
battery back-up in case
,failure (with spare battery
in base).
Easy answer
-
When the phone
rings simply press any key other
than OFF, MUTE, or the Volume
Keys on the handset to answer.
Auto hang up when returning the
handset to the base cradle.
Extension in use indicator.
24
Bit Digital Security Code for
16.8 million combinations.
DTMF and Pulse Dialing.
Low Battery Detect and Warning
indicator.
Handset Power Saving for 7 days
Standbytime 7.0 Hourscontinuous
talk time.
Volume Adjust on Handset.
REDIAL, HOLD, PAGE and MUTE.
Hearing-AidCompatible Receiver.
Detachablepower supply.
Non-volatile storage of security
code and speed dial memories.
Programmable Ringer Types.
This manualis designed to make you
'
familiar with the VTech VT 1911. We
strongly recommend you read the
manual before using your phone.

Parts
Check
List
To purchase replacement battery
1.
Baseunit, HandsetandAC adapter packs, call VTECH Communications
2.
One-LineTelephone Cord at 1-800-624-5688. In Canada, call
3. Battery Pack VTECH Electronics at 1-800-267-
4.
Wall mount accessory 7377.
BASE UNIT
AC POWER ADAPTER
=c==L
TELEPHONELINECORD
WALL MOUNTING
BRACKET
BATTERY PACK
complieswith Parts 15
Communications
!:
A
label is 16catedon the undersideof
the base hitcontaining the FCC
registration?umberand RingerEquiva-
lenceNum er (REN). You must, upon
I
request,
p
ovide this information to
your local.glephone company.
f
is compatible with
may ask you to
corrected.
or modificationsto
1
The equipment has been tested and
found to complywith part 15of the FCC
rules. These limits are designed to
provide reasonable protection against
harmful interference in a residential
installation. Thisequipmentgenerates,
uses and can radiateradio frequency
energy and, if not installed and used
in accordance with the instructions,
may cause harmful interference to
radiocommunications. However,there
is no guaranteethat interferencewill
not occur in a particular installation. If
this equipment does cause harmful
interference to radio or television
reception,which can be determined by
turning the equipment off and on, the
user is encouragedto try and correct
the interferenceby one or more of the
following measures:
-
Reorient or relocate the receiving
antenna.
-
Increase the separation between
the equipment and receiver.
-
Connect the equipment into an
outlet or on a circuit different from
that to which the receiver is
connected.
-
Consult the dealer or an
experienced radiorTV technician
for help.
FCC
Part
68
The FCC requires that you connect
your cordless telephone to the nation-
wide telephone network through a
modulartelephonejack (USOC RJ11C,
RJllWor RJ14).

Your telephonecompany may discon-
tinue your service if your equipment
causesharmtothetelephone network.
They will notify you in advance of
disconnection, if possible. During
notification,youwill beinformedof your
rightto file a complaint with the FCC.
Occasionally,your telephonecompany
may make changes in its facilities,
equipment, operation, or procedures
that couldaffect the operation of your
equipment. If so, you will be given
advance notice of the change to give
you an opportunity to maintain
uninterrupted service.
The base unit contains no user
serviceable parts. The handset
contains a user replaceable battery
pack.
If it is determined that your telephone
equipment is malfunctioning,the FCC
requires that it not be used and that
it be unpluggedfrom the modularjack
untilthe problem has beencorrected.
Repairs to this telephone equipment
can only be madebythe manufacturer
or its authorizedagents or by others
who may be authorized by the FCC.
For repair procedures, follow the
instructionsoutlinedunderthe VTECH
LimitedWarranty.
This equipment may not be used on
coin service provided by the phone
company or Party Lines.
The
REN
is useful in determining the
number of devices you may connect
to your telephone line and still enable
the devicesto ring when you receive
acall. The general ruleisthatthe
REN
value should not exceed
5.OA
total;
however, contact your localtelephone
company for the specific number in
your area.
I"
I!
Caution: qsers should not attempt to
make such connections
themselves, but should
thority, or electrician, as
propriate.
Your VTeok VT
191
1
is designed to
operate at/"themaximum power al-
lowed by the FCC
.
This means your
handset add base unit can communi-
onthe locationof the
or place

When usingyour telephoneequipment,
basicsafety precautionsshouldalways
be followed to reduce the risk of fire,
electric shock and injury to persons,
includingthe following:
1. Read and understand all
instructions.
2.
Followallwarnings and instructions
marked on the product.
3.
Unplug this product from the wall
outlet before cleaning. Do not use
liquid cleaners or aerosol cleaners.
Use a damp cloth for cleaning.
4.
Do not use this product near water
(for example, near a bath tub,
kitchen sink, or swimming pool).
5.
Do not place this product on an
unstable cart, stand, or table. The
product may fall, causing serious
damage to the product.
6. Slots and openings in the cabinet
andthe backor bottomareprovided
for ventilation. To protect it from
overheating, these openings must
not be blocked by placing the
product on the bed, sofa, rug, or
other similar surface. This product
should never be placed near or
over a radiator or heat register.
his
product should not be placed
ina built-ininstallationwhere proper
ventilation is not provided.
7. This product should be operated
only from the type of power source
indicatedon the marking label. If
you are not sure of the type of
power supplyto your home, consult
your dealeror localpowercompany.
8.
Do notallow anythingto rest on the
power cord. Do not locate this
product where the cord will be
abused by persons walking on it.
9.
Never push objects of any kindinto
this product through cabinet slots
as they may touch dangerous
voltage points or short out parts
that could result in a risk of fire or
electricshock. Never spill liquid of
any kind on the product.
10.To reducethe riskof electric shock,
do not disassemble this product,
but take it to a VTech authorized
service facility. Opening or
removing cabinet parts other than
specifiedaccess doors may expose
you to dangerousvoltagesor other
risks. Incorrect reassembling can
cause electric shock when the
appliance is subsequently used.
11.Do not overload wall outlets and
extension cords as this can result
in the risk of fire or electric shock.
12.~n~lu~.#his
'1.
product from the wall
outlet 'nd refer servicing to a
VTech
1
uthorized service facility
under tke following conditions:
A. Whdn the power supply cord or
plug is damaged or frayed.
B. If liqdidhas beenspilled intothe
product.
C. If th8producthas beenexposed
to rain or water.
D. Ifthe productdoes not operate
normally by following the oper-
ating instructions. Adjust only
the p'roductto normaloperation.
E.
If the producthasbeendropped
and the cabinet has been dam-
aged.
F. If the productexhibits a distinct
change in performance.
13. Avoid using a telephone (other
than a cordlesstype) during an
electricalstorm. There may be
a remote risk of electric shock
from lighting.
14. Do not use the telephone to
report a gas leak in the vicinity of
the leak.
VTECH COMMUNICATIONS
SERVICE DEPT. at 1-800-624-5688.
In Canada, call VTECH Electronicsat
1-800-267-7377.
!SAVE
THESE INSTRUCTIONS
'I
1
'!I
THE
RBRCTM
Seal
TheRBRCB Seal
cadmiumbattery
cates that VTech
E RBRCB program
the spent battery at local retail-
ers participating in the
RBRCBprogram or at author-
ized VTech product service
centers.Please call
1-800-8-
BATTERYTM
for informationon
Ni-Cd battery recycling and
disposal banslrestrictiosinyour
area. VTech's involvement in
this program is part of its
commitment to protecting our
environment and conserving
natural resources. Remove the
nickel-cadmiumbattery packby
pressingon the lock knob and
slidingdownwardas mentioned
on this manual.
RBRC is
a
registered
trademark of Rechargeable
Battery Recycling corpora-
tion.

old battery pack. Don't
battery pack in a trash
or a fire
-
it could burst.
Charging'the handset batteries
The handset of your VTech VT
1911
cordless telephone is powered by a
rechargeablebattery pack. It charges
automaticallywheneverthe handset is
in the base. You should charge the
batterypackfor
16
hourswhenyoufirst
receiveyour phone. You'll know the
battery pack needs charging when:
exchangethe drained handset battery
pack with the fully charged replace-
ment battery pack from the base
charger. Place the drained handset
battery pack into the base charger so
that it will charge.
CAUTION:
,,.
,
To Reduce the Risk of Fire or Injury
to Persons, Read and Follow the
Instructions
3.
Place {ke new battery pack in its
I
housinb with the metal contacts
1.
Use only VTECH rechargeable
battery pack.
PLACETHE NEW
COMPARTMENT
PLEASE NOTETHE
CORRECT POSITION
OFTHE BAlTERY
CHANGINGEATERY
I
The base spare battery charger does
NOTchargeabattery PACKas quickly
as the main handset battery charger.
A
full charge requires
24
hours.
2.
Do not dispose of the battery in a
fire. The cell may explode.
The phone beeps when you press
the PHONE key. IMPORTANT: Do not dispose of this
battery into household garbage. For
information on recycling or proper
disposal,consultyour localsolidwaste
collection or disposal organization.
IT'S IMPOSSIBLE TO OVER-
CHARGE THE BATTERY PACK
The battery pack can be recharged
manytimes but
if
you get a low-battery
signal even after
8
hours of charging
in the base cradle (or
24
hours in the
basespare batterycharger),the battery
pack(s) should be replaced.
The low battery message is
displayed:
3.
Do not openor mutilatethe battery.
Released electrolyte is corrosive
and may cause damage to the
eyes or skin. It may be toxic if
swallowed.
the battery case cover by
The handset seems completely
dead, the
LCD
is completelyclear
and the handset does not beep
when you press the keys.
To purchase renlacement battery
packs, callVTECH Communicationsat
1-800-624-5688.
In Canada, call
VTECH Electronics at
1-800-267-
7377.
iecover upwards.
4.
Exercisecare in handlingbatteries
in order not to short the battery
with conducting materialssuch as
rings, bracelets, and keys. The
batteryor conductor may overheat
and cause burns.
SLIDE INTHE
BATTERY
COVER
To Charge The Battery Pack
To charge the batterypack, place the
handsetinthebaseunit. TheCHARGE
indicatorwill lightto show the handset
isseatedproperlyandthe batterypack
ischarging. Itisrecommendedthatthe
batterypack be chargedfor at least
8
hours. You can use your telephone
before that with diminished capacity,
butit isbestto chargethe batteryfully.
It will take several rechargecycles to
maximize the charge capacity of your
batterypack. Themaximumbatterylife
between charges is
7
hours of
continuoustalk time or
7
daysof stand
by.
ReplacingThe Handset Battery Pack
Follow the steps below:
1.
Removethe batten/case cover
bv
pressing on the ridged lines and To purchase replacement battery
packs,callVTECH Communicationsat
1-800-624-5688.
In Canada, call
VTECH Electronics at
1-800-267-
7377.
sliding downward.
5.
If the
alread
in the
allow
lew battery pack is not
:barged,
placethe handset
radle of the base unit to
to charge for
16
hours.
PRESS
and
SLIDE
DOWNWARD
Alternatively, if you have purchaseda
spare battery pack and.it has been
charging in the base unit, simply

Setting
Up
Your VTech VT1911
1.
Choose an area near an electrical
outlet and a telephone wall jack.
2.
Connect your telephone LineCord.
AC Power Adapter
Plug the AC power adapter into an
electrical outlet and the DC connector
to the back of the base unit.
TELEPHONE
WALL
JACK
SElTlNG
UPYOUR
VT191oc
II
1
AC
OUTLET
A
CAUTION:
Use CLASS
2
POWER SUPPLY
ONLY and use
9V
DC.
Handset Ringer
The handset ringer isprogrammedON
as the factory defaultsetting. Referto
PROGRAMMING THE RINGER on
page
21
for more information.
Setting the TonelPulse Switch
The
TONEIPULSE
switchislocatedon
the bottom of the base unit and is
factory set toTONE. If you havetouch
tone service, do notchange the switch
setting. If you have rotary (Pulse)
service, set the switch to PULSE.
-TONE PULSE
SELECTION
Charge the handset battery pack
beforeuse. The batterypackrecharges
automatically whenever the handset is
in the base unit. The batteries must
be charged for
16
hours before using
your phone for the first time.
CHARGE
THE
HANDSET
BAlTERY
PACK
FOR
16
HOURS
BEFORE USING
Fill in the telephone number card on
le base unit.
Check fo$
a
dial tone. After the
batteries 'ire charged, pick up the
handset.
b
ow press PHONE on the
handset. "PHONEON" will appear on
the LCD, a"d vou will hear a dial tone.
If not, see
on page
:
CAUTION
1.
Never
during
2.
Neveri
locatic
specif
locatio~
3.
Never,
wires
telepl
discor
interfac
/
4.
Use c
modify
Istall telephone wiring
lightningstorm.
tall telephonejacks inwet
s unless the jack is
ally designed for wet
~chuninsulatedtelephone
.
terminals unless the
ne line has been
ected at the network
tion when installing or
9
telephone lines.

USING
THE
WALL MOUNT
ADAPTOR
1.
Positionthe wall mount bracket
on the base.
Line up the tabs on the wall mount
adaptor with the holes on the
bottom of the base (Figure
1).
Snap the wall mount bracketfirmly
in place.
-
3
Figure
1
LCD Messages
i:
i
1
is displayed when the handset
microphone has been muted.
2.
Mount the base on the wall.
Positionthe base so the mounting
studs will fit into the holes on the
bottom of the base. Position the
powercordto extend downthe wall
the phone is to be mounted on.
Slide the base down on the
mounting studs until it locks into
place.
6
J
is displayed when the handset ringer
has been muted.
The OFF $30~Indicator is displayed
3.
Connect thetelephone linecord.
The telephone line cord has a
snap-in plug at each end. Insert
oneof the plugs intothejack onthe
bottomof the base. Insertthe other
end of the plug into the wall jack.
---
andset volume setting.
%
isdisplayedwhenthe handsethas lost
communicationwith the base unit and
is attempting to reestablisha link by
scanning all channels.
4.
Plug the ac adaptor on the
power cord into an electrical
outlet (Figure 2).
when the unit is in a low-
ition.The handset typically
at least
5
minutesafterthe
indication is given. is displayedif communicationwith the
base is reestablished.
5.
Set .theTONEIPULSE SWITCH
on the base unit.
If you have touch tone service on
your phone line, set the switch to
TONE. If you have rotary service,
set the switchto PULSE (Figure
3).
is display when the base pages the
handset. is displayed while in standby mode, if
another phone is currently using the
same line.
-TONE
PULSE
SELECTION
1
J
is displaydd when the handset is on
Figure
3

THE HANDSET FEATURES THE BASE FEATURES
ANTENNA
AC
POWER
JACK
]
PHONE CORD JACK
TONEIPULSE SELECTOR
1
VOLUME UP
&
DOWN
7
BATTERY COMPARTMENT ANTENNA
POWER
INDICATOR
IN USE
INDICATOR
CHARGING
INDICATOR
SPARE BATT
INDICATOR
PAGE KEY
LCD DISPLAY
HOLD
1
OFF KEY
PHONE KEY
DIALING KEYS
(0-9)
\
TONE (TemporaryTone)
\
REDIAL
CALLER ID
MUTE
CLEAR
1
DELETE
PROGRAM
MEMORY
MEMORY
DIALING CARD
-
SPARE BATTERYCHARGING
COMPARTMENT
CHARGING CONTACTS
CHARGING CONTACTS

MEMOR ,DIALING: To view the time and date of the
call press and hold the
7
0
key.
The time and date will be shown
along with the phone number. You
will see something like:
Here'sa briefguidetothe features and
functions of your VTech VT
191
1
TO MUTE A CALL
Press
(WE)
on the handset to
disable the handset microphone.
cordless telephone:
Press
(EE)
again to returnto
normal operation.
SET-UP
Connect telephone line cord to
base unit and telephonejack.
MEMORY
DIALING
PRESS=
PRESS-
YOU
WlLL
SEE
[OIAL]
LOCFIT
I
OH
,,
ENTER
MEMORY
LOCATION
(01
-
20)
TO PAGETHE HANDSET
Plug AC adapter into a standard
electrical outlet To age from the base, press
(jj).
-
As long as the key is held down.
Set Dial Mode switchto PULSEor
TONE. The unit is factory set to
TONE.
To cancel the PAGE either press To view othercalls, scrollbackwards
and forwards by using the
a
(*)
and
v
(
#
)
keys.
Let handset battery pack charge
for
16
hours before first use. STORING:
The phone should be
OFF.
Press
(MEM)
. To view additional name charac-
ters notshow on display,press and
hold the ~(8y
To exit press
OFF
.
...
and will be dialed.
MAKING CALLS
Press the(m@key on the
handset. When the "PHONE ON"
indicatorisdisplayed andyou hear
a dial tone, dial the number.
Enterthe number you wish to store
onthe LCD up to a maximumof 20
diaits. USING REDIAL
Press the
(P~Q
key, then
(mi
to automatically redial
out the last number you dialed.
STORING
THE
PHONESHOULD
BE
OFF
Enter the number to be dialed on
the LCDandthen pressthe PHONE
key.
ENTER
THETELEPHONE
NUMBER
YOU
WISH
TO
STORE
PRESS=
YOU
WlLL
SEE
Press
(m~)
so that the
number is shown on the display
and then press the
(P~E)
key.
ANSWERING CALLS
To answer a call on the handset,
key other than@,
the Volume Keys on the
handset. The handset will not
auto-answer when lifted off the
base cradle.
CID
-
CALLER
ID
ENTER
MEMORY
LOCATION
(01
-
20)
HOLD
Press to putacallon hold.
Press
(PROG].
To returnto the call, press
@6@)
key again
Enterthe two digit memorylocation
(01
..
20), the unit will store the
number, emit a happy tone to
confirm successful programming
and exit program mode.
HANGING
UP
Press
(OFF)
on the handset or
place the handset in the base
cradle to hang up a call.
TO PLACE A CALL ON HOLD
Press
(*)
on the handset
to place an active call on hold.
Press again to return to
the call.
The d
recent bplay will show the most
ball received.

MAKING CALLS
You can make calls directly from the
handset whether you are at the base
'
or away from it.
NOTE: There aretwo different ways
to dial
a
number:
1. Pressthe
(-E)
key and wait
for dial tone. Then dial the number
you want.
2. Enter the number onto the display
first, then pressthe
(PHONE)
key.
This will dial the number that is
displayed on the LCD after
2
seconds. See "ADVANCED
DIALING"on Page 21
If you make a mistake when dialing,
press to hangup, then press
the PHONE key to get the dial tone
again.
DISCONNECTING
To enda call, either placethe handset
back inthe base, or press
@
on
the handset.
OFF MODE (STANDBY)
When the unit is OFF the display will
be clear.
VOLUME CONTROLS
The handset has a digital volume
control.
The volume controls for the handset
are located on the side of the unit.
Press the
A
(up) or
Q
(down) keys
to increase of decrease the volume.
Holding either key down will
continuouslychangethevolumesetting.
The ear piece volume level indicator
will change accordingly.
FLASH
You can use your Vtech VT 191
1
cordless phone with services such as
Call Waiting. Insteadof pressing the
switch-hook(asyou would on aregular
phone) press the
(PHONE)
key.
REDIAL
To REDIALthe lastnumber you dialed,
(P~E)
key, then press
The phonewillautomatically
dial the number. The number will be
shown on the display.
CLEARING THE DISPLAY
The displaycan beclearedby pressing
and holdingthe CLEAWDELkeydown
until the display clears.
MUTE
Press
(ME)
on the handset
to disable the handset microphone.
Press
(MUTE)
again to return to
normal operation.
0
RINGER MUTE
Press on the handset
during incoming ringingwill disable
the ringer for the duration of the
call.
I!'.
I
I
CID WITH CALLWAITING
If during amormal phone call another
call comejs in with CID information,
notificatiop beeps will be heard in the
The newl;~~~information will be
displayed on the LCD for
10
seconds
and will ti,'enbe stored in memory.
See
CID-FALLER
ID on page
25.
Switchin
'
calls
To sw !ch over to the new call,
press e phone key, the first call
is put n hold.
To sw tch back to the first call,
press
1
,fie(p=~)ke~ again.
I
[e]li
SWITCHING
CALLS
TO
SWITCH
OVER
TO
I
THE
NEW
CALL
PRESS-
TO
SWITCH BACK
TO
THE
FIRST
CALL
PRESS-
AGAIN
the call normally. Then
To end the call, press or place
the handset back in the base. The
phone will automatically go back to
Programming The Ringer
The handset ringer is capable of four
different types of ringer tones . The
following section details how to select
different ringer types and how to turn
off the handset ringer.
rotary (dial-pulse) servide.-
Changing Ringer Types
To program,the handsetmust be
OFF.
tl
[E)
@=-1
To select a different ringertype do the
TEMPORARYTONE
DIALYOUR
CALL
NUMBER
following:
H
om@
TYPES
PRESS
PRESS
@
PRESS@@@
e)aED-
m
Q
-a-
-
PRESS
n
n
Press:
Press:
1
for ringer type
1
2
for ringer type
2
3
for ringer type
3
4
for ringer type
4
0
for ringer off (ringerdisabled)

I/.
The VTeqh VT 1911 is capable of
memory
$\sling.
You can dial by
pressingt& memory location inwhich
the numb$$ was stored.
lar memory location (e.g.
CLWDEL Key Function
The CLEAR and DELETE functions
canbeaccessedseparatelydepending
on how longthe keyis held down. For
example, to clear the last di itentered
on the display, press thef-0
'
keyfor lessthan 1second. Pressand
holdthe
@LR/DEL)
keyfor morethan
1second to completelyclear the LCD.
The handset
LCD
will showthe ringer
type selected:
Enter the memory location(01..20)
you wish to storethe number in. As
soon as the second memory
locationdigit is entered,the unitwill
emit a happy tone (a short series
of beeps) to confirm successful
programming and exit program
Press or
@
to exit.
Turning
Off
The Ringer
To turn off the ringer do the followin!: dial tone.
2. Press
(MEM).
You will be
The delete function is also used to
delete CID and speed dial memories,
see DELETINGSTORED NUMBERS
on page 23, and DELETING
NUMBERS on page 28.
prompt,ed to enter a location
number.
3.
Enter jhe memory location you
wish to dial. E.g. 15. The number
stored 'at that location will be
shown on the display and will
autom,!ically be dialed.
You c
(I
also review the contents
of the emory locationswhen you
are no /connectedto a line. When
the p pne is off you can scroll
throug the memory locations by
using
1
he
A
(*
)
and
V
(
#
)
mode.
TURNING
OFF
RINGER
PRESS
PRESS
Q
PRESS
@
PRESS(i;ohB
THE
STORING
SPEED
DIAL
NUMBERS
Advanced Dialing
There are two different ways to dial a
DIALYOUR
PHONE
NUMBER
PRESS
I
number:
1. Press the
(PHONE)
key and wait
for a dial tone. Then dial the
PRESS
LOCATION
(01
....
20)
I
number you want either manually,
using MEMORY (MEM) dialing,
CID dialing or REDIAL.
CheckingThe Ringer Type
To test the present ringertype, do the 2. Enter the number you wish to dial
on the display first. Then pressthe
(ME)
key. This will dial the
number which is displayed on the
LCD after 2 seconds.
following: If programmingis unsuccessfulthe unit
will display:
I
\
CHECKING
THE
RINGER
TYPE
PRESS
PRESS
@
PRESS
@
AGAIN
PRESS
@
which is shown onthe display.
If you do not want to dial the
number shown on the LCD, it
can be changed by:
1
I
Storing speed dial numbers
To program a speed dial location, do
the followlng:
i~
Unsuccessfulprogrammingcan result
from not correctly completing the
programmingsequence. Forexample,
if
after entering a numberon the LCD
and entering program mode, the OFF
key were pressed instead of entering
a valid memory location, the
programming incomplete message
wouldappear. Ifthismessageappears,
With ffle phone OFF, enter the
ne number you wish to
Digits Maximum).
Press and hold
[CLRIDEL]
until
the display is cleared, then dial
normally.
Press
(a]
or
(OfF)
to exit.
Wait for the dis lay to clear, then
press
(-5
and enter the
number you wish to dial. simply repeat the programming
sequence.

Dialing From Memory
Press
(P~E)
to get a line.
Press
,
you're promptedto
entera speeddial locationnumber:
Enter a 2 digit location number
(01-20)
The number stored inthat location
will be displayed and immediately
dialed.
0
r
from standby mode,
Fr%,"&followed by a 2 digit
location number (01-20).
Press magainto exit mem
modeand leavethe numberon the
display.
Note that if digits were on the
display prior to entering mem
mode, the contentsof the speed
dial memory will be appended to
those digits. For example, if 1503
was on the LCD and the contents
of the memory locationis6438981,
then the display would show the
following upon exiting mem mode:
Press
(PHONE),
the number on the
display will be dialed after a 2
second pause.
NOTE:
The ability to temporarilyadd memory
contentsto digits already entered on
the display operates in the same way
for CID and speed dial memories.
In this way, long distance and area
codes (for example, 1503) can be
entered on the LCD and can preface
numbers recalled from CID memory
before dialing. This is important
because only the last
7
digits of any
number are displayed when dialing
from CID memory.
Changing Stored Numbers
To change or replace astored number
simply enter the new number on the
display and store it in the memory
location you wish to change.
Deleting Stored Numbers
Press
m.
The display will
change to "SPEED DIAL
LOCATION- -".
Enter memory location number
will change to "LOCATION
XX
DELETED".
~ressmtofinish.
NOTE:
Storednumbersare retainedinmemory
even if the base loses its power or the
isconnected to a PBX
the PBX access
08, do the"following:
2.
Press HOLD
3.
Dial
5
51234
4.
Press,
pressE
PRoG
5. Enter '08

CID
-
CALLER ID
Your VTech
VT
1911 cordless phone
is capable of displaying the name or
phone number of the person calling,
before you answer the phone.
SubscriptiontoCallerIDservicethrough
your local phonecompany is required
to utilize this feature.
Ifyousubscribeto alphanumeric (name
&
number) Caller IDservice,the calling
party'sname (when available) will be
displayedon the LCD screen while the
phone is ringing.
If you subscribe to numeric (number
only) Caller ID service, the calling
party'sphonenumber (whenavailable)
will be displayed on the LCD screen
while the phone is ringing.
CALLWAITINGCALLER ID(TYPE
II
CID)
Your VTech 1911 cordless phone is
also capable of displaying Caller ID
informationin connectionwith a Call
Waiting signal. If you are on acall, and
receivea CallWaiting alert signal, the
LCD will display the name or number
of the party trying to reach you. As
above, subscriptionto Call Waiting ID
service through your local phone
company is requiredin order to utilize
this feature.
A WORD ABOUT CALLER ID
-
CID
Dueto regionalincompatibilities,Caller
ID informationwill not be available for
every call you receive. Inaddition, the
calling party may intentionally block
their name
&
phonenumberfrom being
sent.
NOTE:
You must be in an area where CID
service is available and you must
subscribe to it to use this feature.
If you do not subscribe to the CID
service, the phone will still operate
normallyexceptthattheCIDinformation
is not received or displayed.
Receiving and Storing Calls
This unit receivesand displaysall CID
information, the caller's telephone
number, the callers name and the
exact date and time of the call.
Thephonesequentially numbersthese
call records and retains them in the
unit's CID memory for later review.
These call record numbers are
displayed as the first two digits inthe
display. The unit can store up to 50
numbers in its memory.
Note, once the unit's memory is full,
any new call forces a deletion of the
oldest call record.
DIALING FROM CID MEMORY
NOTE:
It is importantto note that only the last
7
digits of any number are displayed
when dialing from CID memory.
For example, when you review CID
memoryto determinethe time and date
a callwas received, you would see the
following:
I
'I\
,,
.
However,!hen you dial directly from
CID memqdy, only the last
7
digits of
the receive$ telephone number will be
used. Consequently,youwould actually
dial this:
e necessary digits. Your
Once y have locatedthe number
you wi to dial, simply press
PHON~The last seven digits will
be add to the numbers already
inthe L D, and the whole number
shown (elow will
be
automatically
dialed.
i
Special Message Indicators
Out of Area Calls
If for any reasonthe telephone number
of the caller is unavailable, or if the
caller is outsidethe CID servicearea,
the message UNAVAILABLE is dis-
played on the LCD.
i
"Private" Calls
If the caller has exercised the option
to block his or her numberfrom being
sent, then the display will show
PRIVATE.
Transmission Error
If an error is detected then the CID
information is incomplete and will
not be displayed. "TRANSMISSION
ERROR"will be displayedon the LCD
screen.
\
J
The occasional appearance of
"TRANSMISSION ERROR" on your
display does not indicate a problem
with your unit or your telephone line.
However, if this appears frequently,
you maywant to notifyyour telephone
company.

Reviewing Numbers
Calls stored in memo can be
reviewed by pressing
b.
The
display will show the number of the
most recent call. The top line of the
display is used to indicate the
memory location number and the
bottom line of the display shows the
name, see below:
There may be additional characters
in the name which can not be
shownonthe current display. Press
the
A
(
9
)
key. This will overwrite
theCIDmemorylocationonthe top line
to show upto a maximumof
15
alpha
characters for the duration of the
keypress. Thefirst
12
alphacharacters
will be on the top line with up to
3
additional characters on the second
line.
REVIEWING
CID
PHONE
NUMBERS
PRESS
CIEB
PRESS
@.
OR
@
TO
SCROLL
PRESS
8
HOLD
@TO
VIEW
PHONE
NUMBER
Once the view key is released, the
display returns back to normal.
To find out the corresponding phone
number as well as the date and
time of the call, press and hold
the
7
key. The date and time will
beshown. Releasingthe keywill again
show the caller's name.
Pressing the
A
(*)
key displays the
next lower in sequence call record.
Likewise, pressing the
v
(#)
key
displays the next higher in sequence)
call record
To save you time in reviewing call
records, you can "wrap-around" the
call history log. For example, if you
press the
A
(*) key enough to scroll
back to the first record, pressing it
againwill force the display to go to the
very end of the call record.
DELETIN&
NUMBERS
Pressingthe CLRIDEL button deletes
the CID nypber displayed.
While 1'48 phone is in CID mode,
press the
(cLR/DEL)
key once to
delete t,he current call and the
display,+ill show:
The
a
movec er CID number will be
xward by one location
.
Press and holdthe
(-9
key
for more than
2
seconds to delete
the entire contents of CID memory.
The display will show the following,
for a final confirmation, before the
entire CID memorv is erased:
Pressing any key other than
(Cmqwill cancelthe operation.
Pressing
(-I$
will confirm
the operation and the display will
then show:
....
L
Ckl
....
LS
I
The message will remain on the
display for
2
seconds.

NOISE OR INTERFERENCE
Your VTech VT
1911
cordless
telephone has auto-channel scan
circuitrywhich will detect excess noise
and change the channel of the phone
to reduceit. This isdone automatically.
Since the VTech VT 1911 is a fully
digital phone, it does not suffer from
noiseassociatedwith regularcordless
phones. At times you may experience
occasional"dropouts"especially at the
extreme edges of the phone's range.
Simply move closer to the base unit
and this will disappear.
AUTOMATIC SECURITY CODING
Your VTech VT 1911phone is factory
set with
16.8
millionpossible security
codes. This unique security code
allows your handset and base to
recognizeeach other, and minimizes
the possibility of another cordless
phone using your telephone line.
OUT OF RANGE INDICATION
If
the handsetismovedtoapointwhere
the base and handset can no longer
communicate,the handsetwill make a
quick series of beeps to signal Out of
Range.
If the handset is active when taken
out-of-range, it will beep twice a
second and enter standby mode after
25 seconds if the link is not
reestablished. If the handset is
brought back within range, it will
automatically re-link.
Forout-of-rangeinstandby mode, the
handsetwill beeponceand thenat 15
second intervals, will display
"CHANNEL SERACHING" on the
LCD,
and scan all channels in an
attempt to re-link with the base.
OUT OF RANGE WHEN PHONE IS
ON
If you are presentlyengaged inaphone
conversationmove closer to the base.
If the base unitdoes not communicate
with the handsetwithin 25 seconds of
losing contact, it will automatically
hang up.
OUT OF RANGE WHEN PHONE IS
OFF
If the phone is OFF, the handset and
basestill monitor each other to make
sure thatthey can communicate.
If
the
handset is moved out of range, the
handset will make a series of beeps,
and will then display "CHANNEL
SERACHING" on the LCD. At 15
second intervalsthe handset will scan
allchannelsinanattempt to reestablish
communication with the base. This
process does not require user
intervention; the handset will re-link
with the base automatically once it is
brought back within range. The unit
will then be able to receive and place
calls.
When the base unit is unpluggedfrom
the powersupply, the handsetwill give
the "Outof Range"warning beep. Plug
the base in again and this will stop.
d'
TAKING ?CARE OF YOUR TEL-
EPHONE.
Your VTqch VT 1911 cordless
telephone.contains sophisticated
electronic parts, so it must be treated
with
care.
Avoid rouph treatment
Place the handset down gently. Save
the originalpackingmaterialsto protect
your telephone if you ever need
to ship it.
I
Avoid water
Your telephone can be damaged if it
gets wet. Do not use the handset
outdoors in the rain, or handle it with
wet hands. Do not install your base
unit near a sink, bathtub or shower.
Electrical storms
Electricalstormscansometimescause
power surges harmful to electronic
equipment.
For your own safety, usecautionwhen
usingelec ic appliancesduringstorms.
*rw"
"-....
.
.
.
.
.
..--
-
-
..
.
..
.
.
Cleaning your telephone
.
'
Your telephone has a durable plastic
casing that should retain its luster for
many years. Clean it only with a soft
cloth slightly dampened with water or
a mildsoap. Donot use excess water
or cleaning solvents of any kind.
Remember that electrical appliances
can cause serious injury if used when
you are wet or standing in water. If
your base unit should fall into water,
DO NOT RETRIEVE IT UNTIL YOU
UNPLUG THE POWER CORD AND
TELEPHONE LINE CORDS FROM
THE WALL. Then pullthe unit out by
the unplugged cords.

If you have difficulty operating your
phone, the suggestions below should
solve the problem. If you still have
difficulty after trying these suggestions,
call VTECH Communications at
1-800-624-5688. In Canada, call
VTECH Electronicsat 604-273-51
31.
THE PHONE DOESN'T WORK AT
ALL.
Make sure the Power Cord is
pugged
Make sure the telephone line cord
is pluggedfirmly into the base unit
and the telephone wall jack.
Makesurethe batteriesareproperly
charged. If the 'LOW BATTERY'
message is shown, the battery
pack needs charging.
NO DIAL TONE.
First check all the suggestions
above.
If you still don't hear a dial tone,
disconnect the base unit from the
telephone jack and connect a
different phone. If there is no dial
tone on that phone either, the
problem is in your wiring or local
service. Call your localtelephone
company.
YOU GET NOISE, STATIC, OR A
WEAKSIGNALEVENWHENYOU'RE
NEAR THE BASE UNIT.
Householdappliances pluggedinto
the same circuit as the base unit
can sometimes cause interference.
Try moving the appliance or the
base unit to another outlet.
YOU GET NOISE, STATIC, OR A
WEAK SIGNAL WHEN YOU'RE
AWAY FROM THE BASE UNIT.
You may be out of range. Either
move close to the base, or relocate
the base unit.
The layout of your home may be
limiting the range. Try moving the
base unit to another position.
THE HANDSET DOES NOT RING
WHEN YOU RECEIVE A CALL.
Make sure you have the handset
ringer activated. To set the ringer,
see "PROGRAMMING THE
RINGER"on page 20.
Make sure the telephone line cord
is pluggedfirmly into the base unit
andthe telephonejack. Make sure
the power cord is plugged in.
You may be too far from the base
unit.
You may have too many extension
phones on your telephone line to
allow all of them to ring. Try
unplugging some of the other
phones.
YOU HEAR OTHER CALLS WHILE
USING YOUR PHONE.
Disconnectyour base unit from the
telephone jack, and plug in a
regulartelephone. If you still hear
other calls, the problem is probably
inyour wiring or local service. Call
your local telephone company.
YOU HEARNOISEINTHEHANDSET,
AND NONE OF THE KEYS OR
BUTTONS WORK.
Make sure the power cord is plugged
In.
f
COMMON CURE FOR ELECTRONIC
EQUIPMENT
Electronics,likepeople,cansometimes
get confused. If the unitdoes notseem
to be resp~ndingnormally, then try
putting the handset in the cradle. If it
does not sekm to respond after trying
this a few times, do the following (in
the order listed):
1.
Disconh.ect the power to the base.
2.
~isconbectthe handset battery.
3. Wait a'few minutes.
4.
conne$ power to the base.
5. Connect the handset battery.
6.
Put the handset in the base.

LIMITED
WARRANTY
VTECHCommunications warrants, to the originalpurchaseronly, the materialand
workmanshipof this product for ONE YEAR from the date of purchase. VTECH
will repair or replace, at our option, this product without charge should it fail due
to a defect in material or workmanship within that time period.
This warranty does not apply to loss or damage which is the result of accident,
misuse or negligence. All other warranties, expressed, implied, or statutory,
includingwarranties of fitness for a particular purpose, are limitedto the time period
listed and are otherwise excluded from this warranty. VTECH may, at its option,
voidthe warranty if unauthorizedrepairs are attempted. Additionally, WECHshall
not be liablefor any incidental or consequential damage or commercial loss, nor
for any other loss or damages.
VTECH assumes no responsibility for products sent without prior Return
Authorization.
To arrange for service, in or out of
department at 1-800-624-5688; In
267-7377 for Return Authorization.
Isrequired.
warranty, please call our Customer Service
Canada, call VTECH Electronics at 1-800-
For warranty service, proof of purchase
FREQUENCY CONTROL
Crystal Controlled Dual
PLL
Synthesizer
TRANSMIT FREQUENCY
Handset
:
925.05 MHzto 927.75 MHz
(
All ten channelswithin this
range)
Base
:
902.3 MHz to 905.0 MHz
(Allten channels within this
range)
RECEIVE FREQUENCY
Handset: 902.3 MHz to 905.0 MHz
(
All ten channelswithinthis
range)
Base
:
925.05 MHz to 927.75MHz
(
All ten channels withinthis
range)
NOMINAL EFFECTIVE RANGE
Maximumpower allowed by FCC and
IC. Actual operating range may vary
accordingto environmental conditions
at the time of use.
SIZE
Handset
:
19 x 6 x 3.5cm (L x
W
xT)
Maximum (Antenna ex-
cluded)
Base
:
21.5 x 14.5 x 5cm (L x
W
x T) Maximum (Antenna
excluded)
WEIGHT
Handset
:
250 grams
Base
:
415 grams
POWER REQUIREMENTS
Handset: Self-contained nickel-
cadmium rechargeable
battery supply, 3.6V
nominal, 6OOmAh capacity.
Base: 9VDC
@
300mA
MEMORY
Speed Dial:20 Memory locations, 20
digits per location.
CID
:
Alpha Numeric Display 50
Memory locations
SPECIFICATIONS ARE TYPICAL
AND MAY CHANGE WITHOUT
NOTICE.
Table of contents
Other V-tech Cordless Telephone manuals

V-tech
V-tech IA5854 User manual

V-tech
V-tech MS1100-T User manual

V-tech
V-tech i 5857 User manual

V-tech
V-tech CS6648-2 User manual

V-tech
V-tech DS6621 User manual

V-tech
V-tech VT1940 User manual

V-tech
V-tech CS6858-3 User manual

V-tech
V-tech S1310 User manual

V-tech
V-tech CL82219 User manual

V-tech
V-tech CS6114 User manual

V-tech
V-tech ES2000 User manual

V-tech
V-tech gz2339 User manual

V-tech
V-tech DS6221 User manual

V-tech
V-tech CS6909 User manual

V-tech
V-tech DS6771-3 User manual

V-tech
V-tech VT 1721 User manual

V-tech
V-tech DS3111-2 - DECT 6.0 Cordless Phone User manual

V-tech
V-tech CS6829 User manual

V-tech
V-tech VT9041 User manual

V-tech
V-tech CS6428-32 User manual