•Do not leave room when hose is plugged
in to the inlet. Disconnect power before
servicing.
•Electric shock could occur if used on wet
surfaces.
•Do not allow to be used as a toy. Close
attention is necessary when used by or
near children.
•Use only as described in this manual. Use
only those attachments that are recom
mended.
•Do not use with damaged cord or plug. If
applicance is not working as it should, has
beendropped,damaged,leftoutdoors,or
dropped into water, return it to a service
center.
•Do not pull or carry by cord, use cord as a
handle, close a door on cord, or pull cord
around sharp edges or corners. Do not
run appliance over cord. Keep cord away
from heated surfaces.
•Do not unplug by pulling on cord. To
unplug, grasp the plug, not the cord.
•Do not handle plug. valves or appliance
with wet hands.
•Do not unplug system by pulling on
vacuum hose. To unplug, grasp the cuff,
located on the end of the hose. If you have
a standard non-electric hose, pull out with
a twisting motion.
•Do not put anything into vacuum inlets or
vents. Keep all inlets free of things that
might slow airflow, such as lint, dust and
hair. Do not use the vacuum system if
something is blocking an opening.
When using an electrical appliance, basic precautions should always be
followed, including the following:
*Read all instructions before using this appliance.
WARNING: To reduce the risk of fire, electric shock or injury:
*Always follow these safety instructions
IMPORTIMPORT
IMPORTIMPORT
IMPORTANT SAFETY INSTRUCTIONSANT SAFETY INSTRUCTIONS
ANT SAFETY INSTRUCTIONSANT SAFETY INSTRUCTIONS
ANT SAFETY INSTRUCTIONS
•Ifequipped withanair turbinepowerbrush
unplug the vacuum hose before attaching
power brush. Keep fingers, hands and toes
away from the base of the power brush.
Failure to do so could result in injury from
moving parts.
•In the event the power unit should get
wet, do not use the vacuum system until it
has been properly serviced and examined
by a serviceman or installer.
•Keep hair, loose clothing, fingers and all
parts of the body away from wand, other
openings and moving parts.
•If so equipped, do not use your central
vacuum system without dustbag and/or
filters in place.
•Always disconnect vacuum system before
emptying dirt canister, cleaning filters or
replacing dustbag.
•Use extra care when cleaning on stairs.
•Do not use to pick up flammable or
combustible liquids such as gasoline or
use in areas where such liquids may be
present.
•Do not use to pick up dry wall or cement
dust. Doing so will void warranty.
•Do not pick up anything that is burning or
smoking, such as cigarettes, matches or
hot ashes.
•When finished put the vacuum hose and
attachments away to prevent tripping
accidents.
•For a grounded appliance, connect to a
properly grounded outlet only. See
grounding instructions.
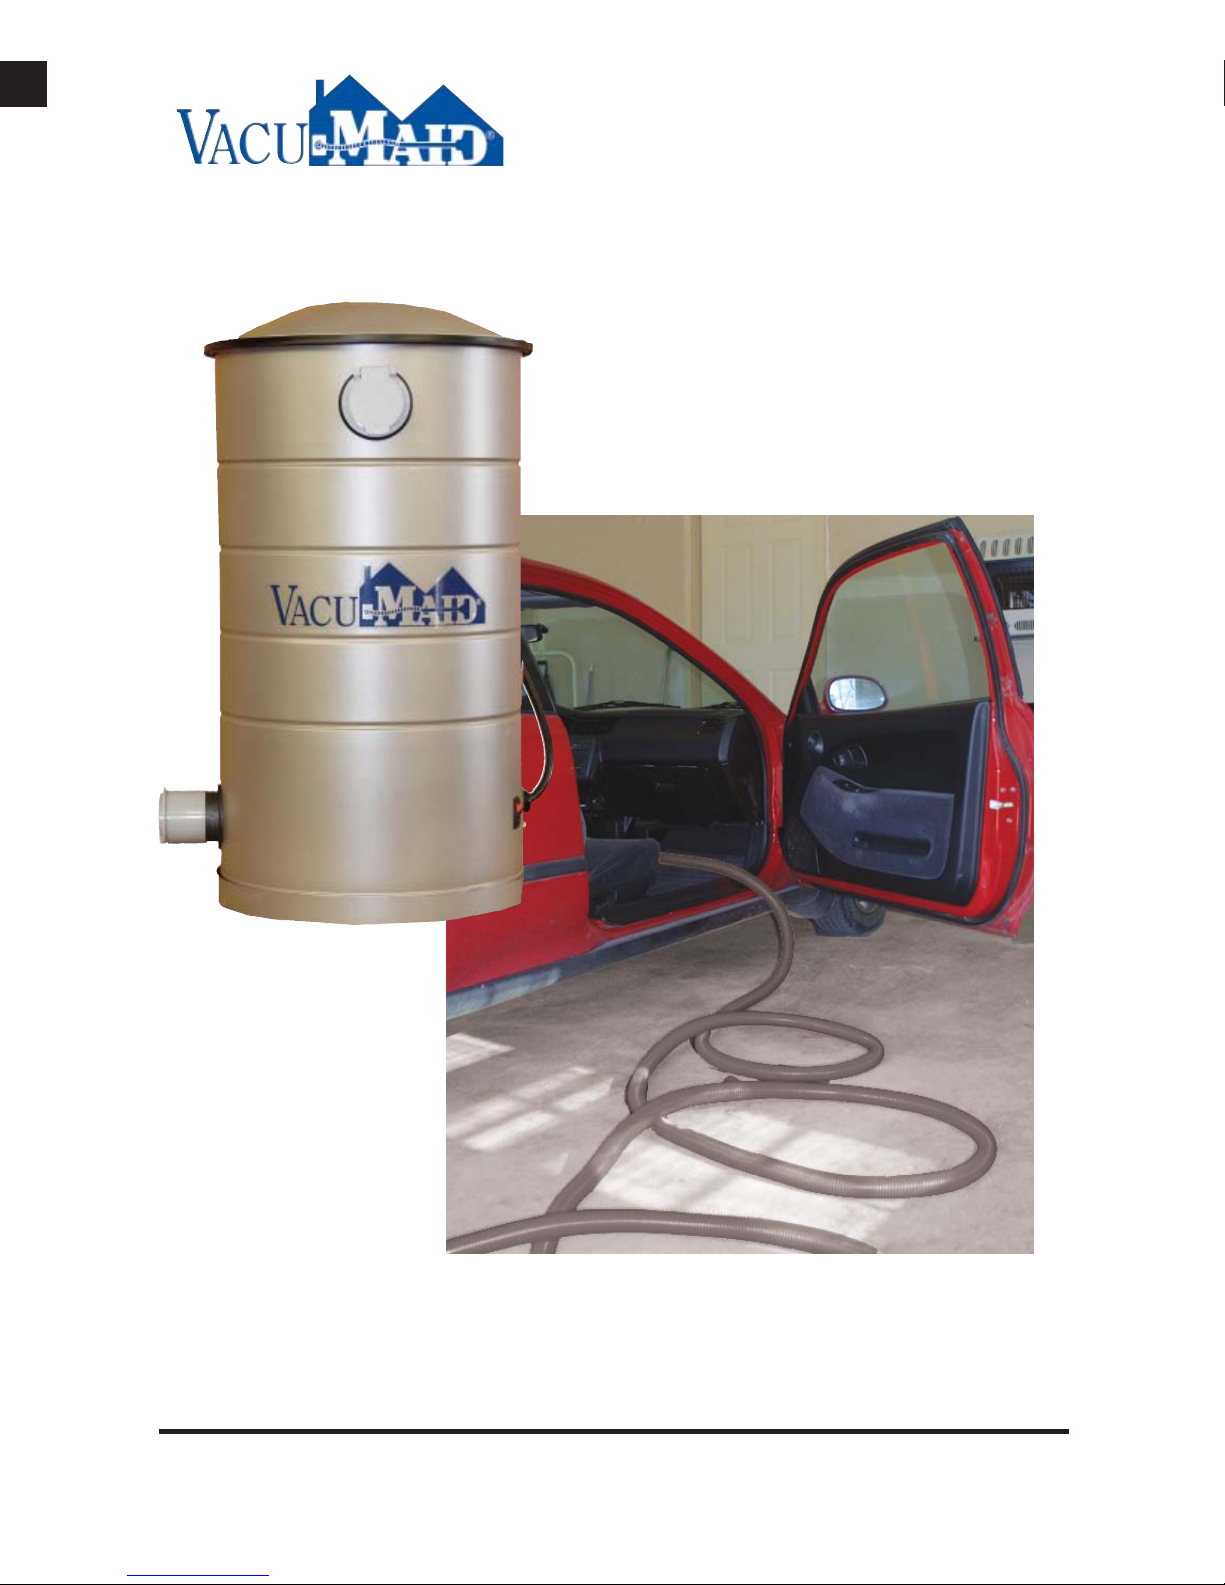
This system uses a sealed HEPA type paper bag for
filtration. The mass of dirt and debris is picked up by
your vacuum and deposited into the filter bag inside
your dirt canister.
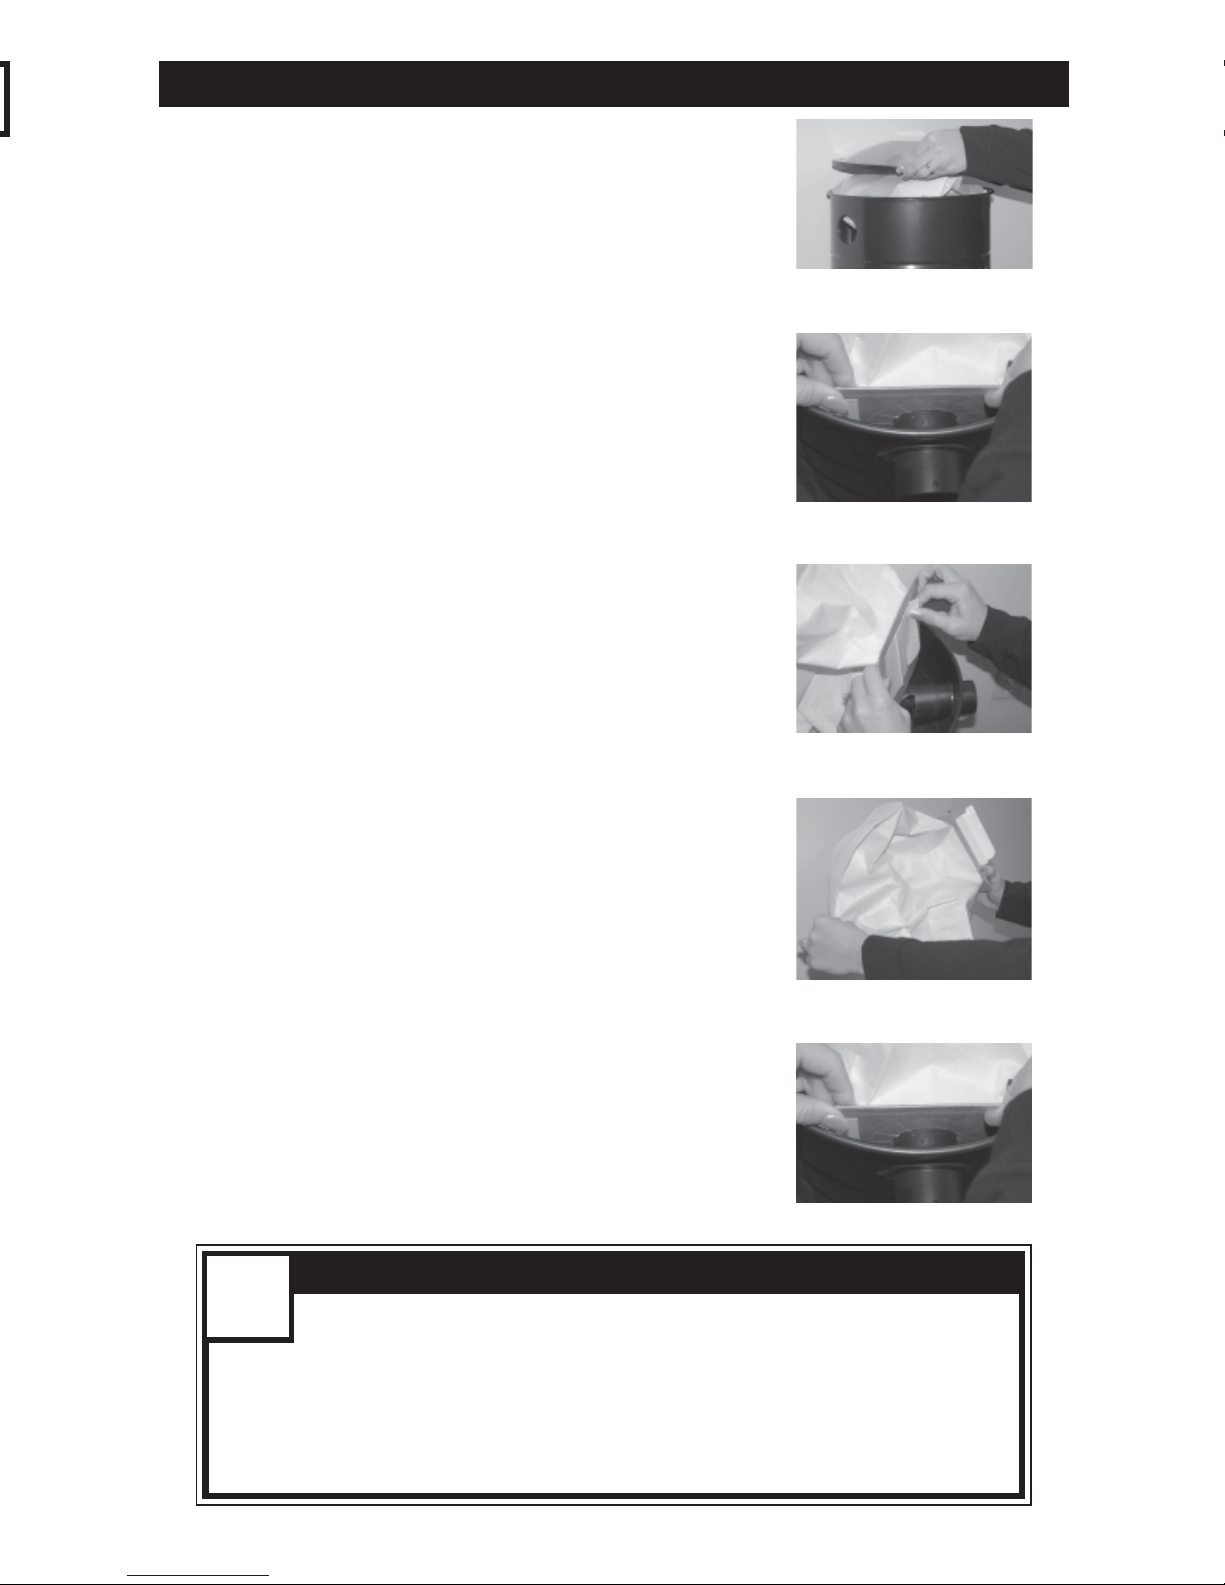
Emptying your Dirt Can
To remove accumulation, follow these steps:
1
2
3
Remove the lid by lifting straight up. There are no
hinges or clamps.
Remove the bag by sliding the rubber gasket that
surrounds the hole in the paper bag off the
plastic inlet stem that protrudes through the
front of the canister.
Once the bag is off of the inlet stem, seal the bag
by removing the backing from the tab and cover
the hole with the flap. Press the flap so that it
securely seals over the hole (Fig. 3). This will help
prevent dirt and dust from escaping. Now, lift the
paper bag from the dirt canister and place in a
suitable trash container.
Take a new bag and extend it fully (Fig. 4).
Place it in the canister, and slide its rubber gasket
onto the inlet stem until the rubber gasket drops
into place in the ridge that is around the inlet
stem (Fig. 5).
Carefully replace the lid onto the dirt canister to
ensure that it seals properly. Not doing so could
cause a vacuum leak and reduce the cleaning
efficiency of your system.
1
2
3
4
5
If bag breaks...
In the event of a bag breaking while in the unit, it is
necessary to lift the plate located under the bag and
clean the small screen.
The filter bag should be changed or cleaned when there is 3-6 inches of
dirt or anytime there is a noticeable reduction of air flow at the cleaning
HOW OFTEN SHOULD I CHECK OR EMPTY THE PAPER BAG?
?
tool. Initially, the dirt canister should be checked or emptied weekly until some
idea can be obtained as to how long it takes to half fill the canister under your
normal cleaning routine. All vacuum systems will function more effectively
if they are emptied frequently. Under no circumstances should you allow your
dirt canister to become more than 3/4 full before emptying.
4
5
6
MAINTENANCE
Installing a New Bag
6