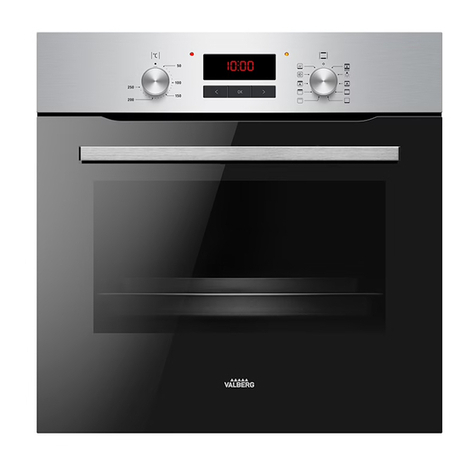
VALBERG MFO 66 P K CD 765C User manual

EN
WARRANTY CONDITION
This product is guaranteed for a period of 2 years from the date of purchase* against
any failure resulting from a manufacturing or material defect. This warranty does not
cover defects or damage resulting from incorrect installation, improper use or abnormal
wear of the product.
*as shown on the sales receipt.
FR
CONDITION DE GARANTIE
Ce produit est garanti pour une période de 2 ans à partir de la date d’achat*, contre
toute défaillance résultant d’un vice de fabrication ou de matériau. Cette garantie ne
couvre pas les vices ou les dommages résultant d’une mauvaise installation, d’une
utilisation incorrecte ou de l’usure anormale du produit.
*sur présentation du ticket de caisse.
NL
GARANTIEVOORWAARDEN
Dit product wordt gegarandeerd voor een periode van 2 jaar vanaf de aankoopdatum*,
voor elke storing die het gevolg is van een fabricagefout of het materiaal. Gebreken of
schade door slechte installatie, onjuist gebruik of abnormale slijtage van het product
worden niet gedekt door deze garantie.
*op vertoon van kassabon.
ES
CONDICIONES DE GARANTÍA
El certificado de garantía de este producto tiene una duración de 2 años a partir de la
fecha de compra* que se limita a los defectos de fabricación y averías del material.
Se excluyen de la garantía deficiencias o daños originados por una mala instalación,
errores en la manipulación o por un uso inadecuado.
*previa presentación del comprobante de compra.
970532 - MFO 66 P K CD 765C
ELECTRO DEPOT
1 route de Vendeville
59155 FACHES-THUMESNIL - FRANCE
INSTRUCTIONS FOR USE ....................02
CONSIGNES D'UTILISATION ....................34
GEBRUIKSAANWIJZINGEN ....................68
INSTRUCCIONES DE USO ...................100
06/2022 - V5
Oven
Four
Oven
Horno
2/2

1
6
8
2 5
7
4
3
9

2 3
EN EN
3EN
Table of contents
2EN
Thanks!
Thank you for choosing this VALBERG product.
Chosen, tested and recommended by ELECTRO DEPOT,
the products of the VALBERG brand are easy to use,
reliable and of an impeccable standard.
Thanks to this appliance, you can be sure that each
use will bring you satisfaction.
Welcome to ELECTRO DEPOT.
Visit our website: www.electrodepot.fr
APreview of the
appliance
CUseful information
BUsing the appliance Installing the oven
Control panel
Cleaning and care
Practical cooking advice
Warranty & service
Parts and features

4 5
EN EN
Preview of the appliance Preview of the appliance
A A
Parts and features
1Control panel 6Level 4
2Guides for sliding the racks or
dripping in and out 7Level 3
3Oven rack 8Level 2
4Dripping pan or baking sheet 9Level 1
5Level 5
• Shelf levels are numbered from the bottom up.
• Levels 4 and 5 are used mainly for the grill function.
Please refer to the cooking guides provided throughout this manual to determine appropriate
shelf levels for your dishes.
Accessories (optional accessories, the actual shall prevail)
The following accessories are provided with your oven.
1. Wire grill, for dishes, cake tins, roast- ing
and grilling trays.
2. Deep pan,and roasting or collecting meat
juices or fat drippings.
• The baking tray, deep pan and wire grill should be inserted correctly into the side runners.
When taking out the cooked foods from the oven, be careful of hot utensils and surfaces.
Example → Level 1: Deep pan / Level 3: Baking tray
Level 3
Level 1
Level 4
Level 2
Level 5
Wire grill
Deep pan
• When using the deep pan or the baking tray to collect drippings from cooking foods, ensure
that the pan or tray is properly placed in the side runners. Allowing these accessories to contact
the bottom surface of the oven can damage the enamel of the surface. Trays and pans placed
on level 1 should clear the bottom surface of the oven by at least 2 cm.
Using the accessories
Wire grill, baking tray and deep pan
• Positioning the wire grill
Insert the wire grill at any desired level.
• Positioning the baking tray or deep pan
Insert the baking tray into level 3 of the oven and the deep pan into level 1 of the oven
Safety shutoff
If a cooking time is not entered, the oven will shut itself off after two hours.
• This oven’s electrical circuitry features a thermal shutoff system. If the oven heats to abnormally
high temperatures, the system will shut off the power supply to the heating elements for a
period of time or oven for all along.
Cooling Ventilation
• To cool the oven outer layer, and some models equipped with a cooling fan. When the oven
gets hot, the cooling fan is automatically enabled.
• When the fan is on, between the oven door and the control panel will appear normal airflow.
NOTE:
After baking, the oven fan has been working to cool
sufficiently.

6 7
EN EN
Using the appliance Using the appliance
B B
Installing the oven
• Electrical installation of this appliance must be performed only by a licensed electrician. The
oven must be installed according to the instructions supplied. Remove the protective vinyl from
the door after installation.
Safety instructions for the installer
• Installation must guarantee protection against exposure to electrically live parts.
Installation of built-in ovens
• In order to ensure that the built-in appliance functions properly, the cabinet containing it must
be appropriate.The figure below gives the dimensions of the cut-out for installation under the
counter or in a wall cabinet unit.
NOTE:
Installation in compliance with the consumption declaration
• In order to ensure adequate ventilation, the back panel of the cabinet unit must be removed.
Installing the oven so that it rests on two strips of wood is preferable. If the oven rests on a
continuous, flat surface, there must be an aperture of at least 45 × 560mm.
45 mm
560 mm
• The panels of the adjacent cabinets must be made of heat-resistant material. In particular,
cabinets with a veneer exterior must be assembled with glues which can withstand temperatures
of up to 100°C.
• In compliance with current safety standards, contact with the electrical parts of the oven must
not be possible once it has been installed.
• All parts, which ensure the safe operation of the appliance, must be removable only with the
aid of a tool.
• To fasten the oven to the cabinet, open the door of the oven and attach it by inserting the
4wooden screws into the 4 holes located on the perimeter of the frame.
Electrical Connection
Those ovens equipped with a three-pole power supply cable are designed to operate with an
alternating current. The wire for earthling the appliance is yellow-green in color.
Fitting on a Power Supply Cable

8 9
EN EN
Using the appliance Using the appliance
B B
Opening the terminal board:
• Using a screwdriver, prize the bolt on the side tabs of the terminal board cover;
• Using a screwdriver unhooking the no.2fixing hooks, pull open the cover of the terminal board.
To install the cable, proceed as follows:
• Remove the wire clamp screw and the three contact screws L-N -
• Fasten the wires beneath the screw heads using the following color scheme :
Blue (N) Brown (L) Yellow-Green
• Fasten the supply cable in place with the clamp and close the cover of the terminal board.
Connecting the supply cable to the mains
• Install a standardized plug corresponding to the load indicated on the data plate. When
connecting the cable directly to the mains, install an omni polar circuit breaker with a minimum
contact opening of 3 mm between the appliance and the mains. The omni polar circuit breaker
should be sized according to the load and should comply with current regulations (the earth
wire should not be interrupted by the circuit breaker).
• The supply cable should be positioned so that it does not reach a temperature of more than
50°C with respect to the room temperature, anywhere along its length, or protected by insulation
sleeping having an appropriate rating.
Before making the connection, check that:
• The electrical safety of this appliance can only be guaranteed if the cooker is correctly and
efficiently earthed, in compliance with regulations on electrical safety. Always ensure that the
earthling is efficient; if you have any doubts call in a qualified technician to check the system.
The manufacturer declines all responsibility for damage resulting from a system which has
not been earthed.
• Before plugging the appliance into the mains, check that the specifications indicated on the
date plate (on the appliance and /or packaging) correspond to those of the electrical mains
system of your home.
• Check that the electrical capacity of the system and sockets will support the maximum power of
the appliance, as indicated on the data plate. If you have any doubts, call in a qualified technician.
• If the socket and appliance plug are not compatible, have the socket replaced with a suitable
model by a qualified technician. The latter, in particular, will also have to ensure that the cross
section of the socket cables are suitable for the power absorbed by the appliance. The use of
adapters, multiple sockets and /or extensions, is not recommended. If their use cannot be
avoided, remember to use only single or multiple adapters and extensions which comply with
current safety regulations. In these cases, never exceed the maximum current capacity indicated
on the single adapter or extension and the maximum power indicated on the multiple adapter.
The plug and socket must be easily accessible.

10 11
EN EN
Using the appliance Using the appliance
B B
Control panel
1 62 5
7
43
1Function kob 5Start button
2Temperature button 6Time, temperature adjustment knob
3Timer button 7Display
4Time button
Adjust the clock after switch on:
• Once it connected with electrical power, the display will show «12:00» and the « » icon
will flash;
• Turn the Time, temperature adjustment knob to set the time until it reaches the right time;
after 5 seconds it will start automatically or you can press the Start button to make it work.
Setting the oven temperature
1. Touch the Temperature button and hold for about 3 seconds,the tempreture will flash.
2. Press the Time, temperature adjustment knob to adjust the temperature in increments of 5 °C.
Automatic setting (set the time of full automatic starting and ending)
1. Press the Time button repeatedly until the « » icon flashes, and press the Time,
temperature adjustment knob to set the time frame baking for;
2. Press the Time button repeatedly until the « » icon flashes, and press the Time,
temperature adjustment knob to set the time to switch off;
3. Adjusting the Temperature button and the Fonction knob to set temperature and baking
method.
• After these setting, press the Start button , the « » icon and « » icon will flash, it
indicates the baking procedure of oven has been set.
• For example: if the food is required to bake for 45 minutes, and it is supposed to stop at 14:00.
• Press the Time button repeatedly until the « » icon flashes, and set the time of baking
to 45 minutes;
• Press the Time button repeatedly until the « » icon flashed, and set the end time of baking
at 14:00.
• After these setting, the proper clock (hour, minute) and the icon will show on the display, it
indicates the setting of baking procedure has been remembered automatically.
• When the clock shows at 13:15 (between 14 -15min), the oven will switch on automatically.
• During the baking time frame, the icon will keep flashing.
• When the clock shows14:00, baking will switch off automatically. The alarm will ring, the icon
will flash, To stop the ringing press any button.
Semi-automatic setting (set the time of automatic starting and ending)
A. setting the time frame of baking (10 hours longest)
• Press the Time button repeatedly until the « » icon flashes, and set the time frame
of baking;
• Switch on the oven immediately, the « » icon begins to flashing. When the baking is done
the « » icon will flash, and alarm ring, To stop the ringing press any button.
B. setting the end time off baking (23hours and 59minutes longest)
• Press the Tme button repeatedly until the « » icon flashes, and set the end time of baking;

12 13
EN EN
Using the appliance Using the appliance
B B
• Switch on the oven immediately, the « » icon begins to flashing. When it reaches the time
set, baking procedure will switch off automatically. The « » icon flash, and alarm will ring,
To stop the ringing press any button.
• The set baking procedure could be seen by pressing any time button repeatedly at any time,
only if the time frame of baking is at «0» position.
• By adjusting the end time of baking to the current time, the set baking procedure can be
cancelled.
Timer
• The longest time frame can be set is 23 hours and 59 minutes. For setting time, press the Timer
button and the « » icon flashes, and Turn the Time, temperature adjustment knob until
the time supposed shows on the display. After setting, after 5 seconds it will start automatically
or you can press the Start button to make it work, the proper time (hour, minute) and the
« » icon begins to flash.
• When it reaches the set time, the « » icon flashes, and the alarm will ring, the square
symbol will flash, To stop the ringing press any button.
Notice: press the relevant button, the setting must be carried out in 5 seconds; if electricity
failure suddenly, all the set procedure and the proper clock time (hour, minute) will disappear.
• After electrical power is on again, «12:00» and the « » icon will show on the display, you
need to set it again.
Oven functions
Convection Mode
The top and bottom heating elements come on. This is the classic,
traditional type of oven which has been perfected, with exceptional heat
distribution and reduced energy consumption. The convection oven is still
unequalled when it comes to cooking dishes made up of several ingredients,
e. g. cabbage with ribs, Spanish style cod, Ancona style stockfish, tender
veal strips with rice, etc. Excellent results are achieved when preparing veal
or beef-based dishes as well (braised meats, stew, goulash, wild game,
ham etc.) which need to cook slowly and require basting or the addition of
liquid. It nonetheless remains the best system for baking cakes as well as
fruit and cooking using covered casserole dishes for oven baking. When
cooking in convection mode, only use one dripping pan or cooking rack at
a time, otherwise the heat distribution will be uneven. Using the different
rack heights available, you can balance the amount of heat between the top
and the bottom of the oven. Select from among the various rack heights
based on whether the dish needs more or less heat from the top.
Fast cooking
Mode
The top and bottom heating elements, as well as the fan, will come on,
guaranteeing constant heat distributed uniformly throughout the oven.
This mode is especially recommended for cooking prepacked food quickly
(as pre-heating is not necessary), such as for example: frozen or pre-
cooked food) as well as for a few «home-made» dishes. The best results
when cooking using the «Fast cooking» mode are obtained if you use one
cooking only (the second from the bottom), please see the table entitled
«Practical Cooking Advice».

14 15
EN EN
Using the appliance Using the appliance
B B
Multi-Cooking
Mode
The top, circle and bottom heating elements, as well as the fan, will come
on alternately. Since the heat remains constant and uniform throughout
the oven, the air cooks and browns food uniformly over its entire surface.
With this mode, you can also cook various dishes at the same time, as
long as their respective cooking temperatures are the same. A maximum
of 2 racks can be used at the same time, following the instructions in
the section entitled: «Cooking On More Than One Rack». This cooking
mode is particularly recommended for dishes requiring a gratin finish
or for those requiring considerably prolonged cooking times, such as for
example: lasagne, pasta backs, roast chicken and potatoes, etc..Moreover
the excellent heat distribution makes it possible to use lower temperatures
when cooking roasts. This results in less loss of juices, meat which is more
tender and a decrease in the loss of weight for the roast. The Multi-cooking
mode is especially suited for cooking fish, which can be prepared with
the addition of a limited amount of condiments, thus maintaining their
flavor and appearance. Excellent results can be attained when cooking
vegetable-based side dishes like courgettes, aubergines, peppers, etc...
Desserts: this mode is also perfect for baking leavened cakes. Moreover,
this mode can also be used to thaw quickly white or red meat and bread
by setting the temperature to 80°C. To thaw more delicate foods, set the
thermostat to 60°C or use only the cold air circulation feature by setting
the thermostat to 0°C.
Pizza Mode The bottom and circle heating elements, as well as the fan, will come on.
This combination rapidly heats the oven due to the large amounts of power
used by the appliance, which results in the production of considerable heat
coming prevalently from the bottom. The pizza mode is ideal for foods
requiring high temperatures to cook, like pizzas and large roasts. Only
use one oven tray or rack at a time. However, if more than one is used,
these must be switched halfway through the cooking process.
Fast Preheat
Mode
The top and circle heating elements, as well as the fan, will come on. To
fast preheat the oven before baking, this function can be activate to preheat.
Fast Preheat enables advanced convection cooking function without having
to turn the food, giving crispy great tasting results in a shorter time without
all the oil. This is suitable for french fries, chicken wings, nuggets and
similar products.
Grill Mode The top central heating elements comes on.
“Grill” directs radiant heat from the powerful upper element onto the
food. You can use the “Grill” function for tender cuts of meat, steak, chops,
sausages, fish, cheese toasties and other quick cooking foods. Grill with the
oven door closed. Preheat your grill for 3 minutes to get the best results.
This will help seal in the natural juices of steak, chops etc. for a better
flavour. You can slide your grill dish into either of the 2 spaces within the
upper pairs of support rails.
Maxi Grill Mode
The top inside and outside heating elements comes on. “Maxi grill” directs
radiant heat from 2 powerful upper elements onto the food. You can use
the “Maxi grill” function for tender cuts of meat, steak, chops, sausages,
fish, cheese toasties and other quick cooking foods. Grill with the oven
door closed. “Maxi grill” allows you to take full advantage of the large
grill dish area and will cook faster than normal “Grill”. For best results it
is recommended to preheat your grill for 3 minutes. This will help seal in
the natural juices of steak, chops etc. for a better flavour.
Fan Assisted
Grill
The top heating elements and the fan come on. This combination of features
increases the effectiveness of the unidirectional thermal radiation of the
heating elements through forced circulation of the air throughout the oven.
This helps prevent food from burning on the surface, allowing the heat to
penetrate right into the food. Excellent results are achieved with kebabs
made with meats and vegetables, sausages, ribs lamb chops, chicken in
a spicy sause, quail, pork chops, etc.
Cook food in «fan assisted grill mode» with the oven door shut.
This mode is also ideal for cooking fish steaks, like swordfish, stuffed
cuttlefish etc.
Baking Mode
The rear heating element and the fan come on, guaranteeing delicate heat
distributed uniformly throughout the oven. This mode is ideal for baking
and cooking delicate foods-especially cakes that need to rise-and for the
preparation of certain tartlets on 3 shelves at the same time. Here are
a few examples: cream puffs, sweet and savory biscuits, savoury puffs,
Swiss rolls and small portions of vegetables au gratin, etc. …

17 EN
Useful information
C
16 EN
Using the appliance
B
«Defrosting»
Mode
The fan located on the bottom of the oven makes the air circulate at room
temperature around the food. This is recommended for the defrosting of all
types of food, but in particular for delicate types of food which do not require
heat, such as for example: ice cream cakes, cream or custard desserts,
fruit cakes. By using the fan, the defrosting time is approximately halved.
In the case of meat, fish and bread, it is possible to accelerate the process
using the «Baking» mode and setting the temperature to 80°C-100°C.
Cleaning and care
Cleaning the oven door
• For normal use, the oven door should not be removed but if
removal is necessary, for example, for cleaning, follow these
instructions. The oven door is heavy.
• How to Remove the Oven door
• For a more thorough clean, you can remove the oven door.
Choose the remove and assemble method. Proceed as
follows:
Oven door structures 1 remove and assemble procedure:
• Open the door to the full extent (fig. 1);
• Open the lever Acompletely on the left and right hinges
(fig. 2);
• Hold the door as shown in fig. 3
• Gently close the door (fig. 3)until left and right hinge levers
Aare hooked to part Bof the door (fig. 4).
• Withdraw the hinge hooks from their location following
arrow C(fig. 4);
• Rest the door on a soft surface;
• To replace the door, repeat the above steps in reverse order.
OFF

18 19
EN EN
Useful information Useful information
C C
1
B
2
A
C
4
3
Removing the Inner Pane of Glass
• Double oven door: Remove the seal Gby unscrew the no.2
bolts (fig. 1)
• Gently pull out the inner pane of glass (fig. 2)
• Clean the glass with an appropriate cleaner. Dry thoroughly,
and place on a soft surface.
• Now you can also clean the inside of the outer glass.
1 2
G
Pyrolysis cleaning
Choose the self clean function, since the clean has three
time can choose:
Standard Degree of
self-cleaning Duration
1Low Approx. 2 hours
2 Medium Approx. 2.5 hours
3 Strongly Approx. 3 hours
What we should know
• For safety reasons, the oven locks automatically when the
oven to start working. You will only be able to open the door
again once the temperature has fallen below 250°C.
• The exterior of the oven will become very hot. Make sure
that nothing is placed against the front panel.
• Keep children at a safe distance.
• Never attempt to open the oven during the self-cleaning
process. The cleaning process may be interrupted.
• Please do not attempt to push in the latch by hand.
• You cannot switch the oven light on during self-cleaning.

20 21
EN EN
Useful information Useful information
C C
Before self-cleaning
• Remove unsuitable accessories and all ovenware from the
oven.
• Risk of fire. Loose food residue, grease and meat juices are
flammable.
• Wipe the oven and the accessories that are to be cleaned at
the same time with a damp cloth.
• Clean the door and along the edges of the oven around the
seal. Do not scour the seal.
• Make sure that the oven door is closed before you start
cleaning.
Cleaning accessories at the same time
• The wire grill is not suitable for self-cleaning.
• Never clean metal sheets and dishes which have been
coated with a non-stick coating using the oven’s automatic
self-cleaning function (pyrolysis operation).
• High temperatures can cause poisonous gases to be
formed from the non-stick coating-risk of serious damage
to health.
Select the self-cleaning function
1. Select the self-cleaning function
2. Turn the Time, temperature adjustment knob to set the
desired duration.
3. Press the Sart button , the oven begins to heat.
Steam Assisted Cleaning function “ ”
You can use the function “Fast cooking Mode” to Steam
Assisted Clean.This function assists in the removal of food
residue from inside the oven. This method is effective in
removing light soiling only. It is not effective in removing
stubborn baked-on stains. This function can only be used
when the oven is cold.
Procedure for cleaning
1. Remove all shelves, dishes and side racks.
2. Make a solution of water (85%), white vinegar (10%), and
dish washing detergent (5%) and spray liberally on to door,
side walls and back wall of oven cavity.
3. Pour 40ml of water into the cavity base well.
4. Close the door. Set the function to Steam Assist Clean and
set the temperature to 130°C.

22 23
EN EN
Useful information Useful information
C C
5. Turn oven OFF after 18 minutes.
6. Allow to cool to a safe level before wiping surface with a
wet cloth.
Practical cooking advice
The oven offers a wide range of alternatives which allow you to cook any type of food in the best
possible way. With time you will learn to make the best use of this versatile cooking appliance
and the following directions are only a guideline which may be varied according to your own
personal experience.
Cooking on more than one rack
• If you have to cook food using several racks, use either the «baking» mode or the «Multi-
Cooking» mode , as these are the only modes that allow you to do so.
• When cooking delicate food on more than one rack, use the «baking» mode, which allows you
to cook on 3 racks at the same time (the 1st 3rd and 5th from the bottom). Some examples are
included in the «Practical Cooking Advice» table.
When cooking other food on several racks, use the «Multi-Cooking» mode keeping the following
suggestions in mind:
• The oven is fitted with 5 racks. During fan assisted cooking, use two of the three central racks;
the lowest and highest racks receive the hot air directly and therefore delicate foodstuffs could
be burnt on these racks.
• As a general rule, use the 2nd and 4th rack from the bottom, placing the foodstuffs that require
greater heat on the 2nd rack from the bottom. For example, when cooking meat roasts together
with other food, place the roast on the 2nd rack from the bottom and the more delicate food on
the 4th rack from the bottom.
• When cooking foodstuffs that require differing times and temperatures, set a temperature that
is somewhere between the two temperatures required, place the more delicate food on the 4th
rack from the bottom and take the food requiring less time out of the oven first.
• Use the dripping pan on the lower rack and the grid on the upper;
Using the «Fast Cooking» Mode
Functional, fast and practical for those of you who use pre-packed products (such as for example:
frozen or pre-cooked food) along with other food items. You will find useful suggestions in the
«Practical Cooking Advice» table.

24 25
EN EN
Useful information Useful information
C C
Using the grill
• This multi-function oven offers you 2 different grilling modes.
• Use the “Grill / Maxi Grill” mode / , placing the food under the center of the grill
(situated on the 3rd or 4th rack form the bottom) because only the central part of the top heating
element is turned on.
• Use the bottom rack (1st from the bottom), placing the dripping pan provided to collect any
sauce and /or grease and prevent the same from dripping onto the oven bottom. When using
this mode, we recommend you set the thermostat to the highest setting. However, this does
not mean you cannot use lower temperatures, simply by adjusting the thermostat knob to the
desired temperature.
• Setting « fan assisted grill », is extremely useful for grilling foods rapidly, as the distribution
of heat makes it possible not only to brown the surface, but also to cook the bottom part.
• Moreover, it can also be used for browning foods at the end of the cooking process, such as
adding that gratin finish to pasta bakes, for example.
• When using this mode, place the grid on the 2nd or 3rd oven rack from the bottom (see cooking
table) then, to prevent fat and grease from dripping onto the bottom of the oven and thus smoke
from forming, place a dripping-pan on the 1st rack from the bottom.
• When using this mode, we advise you to set the thermostat to 200°C, as it is the most efficient
way to use the grill, which is based on the use of infrared rays. However, this does not mean
you cannot use lower temperatures, simply by adjusting the thermostat knob to the desired
temperature.
Therefore the best results when using the grill modes are obtained by placing the grid on the
lower racks (see cooking table) then, to prevent fat and grease from dripping onto the bottom of
the oven and smoke from forming, place a dripping-pan on the 1st oven rack from the bottom.
Baking cakes
When baking cakes, always place them in a preheated oven. Make sure you wait until the oven
has been preheated thoroughly. Do not open the oven door during baking to prevent the cake
from dropping. In general:
Pastry is too dry
Increase the temperature by 10°C and reduce the cooking time.
Pastry dropped
Use less liquid or lower the temperature by 10°C.
Pastry is too dark on top
Place it on a lower rack, lower the temperature, and increase the cooking time.
Cooked well on the inside but sticky on the outside
Use less liquid, lower the temperature, and increase the cooking time.
The Pastry sticks to the pan
Grease the pan well and sprinkle it with a dusting of flour or use greaseproof paper.
I used more than one level (in the function «ventilated oven») and they are not all at the same
cooking point
Use a lower temperature setting. It is not necessary to remove the food from all the racks at
the same time.
Cooking pizza
For best results when cooking pizza, use the «Pizza Mode» :
• Preheat the oven for at least 10 minutes;
• Use a light aluminum pizza pan, placing it on the grid supplied with the oven. If the dripping
pan is used, this will extend the cooking time, making it difficult to get a crispy crust;
• Do not open the oven door frequently while the pizza is cooking;
• If the pizza has a lot of toppings (three of four) , we recommend you add the mozzarella cheese
on top halfway through the cooking process.

26 27
EN EN
Useful information Useful information
C C
• When cooking pizza on two racks, use the 2nd and 4th with a temperature of 220°C and place
the pizzas in the oven after having preheated it for at least 10 minutes.
Cooking fish and meat
• When cooking white meat, fowl and fish, use temperature setting from 180°C to 200°C.
• For red meat that should be well done on the outside while tender and juicy in the inside, it is
a good idea to start with a high temperature setting (200°C-220°C) for a short time, then turn
the oven down afterwards.
• In general, the larger the roast, the lower the temperature setting. Place the meat on the
center of the grid and place the dripping pan beneath it to catch the fat.
• Make sure that the grid is inserted so that it is in the center of the oven. If you would like to
increase the amount of heat from below, use the low rack heights. For savory roasts (especially
duck and wild game), dress the meat with lard or bacon on the top.
Selector
knob
setting
Food to be cooked Weight
(in kg)
Cooking rack
position from
bottom
Preheating
time
(Minutes)
Thermostat
knob setting
Cooking
time
(Minutes)
1
Convection
Duck 1 3 15 200 65-75
Roast veal or beef 1 3 15 200 70-75
Pork roast 1 3 15 200 70-80
Biscuits
(short pastry) - 3 15 180 15-20
Tarts 1 3 15 180 30-35
Selector
knob
setting
Food to be cooked Weight
(in kg)
Cooking rack
position from
bottom
Preheating
time
(Minutes)
Thermostat
knob setting
Cooking
time
(Minutes)
2
Multi-
Cooking
Pizza (on 2 racks) 12-4 15 220 15-20
Lasagna 1 3 10 200 30-35
Lamb 1 2 10 180 50-60
Roast chicken
+potatoes 12-4 10 180 60-75
Mackerel 1 2 10 180 30-35
Plum-cake 1 2 10 170 40-50
Cream puffs
(on 2 racks) 0.5 2-4 10 190 20-25
Biscuits
(on 2 racks) 0.5 2-4 10 180 10-15
Sponge cake
(on 1 rack) 0.5 210 170 15-20
Sponge cake
(on 2 racks) 1.0 2-4 10 170 20-25
Savory pies 1.5 315 200 25-30
3
Grill
Soles and
cuttlefish 1 4 5 Max 8-10
Squid and prawn
kebabs 1 4 5 Max 6-8
Cod filet 1 4 5 Max 10
Grilled vegetables 13/4 5Max 10-15
Veal steak 1 4 5 Max 15-20
Cutlets 1 4 5 Max 15-20
Hamburgers 1 4 5 Max 7-10
Mackerels 1 4 5 Max 15-20
Toasted
sandwiches - 4 5 Max 2-3

28 29
EN EN
Useful information Useful information
C C
Selector
knob
setting
Food to be cooked Weight
(in kg)
Cooking rack
position from
bottom
Preheating
time
(Minutes)
Thermostat
knob setting
Cooking
time
(Minutes)
4
Defrosting
All frozen food
5
Maxi Grill
Soles and
cuttlefish 1 4 5 200 8-10
Squid and prawn
kebabs 1 4 5 200 6-8
Cod filet 1 4 5 200 10
Grilled vegetables 13/4 5200 10-15
Veal steak 1 4 5 200 15-20
Cutlets 1 4 5 200 15-20
Hamburgers 1 4 5 200 7-10
Mackerels 1 4 5 200 15-20
Toasted
sandwiches - 4 5 200 2-3
With rotisserie (where prevent)
Veal on the spit 1.0 - 5 200 80-90
Chicken on the
spit 1.5 - 5 200 70-80
Lamb on the spit 1.0 - 5 200 70-80
Selector
knob
setting
Food to be cooked Weight
(in kg)
Cooking rack
position from
bottom
Preheating
time
(Minutes)
Thermostat
knob setting
Cooking
time
(Minutes)
6
Fan
Assisted
Grilled chicken 1.5 3 5 200 55-60
Cuttlefish 1.5 3 5 200 30-35
With rotisserie (where prevent)
Veal on the spit 1.5 - 5 200 70-80
Chicken on the
spit 2.0 - 5 200 70-80
Chicken (on the
spit)+potatoes 1.5 - 5 200 70-75
(roasted) - 2 5 200 70-75
Lamb on the spit 1.5 - 5 200 70-80
7
Baking
Tarts 0.5 315 180 20-30
Fruit cakes 12/3 15 180 40-45
Fruitcake 0.7 315 180 40-50
Sponge cake 0.5 315 160 25-30
Stuffed pancakes
(on 2 racks) 1.2 2-4 15 200 30-35
Small cakes
(on 2 rakes) 0.6 2-4 15 190 20-25
Cheese puffs
(on 2 cakes) 0.4 2-4 15 210 15-20
Cream puffs
(on 3 cakes) 0.7 1-3-5 15 180 20-25
Biscuits
(on 3 racks) 0.7 1-3-5 15 180 20-25
Meringues
(on 3 racks) 0.5 1-3-5 15 90 180

30 31
EN EN
Useful information Useful information
C C
Selector
knob
setting
Food to be cooked Weight
(in kg)
Cooking rack
position from
bottom
Preheating
time
(Minutes)
Thermostat
knob setting
Cooking
time
(Minutes)
8
Fast
cooking
Frozen food
Pizza 0.3 2 - 250 12
Courgette and
prawn pie 0.4 2 - 200 20
Country style
spinach pie 0.5 2 - 220 30-35
Turnovers 0.3 2 - 200 25
Lasagne 0.5 2 - 200 35
Golden Rolls 0.4 2 - 180 25-30
Chicken morseis 0.4 2 - 200 15-20
Pre-cooked food
Golden chicken
wings 0.4 2 - 200 20-25
Fresh Food
Biscuits
(short pastry) 0.3 2 - 200 15-18
Fruitcake 0.6 2 - 180 45
Cheese puffs 0.2 2 - 210 10-12
9
Pizza
Pizza 0.5 315 220 15-20
Roast veal or beef 1 2 10 220 25-30
Chicken 12/3 10 180 60-70
Selector
knob
setting
Food to be cooked Weight
(in kg)
Cooking rack
position from
bottom
Preheating
time
(Minutes)
Thermostat
knob setting
Cooking
time
(Minutes)
10
Fast
Preheat
Scotch fillet steak,
seared first 1 3 5 220 8
Frozen chips 1 3 5 220 15
Chicken
drumettes/
wingettes, with
dry rub
1 3 5 230 15
Fresh barramundi
fillet with crumb 1 3 5 230 15
Potatoes cut into
wedges 0.5 3 5 230 14
Frozen goods
(Chicken nuggets/
crumbed fish)
1 3 5 230 15
Smashed chats
parboiled 1.0 354 220 15
NOTE:
Cooking times are approximate and may vary according to
personal taste. When cooking using the grill or fan assisted
grill, the dripping pan must always be placed on the 1st
oven rack from the bottom.

32 33
EN EN
Useful information Useful information
C C
Warranty & service
FAQs and Troubleshooting
• On no account open the appliancehousing!
• Installation, maintenance and repairs may only becarriedout by a suitably qualified and
competent person in strict accordance with current national and local safety regulations.
• Repairs and other work by unqualified persons could be dangerous. The manufacturer cannot
be held liable for unauthorised work. Ensure current is not supplied until after maintenance or
repair work has been carried out.
PROBLEM POSSIBLE CAUSE AND REMEDY
The oven does not heat up
• The oven may not be switched on. Switch the
oven on.
• The clock may not be set. Set the clock.
•Check to see if the required settings have been
applied.
• A household fuse may have blown or a circuit
breaker may have tripped. Replace the fuses or
reset the circuit. If this happens repeatedly, call
an authorised electrician.
A noise can be heard after a cooking programme • The cooling fan remains switched on after the
end of a cooking programme.
The lighting is not working
• Disconnect the appliance from the electricity
supply: Switch off and unplug at the socket, or
disconnect the fuse, or switch off at the isolator
as appropriate.
• Turn the lamp turn anti-clockwise to release it
and then pull it downwards to take it out.
• Replace it with a new incandescent lamp.
• Refit the lamp cover and turn it clockwise to
secure it.
• Reconnect the appliance to the mains electricity
supply
PROBLEM POSSIBLE CAUSE AND REMEDY
Cakes and biscuits are browning unevenly
• There will always be a slight unevenness. If
browning is very uneven check that the correct
temperature was set and that the correct shelf
level was used.
A fault code appears in the display:HE1 • Temperature sensor error
• Call local service centre
A fault code appears in the display:HE2 • Probe temperature sensor error
• Call local service centre

34 35
EN EN
A A
34 35
EN EN
35 FR
Table des matières
34 FR
Merci!
Nous vous remercions d'avoir choisi ce produit
VALBERG.
Choisis, testés et recommandés par ELECTRO DEPOT,
les produits de la marque VALBERG sont simples
d'utilisation, tout en offrant des performances
fiables et une qualité irréprochable.
Grâce à cet appareil, vous êtes assuré(e) que chaque
utilisation vous apportera satisfaction.
Bienvenue chez ELECTRO DEPOT.
Consultez notre site Internet: www.electrodepot.fr
www.electrodepot.be
AAperçu de l'appareil
CInformations utiles
BUtilisation de
l'appareil
Installer le four
Panneau de commande
Nettoyage et entretien
Conseils pratiques de cuisson
Garantie et services
Pièces et caractéristiques
VVOOTRETRE AAVISVIS CCOMPTE !OMPTE !
PARTAGEZ
VOTRE EXPERIENCE
SUR LES PRODUITS
Parce que votre satisfaction est notre priorité, nous vous proposons
de donner votre avis sur ce produit. Il sera transmis et analysé par
nos équipes afin d’améliorer continuellement le produit.
Donnez votre avis sur http://www.electrodepot.fr/avis-client
Les notices sont aussi disponibles sur le site
http://www.electrodepot.fr/sav/notices/
http://www.electrodepot.be/fr/sav/notices

36 37
A A Aperçu de l’appareilAperçu de l’appareil
Pièces et caractéristiques
1Panneau de commande 6Niveau 4
2Guides pour faire glisser les rails
ou pour faire basculer l'appareil 7Niveau 3
3Grille du four 8Niveau 2
4Lèchefrite ou plaque de cuisson 9Niveau 1
5Niveau 5
• Les niveaux de grilles sont numérotés à partir du bas.
• Les niveaux 4 et 5 sont principalement utilisés pour la fonction grill.
Veuillez suivre les guides de cuisson fournis dans ce manuel pour choisir le bon niveau de grille
pour vos plats.
Accessoires (accessoires en option, les accessoires présents prévaudront)
Les accessoires suivants sont fournis avec votre four.
1. Grille pour les plats, moules à gâteaux, et
plaques de rôtissage et de grillade.
2. Lèchefrite pour collecter les écoulements
de jus de viande ou de graisse.
• La plaque de cuisson, la lèchefrite et la grille doivent être insérées correctement dans les
glissières latérales. Lorsque vous retirez les aliments cuits du four, faites attention aux ustensiles
et surfaces chaud(e)s.
Exemple → Niveau 1: Lèchefrite / Niveau 3 : Plaque de cuisson
Niveau 3
Niveau 1
Niveau 4
Niveau 2
Niveau 5
Grille
Lèchefrite
• Lorsque vous utilisez la lèchefrite ou la plaque de cuisson pour récupérer les écoulements
issus des aliments cuits, vérifiez que la plaque est correctement placée dans les glissières
latérale. Si ces accessoires entrent en contact avec la surface du fond du four, cela pourrait
endommager l'émail de la surface. Les plaques placées au niveau 1 doivent être séparées du
fond du four de 2 cm minimum.
Utiliser les accessoires
Grille, plaque de cuisson et lèchefrite
• Placer la grille
Insérez la grille au niveau souhaité.
• Placer la plaque de cuisson ou la lèchefrite
Insérez la plaque de cuisson au niveau 3 du four et la lèchefrite au niveau 1
Arrêt de sécurité
Si aucune durée de cuisson n'est entrée, le four s'arrêtera automatiquement au bout de 2 heures.
• Le circuit électrique de ce four est équipé d'un système d'arrêt thermique. Si le four chaue
à des températures anormalement élevées, le système arrête l'alimentation électrique vers
les éléments chauants ou vers tout le four pour une certaine durée.
Ventilation de refroidissement
• Pour refroidir la partie extérieure du four, certains modèles sont équipés d'un ventilateur de
refroidissement. Lorsque le four chaue, le ventilateur s'enclenche automatiquement.
• Lorsque le ventilateur fonctionne, un ux d'air normal se fait sentir entre la porte du four et
le panneau de commande.
REMARQUE :
Après cuisson, le ventilateur du four fonctionne pour le
refroidir susamment.
FRFR
This manual suits for next models
1
Table of contents
Languages:
Other VALBERG Oven manuals