3
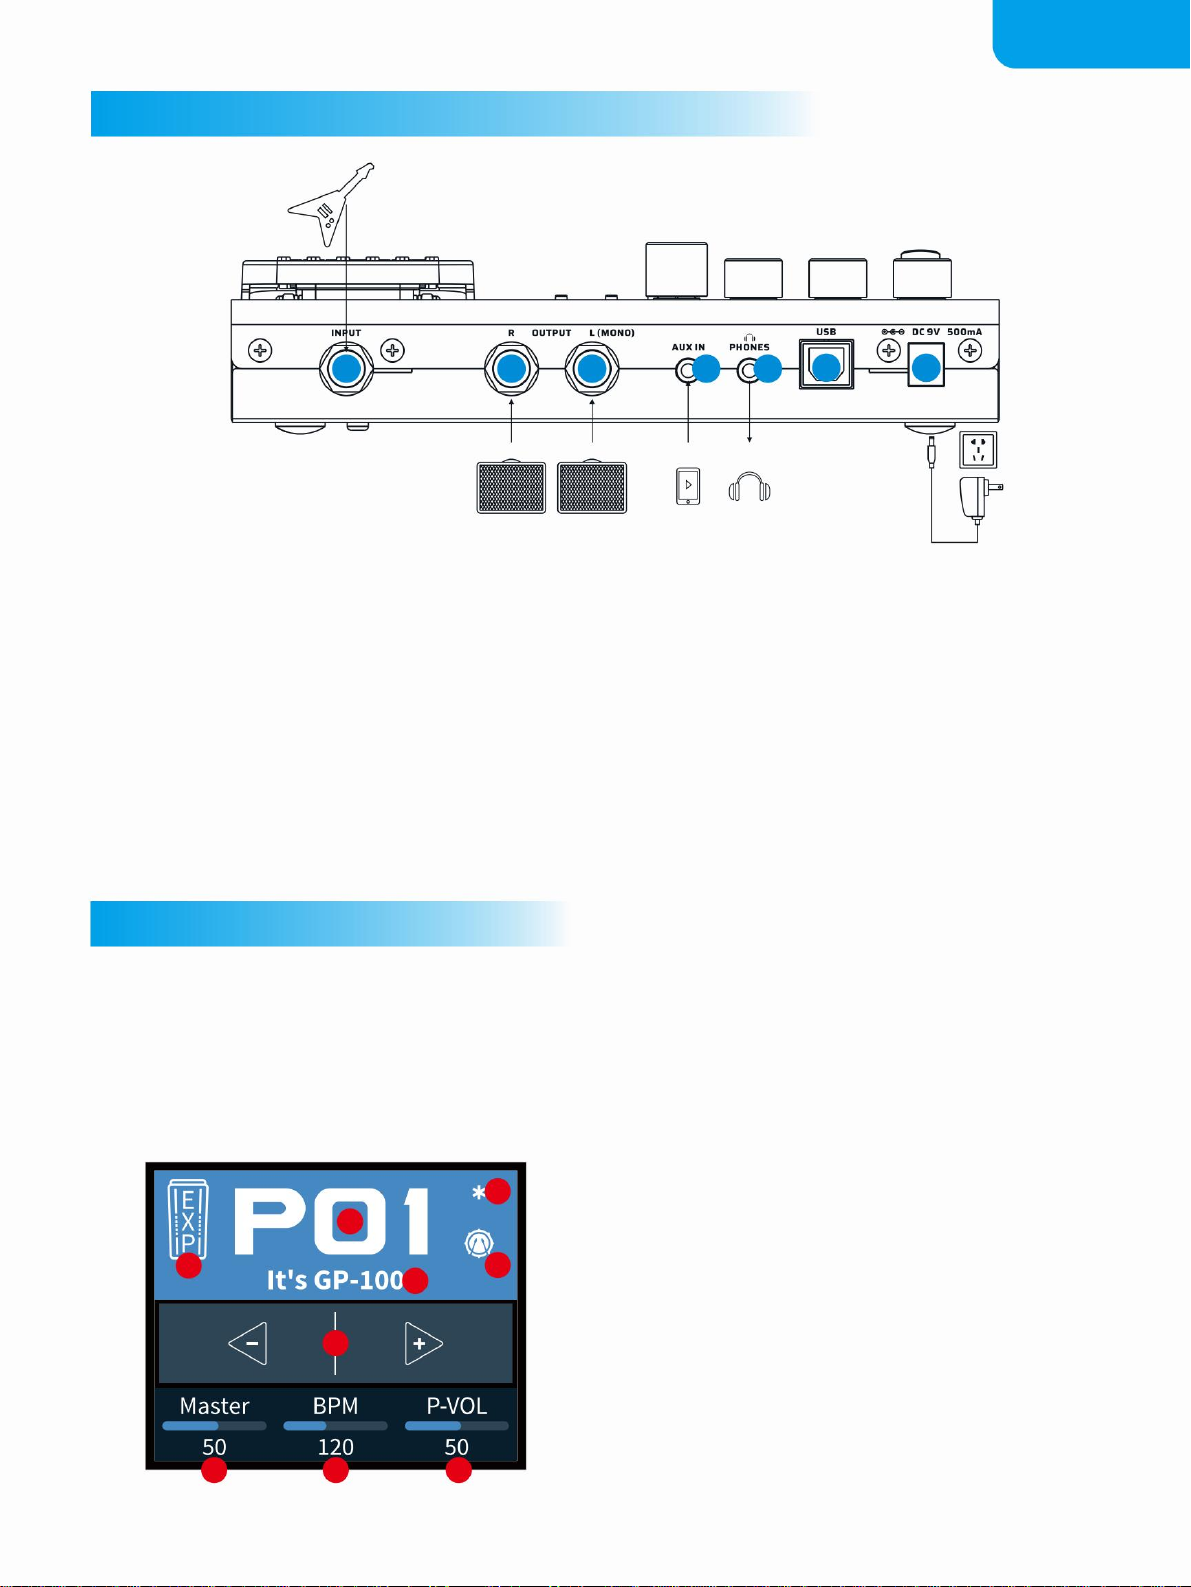
PANEL INTRODUCTION
3. GLOBAL button
9. Expression Pedal
Use to control the parameter of one or several
eects, including output volume.
8. Quick Access Knobs
Use to adjust parameters on the lower part of the
screen. Each knob will vary in function according
to the parameter on the display.
Turning or pressing this knob allows you to
change menus and adjust parameters.
4. DRUM button
Press this button to play the drum. Hold this
button to enter the Drum Machine Edit menu,
where you can edit the drum parameters
(style, rhythm, and volume). In the Drum
Machine Edit menu, press the DRUM button or the
PARA knob to turn the drum machine on / 10. [-] Footswitch / [+] Footswitch
These footswitches are used for controlling the
tuner, preset scrolling, start/stop/record phrases,
and other functions. Their function will depend on
the footswitch mode you are currently using.
Press this button to enter the global setting menu,
where you can edit the global parameters
of the GP-100.
Confirm to save the changed parameter.
In any menu, press this button to enter the Edit
Settings menu.
5. EDIT button
Use this button to store, rename, and copy the
preset. Whenever a preset is modified, the LCD
display will show a “*” symbol to indicate that the
parameter has been changed.
6. SAVE button
O.
2. PARA knob (with enter button)
In any menu, press this button to return to the main
interface.
1. LED Display
This display shows GP-100’s the patch
numbers, patch name, and other operation
information.
7. EXIT button
3 4
6
1
5
10
10
2
7
8
9
88
Machine Translated by Google