website:
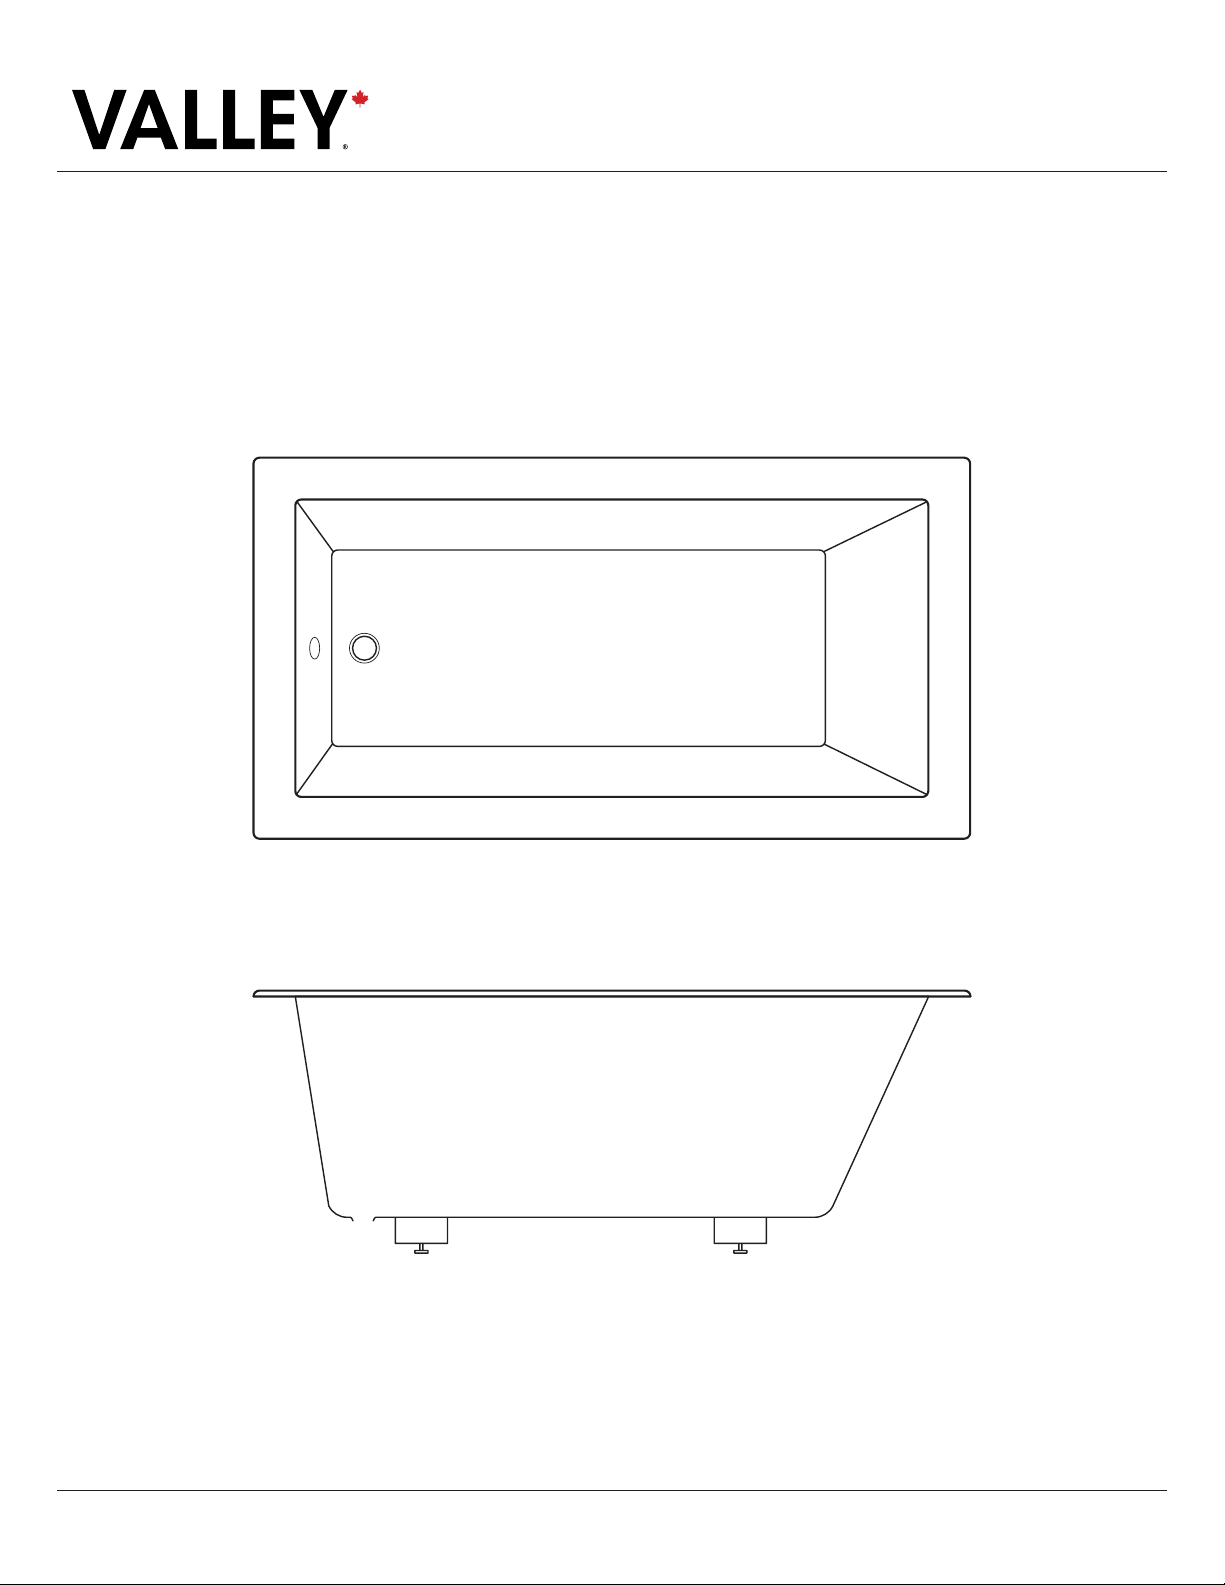
www.valleyacrylic.com • E-mail: [email protected] • customer service call Toll Free: 1.877.398.8827 • Fax: +1.604.820.0124UNDERMOUNT
BATHTUB
INSTALLATION GUIDE
2
Thank you for choosing Valley Acrylic Products. This installation manual provides general
information on the installation of our products.
DO NOT lift or carry your unit by the grab bar. If your unit is equipped with a whirlpool
system, it is very important NOT to carry it by the whirlpool piping.
• Read the instructions carefully before beginning the installation.
• Consult local building codes to make sure the installation complies with standards.
• Remove the unit from its packaging. Before disposing, packaging and taking unit from your sales person, inspect
the unit to make sure it is in good shape.
• Should inspection reveal any damage or defect in the nish, Contact Us. The warranty does not cover damages
or defects in the nish once the unit has been installed. Valley’s responsibility for shipping damages ceases upon
delivery of the product in good order to the carrier. All complaints regarding damage due to transport must be made
directly to the carrier.
• It is recommended that you place the unit in the bathroom before you start. Sectional units should be disassembled
if necessary. Conserve all nuts and bolts.
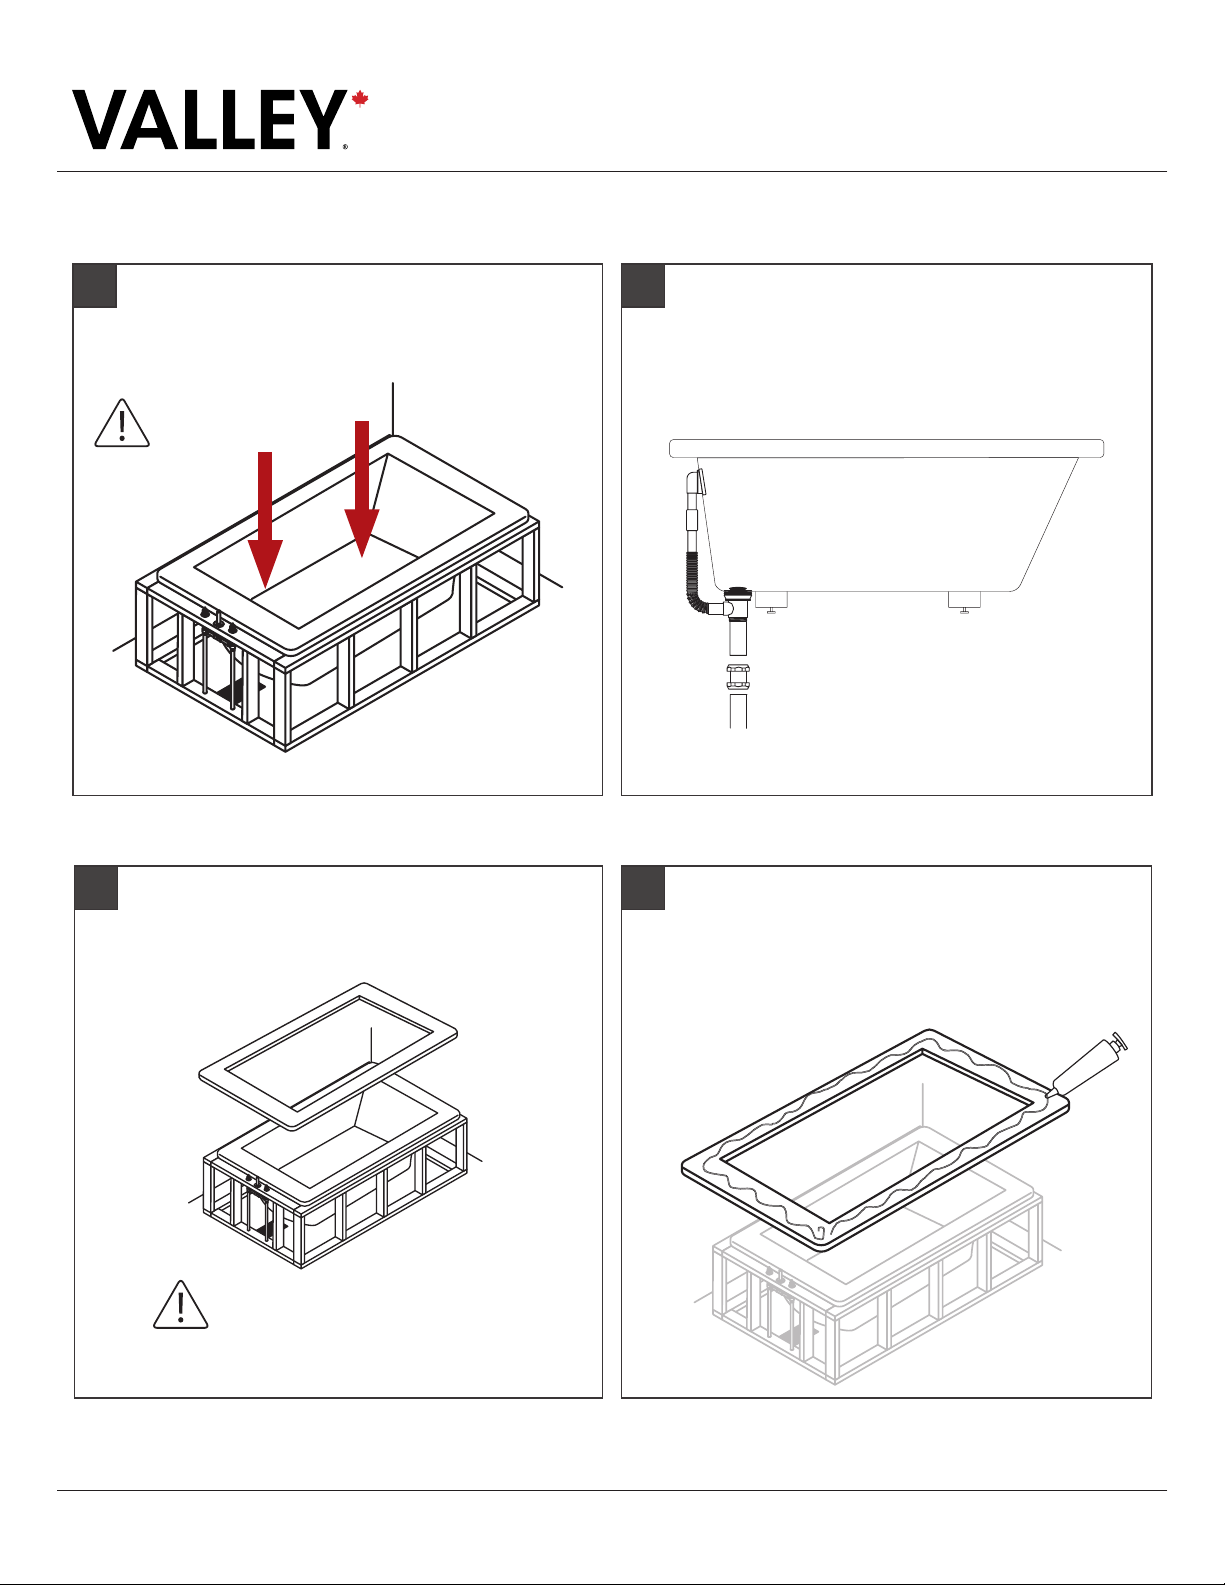
• To protect the unit during installation, we suggest that you lay a piece of at cardboard on the bottom.
• Do not remove the polyethylene protective lm until installation is complete to gain maximum protection. Do
remove it where two surfaces will be in permanent contact.
• The oor must be level and strong enough to support the weight of the water-lled bathtub. If you are renovating,
bring down the walls to install framing and plumbing. Make sure the walls are properly insulated and comply with
the appropriate building code.
• Verify that all dimensions on the plan are the same, as the ones of the unit.
• If an apron is to be installed, make sure the bathtub is at the same height as the oor covering.
• If your bathtub is equipped with both a whirlpool and an air system, space must be made for the air system’s
blower either inside or outside the alcove or island. If the blower cannot be installed under the bathtub, it can be
located up to 9 feet away.
• Make sure an access panel - 30” x 30” (750 mm x 750 mm) must be located near the whirlpool pump and/or the air
system blower to allow easy servicing.
• Access must be provided for each product component (water heater, light, nozzle, elec tronic and air control, faucet).
•Whirpool and/or air systems must be connected before nal installation (see the installation and user’s guide for
whirpool and air systems).
BEFORE YOU BEGIN
IMPORTANT INFORMATION