VARO Gardenpro PowerPlus POWXG6460 User manual

POWXG6460 EN
Copyright © 2014 VARO P a g e | 1www.varo.com
1APPLIANCE .....................................................................................3
2DESCRIPTION .................................................................................3
3PACKAGE CONTENT LIST.............................................................3
4SYMBOLS........................................................................................4
5GENERAL SAFETY.........................................................................4
5.1 Work area ................................................................................................................4
5.2 Electrical safety.......................................................................................................4
5.3 Personal safety .......................................................................................................5
5.4 Power tool use and care.........................................................................................5
5.5 Service.....................................................................................................................6
6ADDITIONAL SAFETY RULES FOR SHREDDERS.......................6
6.1 Preparation:.............................................................................................................7
6.2 Operation:................................................................................................................7
6.3 Maintenance and storage .......................................................................................8
7ASSEMBLY INSTRUCTIONS..........................................................8
7.1 Collect box locking handle.....................................................................................9
8OPERATION.....................................................................................9
8.1 Putting into operation.............................................................................................9
8.2 On/off switch...........................................................................................................9
8.3 Changing direction of rotation.............................................................................10
8.4 Overload protection..............................................................................................10
8.5 Restart prevention ................................................................................................11
8.6 Shredder start-up
:
..............................................................................................11
8.7 Emptying the collect box.....................................................................................11
8.8 Adjusting the counter knife (Fig 13).....................................................................11
8.9 Shredding tips.......................................................................................................12
8.9.1 Mulching .................................................................................................................12
8.9.2 Mulching palm fronds..............................................................................................13
8.9.3 Composting.............................................................................................................13
9TECHNICAL DATA........................................................................13

POWXG6460 EN
Copyright © 2014 VARO P a g e | 2www.varo.com
10 NOISE.............................................................................................13
11 CLEANING AND MAINTENANCE.................................................14
12 STORAGE ......................................................................................14
13 TROUBLE SHOOTING ..................................................................15
14 WARRANTY...................................................................................15
15 ENVIRONMENT .............................................................................16
16 DECLARATION OF CONFORMITY ..............................................17

POWXG6460 EN
Copyright © 2014 VARO P a g e | 3www.varo.com
SILENT SHREDDER 2600W
POWXG6460
1 APPLIANCE
Your shredder is intended for compacting fibrous and wood-related materials such as hedge
and tree cuttings, branches, bark and pine cones.
Warning! Read this manual and the general safety instructions carefully
before using the machine, for your own safety. Keep this manual for future
reference.
2 DESCRIPTION
1. Feeding hopper
2. Blade adjustment knob
3. Collect box
4. Wheel
5. Collect box locking handle
6. Plug (connection for extension
cable)
7. Reverse switch
8. On/off switch
9. Overload protector
10. Push stick
3 PACKAGE CONTENT LIST
Remove all packing materials.
Remove remaining packaging and transit supports (if existing).
Check the completeness of the packing content.
Check the appliance, the power cord, the power plug and all accessories for transportation
damages.
Keep the packing materials as long as possible till the end of the warranty period. Dispose
it into your local waste disposal system afterwards.
WARNING: Packing materials are no toys! Children must not play with
plastic bags! Danger of suffocation!
1x Instruction manual
1x spanner
1x silent shredder
1x collection box
1x base frame
2x wheel set
2x front wheel set
1x small parts bag
1x adjuster
When parts are missing or damaged, please contact your dealer.

POWXG6460 EN
Copyright © 2014 VARO P a g e | 4www.varo.com
4 SYMBOLS
In this manual and/or on the machine the following symbols are used:
Warning / Danger
Warning! Flying objects
Read manual before
usage
Wear gloves
Danger –rotating
blades
Always switch off the shredder,
disconnect the plug and wait until the
cutting disc stops before carrying out
maintenance or cleaning work.
Keep hands and feet out of openings while machine is running
Keep bystanders away
Wear eye protection
5 GENERAL SAFETY
Read all safety warnings and all instructions. Failure to follow all warnings and instructions
may result in electric shock, fire and/or serious injury. Save all warnings and instructions for
future reference. The term "power tool" in the warnings refers to your mains operated (corded)
power tool or battery operated (cordless) power tool.
5.1 Work area
Keep your workspace clean and tidy. Untidiness and unlit working areas can lead to
accidents.
Do not work with the device in an environment where there is danger of an explosion,
where there are combustible fluids, gases or dust. Power tools produce sparks which can
ignite the dust or the vapours.
Keep children and other persons away while you are using the power tool. You may lose
control of the device if you are distracted.
5.2 Electrical safety
The connector plug must fit in the power socket. The mains plug must not be adapted in
any way. Do not use an adapter plug together with earthed devices. Unadapted plugs and
appropriate sockets reduce the risk of an electric shock.
Avoid contact with earthed surfaces, for example on pipes, heaters, cookers and
refrigerators. The risk of an electric shock is increased if your body is earthed.
Keep the device away from rain or moisture. Penetration of water into
an electrical appliance increases the risk of an electric shock.
Do not use the cable to carry or hang up the device and do not pull the cable to remove
the plug from the power socket. Keep the cable away form heat, oil, sharp edges and
moving parts of the device. Damaged or tangled cables increase the risk of an electric
shock.

POWXG6460 EN
Copyright © 2014 VARO P a g e | 5www.varo.com
When working with a power tool outside, only use extension cables which are approved
for outdoor use. Using an extension cable which is suitable for outdoor use reduces the
risk of an electric shock.
Always check that the power supply corresponds to the voltage on the rating plate.
5.3 Personal safety
Be observant, pay attention to what you are doing and be sensible when working with a
power tool. Do not use if you are tired or under the influence of drugs, alcohol or
medicines. One moment of carelessness when using the device can lead to serious injury.
Wear personal protective equipment and always wear safety glasses or goggles. The
wearing of personal protective equipment, such as a face mask, non-slip safety shoes, a
protective helmet or ear protectors, depending on the type and use of the power tool,
reduces the risk of injury.
Avoid unintentional starting. Ensure that the switch is in the “OFF (0)” position before
putting the mains plug in the power socket. Accidents can be caused by having a finger on
the switch while carrying the device or connecting it to the power supply with the switch in
the “ON” position.
Remove any adjusting tools or spanners before switching the device on. A tool or spanner
in a turning part of the device can lead to injuries.
Do not overreach your ability. Ensure that your footing is secure and that you keep your
balance at all times. You will then have better control over the device in unexpected
situations.
Wear suitable clothing. Do not wear loose fitting clothes or jewellery. Keep your hair,
clothing and gloves well away from moving parts. Loose clothing, jewellery or long hair
can get caught in moving parts.
If dust extraction and absorption devices can be fitted, ensure that they are connected and
used correctly. Use of these devices reduces exposure to dust.
5.4 Power tool use and care
Do not overload the device. Use the power tool which is intended for your work. With the
appropriate power tool you will work better and more securely in the performance range
indicated.
Do not use any power tool with a defective switch. A power tool which cannot be switched
on or off correctly is dangerous and must be repaired.
Take the plug out of the power socket before carrying out any adjustments, changing
accessories or putting the device away. These precautions prevent any accidental
starting.
Keep power tools out of the reach of children when not in use. Do not allow anyone who is
not familiar with the device or who has not read these instructions to use it. Power tools
can be dangerous when used by inexperienced persons.
Be careful to maintain the device correctly. Check whether moving parts are operating
correctly and are not sticking and whether parts are broken or damaged to such an extent
that operation is affected. Any damaged components should be repaired before use. Many
accidents are caused by power tools being poorly maintained.
Keep cutting tools sharp and clean. Properly maintained cutting tools with sharp cutting
edges jam less often and are easier to operate.
Use power tools, accessories, inserts, etc. in accordance with these instructions and as
specified for this particular type of device, taking into account the working conditions and
the activity to be carried out. Using power tools for anything other than their intended
applications can lead to dangerous situations.

POWXG6460 EN
Copyright © 2014 VARO P a g e | 6www.varo.com
5.5 Service
Have your power tool serviced by a qualified repair person using only identical
replacement parts. This will ensure that the safety of the power tool is maintained.
6 ADDITIONAL SAFETY RULES FOR SHREDDERS
Wear protective gloves, protective glasses and hearing protectors. Avoid loose clothing.
Always stand steadily and in balance. Do not stretch towards the machine.
During use, the machine should be level and on a firm surface.
Ensure that all screws and nuts are properly tightened before use.
Only use the machine in dry conditions and never use outdoors when it is raining.
Never use the machine with damaged safety devices or without protection.
Keep hands, other parts of our body and clothing away from the feeding hopper and the
discharge chute.
Keep your face and the rest of your body away from the feeding hopper.
Do not leave the machine unsupervised, switch off the motor and disconnect the plug.
Hard objects such as stones, bottle, cans or pieces of metal must not be fed into the inlet
chute. This can cause damage to the machine.
If the machine becomes blocked, stop the motor and disconnect the plug. Pull out any
objects and check for damage.
If the fuse blows or if the overload protection is triggered, this is a sign that the machine is
overloaded and/or that too many appliances are connected to the same extension cable.
Check the cause and remedy. Do not install a more powerful fuse.
Do not tug on the extension cable. Do not hold the cable taut. This can cause damage in
the plugs or in the cables insulation. Such damage is invisible but can be dangerous.
Always keep the extension cable away from the machine. Disconnect the plug from the
electric socket and check the cable regularly for signs of damage or aging. Do not use the
machine with a damaged extension cable.
If the cable is damaged, it must be replaced by an authorized service centre in order to
avoid a hazard.
Never move the machine by pulling the cable. The machine must not be moved with the
motor running.
The shredder must be assembled correctly before use.
Warning! This appliance must be earthed!
Warning! Use only three core extension cables with the earth wire connected.
Only use extension cables that are approved for outdoor use and check that they are in
good condition before use.
Before inserting the plug in the mains socket, make sure that the socket ratings are correct
and correspond to those indicated on the rating label on the shredder.
Always switch off the shredder before disconnecting any plug and socket connector or
extension cables.
Keep children and pets away. All onlookers should be kept a safe distance away from the
shredder when it is in use.
Do not allow children or any person who has not read this instruction leaflet or who is not
familiar with the shredder to operate it.
The operator is responsible for third parties while working with the shredder.
Only use the shredder for its intended purposes.
Caution! There are rotating blades on this machine.
Caution! Blades do not stop immediately after switching off.
Always switch off the shredder, disconnect the plug and wait until the cutting disc stops
before carrying out maintenance or cleaning work.
It is forbidden to move or modify any of the electrical and mechanical safety devices.
Use only in daylight or good artificial light.

POWXG6460 EN
Copyright © 2014 VARO P a g e | 7www.varo.com
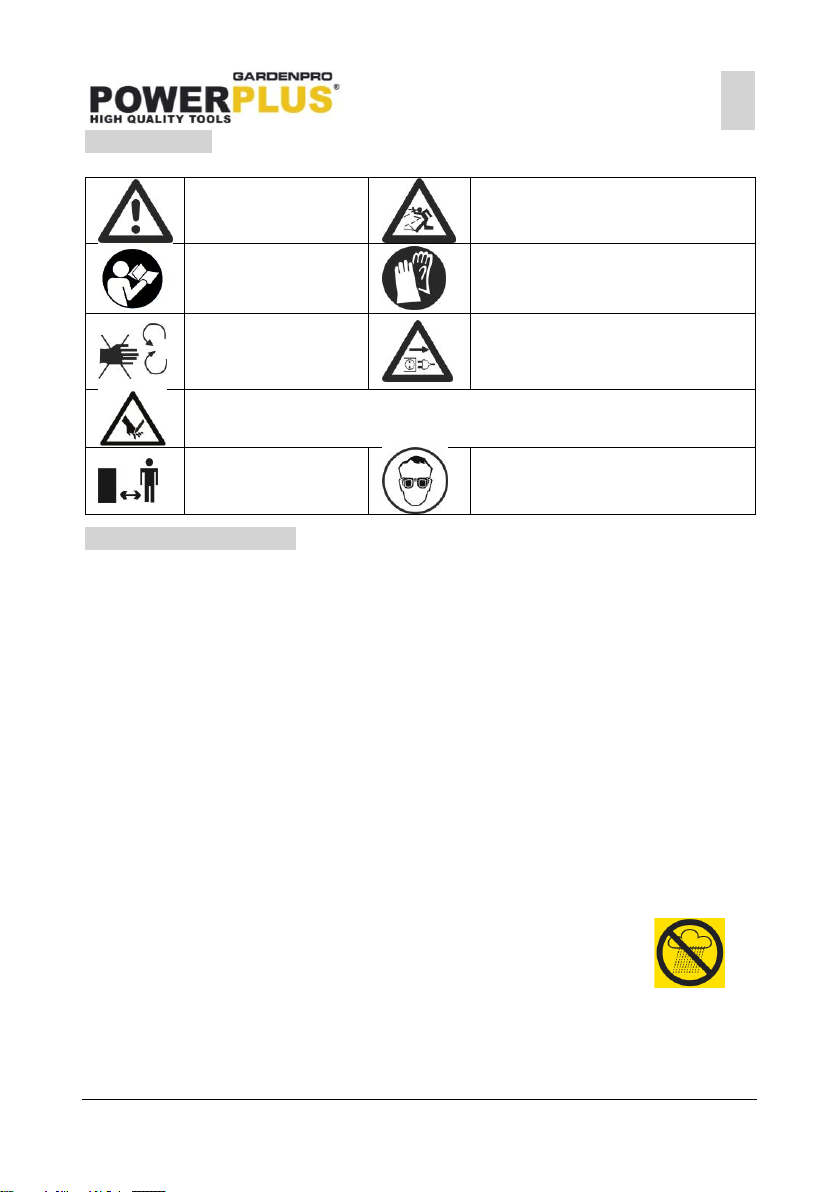
Do not put your hands into the feed funnel or ejection slot.
If the shredder should start to vibrate abnormally, switch off the motor and check for the
cause immediately. Vibration is generally a warning of trouble.
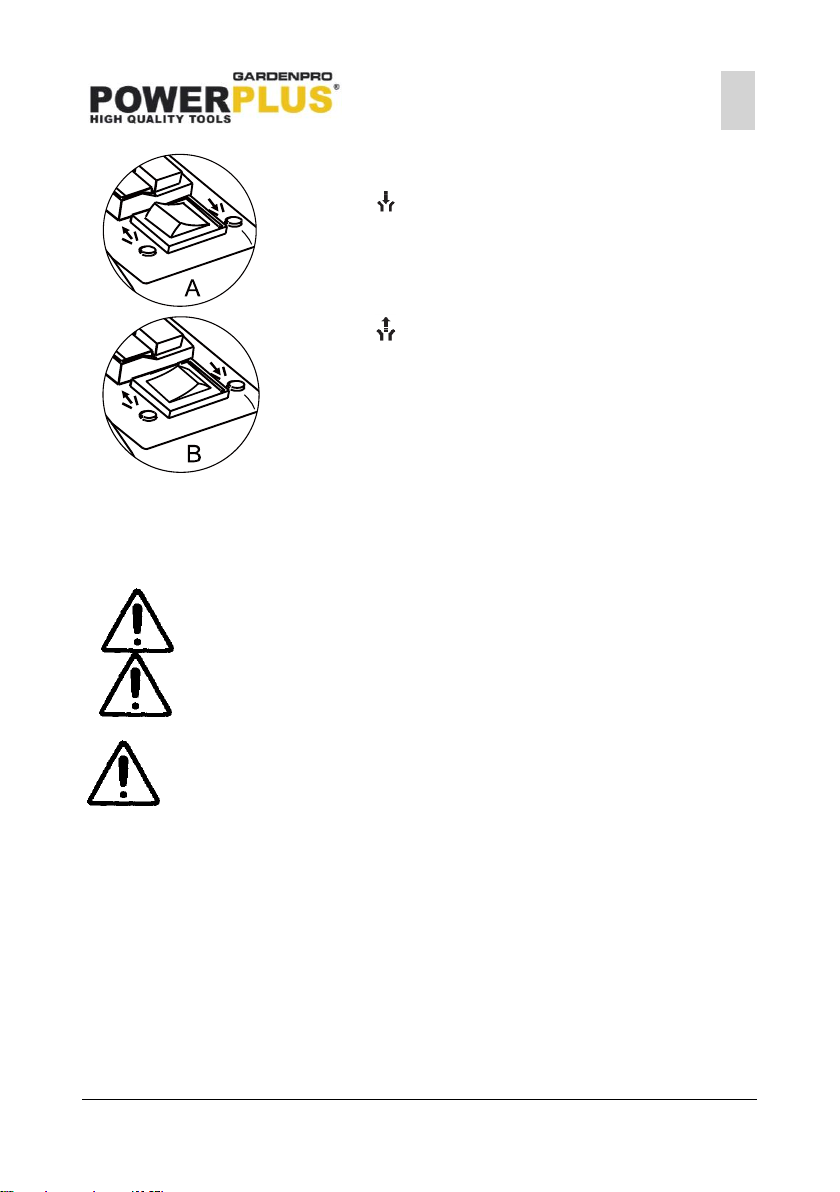
Ensure blades are secure before shredding. Do not operate the shredder if any of the
blades are not properly mounted.
The shredder should be checked carefully before use. You should only work with a
shredder that is in good condition. If you notice any defect on the machine that may cause
danger to the operator, do not operate the shredder until defects are rectified.
Replace worn or damaged parts for safety. Use only original spare parts. Parts not
produced by manufacturer may cause poor fit and possible injury.
Use the shredder only in places where it is protected from water and never use it outdoors
in rainy weather.
Store in a dry secure place out of reach of children,
This appliance is not intended for use by persons (including children) with reduced
physical, sensory or mental capabilities, or lack of experience and knowledge, unless they
have been given supervision or instruction concerning use of the appliance by a person
responsible for their safety.
Children should be supervised to ensure that they do not play with the appliance.
6.1 Preparation:
Do not allow children to operate this equipment
Do not operate this equipment in the vanity of bystanders
Wear ear protection and safety glasses at all times while operating
Avoid wearing clothing that is loose fitting or that has hanging cords and ties
Only operate the machine the machine in open space (e.g. Not close to a wall or other
fixed objects) and on a firm, level surface
Do not operate the machine on a paved or gravel surface, where ejected material could
cause injury
Before starting the machine, check that all screws, nuts, bolts, and other fasteners are
properly secured and that guards and screens are in place. Replace damaged and
unreadable labels
6.2 Operation:
Before starting the machine, look into the feeding chamber to make certain, that it is empty
Keep your face and body away from the feed intake opening
Do not allow hands or any other part of the body or clothing inside the feeding chamber,
discharge chute, or near any moving part
Keep proper balance and footing at all times. Do not overreach. Never stand at a higher
level than the base of the machine, when feeding material into it
Always stand clear of the discharge zone when operating this machine
When feeding material into the machine be extremely careful that pieces of metal, rocks,
bottles, cans or other foreign objects are not included
If the cutting mechanism strikes any foreign objects or if the machine should start making
any unusual noise or vibration, shut off the power source and allow the machine to stop,
disconnect the spark plug wire from the spark plug ( electric unit disconnect from supply)
and take the following steps:
1. Inspect for damage
2. Check for and tighten any loose parts
3. Have any damaged parts replaced or repaired with parts having equivalent specifications
Do not allow processed material to build up in the discharge zone; this may prevent proper
discharge and can result kickback of material through the feed intake opening

POWXG6460 EN
Copyright © 2014 VARO P a g e | 8www.varo.com
If the machine becomes clogged, shut of the power source and disconnect the spark plug
wire from the spark plug (electric unit disconnect from supply) before clearing debris. Keep
the power source clear of debris and other accumulations to prevent damage to the power
source or possible fire. Remember that operating the starting mechanism on engine
powered machines will still cause the cutting means to move
Keep all guards and deflectors in place and in good working condition
Do not tamper with the power source governor settings; the governor controls the safe
maximum operating speed and protects the power source and all moving parts from
damage caused by over speed. Seek authorized service if a problem exists.
Do not transport this machine while the power source is running
Shut off the power source and disconnect the spark plug lead (electric unit disconnect
from supply) whenever you leave the work area
Do not tilt the machine while the power source is running
6.3 Maintenance and storage
When the machine is stopped for servicing, inspection, or storage, or to change an
accessory, shut off the power source, disconnect the spark plug wire from the spark plug
(electric unit disconnect from supply), make sure that all moving parts have come to a
complete stop and, where a key is fitted remove. Allow the machine to cool before making
any inspections, adjustments, etc
Store the machine where fuel vapor will not reach an open flame or spark. For extended
storage periods, run the unit dry of fuel. Allow the machine to cool before storing.
When servicing the cutting means be aware that, even though the power source will not
start due to the interlock feature of the guard, the cutting means can still be moved by a
manual starting mechanism.
7 ASSEMBLY INSTRUCTIONS
Warning! You may need assistance when lifting the machine out of the box
and assembling.
Open the package and remove the machine from package. (Fig 2)
Pull out the collect box and take out the main part of the machine and all accessories.
Take all parts out of the package. Be sure four protruding supports in the bottom of the
motor unit pass through four notches in the upper face of the base frame. (Fig. 3)
Slide the collection box out of the base frame. (Fig. 4)
Fit the front wheel sets to the base frame with the aid of two screws. (Fig. 5)
Use the spanner to mount wheels to the base frame using two wheel shafts, two
grommets, two spring grommets and two screws. Assemble cap by pushing in on by hand.
(Fig. 6)
Slide the collection box back to the base frame. Ensure that the collection box runs above
the guide rails. (Fig. 7)
Stand and put hands in position as shown in Fig. 8. Lay the motor unit on the base frame
by placing four protruding supports (Fig. 8/Item B) of the motor unit on the slots (Fig. 8-
1/Item A) of the base frame.
Fix the location plate to the base frame with two screws. (Fig. 9)
Lock the collection box with safety switch in position by pushing upwards. (Fig. 10-1)

POWXG6460 EN
Copyright © 2014 VARO P a g e | 9www.varo.com
7.1 Collect box locking handle
Your shredder is equipped with a safety switch,
it does not work when this switch is not pushed
by the collect box locking handle.
After sliding in the collect box you have to
move the ‘collect box locking handle’ upwards,
to close the safety switch. Then only you can
start the shredder.
To Remove collect box : before you can
remove it, you have to pull the ‘collect box
locking handle’’ down. When collect box is not
in its place, the shredder can not not be
operated. NOTE ! After re-placing the collect
box, you always have to push the ON switch to
make shredder work again.
8 OPERATION
8.1 Putting into operation
Before you plug the connection cable of the mains
supply into the socket, you have to retract the grey
"pull-out" protection, plug in the socket and then let
spring back the protection. Otherwise caused by
vibrations the plug will be disconnected from the
socket.
8.2 On/off switch
Press the green button to switch on the shredder.
Inrush currents can cause short-time voltage drops; under unfavourable power supply
conditions, other equipment may be affected (if the system impedance of the power supply is
lower than 0,127 + j0,079 Ohm, disturbances are unlikely to occur); if you need further
clarification, you may contact your local power supplier.
Press the red button to switch it off.
Note: This machine is equipped with an electromagnetic switch to prevent it
from being unexpectedly switched on when power source recovered.

POWXG6460 EN
Copyright © 2014 VARO P a g e | 10 www.varo.com
8.3 Changing direction of rotation
Position (IN –normal RUN)
For forward action push the forward/reverse switch on the
lower IN position (see drawing). The cutting drum pulls the
material in and shreds it.
Position (OUT –Reverse RUN)
For reverse action push the forward/reverse switch on the
upper OUT position (see drawing). The cutting blades run in
the opposite direction and release the clogged material. OUT
position (see drawing).
Note : change of direction can be done without first switching
the shredder off. The knive wil slow down and will
automatically turn other way after it has come to a stilstand
Tips
Large objects or woody pieces will be re moved after several operations in both cutting
and releasing directions.
Use a pusher or clearing hook to remove blocked objects from the feeding funnel and
ejection slot
DANGER! Do never try to loosen blocked objects with your hands! Do
never touch the feeding hopper or the discharge chute when the machine
is plugged in!
Caution! Always wait for the shredder to become idle before switching it
on again.
Longer material standing out from the shredder could lash out when
being drawn in by the cutting blade. Please keep at safe distance!
Don’t push hardware into the shredder
8.4 Overload protection
When the shredder is blocked by objects such as branches., it will automatically switch
to reverse to release the blocked material.
After 5 seconds, the shredder will stop automatically.
To continu working, re-press ‘forward’.
If it’s still blocked you can try above procedure again.
In case it is still blocked and still switches to reverse or does not turn at all anymore,
first perform paragraph “adjusting the anvil distance” and try reverse run to free the
blocked material.

POWXG6460 EN
Copyright © 2014 VARO P a g e | 11 www.varo.com
8.5 Restart prevention
To avoid unintentional start up of the shredder After the power supply has been cut, the
shredder is equipped with a ‘restart prevention system’ and will not start up again by itself
when the power goes back on.
You have to Press “run/forward” to switch the shredder back on.
8.6 Shredder start-up
:
Slide the collect box into place;
Close the lock handle of the collect box(move upwards) ( to close the safety switch;
Connect the power;
Press the green ON button to switch the shredder on;
Feed material into the feeding funnel;
The material is automatically pulled in by the chopping knife.
Caution! Longer material standing out from the machine could lash out
when being pulled in by the chopping knife! Keep a safety distance!
Warning! Always use the pusher (Fig.11) if you try to push the material into
the feeding tunnel. Do not use your hands directly! Keep the pusher well
after use.
Only insert as much material as will not block up the feeding tunnel.
Chop garden waste that has been stored for some days and is wilted and damp
alternately with branches.
This will prevent the chopping knife from getting blocked up.
Do not fill into the shredder any soft material such as kitchen waste instead of
compositing it.
Widely branched material with leaves must be completely chopped before any new
material is fed in.
Take care that the chopped material can freely fall from the discharge chute –danger of
backing up!
The ventilation slots must not be covered by the waste bag or the chopped material.
After finishing the job, press the red button to switch the shredder OFF .
8.7 Emptying the collect box.
The level of shredded material debris in the collection box can be checked by looking through
the notches on the upper face of the base frame. Always empty the collection box in good time
to prevent it from overfilling.
To empty it, proceed as follows:
Switch off the device at the ON/OFF switch.
Press the safety switch down.
Release the collection box.
Take the collection box out at the front.
8.8 Adjusting the counter knife (Fig 13)
Counter knife B can be set from 0 to 0.75 mm away from chopping knife A. This distance
should be kept to achieve effective operation.
Soft materials or wet woody branches may be wrapped around the chopping knife or not cut
off clean, while a worn counter knife may cause the same problem after several operations.
There is an adjusting device on the right side of the lower shell. To adjust the distance, turn
handwheel C clockwise. Half a turn will move the counter knife 0.75 mm closer to the
chopping knife.

POWXG6460 EN
Copyright © 2014 VARO P a g e | 12 www.varo.com
After adjusting, make some cutting tests to check if the best effect is achieved. Ensure that the
chopping knife is in contact with the counter knife, especially when shredding soft materials or
wet, woody branches. When you use strong and dry materials the counter knife should have a
corresponding distance to the chopping knife to avoid any damage to the shredder.
Warning! To avoid and damage to the shredder make sure that the
cutting blade does not come into contact with the anvil blade.
8.9 Shredding tips
Heavy material or branches may result in blocking of the cutting blades during continuous
cutting.
Soft materials, such as leaves or stems may block the feeding opening.
Always feed the material to be chopped from the right corner of the feeding funnel.
Check the material to be chopped carefully. Make sure there is no contact with stones or
nails as these could damage the shredder seriously.
To realease blocked material, switch the shredder on and press the “reverse”button. The
blade drumr will release the jammed shredding material. If it is still blocked, you can
increase the distance between the anvil & the drum knive (see described before in this
manual). Try reverse run again to free the blocked material. Readjust the anvil to your
personal choise.
Keep hold of branches while feeding them into the shredder until they are automatically
drawn in.
Keep to the working speed of the shredder and do not overload it.
To protect the shredder from clogging, shred wilted garden waste that has been left for a
few days and shred thin twigs alternately with branches.
Before you shred roots, remove any remaining soil and stones from them Do not shred
soft, damp material such as kitchen waste, but take it straight to the compost.
Keep a few dry branches for the end, as they will help clean the shredder.
Only switch the shredder off when all of the shredding material has passed through the
cylinder. Otherwise, the cylinder may jam the next time you switch the shredder on.
8.9.1 Mulching
The following types of material can be mulched in the shredder:
Twigs and branches.
Waste from cutting bushes.
Waste from hedge-trimming.
Examples of materials which are not suitable for mulching include:
Glass, metal, plastic bags, stones, fabric, and earth covered roots.
Waste that does not have a firm consistency, e.g. kitchen waste.
Soft Leafy material.
CAUTION: The maximum diameter of twigs and branched, which are
shredded or mulched with this unit, must not exceed 40mm. Bigger sized
materials could damage the unit.
Branches and twigs should be mulched shortly after being cut. They become extremely hard
when they dry out, and the maximum diameter of what can be mulched is reduced. Heavy
material or twigs will jam the blades if you let the machine cut continually. A large proportion of
garden waste contains a lot of water and therefore sticks easily. Such material should be
allowed to dry for a few days before being processed.

POWXG6460 EN
Copyright © 2014 VARO P a g e | 13 www.varo.com
Check all the material you want to shred carefully. Make sure it doesn’t contain any stones or
nails as this might severely damage the shredder.
Be aware of vibrations. Heavy vibrations are caused by damaged or worn out blades. Store
the shredder indoors in a dry place.
8.9.2 Mulching palm fronds
The shredder is designed to effectively handle palm fronds, reducing them to an easily
disposable waste.
If the head of the palm fond is particularly large or hard it may have to be removed before it is
inserted into the shredder.
If the material is particularly fibrous or hard then you may have to loosen the blade adjustment
knob as outlined in section ‘Adjusting the cutting gear’ and run the material through once to
soften it. Then retighten the adjustment screw and insert the material a second time to
effectively shred it.
8.9.3 Composting
The processed material can be composted in various ways:
The material can be placed in a heap directly on the ground (cold composting).
The material can be placed in a plastic container, wooden crate, skeleton container or
similar (cold composting).
The material can be placed in an insulated compost holder. The heat is then held for
longer and the rotting process also continues during the winter. This method produces
faster results (warm composting).
The material can be spread directly onto the garden (surface composting).
9 TECHNICAL DATA
Rated Voltage
230V
Rated frequency
50Hz
Rated Power
2600W
Rotation speed
40min-1
Max. diameter
40mm
Protection class
Class I
Int. protection degrees
IPX4
Weight
28kg
Collect box
60L
Note:
1. The S6-40% indicates a load profile of 4 min load and 6 min idle time. For practical
application, continuous operation is permitted.
2. The Max Cutting Diameter depends on the hardness of the wood.
10 NOISE
Noise emission values measured according to relevant standard. (K=2.5)
Acoustic pressure level LpA
80 dB(A)
Acoustic power level LwA
91 dB(A)
ATTENTION! Wear hearing protection when sound pressure is over 85
dB(A).

POWXG6460 EN
Copyright © 2014 VARO P a g e | 14 www.varo.com
11 CLEANING AND MAINTENANCE
Before commencing cleaning and maintenance procedures, make sure the garden shredder is
switched off and disconnected from the mains supply. Always wear sturdy leather gloves when
cleaning the cutter blades.
To ensure the best performance from the garden shredder, it must be kept clean.
Always clean the garden shredder immediately after use.
Do not allow material to become dry and hard on any of the garden shredder surfaces.
This will directly affect the shredding performance.
Make sure that the inlet chute and the discharge chute are kept clean and clear of all
waste material.
Make sure that all nuts, bolts and screws are tight and secure.
Always have any damaged or worn parts repaired, or replaced by qualified personnel.
Do not use detergents or solvents as these could cause irreparable damage to your
machine. Chemicals can destroy the plastic parts.
Oil the drum every 4th or 5th (use BIO-degradable oil to protect environment).
CAUTION! Do not over tighten the anvil plate adjustment knob and cut
excessive aluminum off of the plate, as this will reduce the life of your
shredder.
Have your garden shredder inspected and maintained by qualified service
personnel. Do not attempt to repair the machine unless you are qualified to
do so.
WARNING! Never use a high-pressure washer or running water when
cleaning the shredder! Brush away dirt and plant residue which may be
caught in the spiral cutter. Wipe clean the outside of the shredder with a
cloth which has been moistened with a mild detergent and water.
12 STORAGE
To protect the shredder from corrosion when storing for a longer period, treat the cutting blade
with environmentally-friendly oil.

POWXG6460 EN
Copyright © 2014 VARO P a g e | 15 www.varo.com
13 TROUBLE SHOOTING
PROBLEM
CAUSE
ACTION
The motor does not
run
Collection box not inserted
correctly /- safety handle not
moved up to close safety
switch
Place collect box under machine and
close safety switch by pushing safety
handle upwards.
Power failure
Check the power supply cable, the
plug and the house fuse.
The material to be
chopped is not drawn
in
The cutting blade is running
backwards.
Switch over the direction of rotation.
The material is jammed in the
feeding funnel
Switch the shredder OFF.
Pull the material from the feed
funnel. Switch the shredder back ON
and re-feed thick branches such that
the blade does not immediately
engage the pre-cut notches again.
Shredding material is too soft
Insert wood or shred dried branches
The cutting blade is blocked.
Press the rotational switch in the
reverse position. The cutting blade
will now run backwards to release
the blocked up material.
Note : If blocked material is still not
released, you can enlarge the
distance between anvil and drum
knife.
Shredding material
comes out in chains
Anvil is incorrectly adjusted
Readjust the anvil / drum knive
distance
14 WARRANTY
This product is warranted for a 36-month period effective from the date of purchase by the
first user.
This warranty covers all material or production flaws excluding : batteries, chargers,
defective parts subject to normal wear & tear such as bearings, brushes, cables, and
plugs, or accessories such as drills, drill bits, saw blades, etc. ; damage or defects
resulting from maltreatment, accidents or alterations; nor the cost of transportation.
Damage and/or defects resulting from inappropriate use also do not fall under the
warranty provisions.
We also disclaim all liability for any bodily injury resulting from inappropriate use of the
tool.
Repairs may only be carried out by an authorised customer service centre for Powerplus
tools.
You can always obtain more information at the number 00 32 3 292 92 90.
Any transportation costs shall always be borne by the customer, unless agreed otherwise
in writing.
At the same time, no claim can be made on the warranty if the damage of the device is the
result of negligent maintenance or overload.

POWXG6460 EN
Copyright © 2014 VARO P a g e | 16 www.varo.com
Definitely excluded from the warranty is damage resulting from fluid permeation, excessive
dust penetration, intentional damage (on purpose or by gross carelessness), inappropriate
usage (use for purposes for which the device is not suitable), incompetent usage (e.g. not
following the instructions given in the manual), inexpert assembly, lightning strike,
erroneus net voltage. This list is not exhaustive.
Acceptance of claims under warranty can never lead to the prolongation of the warranty
period nor commencement of a new warranty period in case of a device replacement.
Devices or parts which are replaced under the warranty therefore remain the property of
Varo NV.
We reserve the right to reject a claim whenever the purchase cannot be verified or when it
is clear that the product has not been properly maintained. (Clean ventilation slots, carbon
brushes serviced regularly, etc.).
Your purchase receipt must be kept as proof of date of purchase.
Your appliance must be returned undismantled to your dealer in an acceptably clean state,
(in its original blow-moulded case if applicable to the unit), accompanied by proof of
purchase.
15 ENVIRONMENT
Should your machine need replacement after extended use, do not put it in the
domestic waste but dispose of it in an environmentally safe way.
Waste electrical products should not be disposed of with household waste. Please
recycle where facilities exist. Check with your Local Authority or retailer for
recycling advice.

POWXG6460 EN
Copyright © 2014 VARO P a g e | 17 www.varo.com
16 DECLARATION OF CONFORMITY
VARO N.V. - Joseph Van Instraat 9 - BE2500 Lier - BELGIUM, declares that,
Product Silent shredder 2600W
Trade mark PowerPlus
Model POWXG6460
is in conformity with the essential requirements and other relevant provisions of the applicable
European Directives, based on the application of European harmonized standards. Any
unauthorized modification of the apparatus voids this declaration.
European Directives (including, if applicable, their amendments up to the date of signature);
2011/65/EU
2006/42/EC
2004/108/EC
2000/14/EC Annex V LwA 88dB(A) / 91dB(A)
European harmonized standards (including, if applicable, their amendments up to the date of
signature);
EN60335-1 : 2002
EN13683 : 2003
EN55014-1 : 2006
EN55014-2 : 1997
EN61000-3-2 : 2006
EN61000-3-11 : 2000
Keeper of the Technical Documentation : Philippe Vankerkhove, VARO –Vic. Van Rompuy
N.V.
The undersigned acts on behalf of the company CEO,
Hugo Cuypers
Regulatory Affairs –Compliance Manager
12/11/13
Table of contents
Other VARO Paper Shredder manuals
Popular Paper Shredder manuals by other brands

HSM
HSM Powerline HDS 150 Translation of the original operating instructions

Gardol
Gardol GLH 250 SB operating instructions

Rexel
Rexel Optimum AutoFeed+ 50X instruction manual

ATIKA
ATIKA AMA 2300 Original and safety instructions

Opus
Opus VS 711CD user guide

ABC Office
ABC Office 30304 operating instructions