manuals.online logo
Brands
  1. Home
  2. •
  3. Brands
  4. •
  5. Vax
  6. •
  7. Vacuum Cleaner
  8. •
  9. Vax Power 8 SERIES User manual

Vax Power 8 SERIES User manual

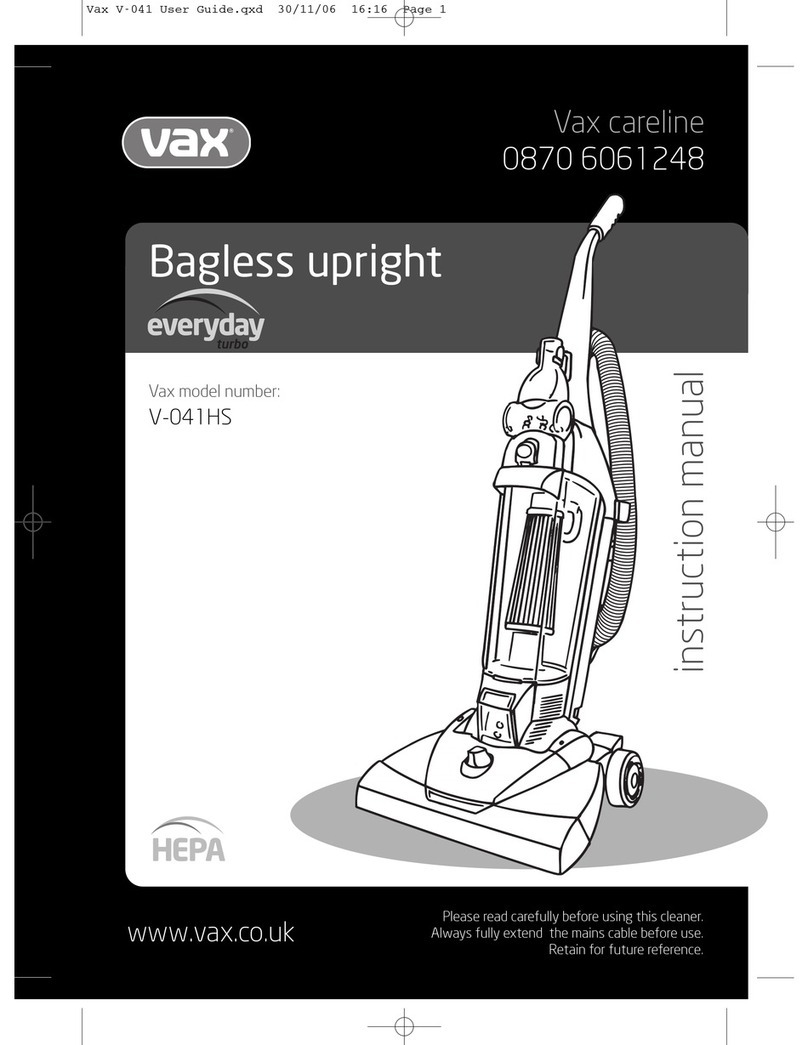
Bagless Upright
power8
Vax Careline: (UK) 0844 412 8455
(ROI) 1-800 928 308
User Gu de
Power 8 ser es
– – – – –
e.g. U89- P 8 - B
Get Cleaning...
What’s your Vax model number? (Located on the top flap of the packaging)
---
What’s your serial number? (Located on the base of the machine)
Note these down in case you need them in future. Please keep instructions for further use.
vax.co.uk
U89-P8 Power 8 V1.3 28.01.13_User guide 29/01/2013 16:31 Page 1
---------- ---
Unit
Accessories Filters
20
1
3
4
9
18
20
19
17
8
5
6
7
8
17 10
18
10
11
13
14
15
16
19
21
14
1Handle
2TurboTool caddy (some models only)
3 Dirt container release button
4 Carry handle
5Dirt container lid
6 Separator
7 Dirt container
8Pre-motor filter housing
9Brushbar height ad ust
10 Cord storage hook
11 Cord
12 Cord safety hook
13 Hose
14 Hose storage
15 Power on/off button
16 Recline pedal
17 Extension tube
18 Crevice tool
19 Dusting brush
20 TurboTool (some models only)
21 Pre-motor filter
PLEASE NOTE: some parts may vary
according to model. Please check inside
flap of box for more details.
2
12
2
Mach ne Overv ew
U89-P8 Power 8 V1.3 28.01.13_User guide 29/01/2013 16:31 Page 2
vax.co.uk
FOR HOUSEHOLD USE ONLY.
When using the vacuum cleaner, basic safety precautions should always
be observed, including the following:
1. Only use the vacuum cleaner indoors on dry surfaces.
2. Turn off the vacuum cleaner controls before
disconnecting or connecting from the mains supply.
3. Always unplug the vacuum cleaner before connecting or
disconnecting the vacuum hose and accessories.
4. Children should be supervised to ensure that they
do not play with the appliance.
5. This appliance is not intended for use by persons
(including children) with reduced physical, sensory
or mental capabilities, or lack of experience and
knowledge, unless they have been given supervision or
instruction concerning use of the appliance by a person
responsible for their safety.
6. Use only as described in this manual. Use only
Vax recommended attachments.
7. Do not use the vacuum cleaner if it has been
dropped, damaged, left outdoors or dropped into
water. Do not use the vacuum cleaner with a
damaged cord or plug. If the supply cord is damaged, it
must be replaced by the manufacturer or a
recommended Service Agent to avoid hazard and
invalidating the guarantee.
8. Do not pull or carry by cord/hose. Do not use the
cord/hose as a handle, close a door on the cord/hose
or pull cord/hose around sharp edges or corners. Do
not run the vacuum cleaner over the cord/hose. Keep
the cord away from heated surfaces.
9. Do not handle the plug or vacuum cleaner with wet hands.
Do not use outdoors or on wet surfaces.
10. Do not put any ob ects into openings. Do not use
with any openings blocked and do not restrict
air-flow. Keep all openings free of dust, lint, hair or
anything that might reduce airflow.
11. Keep hair, loose clothing, fingers and all parts of
the body away from openings and moving parts.
12. Do not pick up hot coals, cigarette butts, matches
or any hot, smoking or burning ob ects.
13. Do not pick up flammable or combustible
materials (lighter fluid, petrol, kerosene etc.) or use
in the presence of explosive liquids or vapours.
14. Do not vacuum up harmful or toxic material
(chlorine, bleach, ammonia, drain cleaner etc.).
15. Do not vacuum up hard or sharp ob ects such as
glass, nails, screws, coins, etc.
16. Do not use without ALL of the filters in place.
17. Take extra care when vacuuming on stairs.
18. Keep vacuuming area well lit.
19. Store the vacuum cleaner in a cool, dry area.
20. Turn off the on/off switch before unplugging the
vacuum cleaner.
21. Use only CE-approved 13 amp extension cords.
Non-approved cords may overheat. Care should
be taken to arrange the cord so that the cord
cannot be tripped over.
WARNING: Always switch off and unplug the vacuum cleaner from
the electrical socket before assembling, opening or emptying the dirt
container, or before connecting/disconnecting the attachments.
CAUTION: The vacuum cleaner is a very powerful unit. Before
plugging the cord into the electrical socket, make sure the
switch is in the ‘off’ position.
IMPORTANT: If the inlet, hose or telescopic tube
is blocked, switch off the vacuum cleaner and remove the
blockage(s) before re-starting the vacuum cleaner.
See Maintenance; Clearing Blockages.
IMPORTANT: Cleaning filters maintains vacuum performance.
Vax recommends that your filters should be checked and cleaned at
least every three months. If your filters are washable make sure they
are completely dry before inserting back into the vacuum cleaner.
Filters must be placed the correct way up to avoid blockages
(Refer to page 4).
IMPORTANT: The motor is equipped with a thermal cut-out. If for any
reason the unit should overheat, the thermostat will automatically turn
the unit off. Should this occur, unplug the vacuum cleaner from the
electrical socket and turn off the switch. Remove dirt container
and empty. Clean filters. Allow the unit to cool for approximately
one (1) hour. To re-start, plug into an electrical socket and switch
back on.
Th s vacuum cleaner s ntended for household use only and NOT for
commerc al or ndustr al use.
PLEASE KEEP INSTRUCTIONS FOR FURTHER USE.
3
General Safety Informat on
U89-P8 Power 8 V1.3 28.01.13_User guide 29/01/2013 16:31 Page 3
---
Assembl ng your vacuum cleaner
Keep your Vax l ke new IMPORTANT: The condition of the filters affects the performance of
your machine. Please check and wash filters at least every three
months. For full cleaning instructions, see pages 7 and 8.
IMPORTANT: Do not use the vacuum cleaner without all of the filters
in place and fitted the correct way up – insert the lip of the filter into
the filter cover and push up.
Push lower back panel onto base
of unit. Insert hose storage and
secure in place with the two
screws provided.
Attach handle to the back panel by
pushing down firmly.
Insert locking pin into place at
the bottom of the handle.
Secure in place with the small
screw provided.
Attach dirt container and click
into place.
Connect hose.
4
Operat on
U89-P8 Power 8 V1.3 28.01.13_User guide 29/01/2013 16:31 Page 4
IMPORTANT: When the vacuum
cleaner is stood in the upright
position, or when using the hose and
tools, the brushbar height ad ust must
be set to the highest position.
IMPORTANT: Vax recommends that you raise the height of the brushbar to the highest position when using this
cleaner on lino and hard flooring due to constant rotation. Vax cannot be held responsible for damage to these
surfaces if the customer fails to take notice of this recommendation.
Operat ng the appl ance
Twist cord storage hook to
release cord.
Turn unit on.
Recline unit. In upright position turn brushbar height
ad ust to desired setting.
H gh - long carpet pile and hard floors
Low - short carpet pile
1
2
5
vax.co.uk
Operat on
U89-P8 Power 8 V1.3 28.01.13_User guide 29/01/2013 16:31 Page 5
---
The crevice tool and TurboTool can be attached to both extension tube and hose directly.
The dusting brush can only be attached to the hose directly.
This unit has a constantly rotating brushbar. Vax recommends you raise the brushbar before attaching accessories.
Us ng accessor es
Attach ng to hose
Remove hose from its holder and
unwind hose from unit.
Choose an accessory. Attach accessory to hose.
Attach ng to extens on tube
Remove extension tube from holder. Attach extension tube to hose. Attach accessory to extension tube.
Operat on
6
U89-P8 Power 8 V1.3 28.01.13_User guide 29/01/2013 16:31 Page 6
Empty ng and clean ng the d rt conta ner
Clean ng the HEPA pre-motor f lter
tap
24hr
!
40° C
max
1
2
1
2
1
2
Insert the lip of the filter into the filter
cover and push up.
IMPORTANT: To avoid blockages ensure the filter is
fitted the correct way up.
7
vax.co.uk
Ma ntenance (Keep your Vax as good as new)
U89-P8 Power 8 V1.3 28.01.13_User guide 29/01/2013 16:31 Page 7
---
Advanced f lter clean ng
tap
1
2
1
2
Ma ntenance (Keep your Vax as good as new)
8
U89-P8 Power 8 V1.3 28.01.13_User guide 29/01/2013 16:31 Page 8
Remov ng blockages
WARNING: To reduce the risk of electric shock, turn the vacuum cleaner off and unplug from the electrical socket
before performing maintenance/troubleshooting checks.
Disconnect the hose from the vacuum cleaner and remove any blockages found then reconnect the hose securely.
Remov ng blockages from the brushbar
Remov ng blockages from the TurboTool (some models only)
Turn the TurboTool over and slide
off the locking ring.
Detach lower housing and
remove blockage.
To re-assemble the TurboTool,
ensure that the tabs are engaged
and pivot the lower housing closed.
Slip the locking ring over the neck
of the TurboTool and into the
groove to finish.
Locking
ring
Tabs
Unscrew the five screws
on the base of unit.
Remove floor nozzle cover. Lift brushbar. Remove the belt from the
end of the brushbar.
Ma ntenance (Keep your Vax as good as new)
9
vax.co.uk
U89-P8 Power 8 V1.3 28.01.13_User guide 29/01/2013 16:31 Page 9
---
FAQs
WARNING: to reduce the r sk of personal njury, unplug the vacuum cleaner before perform ng
ma ntenance/troubleshoot ng checks.
Why won’t the vacuum cleaner turn on?
• It may not be plugged into the electrical socket
correctly; ensure that the plug is pushed in
securely.the ‘Parts Overview’ page in this guide to
make sure the part is definitely included in
your unit.
• The electrical socket may not be working properly;
check the fuse or breaker, or consult an
electrician.
• The motor thermostat may have tripped; switch off
and unplug the vacuum cleaner, and leave for one
hour before switching the cleaner back on.
Why won’t the vacuum cleaner p ck up?
• The dirt container may be incorrectly installed;
remove the dirt container from the unit by pressing
the dirt container release button and then re-
attaching it to the unit, ensuring it is locked firmly
back into place.
• The filter may be clogged; refer to ‘Maintenance:
Cleaning the filters’ on pages 7 & 8.
• The filter may have been replaced upside down;
refer to maintenance on page 7.
• The dirt container may be blocked; refer to
‘Maintenance: Emptying and cleaning the dirt
container’ on page 7.
• There may be a blockage in the hose/tube;
disconnect from the vacuum cleaner.
Carefully remove any blockages found and
reconnect securely.
Why s dust escap ng from the vacuum?
• The filter may be clogged; refer to ‘Maintenance:
Cleaning the filters’ on pages 7 & 8.
• The dirt container may be blocked; refer to
‘Maintenance: Emptying and cleaning the dirt
container’ on page 7.
• The dirt container may be incorrectly fitted; remove
the dirt container from the unit by pressing the dirt
container release button and then re-attaching it to
the unit, ensuring it is locked firmly back into place.
Why won’t the accessor es p ck up properly?
• Hose blockages: remove the hose from the unit.
Carefully remove any blockages found and
reconnect hose securely.
• Accessory blockages: remove accessory from
handle/tube. Carefully remove blockage and
re-attach to the vacuum cleaner.
• The accessory may be faulty. Simply call us on
0844 412 8455 for assistance.
we’re here if you need us
(UK) 0844 412 8455 (ROI) 1-800 928 308
vax.co.uk/support • vaxireland.ie
or call:
Instead of taking me back to the shop, simply visit;
This does not aect your statutory rights.
10
U89-P8 Power 8 V1.3 28.01.13_User guide 29/01/2013 16:31 Page 10
Other Informat on
UK Serv ce & Help
Any queries or concerns about using your Vax, simply visit; vax.co.uk/support –vax reland. e or call the
Vax Careline. Calls are charged at the UK local rate. Please make a note of the serial number and model
number of the vacuum cleaner before calling.
Vax Careline:
(UK) 0844 412 8455
(ROI) 1-800 928 308
Monday-Friday 8.30am to 6.30pm
Saturday-Sunday 9.00am to 5.00pm
Consumables
To purchase spares and accessories, please visit vax.co.uk
The use of genuine vax spare parts helps to maintain optimised
performance and validates your guarantee
Pre-motor filter (Type C ): 1-1-131167-00
Belt Kit (Type 3) 1-1-127370-00
Techn cal Spec f cat on
Voltage: 220-240V ~50Hz
Wattage: 2200W
Capacity: 4L
Filters: pre-motor filter (washable)
Cord length: 10m (approx)
Weight: 7.7kg - 8kg (depending on model)
Sub ect to technical change without notice.
EEC Statement of Compl ance
Manufacturer/EEC importer: Vax Limited, hereby on our own responsibility, declare that the
U89-P8 series is manufactured in compliance with the following Directives:
Safety: 2006/95/EC Low Voltage Directive
EMC: 2004/108/EC Electromagnetic Compatibility Directive
Waste electrical products should not be disposed of with household waste. Please recycle where facilities exist.
Check with your Local Authority or retailer for recycling advice.
11
vax.co.uk
U89-P8 Power 8 V1.3 28.01.13_User guide 29/01/2013 16:31 Page 11
---
Vers on 1.2
Vax Ltd., K ngswood Road, Hampton Lovett, Dro tw ch, Worcestersh re, WR9 OQH, UK
ema l: nf[email protected] - webs te: vax.co.uk
U89-P8 Power 8 V1.3 28.01.13_User guide 29/01/2013 16:31 Page 12

This manual suits for next models

1

Other Vax Vacuum Cleaner manuals

Vax VS-022 Product information sheet

Vax

Vax VS-022 Product information sheet

Vax Power Advance VX77 Installation instructions

Vax

Vax Power Advance VX77 Installation instructions

Vax Power Plus 6 User manual

Vax

Vax Power Plus 6 User manual

Vax ultrixx V-096 User manual

Vax

Vax ultrixx V-096 User manual

Vax SWIFT V-106AA User manual

Vax

Vax SWIFT V-106AA User manual

Vax VUAMM1600T User manual

Vax

Vax VUAMM1600T User manual

Vax KONE K-001 User manual

Vax

Vax KONE K-001 User manual

Vax U90-P4 SERIES User manual

Vax

Vax U90-P4 SERIES User manual

Vax U91-P3 Series User manual

Vax

Vax U91-P3 Series User manual

Vax VMST144V User manual

Vax

Vax VMST144V User manual

Vax VX35 User manual

Vax

Vax VX35 User manual

Vax Zen User manual

Vax

Vax Zen User manual

Vax Gator H90-GA-B User manual

Vax

Vax Gator H90-GA-B User manual

Vax VX Series User manual

Vax

Vax VX Series User manual

Vax U9O-MA-B User manual

Vax

Vax U9O-MA-B User manual

Vax VAXAIR Force 2 VUAFT1600 User manual

Vax

Vax VAXAIR Force 2 VUAFT1600 User manual

Vax VCU-02 User manual

Vax

Vax VCU-02 User manual

Vax Cordless Slim Vac TBTTV1B1 Installation instructions

Vax

Vax Cordless Slim Vac TBTTV1B1 Installation instructions

Vax Powermax VRS2 Series User manual

Vax

Vax Powermax VRS2 Series User manual

Vax H86-S9-B User manual

Vax

Vax H86-S9-B User manual

Vax Platinum SmartWash CDCW-SWXP User manual

Vax

Vax Platinum SmartWash CDCW-SWXP User manual

Vax H89-12V Series User manual

Vax

Vax H89-12V Series User manual

Vax Action C85-AD-Be Installation instructions

Vax

Vax Action C85-AD-Be Installation instructions

Vax INFINITY V-031B Series User manual

Vax

Vax INFINITY V-031B Series User manual

Popular Vacuum Cleaner manuals by other brands

Panasonic MC-9050 Service manual

Panasonic

Panasonic MC-9050 Service manual

Numatic TEM 390A-11 Original instructions

Numatic

Numatic TEM 390A-11 Original instructions

Numatic HAS-750S Owner's instructions

Numatic

Numatic HAS-750S Owner's instructions

Bosch BGL3B112 operating instructions

Bosch

Bosch BGL3B112 operating instructions

Leifheit 51000 Safety instructions

Leifheit

Leifheit 51000 Safety instructions

Vacmaster VBV1330PF Operator's manual

Vacmaster

Vacmaster VBV1330PF Operator's manual

Genius X9 instruction manual

Genius

Genius X9 instruction manual

Husky 8200445 Use and care guide

Husky

Husky 8200445 Use and care guide

Fein Dustex 35 LX AC manual

Fein

Fein Dustex 35 LX AC manual

Nilfisk-Advance CV 10 instruction manual

Nilfisk-Advance

Nilfisk-Advance CV 10 instruction manual

Wilfa INNOVAC SENSOR instruction manual

Wilfa

Wilfa INNOVAC SENSOR instruction manual

Dyson DC31 operating manual

Dyson

Dyson DC31 operating manual

Black & Decker Bdh2000PL instruction manual

Black & Decker

Black & Decker Bdh2000PL instruction manual

Bosch In'genius BGL85 Series instruction manual

Bosch

Bosch In'genius BGL85 Series instruction manual

Gorenje VCEB24DPBK instruction manual

Gorenje

Gorenje VCEB24DPBK instruction manual

Hoover HWD020 instructions

Hoover

Hoover HWD020 instructions

Triple S AF9 operating instructions

Triple S

Triple S AF9 operating instructions

Makita DVC750LZX3 instruction manual

Makita

Makita DVC750LZX3 instruction manual

manuals.online logo
manuals.online logoBrands
  • About & Mission
  • Contact us
  • Privacy Policy
  • Terms and Conditions

Copyright 2025 Manuals.Online. All Rights Reserved.