VegaStream Vega 50 FXS User manual

Version 0.1 23 September 2005 Page 1 of 41
For use with Vega 50 FXS – SIP version 04.02.07 T014 or greater. © 2002-2005 VegaStream Ltd.
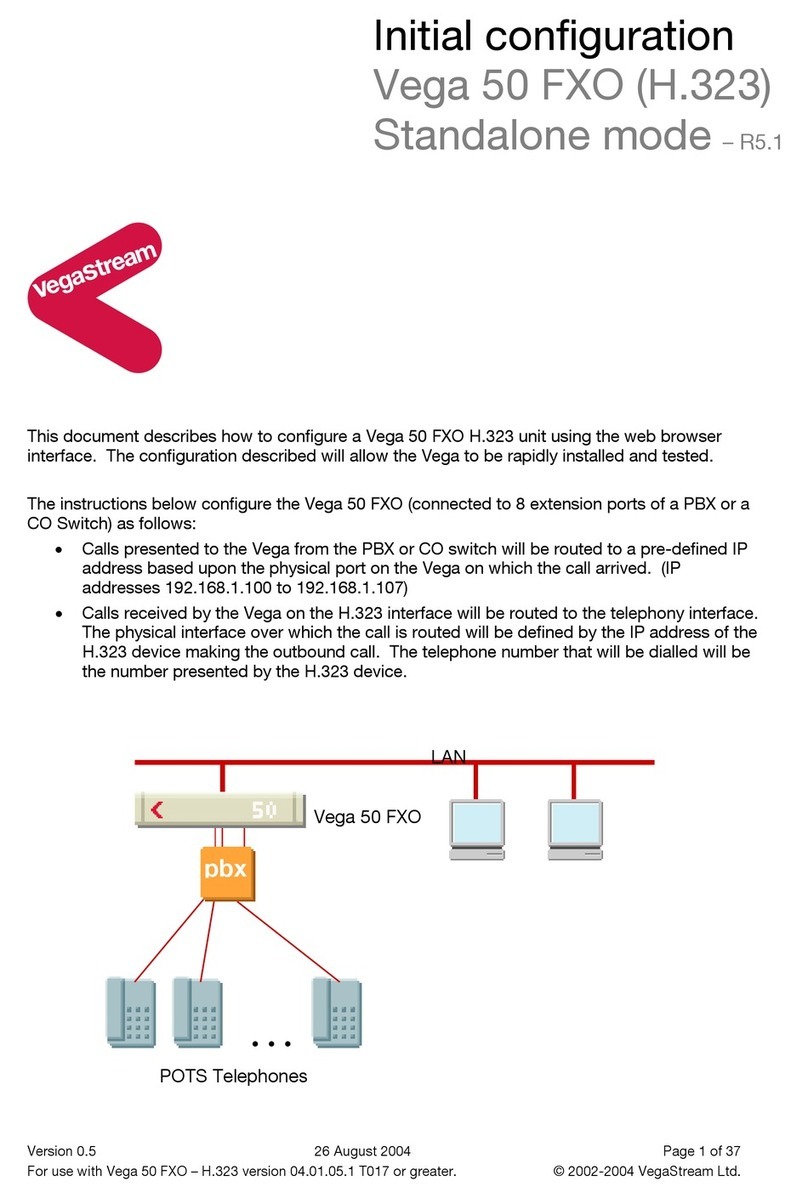
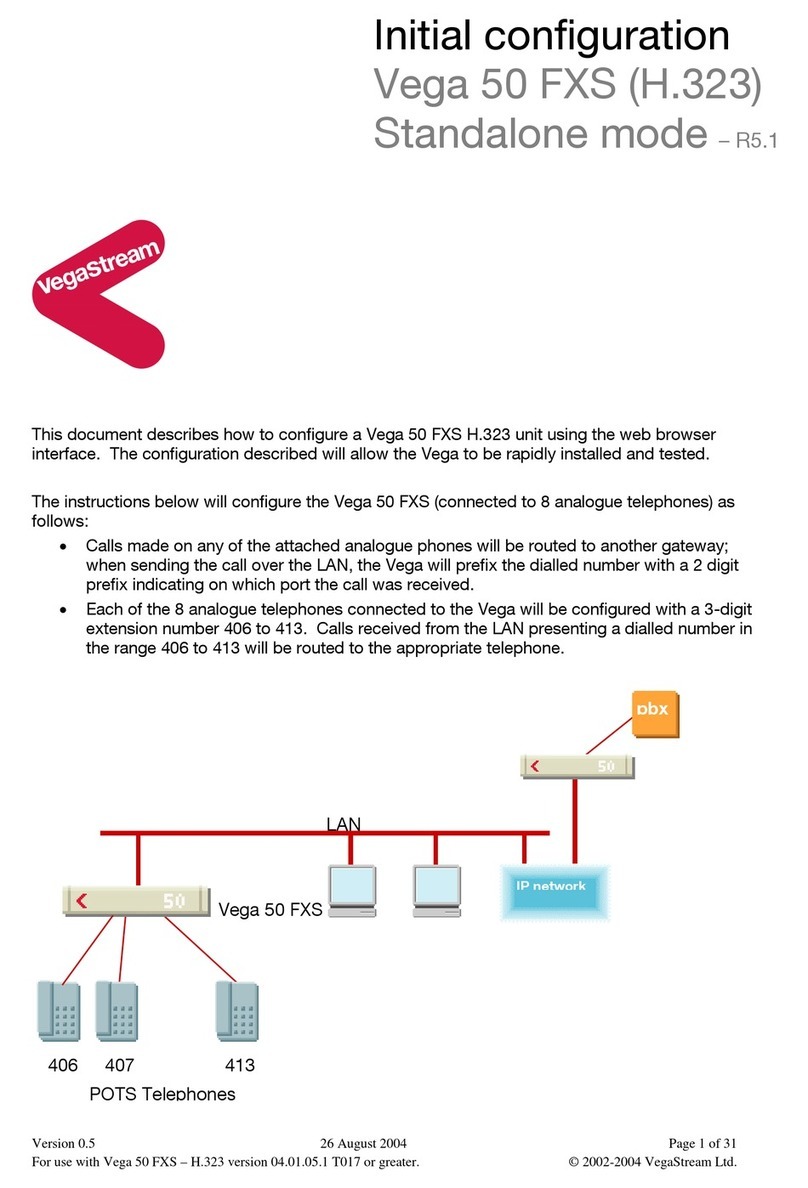
This document describes how to configure the Vega 50 FXS SIP unit using the web browser
interface. The configuration described here will allow the Vega to be rapidly installed and tested.
The instructions below will configure the Vega 50 FXS to operate as follows:
• Calls made by any of the attached analogue phones will be routed to the SIP proxy; the
Vega will pass on any dialled digits
• Calls received from the SIP proxy must have a 2-digit “dialled number”, 06 to 13, to
identify which of the 8 telephones to ring. (The translation of the telephone number to the
2-digit dialled number is carried out in the SIP proxy as the Vega registers the 2-digit
dialled numbers against the user access numbers (registered addresses).)
Initial configuration
Vega 50 FXS (SIP) – R7.0
S
IP Pr
o
x
y
LAN
…
Vega 50 FXS
P
O
T
S
T
e
l
ep
h
o
n
es
55501
Unit1Port1Vega50
Contact: 06
55502
Unit1Port2Vega50
Contact: 07
55508
Unit1Port8Vega50
Contact: 13

Version 0.1 23 September 2005 Page 2 of 41
For use with Vega 50 FXS – SIP version 04.02.07 T014 or greater. © 2002-2005 VegaStream Ltd.
The configuration process is broken down into 11 stages as follows:
1 Connect your Vega to LAN, telephones and Power
2 Configure the basic LAN parameters
3 Configure password and login timeout
4 Check and configure LAN settings and Host name
5 Configure the Dial Plan
6 Configure SIP and audio parameters
7 Configure Authentication
8 Configure Registration
9 Configure POTS parameters
10 Save Changes
11 Archive Vega Configuration
Please also see:
12 Technical Support

Version 0.1 23 September 2005 Page 3 of 41
For use with Vega 50 FXS – SIP version 04.02.07 T014 or greater. © 2002-2005 VegaStream Ltd.
1. Connect your Vega to LAN, telephones and Power
Serial (RS232) LAN
POTS port 8
Power Switch
AC Power
POTS port 1
Before installing your Vega, ensure that you read the VegaStream VoIP Gateways Safety
and Compliance Information document.
LAN:
Using the yellow booted cable connect the LAN port on the Vega to a standard or fast Ethernet
hub or switch (10 baseT or 100 baseTx). The connector nearest the ferrite core should be
plugged into the Vega.
Telephony:
Connect telephones to POTS ports 1 to 8. Note the port numbers increase in an anticlockwise
direction from the bottom left corner.
Port8
IF:13
Port 7
IF:12
Port 6
IF:11
Port 5
IF:10
Port1
IF:06
Port 2
IF:07
Port 3
IF:08
Port 4
IF:09
Power:
Insert the power cable into the AC power inlet on the Vega and switch on. The power LED on the
front panel will illuminate.
The LAN LEDs will also illuminate indicating 10 (baseT) or 100 (baseTx) connection, and the FDX
LED will illuminate if Full Duplex mode has been negotiated.

Version 0.1 23 September 2005 Page 4 of 41
For use with Vega 50 FXS – SIP version 04.02.07 T014 or greater. © 2002-2005 VegaStream Ltd.
2. Configure the basic LAN parameters
If a DHCP server is available, by default, the Vega will automatically pick up an IP address. If you
know the IP address served to the Vega, skip this section and start at section 3.
If DHCP is not to be used to provide the Vega with an IP address, or you need to check the IP
address provided to the Vega, connect the serial interface of the Vega to a PC serial interface
using a 9 way male to female straight through cable.
Configure a terminal emulator program (such as Microsoft’s HyperTerminal) for:
• Speed = 115200 baud
• Data bits = 8
• Parity = none
• Stop bits = 1
• Flow Control = none
Press <Enter> to get the Username: prompt
At the prompts enter the default user name and password
Username: admin
Password: admin
To display the current IP address, type:
show lan.ip
If this is not the IP address required, it can be overridden, together with other LAN parameters by
typing:
set lan.use_dhcp=0
set lan.ip=aaa.bbb.ccc.ddd
set lan.subnet=eee.fff.ggg.hhh
set lan.gateway=iii.jjj.kkk.lll
save
reboot system

Version 0.1 23 September 2005 Page 5 of 41
For use with Vega 50 FXS – SIP version 04.02.07 T014 or greater. © 2002-2005 VegaStream Ltd.
3. Configure password and login timeout
Now configuration will be carried out using a web browser.
Enter the IP address of the Vega into the “Address” field of your web browser.
You will then be presented with the login page:
Enter the default Username and Password
Username: admin
Password: admin
Select

Version 0.1 23 September 2005 Page 6 of 41
For use with Vega 50 FXS – SIP version 04.02.07 T014 or greater. © 2002-2005 VegaStream Ltd.
On the left hand side menu select Users

Version 0.1 23 September 2005 Page 7 of 41
For use with Vega 50 FXS – SIP version 04.02.07 T014 or greater. © 2002-2005 VegaStream Ltd.
Recommended: Change the password
enter New Password and Re-enter Password then
select and then click “here” to return
Optional: Change the timeout1– default is 240 seconds; can extend to 7200 seconds (2hrs)
select and then click “here” to return
1If the web interface is not used for this length of time the Vega will automatically log off the session. This
change is only activated by logging out and back into the web browser session.

Version 0.1 23 September 2005 Page 8 of 41
For use with Vega 50 FXS – SIP version 04.02.07 T014 or greater. © 2002-2005 VegaStream Ltd.
4. Check and configure LAN settings and Host name
On the left hand side menu select LAN
Recommended: In the Physical Layer Configuration section statically select the Ethernet Type
as either 100baseTx or 10 baseT (not 10baseT & 100baseTx) – whichever is appropriate
select and then click “here” to return
Optional: If there are any LAN values that need to be set up manually set them up now (e.g. tftp
and ftp addresses), then
select and then click “here” to return

Version 0.1 23 September 2005 Page 9 of 41
For use with Vega 50 FXS – SIP version 04.02.07 T014 or greater. © 2002-2005 VegaStream Ltd.
5. Configure the Dial Plan
On the left hand side menu select Dial Plan
Firstly, turn off the default profile:
In the Profiles section
Select

Version 0.1 23 September 2005 Page 10 of 41
For use with Vega 50 FXS – SIP version 04.02.07 T014 or greater. © 2002-2005 VegaStream Ltd.
disable (un-tick) Enabled, then
select and then click “here” to return
Now create a new profile and in it create a dial plan entry to handle calls being sent outbound on
the LAN:
In the Profiles section
Select
In the Profiles section, on Profile ID 2 (the new profile):
Select
Set Name = Outbound_To_LAN
select and then click “here” to return

Version 0.1 23 September 2005 Page 11 of 41
For use with Vega 50 FXS – SIP version 04.02.07 T014 or greater. © 2002-2005 VegaStream Ltd.
In the Profiles section, on Profile ID 2:
Select
In the Plans in this Profile, Plan ID 1:
Select

Version 0.1 23 September 2005 Page 12 of 41
For use with Vega 50 FXS – SIP version 04.02.07 T014 or greater. © 2002-2005 VegaStream Ltd.
Set Name = Any_Tel_Port
Set Source = IF:[^9].,TEL:<.*> (This takes a call from any of the 8 telephony
ports and stores the number dialled in store
<1>)
Set Destination = IF:99,TEL:<1> (This routes the call to IF:99 (the SIP proxy)
and passes the dialled number on as the
dialled digits)
Select and then click “here” to return
Select … to return to the Dial Planner Profiles section
Now create a new profile and in it create a dial plan entry to handle calls being received inbound
from the LAN:
In a similar manner to adding profile 2 add another profile, profile 3,
Set Name = Inbound_from_LAN

Version 0.1 23 September 2005 Page 13 of 41
For use with Vega 50 FXS – SIP version 04.02.07 T014 or greater. © 2002-2005 VegaStream Ltd.
Modify the first plan for Profile 3:
Set Name = Any_Tel_Port
Set Source = IF:99,TEL:<..> (For calls from IF:99 (SIP), take the two digits
presented as the telephone number and store
them in store <1>)
Set Destination = IF:<1> (The interface ID (telephone) to ring is defined
by the 2 digits passed in store <1>)
Select and then click “here” to return
Note: The SIP proxy must choose the appropriate interface on the Vega to dial out from;
when a call is presented to the Vega, the INVITE message starts something like:
The digits preceding the @ are then provided to the dial planner as the source TEL:.
Hence in the dial plan above the calls coming from the LAN (IF:99) must have a 2-digit
dialled number (whose value must be 06 ... 13 for valid Vega 50 interface IDs), which is
used to define which telephone to ring.
For more details on the operation of the dial planner, including the various
tokens that may be used, see the section “The Dial Planner” in the Vega
Primer.

Version 0.1 23 September 2005 Page 14 of 41
For use with Vega 50 FXS – SIP version 04.02.07 T014 or greater. © 2002-2005 VegaStream Ltd.
6. Configure SIP and audio parameters
On the left hand side menu select SIP
In the General section:
set Local Domain =
Public_name_of_proxy_used_by_other_devic
es_to_send_their_INVITEs_to
(this value is the “outside world’s” name or IP address for the proxy)
Optional: To allow devices other than the proxy to make calls directly through the Vega
tick Accept Non-Proxy Invites
If only the proxy is allowed to route the calls to the Vega ensure that this tick box is clear.
select and then click “here” to return

Version 0.1 23 September 2005 Page 15 of 41
For use with Vega 50 FXS – SIP version 04.02.07 T014 or greater. © 2002-2005 VegaStream Ltd.
In the Proxy Configuration section:
Select
In the SIP Proxy 1 section:
set IP/DNS Name = IP_address_of_SIP_proxy, or
DNS_hostname_of_the_SIP_Proxy
select and then click “here” to return
Scroll down to the Audio section
In the Audio section
Select the audio codecs desired using the drop down menus
Unless there is a specific reason not to allow a specific codec to be used, it is recommended that
all codecs should be enabled as follows:
select and then click “here” to return

Version 0.1 23 September 2005 Page 16 of 41
For use with Vega 50 FXS – SIP version 04.02.07 T014 or greater. © 2002-2005 VegaStream Ltd.
7. Configure Authentication
In some systems – to ensure that only authorised devices are allowed to set up and clear calls –
SIP authentication is used. If authentication is used, it is typically required on the SIP
REGISTRATION, INVITE, ACK and BYE messages.
For authentication, a userID and a password can be configured. The userID is constructed from
three parts
auth_usernumber_prefix, auth_usernumber and auth_usernumber_suffix
each of which may be configured with alphanumeric values.
The prefix and suffix entries are defined per POTS port profile and the auth_usernumber is
configured per POTS port. Setting parameters to NULL tells the Vega to omit anything from this
parameter (capitalisation of NULL is important).
The values to enter here must match the values that have been configured as the authorisation
user and password in the proxy.
To configure Authentication, follow the following procedure:
On the left hand side menu select SIP
Scroll down to the bottom of the page

Version 0.1 23 September 2005 Page 17 of 41
For use with Vega 50 FXS – SIP version 04.02.07 T014 or greater. © 2002-2005 VegaStream Ltd.
Select Advanced SIP

Version 0.1 23 September 2005 Page 18 of 41
For use with Vega 50 FXS – SIP version 04.02.07 T014 or greater. © 2002-2005 VegaStream Ltd.
Select (tick) Use authentication users, then
select and then click “here” to return
On the left hand side menu select POTS

Version 0.1 23 September 2005 Page 19 of 41
For use with Vega 50 FXS – SIP version 04.02.07 T014 or greater. © 2002-2005 VegaStream Ltd.
Select POTS_Interface_Profiles
Select

Version 0.1 23 September 2005 Page 20 of 41
For use with Vega 50 FXS – SIP version 04.02.07 T014 or greater. © 2002-2005 VegaStream Ltd.
Configure the Authentication versions of
usernumber prefix and usernumber suffix
select and then click “here” to return
select … to return to the POTS configuration page
Other manuals for Vega 50 FXS
1
This manual suits for next models
1
Table of contents
Other VegaStream Network Router manuals