Version 0.3 3 November 2004
For use with Vega 25 version 2.0.10 or greater. © 2004 VegaStream Ltd.
Configuration information is for example only – test well before deploying.
On PBX 1 dial the access number for the Vega 25 Phone port (connected to PBX 1 trunk interface). You will hear dial
tone presented by the far end Vega 25. Dial your destination number (optionally terminated by # to speed up dialling),
you will then hear the destination Vega 25 go off hook and then the far end PBX dial tone will be heard. Immediately
after this, you will hear the requested telephone number being dialled. Call progress tones will then be supplied by the
far end PBX. When the far end phone rings, answer it and you will be connected.
This is symmetric operation so may be tested in exactly the same manner from the destination PBX to PBX 1.
If Option 1 is configured then a call may be made to the PBX port that the Vega 25 is connected to. The destination
Vega will present dial tone and the destination number can be dialled. As in the standard case, the number will then be
dialled into the PBX and PBX call progress tones will be heard. When the far end phone is answered the caller and
called party will be able to speak.
Note. If the standard mode is used, each pair of Vega 25s will allow 1 call PBX 1 to destination PBX and 1 call
destination PBX to PBX 1 to be handled simultaneously. If option 1 is in use, it will utilise both PSTN ports (PBX trunk
interfaces), so only 1 call may be made at a time. (A modification of option 1 can be made, adjusting the dial plan 2 to
call 6601 instead of 6602 – this will mean that calls made to the FXO port will be routed to the auto-attendant or operator
of the destination PBX – in this case 2 calls, one PBX 1 to destination PBX and the second, destination PBX to PBX 1
may be made simultaneously)
Problems outdialing on the FXO port? Hear busy tone after dialling the access code? – See the Vega 10/20/25 FAQ on
the www.VegaAssist.com web site.
Volume level of call to / from PBX not correct? – See the Vega 10/20/25 FAQ on the www.VegaAssist.com web site.
Appendix 1 – Reset Vega to factory defaults
To reset the Vega to its factory default values, using one of the phones attached to the Vega:
Press * * * *
Press RESET# [telephone keys:73738#]
Press 1
The Vega will be reset to its factory default values.
ALL PREVIOUSLY CONFIGURED ITEMS WILL BE LOST
If you are connected to the Vega using your web browser, either restart it, or press refresh to ensure that it displays the
updated (default) values.
Appendix 2 – Enable DHCP
To enable DHCP, using one of the phones attached to the Vega:
Press * * * *
Press 101# 1# 1
The Vega will now be configured for DHCP.
Appendix 3 – Set up fixed IP address
To set up a fixed IP address, using one of the phones attached to the Vega:
Press * * * *
Press 101# 0# 1
Press 111# a*b*c*d# 1
where a.b.c.d is the IP address required
Press 121# w*x*y*z# 1
where w.x.y.z is the subnet mask required
Press 131# p*q*r*s# 1
where p.q.r.s is the Lan gateway
The Vega will now be configured for this static IP setup.
Contact Details
Email: support@vegastream.com
Web: www.vegastream.com
www.vegaassist.com
EMEA Office
VegaStream Limited
Berkshire Court
Western Road
Bracknell
Berks RG12 1RE
UK
+44 (0) 1344 784900
USA Office
VegaStream Inc.
10445 Pacific Center Court
San Diego
CA 92121
USA
+1 858 824 6388
Version 0.3 3 November 2004
For use with Vega 25 version 2.0.10 or greater. © 2004 VegaStream Ltd.
Configuration information is for example only – test well before deploying.
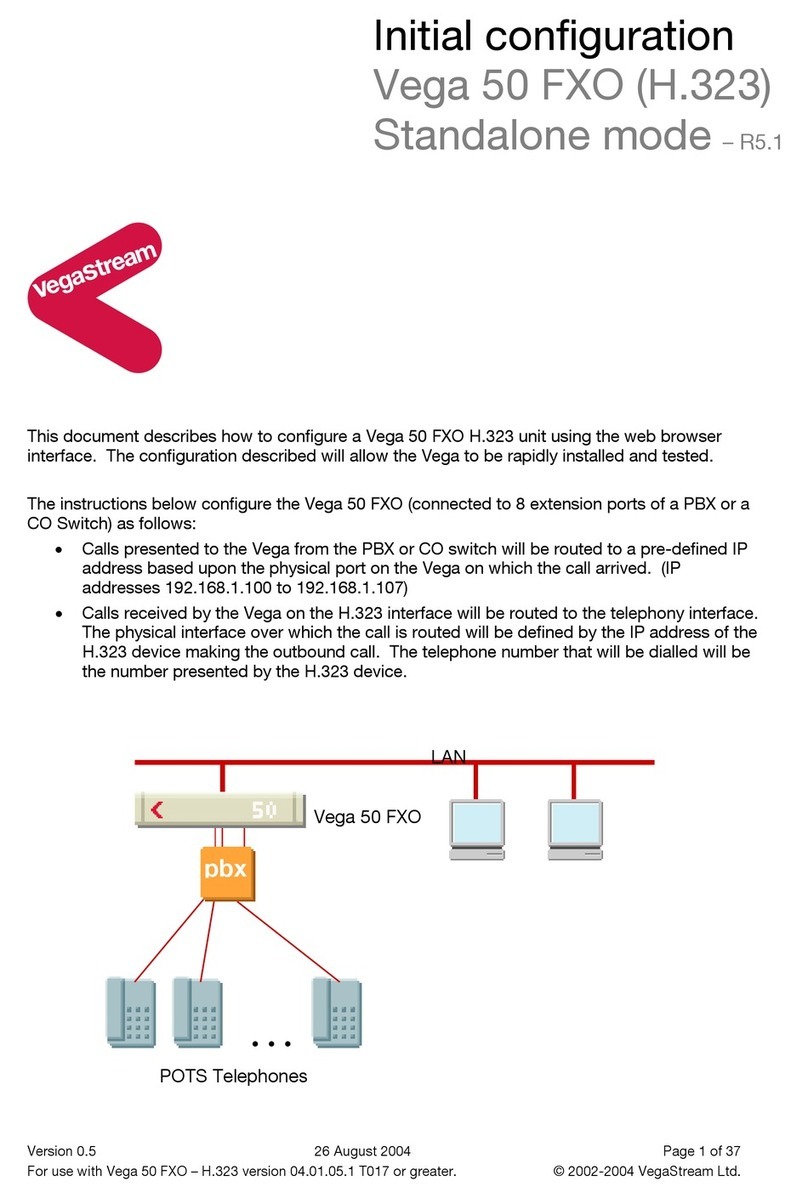
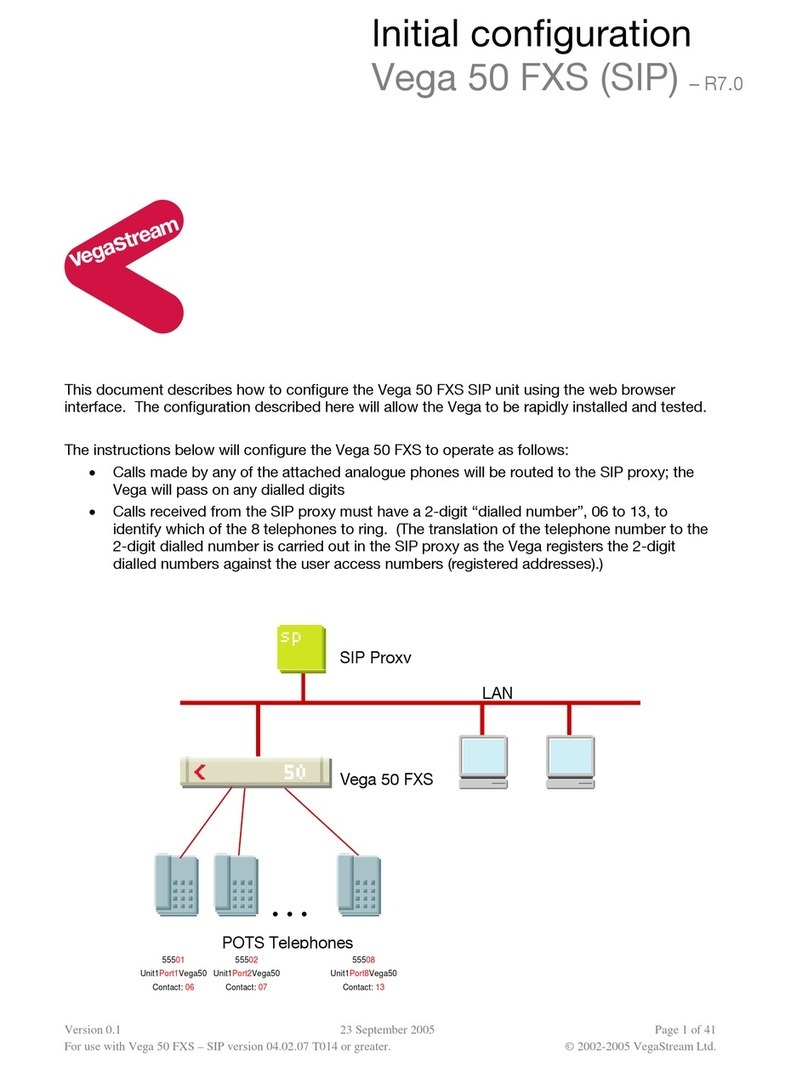
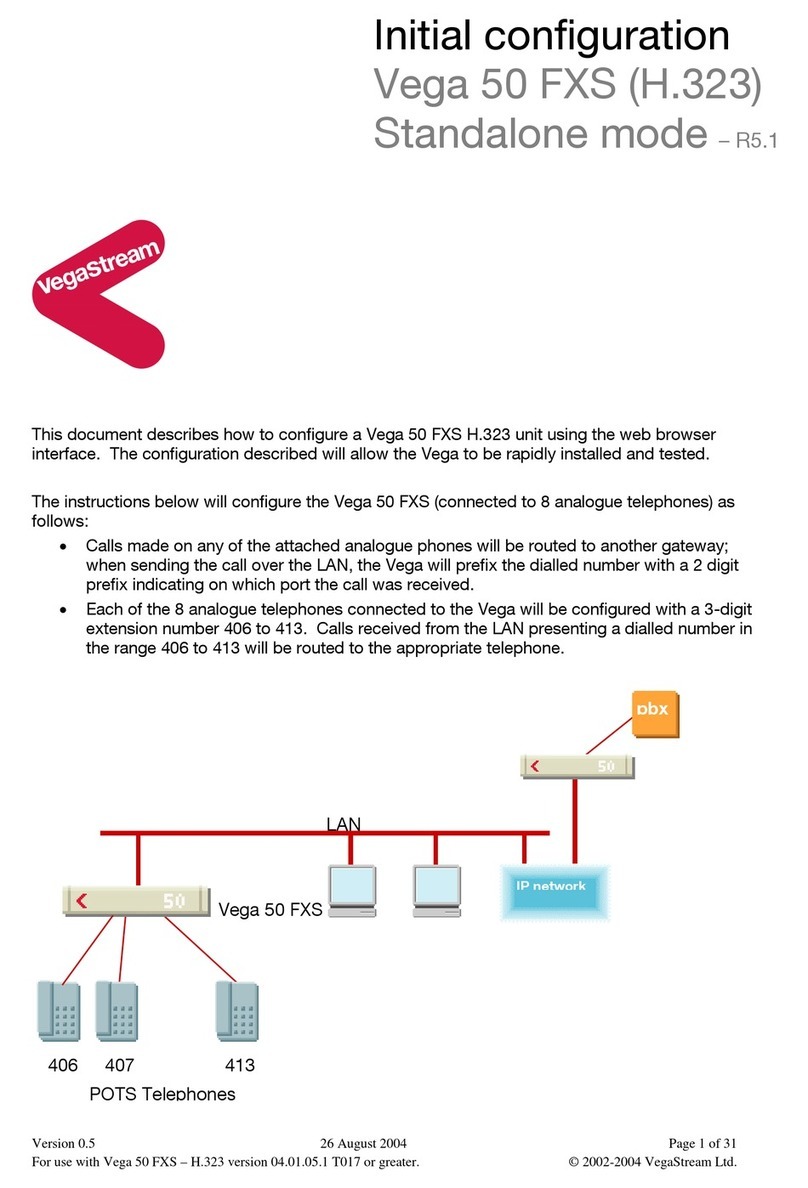
This document describes how to configure a Vega 25 gateway connected to one PBX, such that,
with a similarly configured Vega 25 connected to another PBX, direct dialled calls can be made
from PBX to PBX using VoIP.
Physically:
• the Phone port on the Vega 25 is connected to the analogue trunk interface of the PBX; this is
used to receive calls from the PBX
• the PSTN Line port on the Vega 25 is connected to an analogue extension port of the PBX;
this is used for making calls into the PBX.
In use, the caller dials an access number to reach the analogue trunk interface. The Vega then
provides dial tone to the caller who can then enter the telephone number they wish to reach. The
call is then connected and the parties speak to each other using VoIP to carry the call between the
PBXs.
An option, “Option 1” is also indicated. This allows calls to be received from the PBX on the PSTN
Line port of the Vega 25. This can be useful for call transfer when a PBX allows calls to be
transferred to an extension port, but not a trunk interface port.
The configuration process is broken down into 3 stages as follows:
1 Connect your Vega to LAN, Telephone and Power
2 Configure the basic LAN parameters
3 Configure Vega 25 to Vega 25 operation
You will need:
For this example it is assumed that
• this Vega 25 will have its phone port called 5501 and its PSTN port called 5502
• the destination Vega 25 will have its phone port called 6601 and its PSTN port called 6602
When configuring the partner Vega use 6601 where 5501 is typed, 6602 for 5502 and vice-versa.
Note, the phone numbers used in configuring the Vega 25s does not have to bear any relation to PBX extension
numbers – they are only used by the Vega gateways.
Initial configuration
Vega 25 – R2.0.10
(between PBXs)
IP address of destination gateway


