manuals.online logo
Brands
  1. Home
  2. •
  3. Brands
  4. •
  5. Velleman
  6. •
  7. Recording Equipment
  8. •
  9. Velleman K8062 User manual

Velleman K8062 User manual

Total solder points: 117
Difficulty level: beginner 1 2 3 4 5 advanced
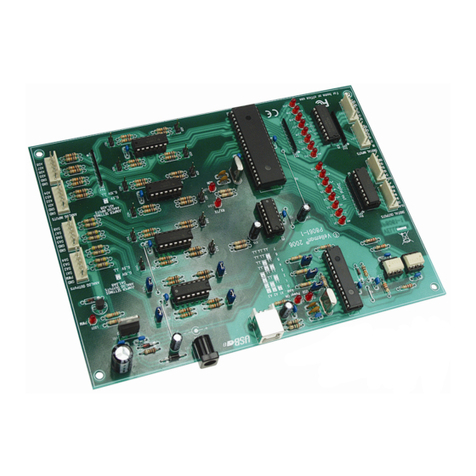
USB Controlled DMX interface
H8062IP-1
K8062K8062
ControlDMXfixturesusingaPCandUSB
interface.
Stand-alonetestfunctionthatoutputsall512
channelsatatime,withadjustablelevels.
2
Features & specifications
Features :
This unit can control DMX fixtures using a PC and USB interface
Test software and "DMX Light Player" software is included, a DLL is provided
to write you own software
Furthermore there is a stand-alone test function that outputs all 512 channels
at a time, with adjustable levels
Specifications :
 Connected and powered through USB
 512 DMX channels with 256 levels each
 3 pin XLR—DMX output connector
 Windows 98SE or higher compatible
 DLL included to write your own software
 Optional 9V battery needed for stand alone test mode
 Solid state - fuse protection on DMX output
 Dimensions: 106 x 101 x 44.5mm (4.2" x 4.0" x 1.75")
*If a DMX terminator is used, you will also need a USB hub (e.g. our PCUSB3)
Kit includes:
 Enclosure
 USB cable
 CD with: test software, DLL for own developments, free DMX light player*
* If not included, check our website http:\\www.velleman.be
This device complies with Part 15 of the FCC Rules provided
the enclosed instructions are followed to the letter. Use of the
device is subject to the following conditions: (1) this device
must not cause harmful interference and (2) the operation of
this device should not be influenced by unwanted interference.
More information about FCC can be look at http://www.fcc.gov
3
Assembly hints
1. Assembly (Skipping this can lead to troubles ! )
Ok, so we have your attention. These hints will help you to make this project
successful. Read them carefully.
1.1 Make sure you have the right tools:
 A good quality soldering iron (25-40W) with a
small tip.
 Wipe it often on a wet sponge or cloth, to keep it clean; then apply solder to
the tip, to give it a wet look. This is called ‘thinning’ and will protect
the tip, and enables you to make good connections. When solder
rolls off the tip, it needs cleaning.
 Thin raisin-core solder. Do not use any flux or grease.
 A diagonal cutter to trim excess wires. To avoid injury when cutting
excess leads, hold the lead so they cannot fly towards the eyes.
 Needle nose pliers, for bending leads, or to hold compo-
nents in place.
 Small blade and Phillips screwdrivers. A basic range
is fine.
For some projects, a basic multi-meter is required, or might
be handy
1.2 Assembly Hints :
Make sure the skill level matches your experience, to avoid disappointments.
Follow the instructions carefully. Read and understand the entire step before
you perform each operation.
Perform the assembly in the correct order as stated in this manual
Position all parts on the PCB (Printed Circuit Board) as shown on the draw-
ings.
Values on the circuit diagram are subject to changes.
Values in this assembly guide are correct*
0.000
4
Use the check-boxes to mark your progress.
Please read the included information on safety and customer service
* Typographical inaccuracies excluded. Always look for possible last minute
manual updates, indicated as ‘NOTE’ on a separate leaflet.
1.3 Soldering Hints :
1- Mount the component against the PCB sur-
face and carefully solder the leads
2- Make sure the solder joints are cone-shaped
and shiny
3- Trim excess leads as close as possible to the
solder joint
REMOVE THEM FROM THE TAPE ONE AT A
TIME !
Assembly hints
AXIAL COMPONENTS ARE TAPED IN
THE CORRECT MOUNTING SEQUENCE !
You will find the colour code for the resistances on our
website: http://www.velleman.be/common/service.aspx
5
Construction
1. Diodes (check the polarity)
R1 : 10K (1 - 0 - 3 - B)
R2 : 10K (1 - 0 - 3 - B)
R3 : 1K5 (1 - 5 - 2 - B)
R4 : 470 (4 - 7 - 1 - B)
R5 : 1K5 (1 - 5 - 2 - B)
R6 : 1K5 (1 - 5 - 2 - B)
R7 : 2K2 (2 - 2 - 2 - B)
R8 : 470 (4 - 7 - 1 - B)
R9 will not be mounted
3. 1/4W Resistors.
R...
D1 : 1N4148
1. Diode (check the polarity)
CATHODE
D...
ZD1 : 6,2V (6V2)
ZD2 : 6,2V (6V2)
2. Zener diodes (check the polarity)
CATHODE
ZD...
IC1 : 8P
IC2 : 28P
4. IC sockets
C1 : 33pF (33)
C2 : 33pF (33)
C3 : 100n (104, 0.1, u1)
C4 : 100n (104, 0.1, u1)
C5 : 100n (104, 0.1, u1)
C6 : 100n (104, 0.1, u1)
C7 : 220n (224)
5. Capacitors
c...
T1 : BC327
T2 : BC337
6. Transistors
T...
VR1: UA78L05
7. Voltage regulator.
VR...
6
Construction
SK4 : USBB90
8. USB connector
C8 : 4,7µF
10. Electrolytic capacitor. Check
the polarity !
C...
FS1 : 3A /60Vdc
FS2 : 3A/60Vdc
The PTC resistor resets automatically
and protects your circuit permanently.
9. Polyswitch resettable fuses
SK3 : 3P
11. Header
X1 : 4MHz
12. Quartz crystal
X...
SW1
13. Push button *
Mount the battery
clip on the PCB
using the 4mm M3
bolt and M3 nut.
14. Battery holder *
LD1 : 3mm RED ‘Power ON’
LD2 : 3mm RED ‘DMX’
15. LEDs. Check the polarity!
LD...
CATHODE
23mm
0.9"
30mm
SK1 : + (Red)
S2 : - (Black)
16. Battery snap *
E...
Red
Black
4mm M3 BOLT
M3 NUT
*Note : If stand alone funtion is not
used, do not mount these parts.
7
Construction
IC1 : SN75176BP or MAX485
IC2 : VK8062 (programmed PIC18F2550)*
17. IC’s check the position !
Solder the 3-pole female print connector to the XLR connector using the figure
below to check the accuracy of the connections (see fig. 2.0 & 3.0).
Now mount the female 3-pole XLR connector in the provided opening in the
upper part of the housing, securing it with the included selftapping screws (flat
head 2.9 x 6.5mm), see figure 4.0.
19. XLR socket.
Affix the supplied CE/FCC sticker on
the bottom of the housing, see fig.
1.0.
18. CE/FCC Sticker
Fig. 4.0
Velleman
SFCC
Tested to comply with
FCC standards for
home and office use
FIG. 1.0
Fig. 2.0
Brown
Red
Orange
Orange
Red
Brown
Fig. 3.0
* firmware rev. 3 or higher
8
Fix the PCB using 4 screws ( 2.9 x 6,5mm).
Connect the wired connector to 3p header (SK3).
If stand alone function is used, connect the battery to the connector and in-
sert the battery in the battery compartment as indicated in fig. 5.0.
Close the enclosure with the longest supplied screws (2.9 x 9.5mm).
Affix the supplied front sticker on the top of the enclosure.
20. Assembly
Assembly
Remark : Respect your national
and local laws when disposing of
empty batteries.
Fig. 5.0
9
Software installation and test
 Browse through the CD and open the K8062 folder.
 Check the appropriate PDF files for further information.
The ‘light player’ software is installed in the folder by default: c:\program files\DMX
This is a screen shot of the DMX_demo software, used tot test the unit or to make some simple shows.
You will find the latest version of the software on our website
21. Software installation
22. Stand alone test mode
For the stand alone DMX test mode a 9V battery must be connected between
the connectors SK1 (+) and SK2 (-).
Test button SW1 is used to control the operation of the test mode.
Operation :
Do not connect the unit to the USB cable.
A short button press turns the unit on. - Power LED goes on and the unit
starts to send DMX code "0" on all the 512 DMX channels.
Next button press increments the code on all the channels to '1', next button
press increments to '2' etc.
The "DMX signal" LED starts to light periodically when the test button is
pressed for some times.
The LED's flashes are longer after pressing the button for several times.
Pressing the button 256 times the internal counter rolls back to 0 and the unit
starts again to send code "0" on all the 512 DMX channels.
If you use e.g. a dimmer as a test equipment you should see how the
intensity of the light increases on every button press.
To turn the power off, keep pressing the button about 9 seconds until the
power LED goes off.
10
PCB
23. PCB
11
24. Diagram
Schematic diagram
5
4
1
0
3
2
9
31
9
1
0
6
Modifications and typographical errors reserved
© Velleman Kit nv H8062IP - 2014 - ED1 (rev 6.0)
VELLEMAN NV
Legen Heirweg 33, B-9890 GAVERE
Belgium (Europe)

Other Velleman Recording Equipment manuals
Velleman CAMCOLVC7 User manual

Velleman

Velleman CAMCOLVC7 User manual

Velleman K4401 User manual

Velleman

Velleman K4401 User manual

Velleman KSR10/USBN User manual

Velleman

Velleman KSR10/USBN User manual

Velleman ASS4 User manual

Velleman

Velleman ASS4 User manual

Velleman PROMIX50U User manual

Velleman

Velleman PROMIX50U User manual

Velleman VMA440 User manual

Velleman

Velleman VMA440 User manual

Velleman HQ-Power PROMIX66 User manual

Velleman

Velleman HQ-Power PROMIX66 User manual

Velleman KSR10/USB User manual

Velleman

Velleman KSR10/USB User manual

Velleman CM1F001 User manual

Velleman

Velleman CM1F001 User manual
Velleman USB INTERFACE KIT FOR ROBOTIC ARM User guide

Velleman

Velleman USB INTERFACE KIT FOR ROBOTIC ARM User guide

Velleman 802 User manual

Velleman

Velleman 802 User manual

Velleman PCUSBVC2 User manual

Velleman

Velleman PCUSBVC2 User manual

Velleman K8055 User manual

Velleman

Velleman K8055 User manual

Velleman HQ Power VDPDP136 User manual
Velleman

Velleman HQ Power VDPDP136 User manual

Velleman VDL215EQ User manual

Velleman

Velleman VDL215EQ User manual
Velleman K4019 User manual

Velleman

Velleman K4019 User manual

Velleman K8045 User manual

Velleman

Velleman K8045 User manual

Velleman VMB1RS User manual

Velleman

Velleman VMB1RS User manual

Velleman HQ POWER PROMIX66 User manual
Velleman

Velleman HQ POWER PROMIX66 User manual

Velleman KV6A910 User manual

Velleman

Velleman KV6A910 User manual
Popular Recording Equipment manuals by other brands

Mach M20.04 user manual

Mach

Mach M20.04 user manual

AND GXA-24A instruction manual

AND

AND GXA-24A instruction manual

ETAS ES921.1 user guide

ETAS

ETAS ES921.1 user guide

HORITA BSG-50 user manual

HORITA

HORITA BSG-50 user manual

Aritech ATS1201 quick start guide

Aritech

Aritech ATS1201 quick start guide

Protege PRT-CTRL-SE installation manual

Protege

Protege PRT-CTRL-SE installation manual

Make Noise 7U 4 ZONE CV BUS CASE quick start guide

Make Noise

Make Noise 7U 4 ZONE CV BUS CASE quick start guide

Nortel 553-3901-200 Installation

Nortel

Nortel 553-3901-200 Installation

Marantz professional PMD661MKIII user guide

Marantz professional

Marantz professional PMD661MKIII user guide

Akai DD1500 user manual

Akai

Akai DD1500 user manual

Collcomm NCS-C003 quick start guide

Collcomm

Collcomm NCS-C003 quick start guide

Sony MU-R201 Service manual

Sony

Sony MU-R201 Service manual

General DCS1600 user manual

General

General DCS1600 user manual

dbx 5BX instruction manual

dbx

dbx 5BX instruction manual

Bticino 3460IR manual

Bticino

Bticino 3460IR manual

Dedicated Mircros Digital Sprite 2 Setup guide addendum

Dedicated Mircros

Dedicated Mircros Digital Sprite 2 Setup guide addendum

Viking PA-15 Technical practice

Viking

Viking PA-15 Technical practice

Cisco Linksys DMRW1000 Quick installation guide

Cisco

Cisco Linksys DMRW1000 Quick installation guide

manuals.online logo
manuals.online logoBrands
  • About & Mission
  • Contact us
  • Privacy Policy
  • Terms and Conditions

Copyright 2025 Manuals.Online. All Rights Reserved.