Velleman PEREL CTH406 User manual

CTH406
DIGITAL THERMOSTAT
DIGITALE THERMOSTAAT
THERMOSTAT NUMÉRIQUE
TERMÓSTATO DIGITAL
DIGITALES THERMOSTAT
TERMOSTATO DIGITAL
USER MANUAL 4
HANDLEIDING 10
MODE D'EMPLOI 17
MANUAL DEL USUARIO 24
BEDIENUNGSANLEITUNG 31
MANUAL DO UTILIZADOR 38

CTH406
V. 01 –10/05/2016 2 ©Velleman nv

CTH406
V. 01 –10/05/2016 3 ©Velleman nv

CTH406
V. 01 –10/05/2016 4 ©Velleman nv
USER MANUAL
1. Introduction
To all residents of the European Union
Important environmental information about this product
This symbol on the device or the package indicates that disposal of
the device after its lifecycle could harm the environment.
Do not dispose of the unit (or batteries) as unsorted
municipal waste; it should be taken to a specialized
company for recycling. This device should be returned to
your distributor or to a local recycling service. Respect the
local environmental rules.
If in doubt, contact your local waste disposal authorities.
Thank you for choosing Perel! Please read the manual thoroughly
before bringing this device into service. If the device was damaged in
transit, do not install or use it and contact your dealer.
2. Safety Instructions
Keep this device away from children and unauthorized users.
This device can be used by children aged from 8 years and
above, and persons with reduced physical, sensory or mental
capabilities or lack of experience and knowledge if they have
been given supervision or instruction concerning the use of
the device in a safe way and understand the hazards
involved. Children shall not play with the device. Cleaning
and user maintenance shall not be made by children without
supervision.
Indoor use only. Keep this device away from rain,
moisture, splashing and dripping liquids.
Risk of electroshock when opening the cover. Be very
careful during the installation: touching live wires can cause
life-threatening electroshocks.

CTH406
V. 01 –10/05/2016 5 ©Velleman nv
3. General Guidelines
Refer to the Velleman® Service and Quality Warranty on the last
pages of this manual.
Familiarise yourself with the functions of the device before actually
using it.
All modifications of the device are forbidden for safety reasons.
Damage caused by user modifications to the device is not covered
by the warranty.
Only use the device for its intended purpose. Using the device in
an unauthorised way will void the warranty.
Damage caused by disregard of certain guidelines in this manual
is not covered by the warranty and the dealer will not accept
responsibility for any ensuing defects or problems.
Do not use outside the technical specifications.
Keep this manual for future reference.
4. Features
up to 24 time zones per day
3 temperature levels
ocomfort
oenergy-saving
oholiday (anti-freeze)
manual override function
manual on/off switch
5. Overview
Refer to the illustrations on page 2 of this manual.
Thermostat
on-off
S
temp sensitivity
holiday mode
time setting
comfort mode
P
program setting
eco mode
confirm
temp setting
previous/next

CTH406
V. 01 –10/05/2016 6 ©Velleman nv
Display
1
low bat indicator
5
holiday mode
2
24 hour bars
6
cooling
3
comfort mode
7
manual override
4
eco mode
8
heating
6. Installation
6.1 Battery Installation
WARNING
Do not puncture batteries or throw them in
fire as they may explode. Do not attempt to
recharge non-rechargeable batteries
(alkaline). Dispose of batteries in accordance
with local regulations. Keep batteries away
from children.
1. Remove the front cover using an appropriate screwdriver.
2. Insert two LR6/AA batteries according to the polarity markings.
3. Replace both batteries with new ones as soon as the low bat
indicator is displayed.
4. Proceed with installing the thermostat.
6.2 Thermostat Installation
WARNING
Make sure to cut off the mains power supply
before installing the thermostat.
1. Choose your installation spot. Install the thermostat in a well-
ventilated place and about 1.5 m (5 feet) above the floor, away
from direct sunlight, heat and interference sources.
2. Mount the thermostat on a flat surface. Drill two 6 mm holes and
insert a nylon anchor plug in each hole. Drill two 2.6 mm holes
when mounting the thermostat on a wooden surface.
3. Wire the thermostat. The thermostat is designed for maximum
230 V~, 6 A. Never exceed these limits!
Use wires with diameter of 1.0-2.5 mm² and connect
accordingly.
Refer to the illustrations on page 3 of this manual.

CTH406
V. 01 –10/05/2016 7 ©Velleman nv
7. Operation
7.1 Setting Time and Day
The thermostat automatically enters the time setting mode after the
batteries have been inserted. To set the time and day:
1. Set the hour with or . Confirm with .
2. Similarly, set the minutes and day.
3. Press to confirm and to return to the normal display.
7.2 Resetting
Press the RESET button located above the battery compartment to
reset all settings.
7.3 Switching the Thermostat On/Off
Press to switch the thermostat on or off.
In the off position, only the room temperature is displayed.
In the on position, the display can look like these:
a
eco mode
c
override mode
b
programmed temp
d
comfort mode

CTH406
V. 01 –10/05/2016 8 ©Velleman nv
7.4 Setting a Program
1. Press Pto enter the programming mode.
2. Set the day with or . Confirm with P.
3. Select the hour with or . Set the comfort ( ) or eco ( )
mode for every hour of the selected day.
4. Press to select the next day. Repeat steps 1 to 3 to set the
program.
5. Press to confirm and to return to the normal display.
7.5 Setting the Temperature
1. Press to enter the temperature setting mode.
2. Select the comfort ( ) or eco ( ) mode.
3. Set the temperature with or .
4. Press to confirm and to return to the normal display.
7.6 Setting the Temperature Hysteresis
The hysteresis is the temperature tolerance at which the thermostat
will not send a signal to switch on the heating appliance. This
thermostat has a user-programmable hysteresis.
1. Press Sto enter the hysteresis setting mode.
2. Set the hysteresis with or .
3. Press to confirm and to return to the normal display.
7.7 Manual Override
You can always override the set program by pressing the desired
mode or by setting the desired temperature. Confirm with . The
manual override symbol will be displayed.
In override mode, only , , and will function.
Cancel the override setting by pressing .
7.8 Holiday Mode
The holiday mode allows temperature control during your absence.
1. In normal display mode, keep pressed for two seconds.
2. Set the temperature with or . Confirm with .
3. Press or to select the comfort or eco mode.
4. Press to confirm and to return to the normal display.

CTH406
V. 01 –10/05/2016 9 ©Velleman nv
7.9 HEAT/COOL Jumper Switch
The HEAT/COOL jumper is located on the circuit board. Remove the
batteries before switching.
HEAT: the thermostat runs in heating mode.
COOL: the thermostat runs in cooling mode.
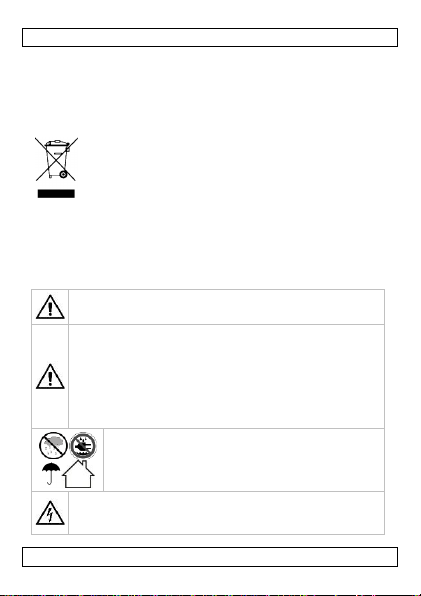
8. Cleaning and Maintenance
There are no user-serviceable parts inside the device. Refer to an
authorized dealer for service and/or spare parts.
Occasionally wipe with a damp cloth to keep it looking new. Do not
use harsh chemicals, cleaning solvents or strong detergents.
9. Technical Specifications
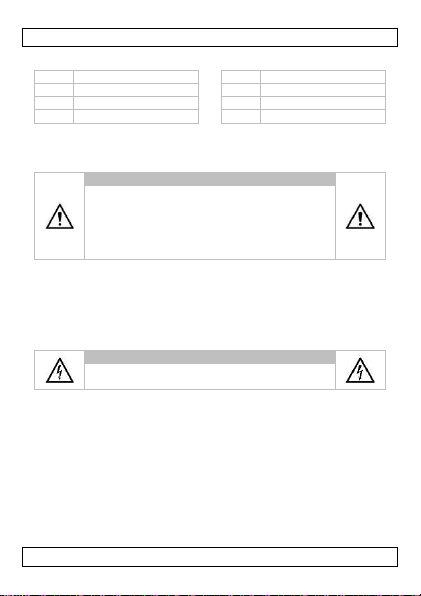
temperature range.................................. 5 °C - 30 °C
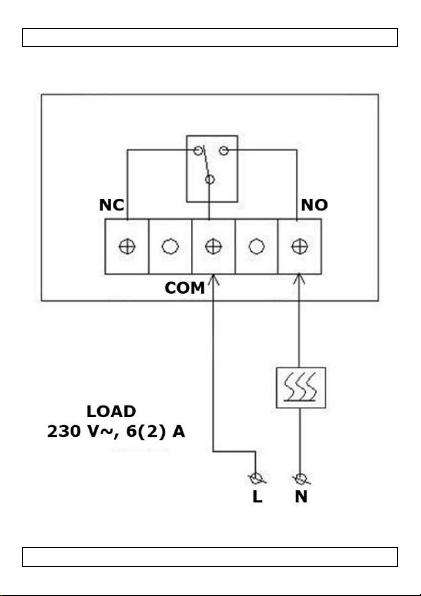
rated power ............................. 230 V~, 50 Hz, 6(2) A
power supply............................... 2 x AA batteries LR6
size.................................................... 140 x 199 mm
weight.............................................................150 g
options
high-energy alkaline batteries....................... LR6
Use this device with original accessories only. Velleman nv
cannot be held responsible in the event of damage or injury
resulting from (incorrect) use of this device. For more info
concerning this product and the latest version of this manual,
please visit our website www.perel.eu. The information in this
manual is subject to change without prior notice.
© COPYRIGHT NOTICE
The copyright to this manual is owned by Velleman nv. All
worldwide rights reserved. No part of this manual may be copied,
reproduced, translated or reduced to any electronic medium or
otherwise without the prior written consent of the copyright holder.

CTH406
V. 01 –10/05/2016 10 ©Velleman nv
HANDLEIDING
1. Inleiding
Aan alle ingezetenen van de Europese Unie
Belangrijke milieu-informatie betreffende dit product
Dit symbool op het toestel of de verpakking geeft aan dat, als het na
zijn levenscyclus wordt weggeworpen, dit toestel schade
kan toebrengen aan het milieu. Gooi dit toestel (en
eventuele batterijen) niet bij het gewone huishoudelijke
afval; het moet bij een gespecialiseerd bedrijf terechtkomen
voor recyclage. U moet dit toestel naar uw verdeler of naar
een lokaal recyclagepunt brengen. Respecteer de plaatselijke
milieuwetgeving.
Hebt u vragen, contacteer dan de plaatselijke autoriteiten
betreffende de verwijdering.
Bedankt voor uw aankoop! Lees deze handleiding grondig voor u het
toestel in gebruik neemt. Werd het toestel beschadigd tijdens het
transport, installeer het dan niet en raadpleeg uw dealer.
2. Veiligheidsvoorschriften
Houd dit toestel buiten het bereik van kinderen en
onbevoegden.
Dit toestel is geschikt voor gebruik door kinderen vanaf
8 jaar, door personen met fysieke, zintuiglijke of
verstandelijke beperkingen, of door personen met gebrek
aan ervaring en kennis, op voorwaarde dat dit onder toezicht
gebeurt van een persoon die verantwoordelijk is voor hun
veiligheid of hun aanwijzingen heeft gegeven, hoe zij het
toestel moeten gebruiken en zich bewust zijn van de risico's
die het gebruik van het toestel met zich meebrengt.
Kinderen mogen niet met het toestel spelen. Reiniging en
onderhoud mogen niet worden uitgevoerd door kinderen
zonder toezicht.

CTH406
V. 01 –10/05/2016 11 ©Velleman nv
Gebruik het toestel enkel binnenshuis. Bescherm
dit toestel tegen regen, vochtigheid en opspattende
vloeistoffen.
Elektrocutiegevaar bij het openen van het toestel. Wees
voorzichtig bij de installatie: raak geen kabels aan die onder
stroom staan, om dodelijke elektroshocks te vermijden.
3. Algemene richtlijnen
Raadpleeg de Velleman® service- en kwaliteitsgarantie
achteraan deze handleiding.
Leer eerst de functies van het toestel kennen voor u het gaat
gebruiken.
Om veiligheidsredenen mag u geen wijzigingen aan het apparaat
aanbrengen. Schade door wijzigingen die de gebruiker heeft
aangebracht valt niet onder de garantie.
Gebruik het toestel enkel waarvoor het gemaakt is. De garantie
vervalt automatisch bij ongeoorloofd gebruik.
De garantie geldt niet voor schade door het negeren van bepaalde
richtlijnen in deze handleiding en uw dealer zal de
verantwoordelijkheid afwijzen voor defecten of problemen die hier
rechtstreeks verband mee houden.
Overschrijd nooit de waarden vermeld in de technische
specificaties.
Bewaar deze handleiding voor verdere raadpleging.
4. Eigenschappen
max. 24 tijdzones per dag
3 temperatuurniveaus (comfort / economisch / vakantie
(antivries)
ocomfort
oenergiebesparend
ovakantie (antivries)
manuele override-functie
manuele aan/uit-schakelaar

CTH406
V. 01 –10/05/2016 12 ©Velleman nv
5. Omschrijving
Raadpleeg de afbeeldingen op pagina 2 van deze handleiding.
Thermostaat
aan-uit
S
temperatuurgevoelighe
id
vakantiemodus
uur instellen
comfortmodus
P
programma instellen
eco-modus
bevestigen
temperatuurinstelli
ng
vorige/volgende
Display
1
lege batterij-
indicator
5
vakantiemodus
2
24u-tijdsweergave
6
koeling
3
comfortmodus
7
handmatige modus
4
eco-modus
8
verwarming
6. Installatie
6.1 Batterijen installeren
WAARSCHUWING
U mag batterijen nooit doorboren of in het
vuur gooien (explosiegevaar). Herlaad geen
alkalinebatterijen. Gooi batterijen weg
volgens de plaatselijke milieuwetgeving.
Houd batterijen buiten het bereik van
kinderen.
1. Verwijder het deksel aan de voorkant met een geschikte
schroevendraaier.
2. Plaats twee LR6/AA-batterijen volgens de
polariteitsaanduidingen.
3. Vervang de batterijen door 2 nieuwe batterijen van zodra de
lege batterij-indicator oplicht.
4. Ga verder met de installatie.

CTH406
V. 01 –10/05/2016 13 ©Velleman nv
6.2 Thermostaat installeren
WAARSCHUWING
Schakel eerst de stroom uit voordat u de
thermostaat installeert.
1. Kies een geschikte montageplaats. Installeer de thermostaat in
een goed geventileerde ruimte en op ongeveer 1.5 m hoogte.
Vermijd direct zonlicht, hitte- en storingsbronnen.
2. Monteer de thermostaat op een effen oppervlak. Boor twee
gaten van 6 mm en plaats nylon plug in elk gat. Boor twee gaten
van 2.6 mm voor de montage op een houten oppervlak.
3. Sluit de thermostaat aan. De thermostaat is geschikt voor max.
230 V~, 6 A. Overschrijd nooit deze limietwaarden!
Gebruik kabels met een diameter van 1.0-2.5 mm² en sluit
overeenkomstig aan.
Raadpleeg de afbeeldingen op pagina 3 van deze handleiding.
7. Gebruik
7.1 Tijd en dag instellen
Na het plaatsen van de batterijen schakelt de thermostaat
automatisch over naar de instelmodus. Om de tijd en dag in te
stellen:
1. Stel het uur in met of . Bevestig met .
2. Stel de minuten en de dag op dezelfde manier in.
3. Druk op om te bevestigen en om naar de normale weergave
terug te keren.
7.2 Resetten
Druk op de resetknop die zich boven het batterijvak bevindt, om alle
instellingen te resetten.
7.3 De thermostaat in-/uitschakelen
Druk op om de thermostaat in of uit te schakelen.
In OFF-positie, wordt enkel de kamertemperatuur weergegeven.

CTH406
V. 01 –10/05/2016 14 ©Velleman nv
In ON-positie, ziet de display er als volgt uit:
a
eco-modus
c
handmatige modus
b
ingestelde
temperatuur
d
comfortmodus
7.4 Een programma instellen
1. Druk op P om naar de programmeermodus te gaan.
2. Stel de dat in met of . Bevestig met P.
3. Selecteer het uur met of . Stel de comfort- ( ) of eco- (
) modus in voor elk uur van de geselecteerde dag.
4. Druk op om de volgende dag te selecteren. Herhaal de
stappen 1 tot 3 om het programma in te stellen.
5. Druk op om te bevestigen en om naar de normale weergave
terug te keren.
7.5 De temperatuur instellen
1. Druk op om naar de instelmodus te gaan.
2. Selecteer de comfort- ( ) of eco- ( ) modus.
3. Stel de temperatuur in met of .
4. Druk op om te bevestigen en om naar de normale weergave
terug te keren.

CTH406
V. 01 –10/05/2016 15 ©Velleman nv
7.6 De temperatuurhysterese instellen
De hysterese is de temperatuurtolerantie waarbij de thermostaat
geen signaal stuurt om het verwarmingstoestel in te schakelen. Deze
thermostaat heeft een instelbare hysterese.
1. Druk op S om naar de instelmodus te gaan.
2. Stel de hysterese in met of .
3. Druk op om te bevestigen en om naar de normale weergave
terug te keren.
7.7 Handmatige modus
U kunt steeds het ingestelde programma wijzigen door op de
gewenste modus te drukken of door de gewenste temperatuur in te
stellen. Bevestig met . Het symbool van de handmatige modus
verschijnt op de display.
In handmatige modus functioneren enkel , , en .
Om de handmatige modus uit te schakelen, druk op .
7.8 Vakantiemodus
In vakantiemodus kan de temperatuur ingesteld worden tijdens uw
afwezigheid.
1. In normale weergavemodus, houd gedurende 2 seconden
ingedrukt.
2. Stel de temperatuur in met of . Bevestig met .
3. Druk op of om de comfort- of eco-modus te selecteren.
4. Druk op om te bevestigen en om naar de normale weergave
terug te keren.
7.9 HEAT/COOL-jumper
De HEAT/COOL-jumper bevindt zich op de printplaat. Verwijder de
batterijen voor het inschakelen.
HEAT: de thermostaat staat in verwarmingsmodus.
COOL: de thermostaat staat in koelmodus.

CTH406
V. 01 –10/05/2016 16 ©Velleman nv
8. Reiniging en onderhoud
De gebruiker mag geen onderdelen vervangen. Contacteer uw
verdeler voor eventuele reserveonderdelen.
Reinig het toestel af en toe met een vochtige doek. Gebruik geen
bijtende chemische producten, reinigingsmiddelen of sterke
detergenten.
9. Technische specificaties
temperatuurbereik .................................. 5 °C - 30 °C
nom. vermogen ........................ 230 V~, 50 Hz, 6(2) A
voeding ........................................2 x AA-batterij LR6
afmetingen ......................................... 140 x 199 mm
gewicht ...........................................................150 g
optioneel
high-energy alkalinebatterijen ..................... LR6
Gebruik dit toestel enkel met originele accessoires. Velleman
nv is niet aansprakelijk voor schade of kwetsuren bij
(verkeerd) gebruik van dit toestel. Voor meer informatie over
dit product en de laatste versie van deze handleiding, zie
www.perel.eu. De informatie in deze handleiding kan te allen
tijde worden gewijzigd zonder voorafgaande kennisgeving.
© AUTEURSRECHT
Velleman nv heeft het auteursrecht voor deze handleiding.
Alle wereldwijde rechten voorbehouden. Het is niet toegestaan
om deze handleiding of gedeelten ervan over te nemen, te kopiëren,
te vertalen, te bewerken en op te slaan op een elektronisch medium
zonder voorafgaande schriftelijke toestemming van de
rechthebbende.

CTH406
V. 01 –10/05/2016 17 ©Velleman nv
MODE D'EMPLOI
1. Introduction
Aux résidents de l'Union européenne
Informations environnementales importantes concernant ce
produit
Ce symbole sur l'appareil ou l'emballage indique que l'élimination
d'un appareil en fin de vie peut polluer l'environnement. Ne
pas jeter un appareil électrique ou électronique (et des piles
éventuelles) parmi les déchets municipaux non sujets au tri
sélectif; une déchetterie traitera l'appareil en question.
Renvoyer cet appareil à votre fournisseur ou à un service de
recyclage local. Il convient de respecter la réglementation locale
relative à la protection de l'environnement.
En cas de doute, contacter les autorités locales pour
élimination.
Nous vous remercions de votre achat ! Lire attentivement le présent
mode d'emploi avant la mise en service de l’appareil. Si l'appareil a
été endommagé pendant le transport, ne pas l’installer et consulter
votre revendeur.
2. Consignes de sécurité
Garder l'appareil hors de la portée des enfants et des
personnes non autorisées.
Cet appareil peut être utilisé par des enfants âgés de 8 ans
et plus et des personnes manquant d’expérience et de
connaissances ou dont les capacités physiques, sensorielles
ou mentales sont réduites, si elles ont été formées et
encadrées quant à l'utilisation de l'appareil d'une manière
sûre et connaissent les risques encourus. Ne pas laisser les
enfants jouer avec l'appareil. Le nettoyage et l’entretien ne
doivent pas être effectués par des enfants sans supervision.
Utiliser cet appareil uniquement à l'intérieur.
Protéger de la pluie, de l’humidité et des projections
d’eau.

CTH406
V. 01 –10/05/2016 18 ©Velleman nv
Risque d’électrocution lors de l’ouverture du boîtier. Être
prudent lors de l'installation : Toucher un câble sous tension
peut causer des électrochocs
3. Directives générales
Se référer à la garantie de service et de qualité Velleman® en
fin de ce mode d'emploi.
Se familiariser avec le fonctionnement de l'appareil avant de
l'utiliser.
Il est interdit de modifier l'appareil pour des raisons de sécurité.
Les dommages occasionnés par des modifications par le client ne
tombent pas sous la garantie.
N’utiliser l'appareil qu’à sa fonction prévue. Un usage interdit peut
annuler d'office la garantie.
Les dommages occasionnés par des modifications à l'appareil par
le client, ne tombent pas sous la garantie et votre revendeur
déclinera toute responsabilité pour les problèmes et les défauts
qui en résultent.
Respecter les spécifications techniques.
Garder ce mode d'emploi pour toute référence ultérieure.
4. Caractéristiques
max. 24 fuseaux horaires par jour
3 niveaux de température
oconfortable
oéconomique d'énergie
ovacances (antigel)
fonction 'override' manuelle
interrupteur on/off manuel

CTH406
V. 01 –10/05/2016 19 ©Velleman nv
5. Description
Se référer aux illustrations en page 2 de ce mode d'emploi.
Thermostat
marche-arrêt
S
sensibilité à la
température
mode vacances
régler l'heure
mode confort
P
programmation
mode éco
confirmer
réglage de
température
précédent/suivant
Afficheur
1
indicateur de pile
faible
5
mode vacances
2
affichage 24 h
6
refroidissement
3
mode confort
7
mode manuel
4
mode éco
8
chauffage
6. Installation
6.1 Installation de la pile
AVERTISSEMENT
Ne jamais perforer les piles et ne pas les
jeter au feu (danger d’explosion). Ne jamais
recharger des piles alcalines. Se débarrasser
des piles en respectant la réglementation
locale relative à la protection de
l’environnement. Garder les piles hors de la
portée des enfants.
1. Retirer le couvercle frontal avec un tournevis approprié.
2. Insérer deux piles type LR6/AA selon les indications de polarité.
3. Remplacer les piles par des piles neuves lorsque l'indicateur de
pile faible s'affiche.
4. Procéder à l'installation du thermostat.

CTH406
V. 01 –10/05/2016 20 ©Velleman nv
6.2 Installer le thermostat
AVERTISSEMENT
S'assurer de débrancher l'alimentation
électrique avant d'installer le thermostat.
1. Choisir l'emplacement de montage. Installer le thermostat dans
un endroit bien ventilé et à environ 1.5 m du sol. Eviter le soleil
direct, les sources de chaleur et d'interférences.
2. Monter le thermostat sur une surface plane. Percer deux trous
de 6 mm et insérer une cheville en nylon dans chaque trou.
Percer deux trous de 2.6 mm lors d'un montage sur une surface
en bois.
3. Relier le thermostat. Le thermostat est conçu pour max. 230 V~,
6 A. Ne jamais dépasser les valeurs limites indiquées !
Utiliser des fils avec un diamètre de 1.0-2.5 mm² et connecter
conformément.
Se référer aux illustrations en page 3 de ce mode d'emploi.
7. Emploi
7.1 Régler l'heure et le jour
Après avoir inséré de nouvelles piles, le thermostat passe
automatiquement en mode de réglage de l'heure. Pour régler l'heure
et le jour :
1. Régler l'heure avec ou . Confirmer avec .
2. De la même manière, régler les minutes et le jour.
3. Appuyer sur pour confirmer et retourner à l'affichage normal.
7.2 Réinitialisation
Appuyer sur le bouton de réinitialisation situé au-dessus du
compartiment à piles pour réinitialiser les réglages.
7.3 Allumer/éteindre le thermostat
Appuyer sur pour allumer ou éteindre l'appareil.
Dans la position OFF, seule la température ambiante est affichée.
Table of contents
Languages:
Other Velleman Thermostat manuals
Popular Thermostat manuals by other brands

Daikin
Daikin 910121746 Installation, operation & application guide

Islandaire
Islandaire 6041228 Installation and operation manual

Kielmann
Kielmann KET-204D Technical guide

Loreme
Loreme THL105 Configuration handbook

Stelpro
Stelpro STE302R2+ user guide

Danfoss
Danfoss FH-RT Installation & operating instructions