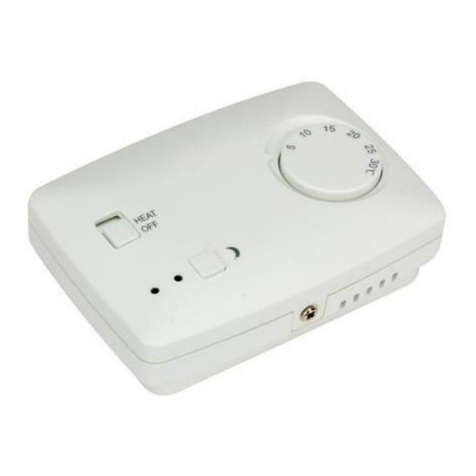
Velleman TT2000 User manual

GTT2000-ED1
GEBRUIKSAANWIJZING 3
MODE D'EMPLOI 9
USER'S MANUAL 15
BEDIENUNGSANLEITUNG 21
TELEPHONE
CONTROLLED
THERMOSTAT
TT2000

TT2000
2
Velleman
Legen Heirweg 33
9890 Gavere
Belgium
Tel: 09-3843611
Fax: 09-3846702

3
TT2000
THERMOSTAAT MET AFSTANDSBEDIENING VIA
TELEFOON
Deze thermostaat wordt gebruikt om via de telefoonlijn te kiezen tussen
dag- of nachttemperatuur instelling, voor de rest wordt hij gebruikt als
een normale thermostaat.
De afstandsbediening wordt bediend d.m.v. de druktoetsen van de
telefoon, men moet dan wel over een DTMF type telefoon beschikken.
De gebruiker krijgt via geluidssignalen een terugmelding hoe de
thermostaat ingesteld is. Het schakelen is beveiligd via een zelf te
bepalen code, die men simpelweg intoetst op de telefoon. Beschikt men
niet over een DTMF telefoon dan kan men de los verkrijgbare
akoestische DTMF generator (ons type PD-888) gebruiken, dit toestel
moet men gewoon tegen de microfoon van de telefoon houden en de
gepaste code’s vormen.
SPECIFICATIES
-Afzonderlijke instelling van dag en nacht temperatuur met LED
aanduiding
-Relais uitgang met LED aanduiding: 5A/240VAC (1200W)
-Opname na ±8 belsignalen
-Toestand melding:
Dubbele toon indien dag-temperatuur gekozen is.
Enkele toon indien nacht-temperatuur gekozen is.
Vijf maal dubbele of enkele toon indien de temperatuur beneden 3°C
gezakt is (melding van defect aan de verwarming)
-Automatisch verbreking indien na 40 sec. geen code ingegeven wordt.
-Aantal veiligheid codes: van 000 tot 999
-Dagtemperatuur instelling: van 14°C tot 26°C
-Nachttemperatuur instelling: van 6°C tot 18°C
-Hysteresis (toegestane temperatuurschommeling): 0.1°C
-Lokale manuele bediening
-Code systeem: DTMF
-Voedingsspanning: 220VAC
Wijzigingen voorbehouden

TT2000
4
MONTAGE EN AANSLUITING
OPMERKING: Heeft men geen ervaring met het aansluiten van
dergelijke toestellen, dan kan men dit best laten doen door een ervaren
installateur!
VOORZIENING
Voorzie de bedrading op een plaats waar geen directe warmtebron of
direct zonlicht aanwezig is.
Let er ook op dat tocht de thermostaat niet kan beïnvloeden (vb. zeer
dicht bij een deur- opening)
Om de thermostaat aan te sluiten heeft men minimum de volgende
aansluitingen nodig:
-Twee draden (a en b) van de telefoon lijn (deze moeten in een
afzonderlijke kabel of buis zitten dus niet samen met netspannings
leidingen)
-Netspanning voor de voeding van de thermostaat (aansluitingen N en
L van MAINS)
-Twee of drie aansluitdraden voor aansluiting van het
verwarmingscircuit, zie verder.
PLAATSING
-Verwijder het deksel van de thermostaat door de schroeven langs de
zijkant los te maken.
-Positioneer de thermostaat tegen de muur op de plaats waar de
bedrading voorzien is, eventueel moet men de bepleistering van de
muur uithalen, zodat de bedrading op de correcte plaats zit.
-Maak een merkteken, op de positie van de bevestigingsgaten, zodat
men eventueel pluggen kan gebruiken om de thermostaat te
bevestigen.

5
TT2000
Maak de volgende verbindingen:
BELANGRIJK: LET ER OP DAT ALLE DRADEN SPANNINGSLOOS
ZIJN!
1) Aansluiten van het telefoon net:
-Verbind de draden met de punten A en B van de schroefconnector
2) Aansluiten van de netspanning:
-Verbind de netspanning met de aansluitingen N en L van de MAINS
schroefconnector.
3) Aansluiten van de verwarming:
a)Elektrische verwarming, circulatiepomp, ventiel... (meest gebruikte
aansluiting):
Voedingsspanning
Belasting
TEL
A
B
B' A'
Van telefoon net
(Eventueel naar telefoon toestel)
MAINS
Naar net
aansluiting

TT2000
6
b)Aansluiting van een motor gestuurde mengkraan:
Monteer het deksel terug op de thermostaat en let er op dat de
bedrading niet over de schakeling komt (eventueel draden inkorten). Let
ook op de positionering van de LED’s en de drukknop, zodat deze door
het front komen.
De thermostaat is nu klaar voor gebruik.
GEBRUIK
AANDACHT: DRUK DE TOETSEN VAN DE TELEFOON NIET TE SNEL
NA ELKAAR, EN LET ER ALTIJD OP DAT U NA HET DRUKKEN VAN
EEN TOETS EEN BEVESTIGINGS BEEPJE HOORT, ANDERS MOET
U DE TOETS HERHALEN.
INSTELLEN VAN DE PERSOONLIJKE CODE
Standaard is de code 0-0-0 geprogrammeerd, het is echter aangeraden
om zelf een persoonlijke code in te stellen, doe dit als volgt:
-Telefoneer naar het nummer waar de thermostaat aangesloten is. Op
de thermostaat zal na elk belsignaal de dag/nacht indicatie even
knipperen.
-Na ongeveer 8 belsignalen zal de thermostaat opnemen (de rode
opneem LED zal oplichten) men zal dit ook horen aan een
geluidssignaal en een kort beepje om de 5 seconden.
-Druk de oude code in, de eerste maal zal dit 0-0-0 zijn, druk
vervolgens op de # toets gevolgd door de nieuwe code, afgesloten
met de # toets.
-Als de code aanvaard is, zal men twee opeenvolgende tonen horen,
anders hoort men de alarm toon die bestaat uit vijf
opeenvolgende tonen, in het laatste geval blijft de oude code geldig.
voorbeeld: de huidige code is 3-5-0 en men wil de code 2-5-5
programmeren, de toetscombinatie is dan alsvolgt:
3-5-0-#-2-5-5-#
Belasting
Voedingsspanning

7
TT2000
*
*
OPMERKING:
-Werkt Uw code niet, dan kan dit er op wijzen dat de netspanning op de
plaats waar de thermostaat zich bevindt, onderbroken geweest is.
Probeer dan de code 0-0-0.
-Is men om een of andere reden de code vergeten, of wil men starten
met de standaard 0-0-0 code, dan kan dit door de voedingsspanning
van de thermostaat even uit te schakelen.
-Na een alarmtoon moet men de complete code herhalen.
TOT STAND BRENGEN VAN DE VERBINDING
-Telefoneer naar het nummer waar de thermostaat aangesloten is.
-Na ongeveer 8 belsignalen zal de thermostaat opnemen. Op het
toestel zal de rode LED oplichten en men zal de huidige toestand
horen. Eén dubbele toon bij DAG instelling, één enkele toon bij
NACHT instelling. Indien de temperatuur beneden 3°C gezakt is
dan zal men vijf maal deze indicatie horen.
OPMERKING: Zolang de thermostaat opgenomen heeft zal men om de
5 seconden een kort beepje horen.
INFORMATIE VRAGEN OVER DE HUIDIGE TOESTAND
-Toets Uw persoonlijke code in gevolgd door 0, een paar seconden
daarna zal men de toestand van de thermostaat horen.
Vb. Uw persoonlijke code is 3-5-0 en men wil de toestand opvragen,
druk dan:
3-5-0-0
OMSCHAKELEN VAN DE DAG / NACHT INSTELLING
-Toets Uw persoonlijke code in gevolgd door de toets.
Stond de thermostaat op dag temperatuur, dan zal deze nu op nacht
temperatuur staan, men hoort een enkele toon als bevestiging.
Stond de thermostaat op nacht temperatuur, dan zal deze nu op dag
temperatuur staan, men hoort een dubbele toon als bevestiging.
Vb: Uw persoonlijke code is 3-5-0 en men wil de toestand
omschakelen, druk dan:
3-5-0-
-Het omschakelen van dag naar nacht instelling kan men ook via het
drukknopje op de thermostaat.

TT2000
8
WAARBORG:
Dit produkt is gewaarborgd wat betreft gebreken in materialen en vakmanschap op het
ogenblik van de aankoop en dit gedurende een periode van EEN JAAR vanaf de
aankoop. De waarborg geldt enkel indien het toestel voorgelegd wordt samen met het
origineel aankoop bewijs, dat voorzien is van het serie nummer. De verplichtingen van
VELLEMAN N.V. beperken zich tot het herstellen van defecten of, naar vrije keuze van
VELLEMAN N.V., tot het vervangen of herstellen van defecte onderdelen. Kosten en
risico’s van transport; het wegnemen en terugplaatsen van het produkt, evenals om het
even welke andere kosten die rechtstreeks of onrechtstreeks verband houden met de
herstelling, worden niet door VELLEMAN N.V. vergoed. VELLEMAN N.V. is niet
verantwoordelijk voor schade van gelijk welke aard, veroorzaakt door het falen van een
toestel.
OPMERKINGEN:
1-Heeft men een verkeerde code ingetoetst, dan hoort men een
alarmtoon, men heeft dan nog twee kansen om de juiste code in te
geven, daarna zal het toestel de verbinding verbreken.
2-Indien men 40 seconden geen toets ingedrukt heeft zal de verbinding
automatisch verbroken worden.
3-Gedurende de tijd dat de thermostaat de telefoonlijn opgenomen heeft,
is de manuele bediening en de thermostaatwerking uitgeschakeld.
IJKEN VAN DE SCHAALVERDELING
Als de aanduiding van de dagtemperatuur niet overeenkomt met een in
de buurt geplaatste thermometer, dan kan men de thermostaat
eenvoudig ijken:
-Kies de dagtemperatuur instelling.
-Draai de dag instelling tot deze overeenstemt met de thermometer.
-Onderaan de behuizing, door een gleuf kan men via een
schroevedraaier een trimpotentiometer verdraaien (zie figuur), juist
totdat de verwarming inschakelt (men hoort het relais en men ziet de
verwarming aanduiding oplichten). De schaalverdeling is nu geijkt.
OPMERKING: Draai de
trimpotentiometer een paar
keer heen en weer tot men exact het
punt van inschakelen gevonden heeft.

9
TT2000
THERMOSTAT COMMANDE A DISTANCE VIA LE
TELEPHONE
Ce thermostat se caractérise par la possibilité de sélectionner la
température de jour ou de nuit via une ligne téléphonique. A part cela, il
s’utilise comme un thermostat ordinaire.
La commande à distance étant actionnée par les touches du téléphone,
vous devez disposer d’un téléphone de type DTMF.
Le réglage du thermostat est indiqué à l’utilisateur sous forme de
signaux sonores. L’activation est protégée par un code à déterminer soi-
même, que l’on compose simplement sur le téléphone. Ceux qui ne
disposent pas d’un téléphone DTMF peuvent se procurer le générateur
DTMF (notre type PD-888), disponible séparément. Il suffit de maintenir
cet appareil contre le microphone du téléphone et de former le code
approprié.
SPECIFICATIONS
-Instauration séparée de la température de jour et de nuit par un
affichage DEL
-Sortie relais avec affichage DEL: 5A/240VAC (1200W)
-Réponse après ± 8 sonneries
-Communication de l'etat:
Double tonalité si la température de jour est sélectionnée.
Tonalité simple si la température de nuit est sélectionnée.
Cinq fois tonalités doubles ou simples si la température est descendue
en-dessous de 3°C (signalisation d’un défaut du chauffage)
-Interruption automatique si aucun code n’est introduit après 40 sec.
-Nombre de codes de sécurité : de 000 à 999
-Instauration de la température de jour: de 14°C à 26°C
-Instauration de la température de nuit: de 6°C à 18°C
-Hystérésis (variation de température admise): 0,1°C
-Commande manuelle locale
-Code du système: DTMF
-Tension d’alimentation: 220 VAC
Sous réserve de modifications

TT2000
10
MONTAGE ET RACCORDEMENT
REMARQUE: Il est conseillé aux personnes n’ayant aucune expérience
en matière de raccordement de ce type d’appareils de faire appel à un
installateur expérimenté!
EQUIPEMENT
Prévoyez de placer le câblage à l’abri d’une source de chaleur directe
ou des rayons solaires directs.
Veillez également à ce qu’aucun courant d’air ne puisse influencer le
thermostat (p. ex. à proximité d’une ouverture de porte)
Les raccordements suivants sont minimum nécessaires pour la
connexion du thermostat:
-Deux fils (a et b) de la ligne téléphonique (ils doivent se trouver dans
un câble ou un tube, donc isolés des câbles du réseau)
-Tension du réseau pour l’alimentation du thermostat (raccordements N
et L de MAINS)
-Deux ou trois fils de raccordement pour la connexion du circuit de
chauffage, voir infra.
MISE EN PLACE
-Retirez le couvercle du thermostat en desserrant les vis située sur le
côté latéral.
-Positionnez le thermostat contre le mur, à l’endroit où le câblage est
prévu. Retirez éventuellement l’enduit du mur pour pouvoir placer le
câblage au bon endroit, voir illustration.
-Tracez une marque au niveau des trous de fixation, afin de pouvoir
éventuellement utiliser des chevilles pour la fixation du thermostat.

11
TT2000
Effectuez les préparatifs suivants:
IMPORTANT: VEILLEZ A CE QUE TOUS LES FILS SOIENT SANS
TENSION!
1) Raccordement du réseau téléphonique:
-Reliez les fils aux points A et B du connecteur à vis.
2) Raccordement de la tension du réseau:
-Connectez la tension du réseau aux raccordements N et L du
connecteur à vis “MAINS”.
3) Raccordement du chauffage:
a)Chauffage électrique, pompe de circulation, valve... (raccordement le
plus utilisé):
B' A' Eventuellement vers le
téléphone
A
B
Du réseau
téléphonique
Vers la tension du réseau
Charge

TT2000
12
Charge
Réseau
Remontez le couvercle sur le thermostat et assurez-vous de ce que le
câblage ne se trouve pas sur le circuit (racourcissez éventuellement des
fils). Veillez également au positionnement de la DEL et au bouton-
poussoir, qui doivent apparaître à l’avant.
Le thermostat est à présent prêt à l’emploi.
UTILISATION
ATTENTION: N’ENFONCEZ PAS LES TOUCHES A INTERVALLES
TROP RAPPROCHES ET ASSUREZ-VOUS TOUJOURS DE CE QU’UN
BIP DE CONFIRMATION RETENTIT CHAQUE FOIS QUE VOUS
ENFONCEZ UNE TOUCHE. SINON, LA TOUCHE DOIT ETRE RE-
ENFONCEE.
INSTAURATION DU CODE PERSONNEL
Le code 0-0-0 est programmé de façon standard, mais il est conseillé
d’instaurer un code personnel. Procédez comme suit:
-Téléphonez au numéro auquel le thermostat est connecté. Sur le
thermostat, l’indication jour/nuit sera signalée brièvement après
chaque sonnerie.
-Après environ 8 sonneries, le thermostat répondra (la DEL rouge de
réponse s’allumera), un signal sonore et un bref bip retentissent toutes
les 5 secondes.
-Composez l’ancien code (la première fois il s’agira du 0-0-0), puis
enfoncez la touche # suivie du nouveau code. Terminez par la touche
#.
-Si le code est accepté, deux tonalités successives retentiront. Dans le
cas contraire , c’est la tonalité d’alarme, constituée de cinq tonalités
successives, qui retentit. Dans ce dernier cas, l’ancien code reste
valide.
Exemple: le code actuel est 3-5-0 et vous souhaitez programmer le
code 2-5-5. La combinaison de touches à enfoncer est la suivante:
3-5-0-#-2-5-5-#
b)Raccordement d’un robinet mélangeur motorisé:

13
TT2000
*
*
REMARQUE:
-Si votre code ne fonctionne pas, c’est peut-être parce que la tension
du réseau auquel le thermostat est connecté a été coupée. Dans ce
cas, essayez le code 0-0-0.
-Si, pour une raison quelconque, vous avez oublié le code, ou si vous
souhaitez instaurer le code standard 0-0-0, il suffit de déconnecter
quelques instants l’alimentation du thermostat.
-Après une tonalité d’alarme, il y a lieu de recomposer le code complet.
ETABLISSEMENT DE LA COMMUNICATION
-Téléphonez au numéro auquel le thermostat est connecté.
-Après environ 8 sonneries, le thermostat répondra. Sur l’appareil, la
DEL rouge s’allumera et le l'état actuel sera indiqué. Une double
tonalité pour le l'état “JOUR”, une tonalité simple pour le l'état
“NUIT”. Si la température est descendue en-dessous de 3°C ,
la tonalité retentira à cinq reprises.
REMARQUE: Tant que le thermostat est en cours de réponse, un bref
bip retentit toutes les 5 secondes.
DEMANDE D’INFORMATION SUR L'ETAT ACTUEL
-Composez votre code personnel suivi de 0, quelques secondes plus
tard, un signal sonore indiquera le réglage du thermostat.
Ex. Votre code personnel est 3-5-0 et vous souhaitez connaître l'état
du thermostat, enfoncez:
3-5-0-0
BASCULEMENT DE L'ETAT JOUR/NUIT
-Composez votre code personnel suivi de la touche .
Si la température de jour était sélectionnée, elle passera à la
température de nuit, une tonalité simple viendra le confirmer.
Si la température de nuit était sélectionnée, elle passera à la
température de jour, une double tonalité viendra le confirmer.
Ex: Votre code personnel est 3-5-0 et vous souhaitez inverser la
position, enfoncez:
3-5-0-
-Il est également possible de basculer l'état jour/nuit via le bouton-
poussoir sur le thermostat .

TT2000
14
REMARQUES:
1-Si un mauvais code a été composé, une tonalité d’alarme retentit. Vous
avez encore droit à deux erreurs, puis l’appareil coupe la
communication.
2-Si aucune touche n’a été enfoncée pendant 40 secondes, la
communication sera coupée automatiquement.
3-Pendant que le thermostat enregistre la communication téléphonique,
la commande manuelle et le fonctionnement du thermostat sont
déconnectés.
ETALONNAGE DE LA GRADUATION
Si l’indication de la température de jour ne correspond pas à celle d’un
thermomètre placé à proximité, le thermostat peut être étalonné
aisément:
-Sélectionnez la position température de jour.
-Faites tourner la position jour jusqu’à ce qu’elle corresponde au
thermomètre.
-Sous le boîtier, par une rainure, un potentiomètre trim peut être réglé
au moyen d’un tourne-vis (voir illustration), jusqu’à ce que le chauffage
s’enclenche (l’on entend le relais et l’indicateur de chauffage s’allume).
La graduation est à présent étalonnée.
REMARQUE: Tournez quelques
fois le potentiomètre trim jusqu’à ce
que vous trouvez le point exact
d’enclenchement.
GARANTIE
Ce produit est garanti contre les défauts des composantes et de fabrication au moment
de l’achat, et ce pour une période d’UN AN à partir de la date d’achat. Cette garantie est
uniquement valable si l'appareil est accompagné de la preuve d’achat originale,
mentionnant le numéro de série. Les obligations de VELLEMAN s.a. se limitent à la
réparation des défauts ou, sur seule décision de VELLEMAN s.a., au remplacement ou
à la réparation des pièces défectueuses. Les frais et les risques de transport,
l’enlèvement et le renvoi du produit, ainsi que tous autres frais liés directement ou
indirectement à la réparation, ne sont pas pris en charge par VELLEMAN s.a..
VELLEMAN s.a. n’est pas responsable des dégâts, quels qu’ils soient, provoqués par le
mauvais fonctionnement de l'appareil.

15
TT2000
THERMOSTAT WITH REMOTE CONTROL VIA THE
TELEPHONE
The thermostat is used as any other one, but with the added facility of
chosing the day or night temperature setting by means of a telephone.
The remote control facility is operated via the telephone keypad, thus a
DTMF type phone is required.
From audio signals sent down the line, the user receives a report back
on how the thermostat is set. Switching is protected by a security code,
set by the user, which is keyed into the telephone in a simple manner. If
a DTMF phone is not available, then the separately supplied acoustic
DTMF generator (our type PD-888) can be used. This unit is simply held
against the telephone mouthpiece and the appropriate codes are then
made.
SPECIFICATIONS
-Separate settings for day and night temperature with LED indication.
-Relay output with LED indication: 5A/240VAC (1200W)
-Telephone pick-up after ±8 rings
-Automatic status report:
Double tone if day temperature is chosen.
Single tone if night temperature is chosen.
Double or single tone is given 5 times if the temperature has fallen
below 3°C (breakdown report of the heating system)
-Automatic hang-up if no code is received within 40 seconds.
-Number of possible security codes: from 000 to 999
-Day temperature setting: from 14°C to 26°C
-Night temperature setting: from 6°C to 18°C
-Hysteresis (allowed temperature swing): 0.1°C
-Local manual control
-Code system: DTMF
-Supply voltage: Mains
The right to make changes is reserved

TT2000
16
INSTALLATION AND CONNECTION
NOTE: If the user has no experience with the connection of such
equipment, then it is best left to an experienced installer !
REQUIREMENTS
Provide the wiring away from any direct sources of heat and out of direct
sunlight. Be careful that moisture cannot affect the thermostat (eg, if it is
very close to a door opening).
In order to connect the thermostat in, the following connections are
minimum required:
-Two wires (a and b) from the telephone line ( these must be in a
separate cable or box, ie. not together with the power supply
conductors)
-Supply voltage for the thermostat supply (connections N and L from the
MAINS)
-Two or three wires for connecting to the heating circuit, see further
down.
FITTING
-Remove the cover of the thermostat by loosening the screws along the
side.
-Position the thermostat against the wall in the same place where the
wiring has been fitted. It is possible that a recess may have to be made
in the wall plaster so that the wiring can be placed correctly, see
diagram.
-Mark the positions of the fixing holes, in the case that rawlplugs have
to be used to fasten the thermostat in place.

17
TT2000
Make the following connections:
IMPORTANT: MAKE SURE THAT WIRES ARE SWITCHED OFF AND
ARE FREE FROM ANY VOLTAGE !
1)Connection to the telephone network:
-Connect the wires to points A and B of the screw terminal.
2) Connection to the mains supply:
-Connect the mains supply to connections N and L of the mains screw
terminal.
3) Connection to the heating system:
a)Electric heating, circulation pump, valves... (most commonly used
connection):
A
B
To telephone (if needed)
From telephone
network
B' A'
LOAD To mains voltage
MAINS
To mains voltage

TT2000
18
LOAD
To mains voltage
3-5-0-#-2-5-5-#
b) Connection to a motor driven valve:
Place the cover back on the thermostat and ensure that the path of the
wiring is not over the circuit connections (possible risk of short circuits).
Also check the position of the LEDs and the push-button to ensure that
these come up through the front.
The thermostat is now ready for use.
USE
ATTENTION: DO NOT PRESS THE TELEPHONE KEYS TOO QUICKLY
IN SUCCESSION, AND ALWAYS CHECK THAT A SHORT
CONFIRMATION BEEP IS HEARD AFTER EACH KEY DEPRESSION.
IF NOT REPEAT THE SAME KEY STROKE.
SETTING THE PERSONAL SECURITY CODE
The equipment comes with the code 0-0-0 pre-programmed as standard.
However, it is recommended to set your own personal code. This is done
as follows:
-Dial the number on which the thermostat is connected. The day/night
indication of the thermostat will be given after each ringing tone.
-After about 8 rings the thermostat will pick-up (the red “hook” LED will
light up). This audio signal will be heard and a short beep will be given
every five seconds.
-Key in the old code, on first use this will be 0-0-0, then press the # key
followed by the new code, finishing off by pressing the # key again.
-If the new code has been accepted, two successive tones will be
heard. If not accepted , an alarm signal consisting of five
successive tones will be heard. In this case the old code will remain in
force.
Example: The current code is 3-5-0 and the new code 2-5-5 is to be
programmed in. The keying combination is then as follows:

19
TT2000
*
*
NOTE:
-If your chosen code does not work, then this may be because the
supply voltage to the thermostat has been interrupted. In this case try
the code 0-0-0.
-If for one reason or another the personal security code has been
forgotten, or if the standard code 0-0-0 is desired, it can be reset by
switching off the supply voltage to the thermostat.
-After an alarm tone the complete code must be repeated.
TO MAKE THE CONNECTION
-Dial the number on which the thermostat is connected.
-After about 8 ringing tones the thermostat will pick-up. The red LED on
the unit will light up and the tones for the current status will be heard. A
double tone for DAY setting and a single tone for NIGHT setting.
If the temperature has fallen below 3°C then this indication will
be heard five times successively.
NOTE:As long as the thermostat is on-line, a short beep will be heard
every five seconds.
INTERROGATION OF THE UNIT FOR THE CURRENT STATUS
-Key in your personal code followed by 0, a few seconds later the status
report of the thermostat will be heard.
eg. Your personal code is 3-5-0 and if the status is to be interrogated
then press:
3-5-0-0
SWITCHING BETWEEN DAY AND NIGHT SETTINGS
-Key in your personal code followed by the key. If the thermostat was
already set for day temperature, it will now be set to night. A single tone
will be heard as confirmation.
If the thermostat was at night temperature setting, it will now be set for
day temperature. A double tone will be heard as confirmation.
e.g. Your personal code is 3-5-0 and the setting is to be switched over
then press:
3-5-0-
-Switching between DAY and NIGHT settings can also be done from the
push button on the thermostat.

TT2000
20
NOTE:
1-If the wrong security code is keyed in then an alarm tone will be given.
Only two attempts are allowed for keying in the correct code. After that
the unit will break the connection.
2-If no key is pressed within 40 seconds, connection will automatically
be broken.
3-Whilst the thermostat is on-line, manual control and thermostat
operation is disabled.
CALIBRATION OF THE TEMPERATURE GRADUATIONS
If the day temperature setting does not agree with a thermometer placed
nearby, then the thermostat can be easily calibrated.
-Choose the day temperature setting.
-Turn the day setting to correspond with the thermometer.
-Underneath the thermostat housing, a trimpotentiometer can be turned
with a screwdriver through the groove, (see diagram), until the heating
system just switches on (the relay will be heard and the heating
indication will light up). The temperature gradations are now set.
NOTE: Turn the
trimpotentiometer back
and forth a couple of times until
the exact switching point has been
found.
GUARANTEE
This product is guaranteed against defects in components and construction from the
moment it is purchased and for a period of ONE YEAR starting from the date of sale.
This guarantee is only valid if the apliance is submitted together with the original
purchase invoice, listing the serial number. VELLEMAN Ltd limits its responsibility to the
reparation of defects or, as VELLEMAN Ltd deems necessary, to the replacement or
reparation of defective components. Costs and risks connected to the transport, removal
or placement of the product, or any other costs directly or indirectly connected to the
repair, will not be reimbursed by VELLEMAN Ltd. VELLEMAN Ltd will not be held
responsible for any damages caused by the malfunctioning of an apliance.
Table of contents
Languages:
Other Velleman Thermostat manuals