Velux INTEGRA KLF 200 Manual

VAS 454069-2016-10
ENGLISH
VELUX INTEGRA®
KLF 200
Directions for use
VELUX INTEGRA®
A

VAS 454069-2016 -06
ENGLISH
VELUX INTEGRA®
KLF 200
Directions for use
VELUX INTEGRA®
A
454069-2016-06_KLF200-GB.indd 1 05-07-2016 08:36:13
VAS 453964 -2016-07
VELUX INTEGRA®
KLF 200
Wi-Fi
B
453964-2016-07_KLF-200.indd 1 05-07-2016 08:32:00
2 VELUX®VELUX®3
ENGLISH ENGLISH
Two instructions are supplied with the interface (Aand B).
Set-up via tablet, computer or
smartphone
This instruction leaflet will help you
set up the interface via a tablet, com-
puter or smartphone and enable more
advanced interface settings.
Set-up via a VELUX INTEGRA®
control
These instructions will help
you set up the interface with a
VELUX INTEGRA®one-way or two-
way control. The instructions contain
the default settings and functions that
can be seen in the table of contents on
the next page.
Congratulations on your new VELUX INTEGRA®product!
Thank you for buying this VELUX INTEGRA®product.
The product can be used as an interface or as a repeater.
The interface function is used when io-homecontrol®products are to
be controlled via external control devices that are not io-homecontrol®
compatible.
The repeater function is used if you want to extend the operation range
of controls in the system by transmitting received wireless commands.
Contents
Contents of packaging 4
Product overview 5
Default settings 5
Important information 6-7
Function as interface
Functions of inputs 8-10
Registration of products 11
Registration with VELUX INTEGRA®
two-way control pad KLR 200 12-16
Registration with VELUX INTEGRA®
one-way remote control 17-19
Function of outputs 20
Resetting 21
Function as repeater 22-24
Own notes 26-27

VELUX INTEGRA
®
KLF 200
4 VELUX®VELUX®5
ENGLISH ENGLISH
Product overview
Default settings
Contents of packaging
1Light-emitting diode
2ETHERNET/service
(for internal use only)
3Power supply
4Key button
5RESET
6Outputs
7Inputs
Default settings
Inputs (control)
An external control signal shorter than 1.5 second makes the VELUX
product travel to end position.
• Even inputs (2, 4, 6, 8) are used for close/down: The product travels to
end position
• Odd inputs (1, 3, 5, 7) are used for open/up: The product travels to end
position
An external control signal longer than 1.5 second makes the VELUX
product travel until the signal stops or until the product has reached end
position.
Default speed is used for all window operators including those supporting
silent mode.
As default, io-homecontrol®channel 3 is used for communication and no
channels or signals are blocked.
Outputs (signals)
The output relay is activated for 2 seconds when an action has been suc-
cessfully executed.
The default settings can be adjusted by using the web interface.
See enclosed instruction leaflet B.
Product overview
A B C D E
1 2 3 4
5 6 7 8 9 10
A B C D E
1 2 3 4
5 6 7 8 9 10
ETHERNET
ETHERNET
RESET
RESET
USB
USB
246
357
1
7

6 VELUX®VELUX®7
ENGLISH ENGLISH
Important information Important information
io-homecontrol®provides advanced and secure radio technology that is easy to install.
io-homecontrol®labelled products communicate with each other, improving comfort,
security and energy savings.
www.io-homecontrol.com
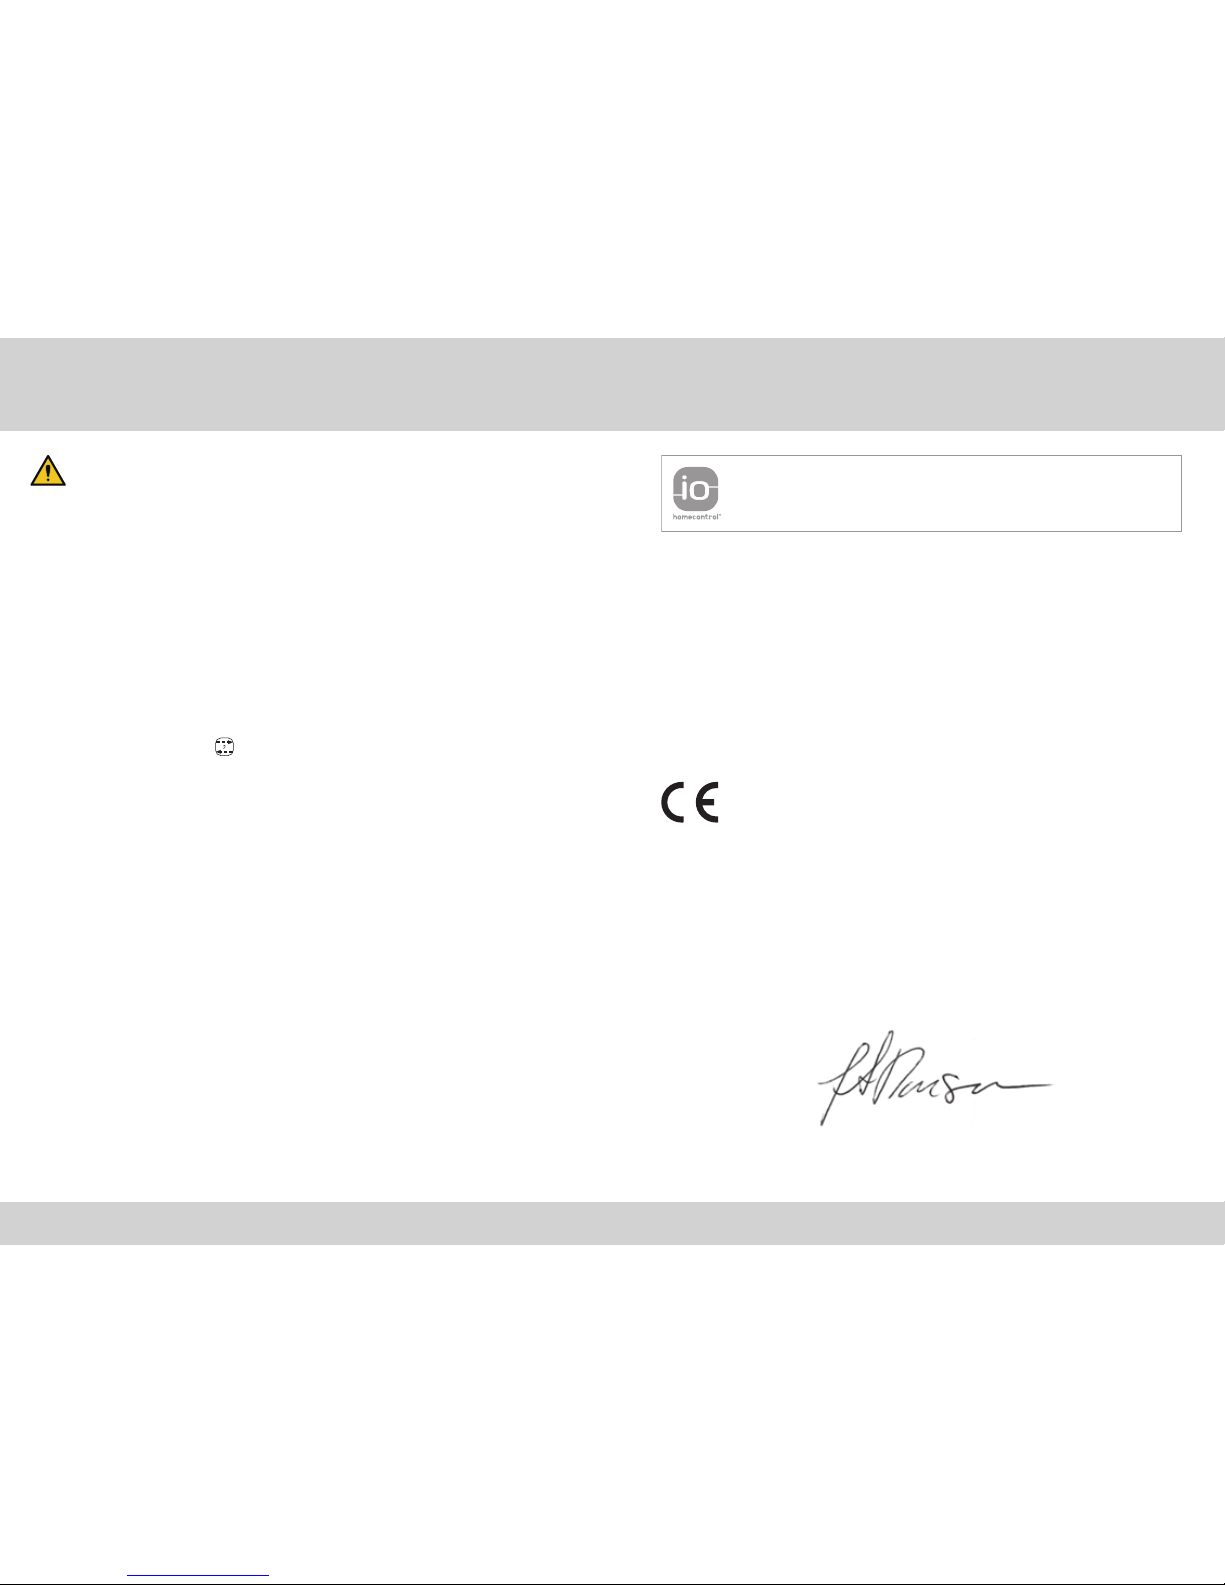
Declaration of Conformity
In accordance with the European Parliament and
Council Directive 2014/35/EU
We herewith declare that VELUX INTEGRA®interface KLF 200
(3LF D02 WW)
− is in conformity with the Low Voltage Directive 2014/35/EU,
the EMC Directive 2014/30/EU and the Radio Equipment Directive
2014/53/EU and
− has been manufactured in accordance with the harmonised standards
EN 60950, EN 55032(2014), EN 55024(2010), EN 301489-1, EN 301489-3,
EN 300220-2, EN 300220-1, EN 300440-2, EN 300440-1 and EN 300328.
VELUX A/S: ..................................................................
(Jens Aksel Thomsen, Market Approval)
Ådalsvej 99, DK-2970 Hørsholm ..............................................
CE DoC 940409-00
Read instructions carefully before installation and operation.
Please keep instructions for future reference and hand them over to any
new user.
Safety
• Interface KLF 200 can be used by persons (aged 8 years and above) with
sufficient experience and knowledge if they have been given instruction
concerning their safe use and understand the hazards involved. Cleaning and
user maintenance must not be made by unsupervised children.
• Children must not play with the interface.
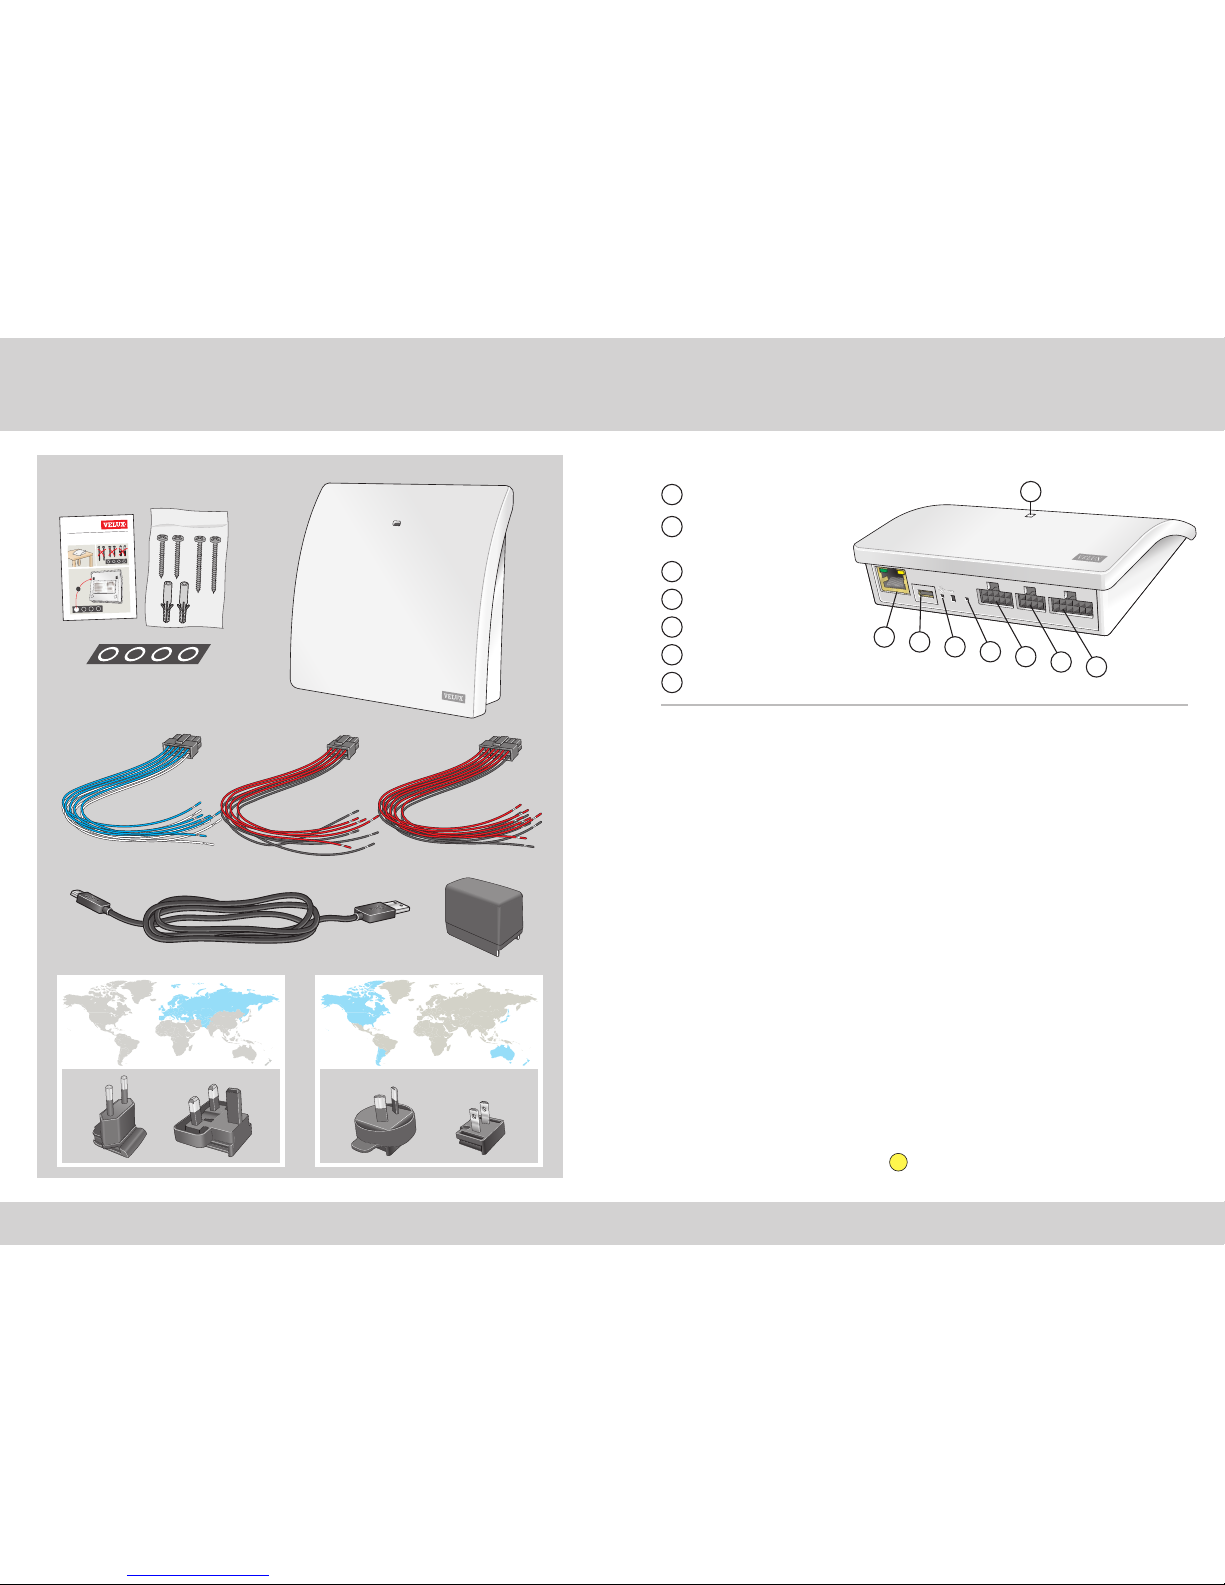
• The interface, adaptor plug and cable are for indoor use only.
• The interface must not be covered (maximum ambient temperature: 50°C).
Product
• The interface is based on two-way RF (radio frequency) communication and
marked with the symbol 2. This symbol can be found on the data label.
• Cables from the interface input must not exceed 100 m.
• Radio frequency band: 868 MHz (io-homecontrol®), 2.4 GHz
(WiFi 802.11 b/g/n).
• Radio frequency range: 300 m free field. Depending on building construc-
tion, the indoor range is approx. 30 m. However, constructions with rein-
forced concrete, metal ceilings and plaster walls with steel members may
reduce the range.
• Electrical products must be disposed of in conformity with national regula-
tions for electronic waste and not with household waste.
• The packaging can be disposed of with usual household waste.
Maintenance
• If repair or adjustment work is needed, disconnect any power supply and
ensure that it cannot be reconnected unintentionally.
• The interface requires a minimal amount of maintenance.
The surface may be cleaned with a soft, damp cloth.
• If the adaptor plug and/or cable is/are damaged, it/they must be replaced.
• Spare parts are available from your VELUX sales company.
• If you have any technical questions, please contact your VELUX sales com-
pany, see telephone list or www.velux.com. 01.05.2016

C
C
A B C D E
1 2 3 4
5 6 7 8 9 10
A B C D E
1 2 3 4
5 6 7 8 9 10
ETHERNET
ETHERNET
RESET
RESET
USB
USB
5 6 7 8 9 10
A B C D E
1 2 3 4
1 2 3 4 5
5 6 7 8 9 10A B C D E
1 2 3 4
23˚C 21˚C
5 6 7 8 9 10A B C D E 1 2 3 4
5 6 7 8 9 10A B C D E
1 2 3 4
5 6 7 8 9 10A B C D E
1 2 3 4
8 VELUX®VELUX®9
ENGLISH ENGLISH
The inputs on the interface must be
connected to control devices with
potential free contacts. When the
potential free contact is activated, the
interface sends a wireless command
to the io-homecontrol®products to
be operated. It is possible to operate a
single product or a group of products
(up to 200 products in total).
The window can also be operated
with the wireless control, if preferred.
Individual control of a product or a
product group requires a double input
per product or product group, ie input
1 and 2 belong together, input 3 and
4, input 5 and 6 etc. This means that
up to five products or product groups
can be configured.
Function as interface is used when io-homecontrol®products are to
be controlled by external control devices that are not io-homecontrol®
compatible.
Function as interface
Functions of inputs
Function as interface
Functions of inputs
A thermostat set to 22°C will typically change
positions (ie open the window(s)) when the tempera-
ture rises above 23°C, and switch back (ie close the
window(s)) when the temperature has again fallen
below 21°C.
The window can also be operated with the wireless
control, if preferred.
Thermostatic control of a VELUX roof window by a non
io-homecontrol®compatible thermostat
A thermostat can be used for controlling automatic opening and closing
of windows depending on the temperature. A typical thermostat works
by means of a potential free change-over contact that switches between
two positions depending on the ambient temperature.
Standard setting of inputs:
OPEN/UP/ON is controlled by connecting 1 and
.
CLOSE/DOWN/OFF is controlled by connecting 2
and .
STOP is controlled by connecting both 1 and 2
and .
The top rows in the INPUT terminals are signal
/ .The bottom rows in the INPUT terminals are
common ground .

22
A B C D E
1 2 3 4
5 6 7 8 9 10
A B C D E
1 2 3 4
5 6 7 8 9 10
ETHERNET
ETHERNET
RESET
RESET
USB
USB
1
10 VELUX®VELUX®11
ENGLISH ENGLISH
If you have a VELUX INTEGRA®two-way
control pad KLR 200 (labelled with the
symbol 2), you can copy the registered
products from the control pad to the inter-
face. See how on pages 12-16.
Note: If you have both a one-way and a two-way control, you can copy
the registered products from both controls using VELUX INTEGRA®
two-way control pad KLR 200.
io-homecontrol®products must be registered in the interface to be
operational. You can register and operate up to 200 products.
Function as interface
Registration of products
If you only have a VELUX INTEGRA®
one-way remote control (labelled with the
symbol 1), you can copy the products
operated by this control to the interface.
See how on pages 17-19.
Function as interface
Functions of inputs
A single contact can be used for run-
ning products either up or down, for
instance for a blind.
Short press (under 1 second): The
product will run to end position.
Long press: The product will run until
the key is released.
A set of two contacts can be used for
running products both up and down
with variable stops by pressing both
contacts simultaneously.
A change-over contact can also be
used for running products both up and
down but stops are not possible, for
instance for a thermostat.
5 6 7 8 9 10A B C D E
1 2 3 4
5 6 7 8 9 10A B C D E
1 2 3 4
5 6 7 8 9 10A B C D E
1 2 3 4

22
A B C D E
1 2 3 4
5 6 7 8 9 10
A B C D E
1 2 3 4
5 6 7 8 9 10
ETHERNET
ETHERNET
RESET
RESET
USB
USB
A B C D E
1 2 3 4
5 6 7 8 9 10
A B C D E
1 2 3 4
5 6 7 8 9 10
ETHERNET
ETHERNET
RESET
RESET
USB
USB
1 sec
A B C D E
1 2 3 4
5 6 7 8 9 10
A B C D E
1 2 3 4
5 6 7 8 9 10
ETHERNET
ETHERNET
RESET
RESET
USB
USB
12 VELUX®VELUX®13
ENGLISH ENGLISH
Function as interface
Registration with VELUX INTEGRA®two-way control pad KLR 200
Tap on KLR 200.
Tap "Copy control pad".
Tap "New product".
Tap and continue to
step 6.
Connect the interface to the mains supply. When the light-emitting
diode flashes yellow, the interface is ready for configuration.
The illustrations below show how to copy the
contents from control pad KLR 200 to
interface KLF 200.
Function as interface
Registration with VELUX INTEGRA®two-way control pad KLR 200
Await green flash on the light-emitting diode and then continue to
the next step.
Note: In case of red flash, repeat steps 2-6.
Press the button on the back of the interface briefly (1 second)
with a pointed object. The light-emitting diode flashes white.
2 3
1
4 5
6
7
A B C D E
1 2 3 4
5 6 7 8 9 10
A B C D E
1 2 3 4
5 6 7 8 9 10
ETHERNET
ETHERNET
RESET
RESET
USB
USB

1 sec
A B C D E
1 2 3 4
5 6 7 8 9 10
A B C D E
1 2 3 4
5 6 7 8 9 10
ETHERNET
ETHERNET
RESET
RESET
USB
USB
14 VELUX®VELUX®15
ENGLISH ENGLISH
Function as interface
Registration with VELUX INTEGRA®two-way control pad KLR 200
The illustrations below show how to choose products from the control
pad and how to assign them to inputs on the interface.
Tap "Prepare one-way
control".
Tap "New product".
Tap "Add products".
Tap on KLR 200.
Scroll down the display and choose
the product(s) to be assigned to an
input 1. The products must be of
the same type.
Note: By tapping the icon, you can
see whether you have chosen the
intended products.
Tap 2.
Function as interface
Registration with VELUX INTEGRA®two-way control pad KLR 200
Connect the supplied wire bundle to the input terminal. Press the
RESET button on the back of the interface briefly (1 second) with a
pointed object. The light-emitting diode flashes white rapidly.
Step 15 must now be carried out within 2 minutes.
Note: Take care that the red and black wire ends do not touch each
other at this point, as they may short-circuit. A short-circuit will
result in an unintended registration of products.
Tick the chosen product(s) 1.
Tap 2.
8 9
12
10 11
2
1
13
14
2
1

1
10 sec
1 sec
16 VELUX®VELUX®17
ENGLISH ENGLISH
Function as interface
Registration with VELUX INTEGRA®two-way control pad KLR 200
When the white light-emitting diode is on, interface KLF 200 has been
configured as an interface. The configuration may take up to several
minutes.
Note: If you want to add more products to the interface, repeat
steps 9-15.
Function as interface
Registration with VELUX INTEGRA®one-way remote control
The illustrations below show how to copy the
contents from a one-way remote control to interface
KLF 200.
Press the RESET button on the back of the one-way remote control for
10 seconds with a pointed object.
Connect the interface to the mains supply and connect the supplied wire
bundle to input terminal. When the light-emitting diode flashes yellow,
the interface is ready for configuration.
Short-circuit wires (1 second) in the double input which is to control the
chosen product(s). It can take up to 1 minute before the light-emitting di-
ode flashes green and the product(s) is/are assigned to the input terminal
on the interface.
Note: When short-circuiting the same input again, previous configura-
tions will be replaced. This means that if a product is to be added to a
group which has already been configured, all the products in the group
have to be added again.
2
1
16
15

1 sec
1 sec
A B C D E
1 2 3 4
5 6 7 8 9 10
A B C D E
1 2 3 4
5 6 7 8 9 10
ETHERNET
ETHERNET
RESET
RESET
USB
USB
18 VELUX®VELUX®19
ENGLISH ENGLISH
Short-circuit wires (1 second) in the double input which is to control the
chosen product(s). The light-emitting diode flashes green.
Note: When short-circuiting the same input again, previous configura-
tions will be replaced. This means that if a product is to be added to a
group which has already been configured, all the products in the group
have to be added again.
When the white light-emitting diode is on, interface KLF 200 has been
configured as an interface.
Note: If you want to add more products to the interface, repeat
steps 1-4.
Function as interface
Registration with VELUX INTEGRA®one-way remote control
Function as interface
Registration with VELUX INTEGRA®one-way remote control
Press the RESET button on the back of the interface briefly (1 second)
with a pointed object. The light-emitting diode flashes white. Step 4
must now be carried out within 2 minutes.
5
4
3

A B C D E
1 2 3 4
5 6 7 8 9 10
A B C D E
1 2 3 4
5 6 7 8 9 10
ETHERNET
ETHERNET
RESET
RESET
USB
USB
A B C D E
1 2 3 4
5 6 7 8 9 10
A B C D E
1 2 3 4
5 6 7 8 9 10
ETHERNET
ETHERNET
RESET
RESET
USB
USB
10 sec
A B C D E
1 2 3 4
5 6 7 8 9 10
A B C D E
1 2 3 4
5 6 7 8 9 10
ETHERNET
ETHERNET
RESET
RESET
USB
USB
20 VELUX®VELUX®21
ENGLISH ENGLISH
Function as interface
Resetting
Press the RESET button on the back of the interface for 10 seconds with
a pointed object until the red light-emitting diode is on. After this, the
light-emitting diode will turn yellow followed by a red flash.
When the light-emitting diode flashes yellow, the interface has been
reset. This may take up to 1 minute.
When resetting, all settings will be deleted and the interface reset to
factory settings.
Function as interface
Function of outputs
OUTPUT A connects to INPUT 1 and 2.
OUTPUT B connects to INPUT 3 and 4 etc.
The output function is used together with an intelligent building instal-
lation (IBI) to get feedback from KLF 200. The output function gives the
user feedback as to whether an action has been executed, eg if the win-
dow has been closed. As feedback, the built-in output relay is activated
for 2 seconds.
Intelligent building installations
io-homecontrol®products can be combined with most intelligent building
installations (IBI). The IBI system must include an output module with
one or more programmable outputs. When the outputs from the IBI have
been connected to the input terminals on the interface, the relevant
io-homecontrol®products can be controlled via the interface. With two
outputs it is possible to control both of the functions and in an
io-homecontrol®product or a group of io-homecontrol®products.
5 6 7 8 9 10A B C D E 1 2 3 4
Max 30 V AC/DC
Max 50 mA
5 6 7 8 9 10A B C D E 1 2 3 4
INPUT INPUTOUTPUT
(A) (B) (C) (D) (E)

A B C D E
1 2 3 4
5 6 7 8 9 10
A B C D E
1 2 3 4
5 6 7 8 9 10
ETHERNET
ETHERNET
RESET
RESET
USB
USB
22 VELUX®VELUX®23
ENGLISH ENGLISH
Function as repeater
Tap "New product".
Tap on KLR 200.
Tap "Add new products". Tap .
Function as repeater
The repeater function extends the operation range
of controls in the system by transmitting received
wireless commands. When used as a repeater, the
interface is therefore to be placed approximately
halfway between the controls and the
io-homecontrol®products to be operated.
The repeater function must be registered in two-
way controls as if it were a product in the same
way as other io-homecontrol®products.
Note: The repeater function cannot be used with
one-way controls.
The example shows how the repeater function is
activated in the interface and registered in a two-
way control pad KLR 200.
Note: Up to three interfaces in a system can be set
to repeater function.
The operation range of controls cannot be
extended further in the same direction by placing
more repeaters after each other as commands can
be sent only via one repeater.
Connect the interface to the
mains supply. When the light-
emitting diode flashes yellow,
the interface is ready to be
configured.
2
4
3
5
1

Repeater
24 VELUX®VELUX®25
ENGLISH ENGLISH
Function as repeater
If this image appears, tap
when the control pad has found
the products.
You can now operate the products.
If this image appears, turn off the
control pad.
You can now operate the products.
When the blue light-emitting
diode is on, the interface is
configured as a repeater.
Now, one of the two images below (A or B) will appear on the
display:
A
B
6
7
A B C D E
1 2 3 4
5 6 7 8 9 10
A B C D E
1 2 3 4
5 6 7 8 9 10
ETHERNET
ETHERNET
RESET
RESET
USB
USB

26 VELUX®VELUX®27
ENGLISH ENGLISH
Own notes Own notes
5 6 7 8 9 10A B C D E 1 2 3 4
INPUT INPUTOUTPUT
(A) (B) (C) (D) (E)
Product
A
B
C
D
E
1 2
3 4
5 6
7 8
9 10

AR: VELUX Argentina S.A.
348 4 639944
AT: VELUX Österreich GmbH
02245/32 3 50
AU: VELUX Australia Pty. Ltd.
1300 859 856
BA: VELUX Bosna i Hercegovina d.o.o.
033/626 493, 626 494
BE: VELUX Belgium
(010) 42.09.09
BG: ВЕЛУКС България ЕООД
02/955 99 30
BY: Унитарное предприятие
"ВЕЛЮКС Мансардные Окна"
(017) 329 20 89
CA: VELUX Canada Inc.
1 800 88-VELUX (888-3589)
CH: VELUX Schweiz AG
062 289 44 45
CL: VELUX Chile Limitada
2 953 6789
CN: VELUX (CHINA) CO. LTD.
0316-607 27 27
CZ: VELUX Česká republika, s.r.o.
531 015 511
DE: VELUX Deutschland GmbH
01806 / 33 33 99
Festnetz: 0,20 €/Anruf
Mobilfunk: max. 0,60 €/Anruf
DK: VELUX Danmark A/S
45 16 45 16
EE: VELUX Eesti OÜ
621 7790
ES: VELUX Spain, S.A.
91 509 71 00
FI: VELUX Suomi Oy
0207 290 800
FR: VELUX France
0821 02 15 15
0,119€ TTC/min
GB: VELUX Company Ltd.
01592 778 225
HR: VELUX Hrvatska d.o.o.
01/5555 444
HU: VELUX Magyarország Kft.
(06/1) 436-0601
IE: VELUX Company Ltd.
01 848 8775
IT: VELUX Italia s.p.a.
045/6173666
JP: VELUX-Japan Ltd.
0570-00-8145
LT: VELUX Lietuva, UAB
(85) 270 91 01
LV: VELUX Latvia SIA
67 27 77 33
NL: VELUX Nederland B.V.
030 - 6 629 629
NO: VELUX Norge AS
22 51 06 00
NZ: VELUX New Zealand Ltd.
0800 650 445
PL: VELUX Polska Sp. z o.o.
(022) 33 77 000 / 33 77 070
PT: VELUX Portugal, Lda
21 880 00 60
RO: VELUX România S.R.L.
0-8008-83589
RS: VELUX Srbija d.o.o.
011 20 57 500
RU: ЗАО ВЕЛЮКС
(495) 640 87 20
SE: VELUX Svenska AB
042/20 83 80
SI: VELUX Slovenija d.o.o.
01 724 68 68
SK: VELUX Slovensko, s.r.o.
(02) 33 000 555
TR: VELUX Çatı Pencereleri
Ticaret Limited Şirketi
0 216 302 54 10
UA: ТОВ "ВЕЛЮКС Україна"
(044) 2916070
US: VELUX America LLC
1-800-88-VELUX
www.velux.com
DIRECTIONS FOR USE FOR VELUX INTEGRA®KLF 200. ©2016 VELUX GROUP
®VELUX, THE VELUX LOGO, VELUX INTEGRA, io-homecontrol AND THE io-homecontrol LOGO ARE REGISTERED TRADEMARKS USED UNDER LICENCE BY THE VELUX GROUP
Table of contents
Other Velux Recording Equipment manuals