3
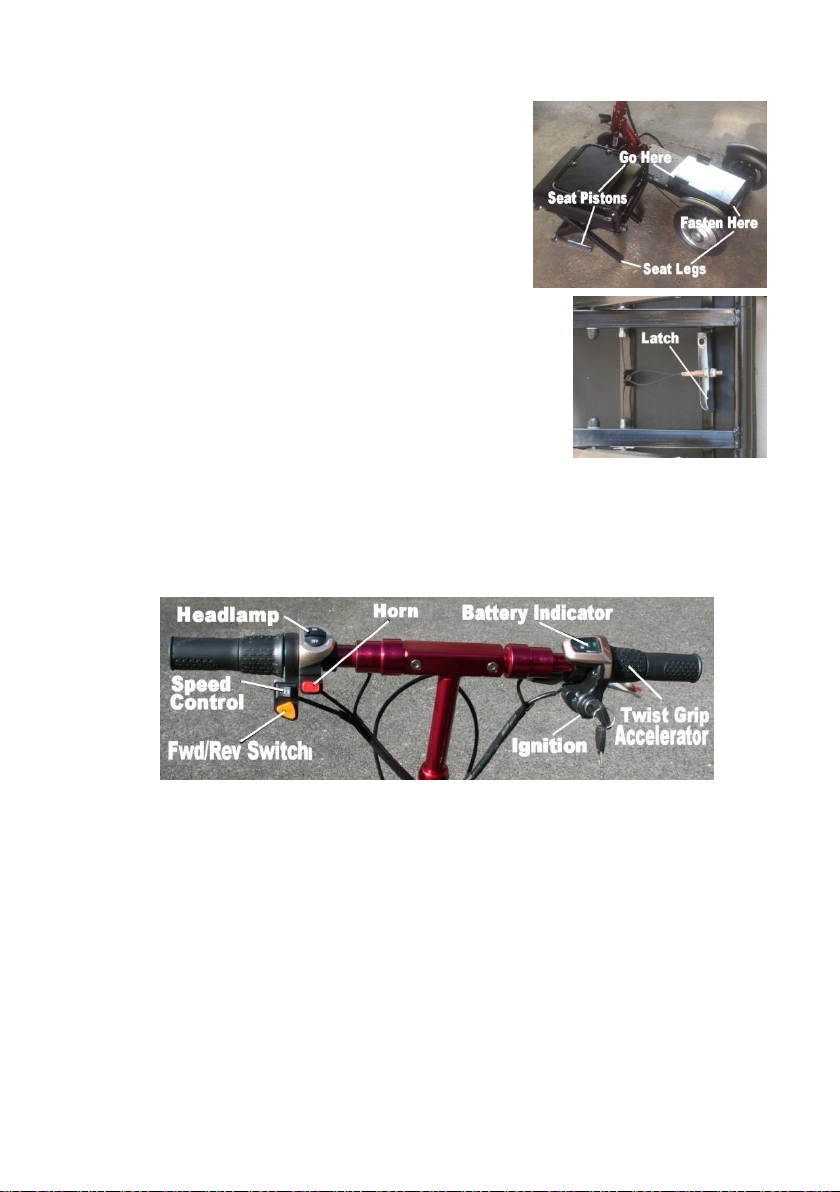
2. Setting the handle bars:
a. Lift each handlebar to the normal
working position. The barrel connector
is spring loaded and will click into a
locking position.
b. To lower each handlebar apply
pressure to the barrel connector and
slide it towards the handle grip until the handlebar can be released.
This will ensure that the steering
column does not accidentally
collapse.
!"#$%&'() '(*&$+,&'!(*-
!" #$%&'()$* +,- .&$+/&' 0+--/)$* .&'12$3
!" #$%&' ()'**%+, -$' *-'')%+, ./&01+ &!-.$ (0&& -$' *-'')%+, ./&01+
-/ -$' 0()%,$- (/*%-%/+"
!" #$%& '& ($% )'&*+ ,-.'('-&
($% .(%%/'&0 column will lock
!" #$%$&'$ ()$ %&(*) +,-., (. ()$ /-0&% +.'-(-.0"
!" #$%& '(& )$*+,-. (/-!)& 0-',) ,' ,1
1,'',-. 2,'(,- '(& 1033$4'
54/6&2$4+"
!"# $%&'# (")*( +"# ,)-.$/' "&/0,#
$/ +"# 1/,)-.#0 2)($+$)/3
!" #$%& %'(% %'& )&*% '(+, -.(/& '(0 ()$!/1+g mechanism which will
stop the scooter from moving. The scooter will not operate when the
handbrake is on.
e. Tighten the steering column lock.
d. To move the steering column to amore
comfortable position unscrew the
steering column lock, press the spring
loaded locking pin and slide the steering
column to anew position. The locking
pin will register in the next hole position
and lock.