Gravity scooters PIXIES User manual

1
MANUAL DE USUARIO (P.2)
OWNER’S MANUAL (P.10)
MODE D’EMPLOI (P.18)
MANUALE UTENTE (P.26)

2
CONTENIDO
1. USO DEL MANUAL
2. FELICITACIONES
3. LÍMITES GENERALES DE USO.
4. NORMAS DE SEGURIDAD
5. ANTES DE CADA USO
6. CONSEJOS GENERALES
7. MANTENIMIENTO DEL PATINETE
7.1 Ruedas
7.2 Horquilla y juego de dirección
7.3 El manillar y la potencia
7.4 El chasis
7.5 Sistema de frenos
7.6 Tabla de madera, protección de aluminio y guardabarros
8. GARANTÍA.
1. USO DEL MANUAL
- Este manual ha sido elaborado para ayudarle a aprovechar al máximo su GRAVITY. Lea atentamente,
comprenda y siga las instrucciones de este manual. Utilícelo para asegurar un buen mantenimiento de su
GRAVITY.
- Para cualquier consulta póngase en contacto con nosotros a través del correo electrónico. Le orientaremos
en las operaciones más complicadas y le aconsejaremos sobre cualquier cuestión referida a su GRAVITY.
- El no respeto de las advertencias e instrucciones de este manual puede causar daños al patinete y por
consiguiente: accidentes, lesiones graves o la muerte.
- El incumplimiento de las instrucciones contenidas en este manual es responsabilidad del usuario del patinete.
- Este manual cubre todos los modelos GRAVITY Scooters. Existen distintos modelos GRAVITY Scooters con
distinto equipamiento, por lo que este manual contiene información variada que pueden no afectar a su
patinete. Algunas ilustraciones pueden variar con respecto a modelos del catálogo vigente.
- El usuario de este producto reconoce y acepta los riesgos asociados a la conducción de patinetes que
comprenden entre otros, pero no limitados a estos, el riesgo de rotura de cualquier parte o componente de un
GRAVTIY que podría causar accidentes, lesiones graves o la muerte, comprando y utilizando este producto, el
usuario reconoce y acepta expresa, voluntaria y deliberadamente estos riesgos de negligencia activa o pasiva
de GRAVITY Scooters, o de defectos escondidos, latentes o manifestados del producto. El usuario acepta
además de eximir a GRAVITY Scooters y a sus distribuidores y revendedores de cualquier responsabilidad por
eventuales daños en los límites previstos por la ley.
- GRAVITY Scooters se reserva el derecho de modificar el patinete, en cualquier momento y sin preaviso.
NOTA: Para horquillas de suspensión y los frenos de disco le adjuntamos el manual del proveedor.

3
2. FELICITACIONES
Usted ha elegido un patinete fabricado por GRAVITY Scooters. Le agradecemos la confianza que nos deposita.
Su GRAVITY es un patinete derivado de continuas investigaciones y numerosas pruebas. Nuestros esfuerzos
para asegurar la calidad del producto van dirigidos a dar la seguridad, resistencia, comodidad y sobre todo una
calidad-precio que satisfaga les necesidades de nuestros clientes. Este manual cubre toda la gama de patinetes
GRAVITY Scooters.
En la siguiente descripción gráfica del patinete se muestran las partes más importantes de su GRAVITY. Su
conocimiento le permitirá comprender mejor este manual.
(1) chasis; (2) amortiguación
delantera; (3) frenos de disco; (4) rueda
delantera; (5) plancha de protección; (6)
rueda trasera; (7) guardabarros; (8) tabla;
(9) manetas; (10) manguitos; (11) manillar;
(12) potencia.
3. LÍMITES GENERALES DE USO
Hay diferentes modelos de patinetes diseñados para una variedad de modalidades. El uso en condiciones
distintas de las aquí reseñadas podría provocar daños en la bicicleta e incluso un accidente.
PIXIES: Peso máximo del piloto 65 kg.
M10: Peso máximo del piloto 120 kg. No apto para saltar.
PULKA: Peso máximo del piloto 100 kg. No apto para saltar.
PULKA R: Peso máximo del piloto 85 kg. No apto para saltar. No apto para caminos en malas condiciones.
IRON COLS Y MUSHING PRO: Peso máximo del piloto 140 kg.
4. NORMAS DE SEGURIDAD
Aprenda a usar su GRAVITY siguiendo nuestras recomendaciones, no exceda nunca en sus posibilidades y sus
límites, use el equipo de seguridad adecuado: casco de su tamaño y debidamente abrochado, indumentaria de
protección y protecciones oculares.
Compruebe que tanto los elementos de protección, el chasis y todos los componentes están en buen estado
con una revisión visual para buscar posibles roturas y así poder reemplazar inmediatamente el componente o
parte dañada.

4
Si Ud. Pesa 70 Kg o más debe tener más cuidado y revisar más a conciencia su GRAVITY para buscar fisuras,
deformaciones o pérdidas, sobre todo en los modelos de aluminio. En los modelos Pixies debe aumentar el
cuidado y revisar más a conciencia el patinete a partir de los 50 Kg del piloto.
Es muy importante seguir las instrucciones de mantenimiento y reparación de este manual ya que de no hacerlo
podría ocurrir un accidente.
Preste mucho cuidado sobre terreno mojado ya que el antideslizante puede no trabajar correctamente y podría
resbalar de la tabla.
Lleve pantalones cortos o ajustados para que no entorpezcan ni se enganchen en la rueda trasera.
5. ANTES DE CADA USO
No use el patinete si no ha superado los controles preliminares citados a continuación. Elimine cualquier
anomalía antes de cada uso.
Antes de cada paseo o descenso: compruebe su GRAVITY
Antes de cada paseo compruebe su patinete y componentes con la siguiente lista. No se trata de un sistema de
inspección completo, pero si orientativo. Recuerde que si detecta algún problema en su patinete, en caso de
no poder reparar, tiene que llevarla a un taller especializado.
Compruebe el chasis en busca de signos de fatiga o elevadas tensiones
Inspeccione cuidadosamente el chasis para detectar signos de fatiga: arañazos, grietas, abolladuras,
deformaciones o decoloraciones. Si alguna parte muestra posibles daños no use el patinete y póngase en
contacto con nosotros en info@gravity-scooters.com. (Ver garantía en el punto 7 de este manual).
Compruebe la presión de inflado
Infle las ruedas con la presión de aire recomendada en el lateral de los neumáticos. Tenga asimismo en cuenta
su peso. Una presión alta proporciona un mejor comportamiento en superficies duras como el asfalto, mientras
que bajas presiones son mejores para rodar fuera de carreteras. Presión baja facilita los pinchados. Mínimo 2Kg
de presión.
PRECACUCIÓN: Las mangueras de aire de las estaciones de servicio inflan las ruedas demasiado rápido, e
indican presiones que no son correctas. Use bombas manuales para inflar las ruedas.
Compruebe el manillar y potencia
Asegúrese de que la potencia y el manillar están correctamente posicionados y apretados.
Inspeccione cuidadosamente el manillar y la potencia para detectar signos de fatiga: arañazos, grietas,
abolladuras, deformaciones o decoloraciones. Si alguna parte muestra posibles daños o fatiga, cámbiela antes
de montar en su patinete. Asimismo compruebe que los tapones del manillar están correctamente colocados
en los extremos.
Compruebe el ajuste de la suspensión
Asegúrese de que los componentes de suspensión están ajustados a su gusto, y que ningún elemento de
suspensión llega a su tope. La suspensión afecta en el comportamiento de su patinete, por lo que un ajuste
correcto es muy importante. Si la suspensión se comprimiese tanto que llegara a bloquear la horquilla, podría
perder el control. Para más información sobre el ajuste de la suspensión, consulte el manual adjunto del
proveedor o fabricante de la horquilla.
Compruebe la fijación de ambas ruedas
Para una conducción más segura, las ruedas del patinete deben estar firmemente unidas a la horquilla y al
chasis. Las ruedas están unidas por medio de cierres rápidos que deben ser comprobados antes de cada paseo
o descenso; o por tornillos que deben ser apretados antes de cada uso.

5
Como ajustar el cierre rápido: para un adecuado y seguro ajuste del cierre rápido, lea y siga las siguientes
instrucciones cuidadosamente:
1 Abra la palanca de bloqueo rápido y coloque la rueda en la puntera asegurándote de que el eje está
bien asentado.
ok
incorrecto
2 Coloque la palanca a 45º y apriete a mano la tuerca del cierre rápido en sentido horario hasta que no
pueda girar más.
3 Accione la palanca en sentido de apriete.
4 Si la palanca puede ser abierta fácilmente significa que la fuerza de fijación es insuficiente. En este caso
ha de reapretar la tuerca del cierre hasta la posición de cerrado. En caso de que la fuerza a efectuar
para girar la palanca fuera excesiva repita la operación anterior pero aflojando la tuerca del cierre en
sentido contrario de las agujas del reloj. Efectúe estas operaciones tantas veces como sea necesario
hasta notar que la rueda está bien apretada.
5 El cierre rápido se debe de orientar de tal forma que no interfiera con otros accesorios del patinete.
6 En caso de que falle el cierre rápido lleve el patinete a su distribuidor autorizado.
No apriete el eje rápido como si fuera una tuerca; no resultara suficientemente rígida la unión como para
mantener la rueda en su posición.
PELIGRO: Un cierre rápido que no esté ajustado apropiadamente puede hacer que la rueda se afloje o se
salga inesperadamente, provocando una pérdida de control y una posible caída. Asegúrese de que el cierre
rápido esta ajustado y cerrado correctamente antes de usar el patinete.
Comprobación del ajuste correcto del cierre rápido:
Eleve el patinete y golpee la zona superior de la rueda con la mano. La rueda no debe salirse, aflojarse, o
moverse de un lado a otro.
Asegúrese de que la palanca del cierre rápido no puede rotar paralelamente al neumático.
Compruebe que las ruedas están alineadas
Gire cada rueda y mire la llanta al pasar por las zapatas de freno y el chasis. Si el giro de la llanta no es uniforme,
lleve su patinete a su distribuidor autorizado.
Compruebe sus frenos
Asegúrese de que todos los cables y los demás componentes del sistema de frenado estén correcto
posicionamiento y que el sistema de frenado funcione correctamente. (Ver instrucciones adjuntas del
fabricante).
PELIGRO: Si sus frenos no funcionan correctamente, puede perder el control y caer. Inspeccione
cuidadosamente el sistema de frenos antes de cada paseo o descenso, y no use el patinete hasta solucionar
cualquier problema que pueda surgir con el sistema de frenos.
6. CONSEJOS GENERALES
Mantenga limpio su patinete
Para un correcto funcionamiento, su patinete debe de estar limpio.

6
Use un lugar adecuado para guardar su patinete.
Cuando no use el patinete, déjelo en una zona protegido de la lluvia, la nieve, y el sol… La lluvia y la nieve pueden
causar la corrosión del metal y la descomposición de la madera. Los rayos ultravioletas del sol pueden decolorar
la pintura, rasgar la goma o plásticos del patinete.
Guarde el patinete elevado del suelo y dejando los neumáticos a media presión. No deje el patinete cerca de
motores eléctricos, porque el ozono de los motores destruye la goma y la pintura. Antes de volver a usar el
patinete asegúrese de que está en condiciones óptimas.
No lave su patinete con una máquina de agua a presión. Esto puede estropear los frenos mecánicos, e incluso
arrancar la pintura del chasis.
Cambios de horquilla, chasis o componentes
La modificación de cualquier parte del patinete, incluyendo el chasis, la horquilla y el resto de componentes,
pueden que hagan que su patinete no sea seguro y esto significa que el patinete ya no cumple con nuestras
especificaciones y, por tanto, la garantía del patinete quedará anulada.
PRECACUCIÓN: Nunca modifique el conjunto del chasis. Tampoco realice operaciones de lijado, taladro,
rellenado o cualquier otra operación que pueda dañar el chasis.
Proteja su patinete de posibles golpes
Evite cualquier caída del patinete ya que esto puede dañar el manillar, la tabla o cualquier otro componente.
También el uso incorrecto de portaequipajes puede dañarlo.
7. MANTENIMIENTO DEL PATINETE
Los intervalos de mantenimiento, el rendimiento, la seguridad y la vida útil del patinete y sus componentes
dependen del mantenimiento correcto y oportuno. Si utiliza su GRAVITY en condiciones muy adversas, es
necesario llevar a cabo el mantenimiento con mayor frecuencia.
Realice los siguientes procedimientos de mantenimiento preventivo con la periodicidad adecuada. Si durante
la inspección se comprobara algún elemento deteriorado o que no cumple los requisitos de funcionamiento,
no use el patinete hasta que no haya sido reparado.
Las distintas partes del patinete tienen una vida útil al desgaste, tensión y fatiga. La fatiga hace referencia a las
fuerzas de pequeña magnitud, que por repetición en un gran número de ciclos, pueden causar fallo de material.
La vida útil de las diferentes partes varía según el diseño, el material, el uso y el mantenimiento. Algunos posibles
signos de fatiga en el patinete son: abolladuras, grietas, rasguños, deformaciones y decoloraciones.
7.1 Ruedas
INSPECCIÓN: Antes de cada uso compruebe que el cierre rápido de las ruedas está en posición de cerrado
y bien apretados. Compruebe que las ruedas están bien centradas y son redondas haciéndolas girar, en caso de
que el giro de la llanta no sea uniforme, acuda a un taller especializado. Asegúrese de que las ruedas están
infladas y que la presión sea la correcta. Inspeccione las cubiertas para comprobar desgastes o cualquier otro
tipo de daño. Si tuvieran algún corte o abertura que hagan visible la cámara interior, cámbielas antes de salir.
Las llantas deben estar limpias para asegurar un buen frenado.
Cada cinco salidas inspeccione los radios que no estén flojos, dañados o rotos.
Si el conjunto de la rueda no está en condiciones puede correr el riesgo de accidente.
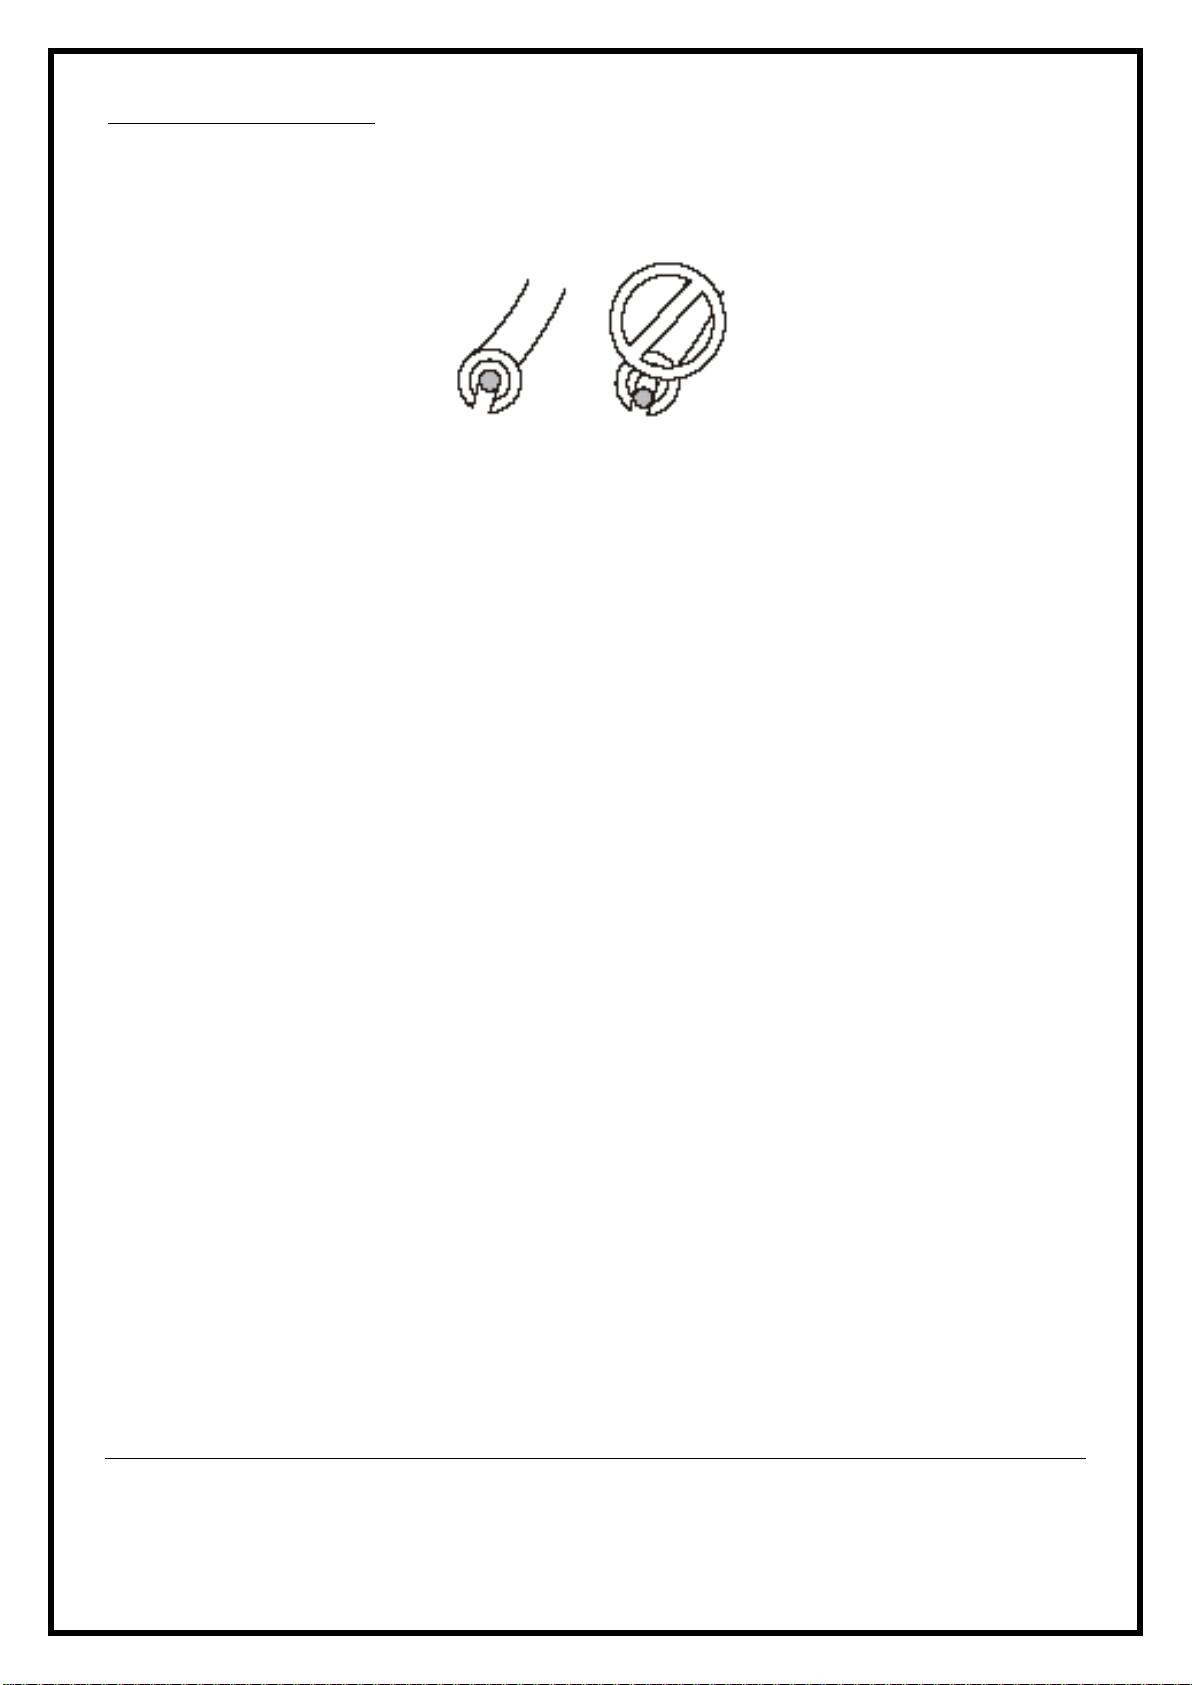
Un carrete mal ajustado puede hacerle perder el control y caer. Inspeccione los carretes antes de cada uso.
Cada 15 salidas compruebe que los carretes estén bien ajustados. Eleve la rueda delantera y trate de mover la
llanta de izquierda a derecha. Mire y sienta si la llanta tiene holgura. Haga girar la rueda y escuche si hay algún
ruido extraño en el movimiento. Si el carrete parece suelto o hace ruidos extraños es que necesitará ser
ajustado. Repita éste procedimiento con la rueda trasera.

7
Cada año hay que engrasar los carretes. Se necesita conocimientos y herramientas especiales por lo que se
recomienda llevar el patinete a un taller especializado.
Cada mes compruebe el desgaste de las llantas. Si cambia la llanta asegúrese de montar el fondo llanta para
evitar que los radios pinchen la cámara.
Una vez al año lubrique el cierre rápido con lubricante sintético donde gira la palanca.
(Vea como ajustar el cierre rápido en el apartado ANTES DE CADA USO).
7.2 Horquilla y juego de dirección
El juego de dirección es el conjunto de rodamientos que permite la rotación de la horquilla, potencia y manillar
en el patinete.
INSPECCIÓN: Una vez al mes compruebe que el juego de dirección no está demasiado flojo o prieto. En éstos
casos no use el patinete y llévelo a un taller especializado.
Comprobar holguras en el ajuste del juego de dirección: colóquese detrás del manillar sin subirse en el patinete
ambos pies en el suelo. Apriete el freno delantero mientras mueve el patinete hacia delante y detrás. Vea,
escuche y sienta si el juego de dirección esta flojo. NOTA: no confundir con el juego de la botella de la horquilla.
Comprobar el apriete en el ajuste del juego de dirección: colóquese detrás del manillar sin subirse en el patinete
con ambos pies en el suelo y gire la horquilla y el manillar de izquierda a derecha y viceversa. Vea, escuche y
sienta si el juego de dirección delantero está demasiado prieto de forma que haga ruido al girarlo o se enganche
en ciertos puntos.
Una vez al año se debe engrasar el juego de dirección para esto lleve el patinete a un taller especializado.
Las horquillas de suspensión necesitan ser lubricadas regularmente para que trabajen de forma suave y tengan
larga vida. LEA LAS INSTRUCCIONES E INFÓRMESE EN EL MANUAL ADJUNTO DEL PROVEEDOR.
IMPORTANTE: El cambio de horquilla o la variación de la longitud de suspensión de esta pueden afectar en
la capacidad de giro del patinete, crear tensiones demasiado elevadas o efectos de fatiga en el patinete.
7.3 El manillar y potencias.
Es importante asegurar que la posición del manillar sea lo más ergonómica posible y debe ajustar la posición
del manillar de manera que le resulte más cómoda.
INSPECCIÓN: Cada vez que salga con su patinete compruebe que todos los tornillos de la potencia estén
bien apretados. Compruebe la unión entre la potencia y el manillar intentando mover éste respecto de la rueda
delantera. Compruebe también que la potencia está alineada con la rueda delantera.
7.4 Cuidado del cuadro
Por motivos de seguridad y durabilidad cuide el cuadro de su patinete y tenga en cuenta lo siguiente:
INSPECCIÓN: Antes de cada salida inspeccione cuidadosamente el cuadro para comprobar si hay signos de
fatiga como arañazos, grietas, abolladuras, deformaciones, decoloraciones, etc. En el caso de que el cuadro
estuviera dañado póngase en contacto con GRAVITY Scooters y bajo ningún concepto utilice su patinete.
INFORMACIÓN SOBRE EL CUADRO
Limpie el cuadro con un paño con agua y jabón. El uso de disolventes industriales o productos químicos fuertes
puede dañar la pintura del cuadro.
PELIGRO: No modifique el conjunto del cuadro de ninguna forma, ni altere su geometría. Lijar, taladrar, cortar
o cualquier otra operación hecha sobre el patinete puede influir sobre la seguridad de este y por consiguiente
provocar un accidente.

8
7.5 Sistema de frenado
Los distintos tipos de frenos tienen capacidades de frenada distintas. Si usted no está satisfecho, o cómodo con
su sistema de frenos, consulte a un taller especializado o directamente a GRAVITY Scooters.
Con cualquier sistema de frenos, un fallo en el ajuste, mantenimiento, o uso de los frenos puede provocar una
pérdida de control del patinete.
Si no está seguro del ajuste de sus frenos, o sospecha de algún problema tanto en los frenos, cables o sistema
hidráulico, no use su patinete y llévelo a un taller especializado.
Frenos de disco hidráulico
Este sistema de freno está formado por: la maneta de freno/ deposito de fluido, tubo hidráulico, pinzas del
freno y las pastillas.
INSPECCIÓN: Antes de usar el patinete apriete fuertemente las manetas de freno. En el caso de que la
maneta, al apretarla, llegue hasta el manillar el freno debe ser purgado. Lleve el patinete a un taller
especializado.
Compruebe que no hay aceite, grasa u otro tipo de suciedad en el disco.
Cada 10 salidas compruebe que las pastillas del freno de las pinzas no están gastadas. Si tienen un grosor inferior
a 1mm deben ser cambiadas.
Compruebe cada 10 salidas que no hay retorcimientos ni fugas en la manguera. Si detecta alguna parte del
sistema hidráulico averiado lleve el patinete a un taller especializado.
AJUSTE: LEA LAS INSTRUCCIONES E INFÓRMESE EN EL MANUAL ADJUNTO DEL PROVEEDOR.
PRECACUCIÓN: Los frenos de disco pueden calentarse mucho y pueden estar afilados y cortar. Evite
tocarlos después de su uso. El líquido de los frenos de disco es muy corrosivo. Evite el contacto con la piel o con
la pintura del patinete porque corroe la pintura.
Frenos de disco mecánico o V-Brake
Este sistema de frenos está formado por: palanca de freno, cable de freno y funda, pinza de freno y pastillas.
INSPECCIÓN: Antes de cada uso apriete las manetas de freno firmemente 10 veces. En el caso de que la
maneta llegue al manillar el freno debe ser ajustado. Lleve el patinete a un taller especializado.
Compruebe que no hay aceite, grasa u otro tipo de suciedad en el disco.
Cada 10 salidas compruebe que las pastillas del freno de las pinzas no están gastadas. Si tienen un grosor inferior
a 1mm deben ser cambiadas.
Cada 10 salidas compruebe que los cables de freno de su patinete no tengan ni retorcimientos, ni óxido, hilos
rotos o extremos deshilachados, que la funda no tenga extremos doblados, cortes o desgastes.
Si detecta alguna parte del sistema de frenado mecánico averiado lleve el patinete a un taller especializado.
No lavar con agua a presión o podría entrar agua en los cables y oxidarlos.
AJUSTE: LEA LAS INSTRUCCIONES E INFÓRMESE EN EL MANUAL ADJUNTO DEL PROVEEDOR.
7.6 Tabla de madera, protección aluminio y guardabarros.
La tabla superior esta forrada con una superficie antideslizante o lija. En el interior del chasis va otra tabla de
madera atornillada a la tabla superior por un juego de anclajes. El anclaje de la tabla superior, es fijo y va clavado
a la madera.
Antes de cada salida hacer una revisión visual de todo el sistema de anclaje y apretar todo aquello que se haya
aflojado.
CORRECTA POSICIÓN DE PIES
El gran tamaño de la tabla permite la colocación de los dos pies a la vez sobre ella.
Siempre hay que llevar una correcta posición de pies, tal y como se muestra seguidamente y las rodillas
flexionadas para una buena amortiguación del cuerpo y así prevenir posibles lesiones de espalda.

9
La colocación de los pies tal y como se muestra en el croquis 1 es ideal para el descenso. El pie de delante se
tiene que colocar encima de la curva de la madera, con el tubo bajante del chasis haciendo de tope; el pie
trasero atravesado. Esto nos permitirá guiar la tabla.
La colocación de los pies tal y como se muestra en el croquis 2 la utilizaremos en plano, es la posición que nos
permitirá remar. No usar nunca esta posición para el descenso ya que se puede perder el dominio del patinete
y por consiguiente caer.
La protección de aluminio protege los bajos del chasis de golpes y arañazos. Va atornillada a la tabla interior por
debajo y al chasis por delante. La tabla superior del IRON COLS tiene dos tiras protectoras de aluminio para
protegerla de los golpes. Antes de cada salida, comprobar cuidadosamente que las protecciones de aluminio
no tengan rebabas o bordes cortantes.
El guardabarros protege que el pie no entre en contacto con la rueda. Va fijado con tornillos.
Antes de cada salida hacer una revisión visual de todo el sistema de anclaje y apretar todo aquello que se haya
aflojado.
8. GARANTÍA.
La garantía cubre todo defecto de material o de fabricación, con la sustitución de las piezas defectuosas por
piezas compatibles para el mismo uso.
APLICACIÓN DE LA GARANTÍA:
• Ausencia de impactos. El producto no debe mostrar signos de daños debido a condiciones anormales de uso.
• El producto debe ser utilizado de acuerdo con las instrucciones de uso.
• Las piezas originales no deben ser sustituidas por piezas no autorizadas.
LA GARANTÍA NO CUBRE:
• Los daños que implican la responsabilidad de un tercero o son el resultado de un error intencionado.
• Los daños como consecuencia del mantenimiento o del uso no conforme a las prescripciones del fabricante
o negligencia.
• Piezas de desgaste (bombillas, cables, pastillas de freno, llantas, neumáticos, cámaras de aire etc.).
• El producto que haya sido objeto de modificaciones
• Daños causados por incendio, rayo, tormenta, vandalismo o el transporte sin garantía.
DURACIÓN DE LA GARANTÍA:
• 5 años para el cuadro y tablas a partir de la fecha de compra.
• 2 años para los componentes a partir de la fecha de compra.
1
2

10
CONTENTS
1. ABOUT THIS MANUAL
2. CONGRATULATIONS
3. GENERAL LIMITS OF USE
4. SAFETY RECOMMENDATIONS
5. BEFORE EACH USE
6. GENERAL ADVICE
7. SCOOTER MAINTENANCE
7.1 Wheels
7.2 Fork and headset
7.3 Saddle and seat post
7.4 Frame
7.5 Brake systems
7.6 Wood board, aluminum protection and mudguard
8. WARRANTY
1. ABOUT THIS MANUAL
_____________________________________________________________________
- This manual has been created to help you get the most out of your GRAVITY. Carefully read, understand and
follow the instructions given in this manual. Keep it in a safe place for future reference.
- Please contact us through e-mail if you have any questions. We will guide you in the most complicated
procedures and give you advice about anything referring to you GRAVITY.
- Failure to follow the warnings and instructions could result in failure of the product, an accident, personal
injury or death.
- Failure to comply with the instructions in this manual is the sole responsibility of the user of the scooter.
- This manual covers all the GRAVITY Scooters models. GRAVITY Scooters produces various models with different
accessories and equipment. As a result, this manual may contain information that does not concern your
scooter. Some illustrations may differ with respect to the models detailed in the current catalogue.
- The user of this Gravity scooter product expressly recognizes and agrees that there are risks inherent in
scooter riding, including but not limited to the risk that a component of your suspension system can fail,
resulting in an accident, personal injury or death. By his/her purchase and use of this GRAVITY scooter product,
the user expressly, voluntarily and knowingly accepts and assumes these risks, including but not limited to the
risk of passive or active negligence of GRAVITY scooters or hidden, latent or obvious defects in the product, and
retailers harmless to the fullest extent permitted by law against any resulting damages. The user further agrees
to exempt GRAVITY Scooters, its distributors and resellers all responsibility for any damage to the limits set by
law.
- GRAVITY Scooters reserves the right, in its sole discretion, to make changes to the product at any time and
without prior notice.
NOTE: For a suspension forks and brake system, please refer to the supplier’s manual.

11
2. CONGRATULATIONS
You have chosen a scooter made for GRAVITY Scooters. Thank you for putting your faith in us. Your GRAVITY is
a scooter product of continuous research and multiple testing. Our efforts to ensure the quality of the product
aim at safety, resistance, comfort, and, above all, a quality-price rate that satisfies the needs of our customers.
Special tools and skills are required when assembling and setting up your GRAVITY scooter for the first time, a
process that only specialized personnel should carry out.
The names of the most important parts of your Gravity are given in the diagram below:
3. GENERAL LIMITS OF USE
There are many different kinds of scooter uses, designed for a variety of purposes. Failure to use your scooter
in accordance with the recommendations detailed below may result in damages and accidents.
PIXIES: maximum pilot weight 65 kg.
M10: maximum pilot weight 120 kg. Not suitable for jumping.
PULKA: maximum pilot weight 100 kg. Not suitable for jumping.
PULKA R: maximum pilot weight 85 kg. Not suitable for jumping. Not suitable for roads in poor condition.
IRON AND COLS MUSHING PRO: maximum pilot weight 140 kg.
4. SAFETY RECOMMENDATIONS
Learn to use your GRAVITY following our recommendations. Do not exceed your possibilities and limits, use the
adequate safety equipment: appropriate size helmet, which must be properly attached, protection gear and
eye protection. Check carefully that the equipment, as well as your scooter is in good shape. Look for possible
fissures so that you can immediately replace the components or damaged part of the scooter.
If you weigh 70 kg/180Ibs or more, you must be especially vigilant and have your scooter inspected more
frequently for any evidence of cracks, leaks, deformation, or other signs of fatigue or stress, especially in the
(1) frame; (2) fork; (3) disk brakes; (4)
front wheel; (5) protection plate; (6) rear wheel;
(7) mudguard; (8) board; (9) brake lever; (10) gear
shifter; (11) handlebar; (12) stem.

12
aluminum models. Pixies models should increase care and review more thoroughly the scooter, from 50 kg of
the pilot.
It is very important to follow the maintenance and repair instructions of this manual. Failing to do so could
cause an accident.
Pay special attention on wet ground as the nonslip may not work properly and you could fall off the board.
Wear short or tight trousers so that they do not get tangled in the rear wheel.
5. BEFORE EACH USE
Do not use the scooter if it has not passed the preliminary controls quoted below. Correct any anomaly before
each use.
Always inspect your scooter before taking it out
Use the list below to inspect your scooter and its components before every ride. The list is not exhaustive but
is designed to assist you with inspecting your scooter. If you detected any problem with your scooter and are
unable to repair it, take it to your specialized repair shop.
Check frame for signs of fatigue or high stresses
Carefully inspect the frame for signs of fatigue: scratches, cracks, dents, bent or discolored. If any part shows
any damage, fatigue or crack, do not use the scooter and contact us at info@gravity-scooters.com. (See
warranty in section 7 of this manual).
Check the tire pressure
Inflate the tires to the pressure range indicated on the tires. High pressures ensure better performance on hard
surfaces such as tarmac whereas lower pressures are more suitable for off-road cycling.
CAUTION: The pumps you see at service stations inflate tires too quickly and also indicate incorrect pressures.
Always use a hand pump to inflate your tires.
Inspecting the handlebar and stem
Make sure that the stem and the handlebar are correctly positioned in line with the front wheel and tightened.
Carefully check the handlebar and the stem for any signs of fatigue: scratches, cracks. Dents, bent areas or
discolored areas. If any parts show any signs of fatigue, change it before riding your scooter again. You should
also check that the end caps on the handlebar are properly fitted.
Checking the suspension setting
Check that the suspension components are set as required and that none of them reach the end of their stroke.
The suspension fork shock affect the behavior of the scooter and it is very important that it is set correctly. If
the suspension system is compressed so much that it locks the fork down, it may lead to a loss of control. For
more information on setting the suspension, please refer to the supplier’s manual.
Checking both wheels are properly secured in place
To ensure riding your scooter is a safe experience, the wheels are attached to the fork and the frame. The
wheels are attached by nuts requiring wrenches or quick-release mechanisms that enable you to take them off
and put them on without using any tools.
Make sure that the quick-release mechanisms are properly set and closed before using the scooter,
Adjusting the quick-release mechanism
Read the following instructions carefully to set the quick-release mechanism properly and safely:

13
1. Open the quick-release lever and clip the wheel into the fork ends, making sure that the axle is properly
in place.
ok
incorrecto
2. Turn the lever to 45º and tighten the quick-release nut by hand in a clockwise direction.
3. Closed the lever. Do not tighten the quick-release mechanism as if it was a nut, this will weaken the
coupling and may cause the wheel to work loose.
4. If the lever can easily be turned back to the open position, it means that the correct force has not been
applied to tighten it. In this case tighten the quick release nut up again in a clockwise direction and turn
the lever back again to the close position. If an excessive amount of force is needed to turn the lever,
repeat the previous operation but this time loosens the quick-release nut in anti-clockwise direction.
Repeat the procedure as many times as necessary until the coupling is fastened as required.
5. The quick-release mechanism must be pointing in such a way that it does not interfere with the
scooter’s other accessories.
6. If the quick-release mechanism is faulty, take your scooter to a specialized repair shop.
CAUTION: If the quick-release mechanisms are not set properly, the wheel or wheels may work loose and
come off completely. You may lose control of the scooter as a result and fall. Make sure that the quick-release
mechanisms are properly set and closed before using the scooter.
Checking the quick-release mechanisms is properly set:
Lift the scooter up and bang the top of the wheel. The wheel should not come out, work loose or move from
one side to the other.
Make sure that the quick-release lever cannot rotate parallel to the tire.
Checking the wheels is in line.
Turn both wheels and check the rim is in line with the frame and the brake blocks. If the rim does not rotate
freely, take your scooter to a specialized repair shop.
Checking your brakes
Make sure the front and rear brakes are working correctly.
The GRAVITY uses disk brakes. The brake levers are connected to pads that expert pressure on a disc attached
to the wheel hubs. (See attached manufacturer’s instructions).
CAUTION: If your brakes do not operate correctly, you may lose control of the scooter and fall. Check the
brake system carefully before each ride and if you detect a problem, do not use the scooter until it has been
resolved.
6. GENERAL ADVICE
Keep your scooter clean
To ensure your scooter works properly you should keep it clean.

14
Keep your scooter in a suitable place
When you are not using your scooter keep it stored away from the rain, snow, sun, etc. Rain and snow can
cause the metal to corrode and the wood to decompose. The sun's ultraviolet rays can cause the paint to fade
and scooter's rubber and plastic parts to crack.
When you put your scooter away, keep it off the ground and deflate the tires to half pressure. Do not leave the
scooter close to electric motors as the ozone they emit damages the rubber and paint. Make sure the scooter
is in perfect condition before using it again.
Changes in the fork, frame or components
The modification of any part of the scooter, including the frame, fork and other components may make your
scooter unsafe and this will mean the scooter no longer complies with our specifications, thus rendering the
scooter warranty invalid.
CAUTION: Do not make any modifications to the frame. Nor should you file, drill, fill in, dismantle or any other
operation that damages the frame.
Protect your scooter from damage
Make sure the scooter does not fall over as this can damage the handlebar, the board and other parts.
The incorrect use of the rack may also cause damage.
7. SCOOTER MAINTENANCE
Maintenance intervals, as well as the performance, safety, and longevity of your scooter and its components
depend on the correct and timely maintenance. If you use your GRAVITY in very adverse conditions,
maintenance should be done more often.
Carry out the following preventive maintenance procedures with the adequate frequency. If you find that some
of parts are not operating as they ought to, do not use the scooter until you have corrected the fault, replaced
the part or taken the scooter to a specialized repair shop.
The various parts of a scooter have a useful life that is shortened by wear, stress and fatigue.
Fatigue is caused by small forces repeated over and over again, which may cause the parts to break. The useful
life of different parts varies according to their design, material, use and maintenance.
The following are all signs of fatigue in a scooter: dents, cracks, scratches, bent areas and discolored areas.
7.1 Wheels
CHECKS TO BE MADE: Every time you take your scooter out check that the quick release of the rear wheel
is in the closed position and the clamp nut of the front wheel is tight. Turn the wheels to make sure they are
centered and not buckled in any way. If the rims do not run true, contact a specialized repair shop.
Make sure the wheels are inflated and the pressure is correct.
Check the tires for wear or any other damage. If the inner tube is visible through a cut or any other opening,
change the tires before riding the scooter again.
You should check for loose, damaged or broken spokes every five uses.
If one of the wheels is in poor condition you run the risk of having an accident.
An improperly adjusted wheel hub may cause you to lose control and fall. Inspect the hubs before each use.
Once a month checks the hubs to make sure they are correctly in position. Lift up the front wheel and try to
move the rim from left to right. Inspect and feel the rim to see if it is loose. Turn the wheel and listen for any
strange noises as you do so. Adjust the hub if it seems to be loose or makes strange noises. Repeat the
procedure with the rear wheel.
Every month check the rim wear.If you change the rim make sure that the rim strip is in place; this prevents the
spoke heads from puncturing the inner tube.

15
Lubricate the hubs every year. This job requires special knowledge and tools, and should be carried out by a
specialized repair shop.
Every year use synthetic lubricant to lubricate the lever on the quick-release. (See how to adjust the quick-
release in the BEFORE EACH USE section).
7.2 Fork and headset
The headset is the bearing assembly that allows the fork, stem and handlebar to turn.
CHECKS TO BE MADE: Inspect the headset on your scooter once a month and check it is neither too tight
nor too loose. If it is, do not use the scooter and take it to a specialized repair shop.
Checking for looseness when adjusting the headset: stand behind the handlebar with both feet on the ground.
Press the front brake down while moving the scooter backwards and forwards. Look, listen, and feel to see if
the front headset is loose.
Checking for tightness when adjusting the headset: stand behind the handlebar with both feet on the ground.
Turn the fork and the handlebar from right to left and vice versa. Look, listen, and feel to see if the front headset
is so tight that it makes a noise when it is turned or sticks at certain points.
The headset should be lubricated once a year. This job requires specialist tools and knowledge and should only
be carried out by a specialized repair shop.
The suspension forks need to be lubricated on a regular basis to ensure they operate smoothly and have a long
useful life. READ INSTRUCTIONS AND THE INFORMATION IN THE ATTACHED SUPPLIER’S MANUAL.
IMPORTANT: Changes in the fork or the variation of the length of the suspension may affect the scooter’s
ability to turn, create very high tensions or cause fatigue effects on the scooter.
7.3 The handlebar and stem.
Make sure the position you adopt on the bike is as ergonomic as possible.
CHECKS TO BE MADE: Check that all the bolts are properly tightened. Every month you check that the
stem is properly aligned with the front wheel. Check the coupling between the stem and the handlebar any try
to move it in relation to the front.
7.4 Looking after the frame
You should look after the frame of you scooter for safety and durability reasons and take the following points
into account:
CHECKS TO BE MADE: Check the frame carefully before each use for signs of wear such as scratches,
cracks, dents and bent or discolored areas. In case the frame was damaged get in touch with GRAVITY Scooters,
and do not use scooter in any case.
INFORMATION ON THE FRAME
Clean off any dirt with a cloth, soap and water. The use of industrial solvents may damage the paint on the
frame.
DANGER: Do not make any modifications whatsoever to the frame, nor alter its geometry. By sanding, drilling,
filling holes or performing any other operation on the scooter, or making any incorrect modification to the
frame, you may lose control of the scooter when riding it and fall.

16
7.5 Brake system
Different types of brakes have different braking capacities. If you are not happy or comfortable with your brake
system, consult a specialized repair shop, or get in touch directly with GRAVITY Scooters.
With any brake system, an error in adjusting, maintaining or using the brakes can cause you to lose control of
the scooter.
If you are not sure about the brakes settings or you think there may be a problem, do not use the
scooter and take it to a specialized repair shop.
Hydraulic disk brakes
This brake system comprises: brake lever/brake fluid reservoir; hydraulic pipe; disk brake body/disk
brake pad; disk brake disk.
CHECKS TO BE MADE: Before using the scooter squeeze the brake levers hard. The lever should not touch
the handlebar. If it does, the brake system should be bled. The job requires specialist equipment and knowledge
and should be carried out by a specialized repair shop.
Check that there is no oil, grease or any other type of dirty on the disk.
Check the disk brakes for signs of wear once a month. If the pads are less than 1mm thick they should be
replaced. You should also check that the pads are in the correct position, at a distance of between 0.25 and
0.75 mm from the disk when the brakes are not being applied.
Check that the pipe is not twisted or leaking. Replace any faulty parts in the system. Replacing parts requires
specialist equipment and knowledge and should be carried out by a specialized repair shop.
ADJUSTMENT: READ INSTRUCTIONS AND THE INFORMATION IN THE ATTACHED SUPPLIER’S MANUAL.
DANGER: Disk brake disks and disk brake bodies can become very hot and burn the skin. The edges are also
very sharp and can cut you. Do not touch the disk or the brakes when they are hot or still turning. Disk brakes
use a highly corrosive brake fluid. Avoid contact with skin and the scooter, as it will corrode the paint.
Mechanical disk brakes or V-Brake
This brake system comprises: brake lever, brake cables and sleeves, disk brake pads, disk brake disk/disk brake
bodies.
CHECKS TO BE MADE: After riding the scooter squeeze the brake lever tightly 10 times. The lever should
not touch the handlebar. If it does, the brake system should be bled. The job requires specialist equipment and
knowledge and should be carried out by a specialized repair shop.
Check that there is no oil, grease or any other type of dirty on the disk.
Check the disk brakes for signs of wear once a month. If the pads are less than 1mm thick they should be
replaced. You should also check that the pads are in the correct position, at a distance of between 0.25 and
0.75 mm from the disk when the brakes are not being applied.
Check the brake cables every month for twisted sections, rust, snapped threads and frayed ends and check that
the edges of the sleeves are not bent, cut or worn. Replace any faulty parts in the system. Replacing parts
requires specialist equipment and knowledge and should be carried out by a specialized repair shop.
Do not wash with pressurized water. Water may enter the cable and oxidize
ADJUSTMENTS: READ INSTRUCTIONS AND THE INFORMATION IN THE ATTACHED SUPPLIER’S MANUAL
DANGER: Disk brake disks and disk brake bodies can become very hot and burn the skin. The edges are also
very sharp and can cut you. Do not touch the disk or the brakes when they are hot or still turning.
7.6 Wood board, aluminum protection and mudguard
The upper board is made of wood and covered with a nonslip surface. In the inner part of the chassis there is
another wood board attached to the upper board by an anchorage system. The anchorage of the upper board
is fixed and nailed to the wood.
To dismantle the boards, fix the anchorage of the upper board with an Allen wrench and loosen the screw of
the bottom board.

17
Before you take the scooter out, carefully check the anchorage system and tighten everything that is loose.
APPROPRIATE FEET POSITION
The large size of the upper board allows you to place both feet on it at the same time.
You must always place your feet correctly, just as it is shown below, and keep your knees bent to reduce the
impact of the rough surface on your body and prevent possible back injuries.
Figure 1 shows the ideal way to place your feet for descent. The front foot must be placed on the curved part
of the wood with the chassis tube working as a limit. The back foot in a perpendicular position allows us to guide
the board.
Figure 2 shows the way to place your feet for riding in a flat ground. This position allows us to row. Do not use
this position for descent, as it will cause you to lose control of the scooter and fall.
The aluminum protection protects the chassis from blows and scratches. It is screwed to the inner board
underneath and to the chassis in front.
The upper board of IRON COLS has two protective strips made of aluminum in order to be protected from blows.
Before you take the scooter out, carefully check for exceeding metal parts or cutting edges.
The mudguard prevents the foot from touching the wheel. Screws fix it. Before you take the scooter out,
carefully check the anchorage system and tighten everything that has come loose.
9. WARRANTY
The guarantee covers any equipment or manufacturing defect, with the replacement of defective parts with
compliant parts for the same use.
APPLICATION OF THE GUARANTEE:
• No impacts: the product must show no signs of damage due to abnormal conditions of use.
• The product must be used in accordance with its operating instructions.
• Original parts have not been replaced.
THE GUARANTEE DOES NOT COVER:
• Damage engaging the liability of a third party or resulting from an intentional fault.
• Damage resulting from maintenance and use not in accordance with the manufacturer's recommendations
or negligence.
• Wear parts (bulbs, cables and cable casings, brake pads, rims, tyres, inner tubes, inside guards, etc) .
•Damage resulting from fire, lightening, storm, vandalism or unsecured transport.
DURATION OF THE GUARANTEE:
• 5 years for the frame and boards from the date of the purchase.
• 2 years for components from the date of the purchase.
1
2

18

19

20
SOMMAIRE
1. UTILISATION DU MODE D’EMPLOI
2. FÉLICITATIONS
3. LIMITES GÉNÉRALES D’UTILISATION
4. NORMES DE SÉCURITÉ
5. AVANT CHAQUE UTILISATION
6. CONSEILS GÉNÉRAUX
7. ENTRETIEN DU SCOOTER
7.1 Les roues
7.2 La fourche et le jeu de direction
7.3 Le guidon et la puissance
7.4 Le cadre
7.5 Le système de freinage
7.6 La planche en bois, la protection en aluminium et le garde-boue.
8. GARANTIE
1. UTILISATION DU MODE D’EMPLOI
- Ce manuel a été rédigé pour vous aider à profiter au maximum de votre GRAVITY. Lisez attentivement les
instructions de ce manuel.
-Utilisez-le pour garantir un entretien correct de votre GRAVITY.
- Si vous avez des questions à nous poser, contactez-nous par courrier électronique. Nous vous guiderons dans
les opérations les plus compliquées et nous vous conseillerons sur tout ce qui a trait à votre GRAVITY.
- Si vous ne faites pas attention aux avertissements et aux intructions de ce manuel, vous risquez
d’endommager le scooter et de souffrir des accidents, des blessures graves ou même la mort.
- Le respect des instructions de ce manuel est la responsabilité de l’utilisateur du scooter.
- Ce manuel couvre tous les modèles GRAVITY Scooters. Il et a plusieurs modèles de GRAVITY Scooters, qui
diffèrent par leur équipement. Il est donc possible que ce manuel contienne des informations qui ne regardent
pas votre scooter. Certaines illustrations peuvent ne pas être applicables à certains modèles du catalogue en
vigueur.
- L’utilisateur de ce produit reconnaît et accepte les risques associés à la conduite des scooters. Entre autres,
mais pas seulement, le risque de cassure des différentes parties et des differents composants du GRAVITY, qui
pourrait causer des accidents, des blessures graves ou même la mort. Du fait même d’acheter et utiliser ce
produit, l’utilisateur reconnaît et accepte expressement, volontairement et délibérement ces risques de
négligence active ou passive dans la manipulation de GRAVITY Scooters, ainsi que le risque associé à des défauts
cachés, latents ou manifestes du produit. L’utilisateur accepte en outre de libérer GRAVITY Scooters et ses
distributeurs et revendeurs de toute responsabilité face à d’éventuels dommages dans les limites prévues par
la loi.
GRAVITY Scooters se réserve le droit de modifier le scooter, en tout moment et sans avertissement préalable.
NOTE: Pour les fourches de suspension et les freins de disque, nous adjoignons le mode d’emploi du
fournisseur.
This manual suits for next models
5
Table of contents
Languages:
Other Gravity scooters Scooter manuals