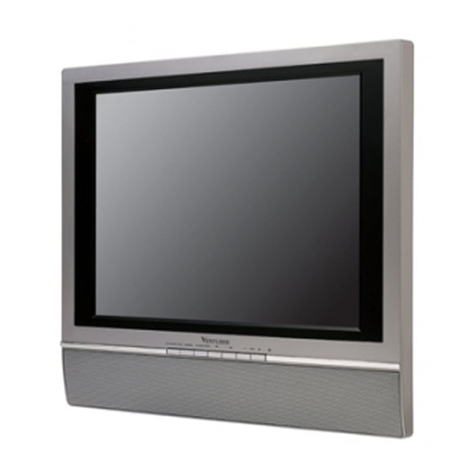
Venturer 15" LCD TV PLV7615H User manual

E - 16
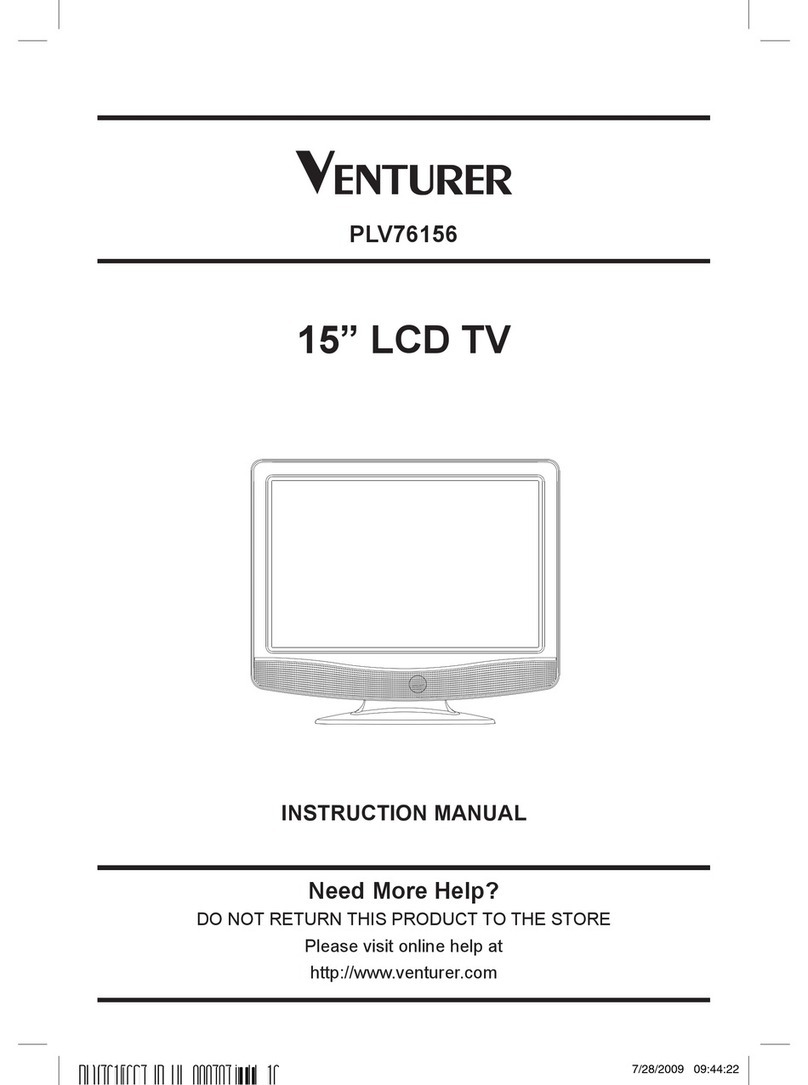
15” LCD TV
INSTRUCTION MANUAL
Need More Help?
DO NOT RETURN THIS PRODUCT TO THE STORE
Please visit online help at
http://www.venturer.com
PLV7615H
PLV76156S7_ENG_IB_UL_091221.indd 16PLV76156S7_ENG_IB_UL_091221.indd 16 12/22/2009 10:49:3212/22/2009 10:49:32

E - 1
PLACEMENT INFORMATION
• Donotusethisunitinplaceswhichareextremely
hot, cold, dusty or humid.
• Donotrestrict the air flowofthis unit by placingit
somewherewith poor air flow,bycovering it with
a cloth, by placing it on bedding or carpeting.
SAFETY INFORMATION
• WhenconnectingordisconnectingtheACpower
cord,grip the plugand not the corditself. Pulling
the cord may damage it and create a hazard.
• Whenyou are not goingto use the unitfor a long
period of time, disconnect the AC power cord.
CONDENSATION INFORMATION
• When left in a heated room where it is warm
and damp, water droplets or condensation
may form inside the equipment. When there is
condensation inside the unit, the unit may not
functionnormally. Let theunitstandfor1-2 hours
beforeturningthepower on or gradually heatthe
room and let the unit dry before use.
RATING PLATE LOCATION
The rating plate is located on the rear of unit.
FCC STATEMENTS
This device complies with Part 15 of the FCC Rules.
Operation is subject to the following two conditions:
(1) This device may not cause harmful interference,
and (2) this device must accept any interference
received, including interference that may cause
undesired operation.
This unit has been tested and found to comply
with the limits for a Class B digital device, pursuant
to Part 15 of the FCC Rules. These limits are
designed to provide reasonable protection against
harmful interference in a residential installation.
This unit generates, uses and can radiate radio
frequency energy and, if not installed and used in
accordancewiththeinstructions,maycause harmful
interferencetoradiocommunication.However,there
is not guarantee that interference will not occur in a
particular installation. If this unit does cause harmful
interference to radio or television reception, which
can be determined by turning the unit off and on, the
user is encouraged to try to correct the interference
by one or more of the following measures:
- Reorient or relocate the receiving antenna.
- Increase the separation between the unit and
receiver.
- Connecttheunitintoanoutletonacircuitdifferent
from that to which the receiver is connected.
- Consult the dealer or an experienced radio/TV
technician for help.
- Shielded cables must be used with this unit to
ensure compliance with the Class B FCC limit.
- This television receiver provides display of
television closed captioning in accordance with
Section 15.119 of the FCC rules.
SAFETY PRECAUTIONS
The lightning flash with arrowhead symbol,
within an equilateral triangle, is intended to
alert the user to the presence of uninsulated
“dangerous voltage” within the product’s
enclosure that may be of sufficient magnitude to
constitute a risk of electric shock to persons.
The exclamation point within an equilateral
triangle is intended to alert the user to
the presence of important operating and
maintenance (servicing) instructions in the
literature accompanying the appliance.
CAUTION : TO REDUCE THE RISK OF
ELECTRIC SHOCK, DONOT REMOVE COVER
(OR BACK). NO USERSERVICEABLE PARTS
INSIDE. REFER SERVICING TO QUALIFIED
SERVICE PERSONNEL.
CAUTION :
• DANGER OF EXPLOSION IF BATTERY IS
INCORRECTLY REPLACED. REPLACE ONLY
WITH THE SAME OR EQUIVALENT TYPE.
• TO PREVENT ELECTRIC SHOCK, MATCH WIDE
BLADE OF PLUG TO WIDE SLOT OF WALL
OUTLET, THEN FULLY INSERT.
• USE OF CONTROLS OR ADJUSTMENTS OR
PERFORMANCE OF PROCEDURES OTHER
THAN THOSE SPECIFIED MAY RESULT IN
HAZARDOUS RADIATION EXPOSURE.
The symbol for Class II
(Double Insulation)
WARNING :
• To reduce the risk of fire or shock hazard, do not
expose this unit to rain or moisture.
• Mainplugisusedasdisconnectdeviceanditshould
remain readily operable during intended use.
• The unit shall not be exposed to dripping or
splashing and that no objects filled with liquids,
such as vases, shall be placed on unit.
• In order to disconnected the unit from the
mains completely, the AC power cord should
be disconnected from the mains socket outlet
completely.
• Battery shall not be exposed to excessive heat
such as sunshine, fire or the like.
WARNING:
• Changesormodificationstothis unit not expressly
approved by party responsible for compliance
could void the user authority to operate unit.
PLV76156S7_ENG_IB_UL_091221.indd 1PLV76156S7_ENG_IB_UL_091221.indd 1 12/22/2009 10:45:5612/22/2009 10:45:56
E - 2
IMPORTANT SAFETY INSTRUCTIONS
1) Read these instructions.
2) Keep these instructions.
3) Heed all warnings.
4) Follow all instructions.
5) Do not use this apparatus near water.
6) Clean only with dry cloth.
7) Do not block any ventilation openings. Install in accordance with the manufacturer’s
instructions.
8) Do not install near any heat sources such as radiators, heat registers, stoves, or other
apparatus (Including amplifiers) that produce heat.
9) Do not defect the safety purpose of the polarized or grounding-type plug. A polarized plug
has two blades with one wider than the other. A grounding type plug has two blades and
a third grounding prong. The wide blade or the third prong are provided for your safety. If
the provided plug does not fit into your outlet, consult an electrician for replacement of the
obsolete outlet.
10) Protect the power cord from being walked on or pinched particularly at plugs, convenience
receptacles, and the point where they exit from the apparatus.
11) Only use detachments / accessories specified by the manufacturer.
12) Use only with the cart, stand, tripod, bracket, or table specified by the
manufacturer, or sold with the apparatus. When a cart is used, use caution
when moving the cart / apparatus combination to avoid injury form tip-over.
13) Unplug this apparatus during lightning storms or when unused for long periods of time.
14) Refer all servicing to qualified service personnel. Servicing is required when the apparatus
has been damaged in any way, such as power-supply cord or plug is damages, liquid has
been spilled or objects have fallen into the apparatus, the apparatus has been exposed to
rain or moisture, does not operate normally, or has been dropped.
PLV76156S7_ENG_IB_UL_091221.indd 2PLV76156S7_ENG_IB_UL_091221.indd 2 12/22/2009 10:46:0212/22/2009 10:46:02

E - 3
Beforeturning on your televisionset for the firsttime,be sure toplaceit on asolidstable surface.Toavoid
danger, do not expose the TV to water, or a heat source (e.g. lamp, candle, radiator). Do not obstruct
the ventilation grid at the rear and be sure to leave sufficient gaps around the unit as shown.
QUICK INSTALLATION
TURNING ON THE UNIT FOR THE FIRST TIME
The first time you turn on the unit, the unit will enter the setup mode. The unit will guide you through
initial setup with easy-to-follow menus on the TV’s screen.
Make sure the TV antenna or CATV cable has been connected properly to the TV
antenna input jack on the rear of the system.
1. Connect the TV antenna.
2. Connect the power cord.
3. Press the / ON button to turn on the unit.
4. Press the / button to highlight Antenna,
then use the ENTER or button to select
“Air”, “Cable STD”, “Cable HRC”, “Cable IRC”
or “Cable Auto“.
5. Use the / button to highlight Auto
Scan, then press the ENTER or button to
confirm.
6. The unit will immediately search all channels
for those with adequate signal strength and
store those channels with signals in memory.
The unit will take a few minutes to finish auto
scan and after this is completed, the unit will
switch to the first channel found.
If you subscribe to Cable TV Service, we
recommend you pick “Cable Auto”, however
you might find you get improved results using
“Cable STD”, “Cable IRC”, or “Cable HRC” -
these are different standards used by various
Cable Systems. To Stop
Menu
Analog Air Channel 10
Analog Channels Found
Autoprogram Menu
Digital Channels Found
Progress(%) 5
0
0
Not Found
To Move To Select To Exit
Enter Menu
OSD Language
Antenna
Initial Setup Menu
Auto Scan
Air
English
2 3/8"
2 3/8" 2 3/8"
PLV76156S7_ENG_IB_UL_091221.indd 3PLV76156S7_ENG_IB_UL_091221.indd 3 12/22/2009 10:46:0312/22/2009 10:46:03

E - 4
CONTENTS
Please check and identify the supplied accessories.
Remote Control (with batteries) ............................................................................................ x 1
Screws ................................................................................................................................... x 2
GETTING STARTED
ACCESSORIES
USING THE REMOTE CONTROL
• Point the remote control at the remote sensor
located on the unit.
• Whenthere is astrong ambient lightsource, the
performance of the infrared remote sensor may
be degraded, causing unreliable operation.
• Therecommended effectivedistance for remote
operation is about 16 feet (5 meters).
TO INSTALL BATTERIES
1. Open the battery door.
2. Insert 2 “AAA” batteries.
BATTERY REPLACEMENT
When the batteries become weak, the operating
distance of the remote control is greatly reduced
and you will need to replace the batteries.
CAUTION: Danger of explosion if battery is
incorrectly replaced. Replace only with the same
or equivalent type.
NOTES
• Ifthe remote controlis not goingto be used fora
longtime,remove the batteriestoavoid damage
caused by battery leakage corrosion.
• Do not mix old and new batteries. Do not mix
ALKALINE, standard (CARBON-ZINC) or
rechargeable (NICKEL-CADMIUM) batteries.
• Always remove batteries as soon as they
become weak.
• Weak batteries can leak and severely damage
the remote control.
• WARNING : Donot dispose of batteriesin a fire.
Batteries may explode or leak.
SAFETY PRECAUTIONS ............................. 1
IMPORTANTSAFETYINSTRUCTIONS...........2
QUICK INSTALLATION ............................... 3
CONTENTS ................................................. 4
ACCESSORIES .......................................... 4
GETTING STARTED ..................................... 4
CONTROL REFERENCE GUIDE .............. 5 - 6
CONNECTIONS .......................................... 7 - 8
ConnectingaTVAntenna..........................7
Connecting To A VCR / Camcorder / Video
GameSystem / Cable /SatelliteSystem ....7
Connecting to HDMI ................................. 8
Connectingthepower cord ........................ 8
USINGHEADPHONES/EARPHONES...............9
INSTALLATION ............................................ 9
TV SETUP ............................................. 10 - 12
Picture Menu ....................................... 10
Audio Menu ....................................... 10
TV Menu .............................................. 11
SetupMenu ...................................... 11 - 12
MAINTENANCE ..................................... 12
TROUBLESHOOTING GUIDE ............... 13
PLV76156S7_ENG_IB_UL_091221.indd 4PLV76156S7_ENG_IB_UL_091221.indd 4 12/22/2009 10:46:0512/22/2009 10:46:05

E - 5
CONTROL REFERENCE GUIDE
REMOTE CONTROL
1) MUTE Button
Press to turn off the sound.
2) MENU Button
Press to display the on-screen menu or switch
back to the previous menu screen.
3) CURSOR ( , , , ) Buttons
Use to highlight selections on a menu screen and
adjust certain settings.
ENTER Button
Confirm selection on a menu screen.
4) DISPLAY Button
Press to display information on the current
channel.
5) VOL + / VOL - Button
Press to increase/decrease the volume.
6) LAST CH
Press to switch repeatedly between the last two
channels displayed.
7) STANDBY/ON Button
Press to turn ON the unit or put it in STANDBY
(OFF) mode.
8) FUNCTION Button
Press to switch between TV /AV / HDMI.
9) LCD MODE Button
PresstoSelectfrompresetscreendisplaysettings
to match the type of show you are watching.
10) CH / CH Buttons
Press to select the channel upward or
downward.
11) NUMERIC Buttons
Press to enter numbers or go directly to a specific
channel.
12) • [dot] Button
Presstoenterdigitalsub-channelswiththenumeric
buttons (i.e. 11.3 or 12-1).
PLV76156S7_ENG_IB_UL_091221.indd 5PLV76156S7_ENG_IB_UL_091221.indd 5 12/22/2009 10:46:0712/22/2009 10:46:07

E - 6
CONTROL REFERENCE GUIDE
FRONT & SIDE VIEWS
1. AUDIO IN (Left/Right) /
VIDEO IN jacks
2. / ON button
Turns the unit on and off.
3. MENU button
Enters the on-screen TV menu.
4. FUNCTION button
Selects TV /AV / HDMI mode.
5. CH / CH buttons
Press to confirm selections on the TV
menu screen and / to change TV
channels.
6. VOL + / VOL - controls
Adjusts the volume level and highlights
selections(Left & Right)ontheTVmenu
screen.
7. Color LCD screen
8. Built-in speakers
9. Remote sensor
Point the remote control here.
Standby indicator
10. Removable stand
11. Power cord
12. HDMI IN jack
13. Headphones jack
14. TV ANTENNA terminal
Connects a TV antenna or CATV
cable.
7
10
9
1413
11
2
3
6
4
5
1
8
12
PLV76156S7_ENG_IB_UL_091221.indd 6PLV76156S7_ENG_IB_UL_091221.indd 6 12/22/2009 10:46:0812/22/2009 10:46:08

E - 7
TV ANTENNA
CONNECTIONS
CONNECTING A TV ANTENNA
To view television channels correctly, a signal must be received from one of the following sources:
- An indoor or outdoor aerial antenna
- A cable system
- A satellite system
NOTE
For optimal reception of over-the-air TV broadcasts, we recommend that you use an external fixed
antenna. If using an indoor antenna, please ensure that you purchase an antenna with sufficient
ability to receive signals in your home. Orientation and location of the antenna is typically critical for
best results – you may find that placement of the antenna near a window, or in an elevated location,
improves performance.
To TV Antenna
terminal
To Home Antenna terminal
COAX Cable
(If not using a Cable
box)
Combination VHF /
UHF antenna
(ATSC / NTSC signal)
Separate VHF or UHF
antenna
(ATSC / NTSC signal)
CONNECTING TOAVCR / CAMCORDER /VIDEO GAME SYSTEM/ CABLE/ SATELLITE
SYSTEM
Connect an AUDIO / VIDEO cable (not included) as shown:
Make sure you connect a cable from the AUDIO/VIDEO OUT jacks of the other equipment to AUDIO
VIDEO IN jacks of this unit.
NOTE
Please refer to the connected equipment’s user manual for more information.
To AUDIO /VIDEO
IN jacks
To AUDIO / VIDEO
OUT jacks
PLV76156S7_ENG_IB_UL_091221.indd 7PLV76156S7_ENG_IB_UL_091221.indd 7 12/22/2009 10:46:1112/22/2009 10:46:11

E - 8
CONNECTIONS
To AC outlet
CONNECT THE POWER CORD
• Connect the AC power cord into a wall outlet.
• Press the / I button on the unit or remote control to turn on the unit.
NOTE
• Be sure the AC power cord is disconnected and all functions
are off before making connections.
• Make sure that all the components are connected correctly.
•To prevent electrical shock, match wide blade of plug to
wide slot of wall outlet, then fully insert.
• Whenyouarenotgoingtousetheunitforalong
period of time, disconnect the power cord.
CONNECTING TO HDMI
HDMI(HighDefinitionMultimediaInterface)supportsboth video and audio on a single digitalconnection
for use with DVD players, DTV, set-top boxes and other digital AV devices.
HDMI has the capability to support standard, enhanced or high-definition video plus standard to multi-
channelsurround-sound audio. HDMI featuresincludeuncompressed digital video,abandwidth of up to
2.2gigabytespersecond(withHDTVsignals),oneconnector(insteadofseveralcablesandconnectors),
and communication between the AV source and AV devices such as DTVs.
HDMI, the HDMI logo and High-
Definition Multimedia Interface are trademarks or
registered trademarks of HDMI licensing LLC.
Connect the HMDI cable (not included) as
shown:
Make sure you connect the cable from the source
equipment (HDMI OUT) to this unit (HDMI IN).
Press the FUNCTION button to switch to HDMI
mode.
PLV76156S7_ENG_IB_UL_091221.indd 8PLV76156S7_ENG_IB_UL_091221.indd 8 12/22/2009 10:46:1412/22/2009 10:46:14

E - 9
INSTALLATION
MOUNTING THE TV UNIT
1) Mark the correct mounting position on the wall.
2) Insert a fixing screw(s) at the marked position on the wall.
3) Align the slot hole(s) of the speaker over the screw and pull the TV
downward until it is firmly hooked.
NOTE
Remove the base stand before mounting the unit on the wall.
Press and pull downwards
USING HEADPHONES / EARPHONES
• Turndown the volume before connecting
headphones/earphonestotheunit, then
adjust the volume to your desired level.
• When headphones / earphones are
connected, no sound will come from the
front speakers.
NOTE
Excessivesoundpressurefromheadphones
/ earphones can cause hearing loss.
INSTALLING / REMOVING THE BASE STAND
WARNING:TheLCD Display isvery fragile, andmust be protected
at all times when removing the base stand. Be sure that no hard
or sharp object, or anything that could scratch or damage the LCD
display, comes into contact with it. Do NOT exert pressure on the
front of the unit at any time because the screen could crack.
1. Disconnect all cables or cords connected to the unit.
2. Lay the unit down on a flat surface with the back side facing
up. Please make sure to place a soft cushioned material (such
as a pillow or thick piece of foam) beneath the screen.
3. To installthe base stand,place the basestand on themounting
slot, push the stand till it locks.
4. Toremovethebasestand, keep pressing the lockingareaofthe
base stand and pull downwards to release the base stand.
PLV76156S7_ENG_IB_UL_091221.indd 9PLV76156S7_ENG_IB_UL_091221.indd 9 12/22/2009 10:46:1412/22/2009 10:46:14

E - 10
TV SETUP
PICTURE MENU
1. Press the MENU button.
2. Press ENTER or button to highlight Picture
Mode.
3. Use the or button to select other options
(Contrast, Brightness, Sharpness, Color,
Tint, Aspect Ratio & Color Temperature).
4. UsetheENTER or buttontomakeadjustment.
The screen will adjust to your selected setting
immediately.
5. Repeat steps 3 and 4 to adjust other options.
6. To exit the TV SETUP MENU and return to the
normal screen, press the MENU button.
Picture Mode: Select from preset screen display settings to match the type of show you are watching
(Standard, Movie, Soft & Personal).
Contrast:Adjust to sharpen the picture quality. The dark portions of the picture become richer in
darkness and the light portions become brighter.
Brightness:Adjust to brighten or darken the whole picture.
Sharpness:Adjust the sharpness level to improve detail in the picture.
Color:Adjust the color of the picture.
Tint:Adjust natural skin tones in the picture quality.
Aspect Ratio: Select from preset aspect ratio to match the type of show you are watching (Full-screen,
& Auto).
Color Temperature:Adjust the 3 color temperature of the picture. Choose from Normal (balanced),
Warm (red white) or Cool (blue white) modes.
AUDIO MENU
1. Press the MENU button.
2. Use the or button to select Audio setting.
3. Press ENTER or button to highlight Audio
Mode, then use the or button to select
other options (Audio Language, MTS, Bass,
Treble & Balance).
4.
Use the ENTER or
button to make
adjustment.
5. Repeat steps 3 to 4 to adjust other options.
6. To exit the TV SETUP MENU and return to the
normal screen, press the MENU button.
Audio Mode: Select from preset audio settings (Standard, Movie, Music & Personal) to match
the type of show you are watching.
Audio Language: Select from English / Spanish / French. (Available for digital channels if multiple
audio languages are broadcasted.)
MTS (Multi Channel Television Sound): Select SAP (Secondary Audio Program) / Mono.
Bass: Adjust the bass range.
Treble: Adjust the treble range.
Balance: Adjust the balance level toward the left or right speakers.
Note:
Some TV stations broadcast audio in more than one language, the SAP (Secondary Audio Programs)
feature allows you to listen to this, if available.
Picture Audio Mode
Balance
Treble
Audio Language Standard
English
Mono
30
30
0
To Move To Select To Exit
Bass
30MTS
Audio
TV
Setup
Enter Menu
Picture Picture Mode
Aspect Ratio
Color Temperature
Tint
Color
Sharpness
Contrast 50 Standard
Full-screen
50
50
55
50
To Move To Change To Exit
Brightness
Audio
TV
Setup
Enter Menu
Normal
PLV76156S7_ENG_IB_UL_091221.indd 10PLV76156S7_ENG_IB_UL_091221.indd 10 12/22/2009 10:46:1612/22/2009 10:46:16

E - 11
TV SETUP
TV MENU
1. Press the MENU button.
2. Use the or button to select TV setting.
3. PressENTER or button to highlightAntenna,
then use the or button to select other
options (DTV Signal, Auto Scan, Auto Scan
Add CH, Channel Skip & Channel Labels).
4. Use the ENTER or button to make
adjustment. The screen will adjust to your
selected setting immediately.
5. Repeat steps 3 to 4 to adjust other options.
6. To exittheTV SETUPMENU and returnto the
normal screen, press the MENU button.
NOTE
Channel No. : 2-69 Channel for Air, 1-135 Channel for CATV.
Antenna : Select “Air, Cable STD, Cable HRC, Cable IRC & Cable Auto” to receive over-
the-air signal / cable signal.
DTV Signal :Display the signal strength (for digital TV channels only).
Auto Scan : Search for available stations and store them in memory.
Auto Scan Add CH : Search for more available stations and add them in memory. The stations stored
before are still kept.
Channel Skip: Skip weak channels and the channels you don’t like.
Channel Labels : Display and edit the channel label.
Picture DTV Signal
To Move To Select To Exit
Audio
TV
Setup
Enter Menu
Auto Scan
Auto Scan Add CH
Channel Skip
Channel Labels
Antenna Cable HRC
SETUP MENU
1. Press the MENU button.
2. Use the or button to select Setup
setting.
3. Press ENTER or button to highlight Time
Setting, then use the or button to select
other options (Time Setting, Sleep Timer,
Password Setting, ParentalControl, Closed
Caption, OSD Language & Reset).
4.
Use the ENTER or button to make
adjustment.
5. Repeat steps 3 to 4 to adjust other options.
6. To exittheTV SETUPMENU and returnto the
normal screen, press the MENU button.
Time Setting: Select to set the time manually or automatically.
Sleep Timer: Set the LCD TV to turn itself off within a certain time (Off / 5 min / 10 min / 15 min
/ 30 min / 60 min / 90 min / 120 min).
Password Setting: Enter a 4-digit password. Once entered, the screen will prompt you to enter new
password and confirm your new password.
Parental Control: Enter the 4-digit password to set the parental control. (If you forgot the password,
enter “8888” to unlock the parental control.)
OSD Language : Select the menu language from English / Español / Français.
Reset : Reset the default settings.
Picture Sleep Timer
To Move To Select To Exit
Audio
TV
Setup
Enter Menu
Parental Control
Closed Caption
Time Setting
Off
Password Setting
OSD Language
Reset English
PLV76156S7_ENG_IB_UL_091221.indd 11PLV76156S7_ENG_IB_UL_091221.indd 11 12/22/2009 10:46:1712/22/2009 10:46:17

E - 12
TV SETUP
Closed Caption
CC Mode : Select closed caption On, Off or CC on Mute.
Analog Closed Caption : Select the analog closed caption.
Digital Closed Caption : Select the digital closed caption.
Digital Caption Style : Select Custom to activate the caption style items and set your desired
detailed settings.
NOTE
This function only works on ATSC
(Digital Broadcast TV) programs
broadcast with captions.
To Move To Select To Exit
Enter Menu
CC Mode
Analog Closed Caption
Closed Caption
Digital Closed Caption
Digital Caption Style Service1
CC1
Off
MAINTENANCE
MAINTENANCE
CLEANING THE UNIT
• Be sure to turn the unit off and disconnect theAC power cord before cleaning the unit.
• Wipe the unit with a dry soft cloth. If the surfaces are extremely dirty, wipe clean with a cloth which
has been dipped in a weak soap-and-water solution and wrung out thoroughly. Then wipe it with a
dry cloth.
• Never use alcohol, benzene, paint-thinner, cleaning fluid or other chemicals. Do NOT use
compressed air to remove dust.
PLV76156S7_ENG_IB_UL_091221.indd 12PLV76156S7_ENG_IB_UL_091221.indd 12 12/22/2009 10:46:1812/22/2009 10:46:18

E - 13
TROUBLESHOOTING GUIDE
SYMPTOM CAUSE (AND REMEDY)
The remote does not
function.
• Ensure the AC power cord is connected.
• The unit is not turned on.
No power.
• Remove any obstacles between the remote and the unit.
• Use the remote near the unit.
• Point the remote at the remote sensor on the unit.
• Replace the batteries in the remote with new ones.
• Check the location of the antenna and adjust it if necessary.
• Make sure the antenna cable is firmly connected.
• Make sure all input cables are firmly connected.
TV
Bad Picture (snow,
multiple images,
distortion, blurry)
• Check the PICTURE SETTING within the TV SETUP MENU.
• Check to make sure the program you are watching is broadcast in Color
and not Black & White.
Black and white
picture.
• Make sure the unit is plugged in and turned on.
• Make sure that TV mode is selected.
• Try a new channel to check for possible station trouble.
• Make sure the antenna is connected properly.
• Increase the volume.
• Make sure the antenna or audio video source device is working
properly.
• Make sure all cables are firmly connected.
• Check for local interference.
No picture or sound.
• Make sure there are no unshielded electrical devices nearby that are
causing interference.
• Turn the unit off for 30 minutes, then try it again.
Colored patches of
picture.
Specifications and appearance are subject to change without notice.
As concerns grow about the environmental impact of outdated
electronic products, Venturer Electronics is committed to being
a part of the solution. Free of charge, Venturer Electronics
customers can return qualifying units to us for recycling. For more
details, please visit our website at www.venturer.com/recycle or
call 1-800-252-6123.
No sound is output from
the HDMI out.
• Check the connection between this unit and the HDMI out jack of other
equipment.
• See if the TV supports this 480p/576p/720p/1080i DVD system.
• Check your TV system setup correctly.
• Make sure your TV supports HDCP (High Bandwidth Digital Content
Protection).
PLV76156S7_ENG_IB_UL_091221.indd 13PLV76156S7_ENG_IB_UL_091221.indd 13 12/22/2009 10:46:1812/22/2009 10:46:18

E - 14
Model no. ............................................................... Product name ................................................................
Typeofset ........................................................................................................................................................
Serial no. ................................................................Invoiceno........................................................................
Date purchased ......................................................Dealername ....................................................................
LIMITED WARRANTY
VENTURER ELECTRONICS (“VENTURER”) makesthefollowinglimited warranty.This limited warranty extend
to the original consumer purchaser and is limited to non-commercial use of the product.
Ninety (90) Day Parts & Labor Warranty
VENTURER products purchased in the United States are warranted to be free from defects in materials or
workmanship for a period of ninety (90) days from the date of their original retail purchase. If the unit fails to
conformtothis warranty,we will service theproductusing new or refurbishedpartsand products, at VENTURER’s
sole discretion.
During a period of ninety (90) days from the effective warranty date, VENTURER will provide, when needed,
service labor to repair a manufacturing defect at its designated Service Center. To obtain warranty service in
the Untied States, you must first call our Customer Support Center at 1-800-252-6123 or 1-866-444-6478,
during the hours listed in the box below. Thedetermination of service will be made by VENTURER Customer
Support. PLEASE DO NOT RETURN YOUR UNIT TO VENTURER WITHOUT PRIOR AUTHORIZATION.
New or remanufactured replacements for defective parts or products will be used for repairs by VENTURER at
its designated Service Center for ninety (90) days from the effective warranty date. Such replacement parts or
products are warranted for an additional ninety (90) days from the date of repair or replacement. The Customer
willberequiredto ship the unit to theServiceCenterindicatedat the time Customer Support iscontactedtomake
the necessary repairs. The customer is responsible for all transportation charges to the service facility.
Packaging and Shipping Instruction
When you send the product to the Venturer service facility you must use the original carton box and packing
material or an equivalent as designated by VENTURER.
LIMITED WARRANTY
Your Responsibility
(1) You must retain the original sale receipt to provide proof of purchase.
(2) These warranties are effective only if the product is purchased and operated in the U.S.A. or Canada.
(3) Warranties extend only to defects in material or workmanship, and do not extend to any product or parts
which have been lost or discarded, or damage to product or parts caused by misuse, accident, improper
operation or maintenance, or use in violation of instructions provided with the product, or to product which
has been altered or modified without authorization of Venturer, or to products or parts thereof which have
had the serial number removed or changed.
Out of Warranty
In the event your product requires repair after the limited warranty period has expired, please contact our
Customer Support Center at 1-800-252-6123, 1-866-444-6478 or www.venturer.com
Hours: Monday–Thursday: 9–7, Friday: 9–5, Saturday: 9–12 EST.
Important:
You are responsible for any transportation, shipping or insurance relative to the return of product to our
Product Returns Center.
All warranties implied by state law, including the implied warranties of merchantability and fitness for a particular
purpose, are expressly limited to the duration of the limited warranties set forth above. With the exception of
any warranties implied by state law as hereby limited, the foregoing warranty is exclusive and in lieu of all other
warranties, guarantees, agreements and similar obligations of manufacturer or seller with respect to the repair
or replacement of any parts. In no event shall VENTURER be liable for consequential or incidental damages.
No person, agent, distributor, dealer or company is authorized to change, modify or extend the terms of these
warranties in any manner whatsoever. The time within action must be commenced to enforce any obligation of
VENTURER arising under the warranty or under any statute, or law of the United States or any state thereof, is
hereby limited to ninety (90) days from the date of purchase. This limitation does not apply to implied warranties
arising under state law.
This warranty gives you specific legal rights and you may also have other rights, which may vary, from state
to state. Some states do not allow limitation on how long an implied warranty lasts, when an action may be
brought, or the exclusion or limitation of incidental or consequential damages, so the above provisions may
not apply to you.
For more information on other products and services, please visit out website at www.venturer.com.
Important: Also keep your “Bill of Sale” as proof of purchase.
PLV76156S7_ENG_IB_UL_091221.indd 14PLV76156S7_ENG_IB_UL_091221.indd 14 12/22/2009 10:46:1912/22/2009 10:46:19

E - 15
UNIT INCH
Printed in China
811-761591W050
16
3
13 3/8
5
11 7/8
5 7/8
3 3/4
© 2010 VENTURER Electronics Inc.
PLV76156S7_ENG_IB_UL_091221.indd 15PLV76156S7_ENG_IB_UL_091221.indd 15 12/22/2009 10:46:1912/22/2009 10:46:19
Table of contents
Other Venturer LCD TV manuals

Venturer
Venturer PLV3117i User manual

Venturer
Venturer PLV36190S5W User manual

Venturer
Venturer PLV16198 User manual

Venturer
Venturer PLV16198 User manual

Venturer
Venturer PLV36199S1 User manual

Venturer
Venturer PLV76198E User manual

Venturer
Venturer PLT37260 User manual

Venturer
Venturer PLV21198 User manual

Venturer
Venturer PLV36220S1 User manual

Venturer
Venturer PLV16070 User manual