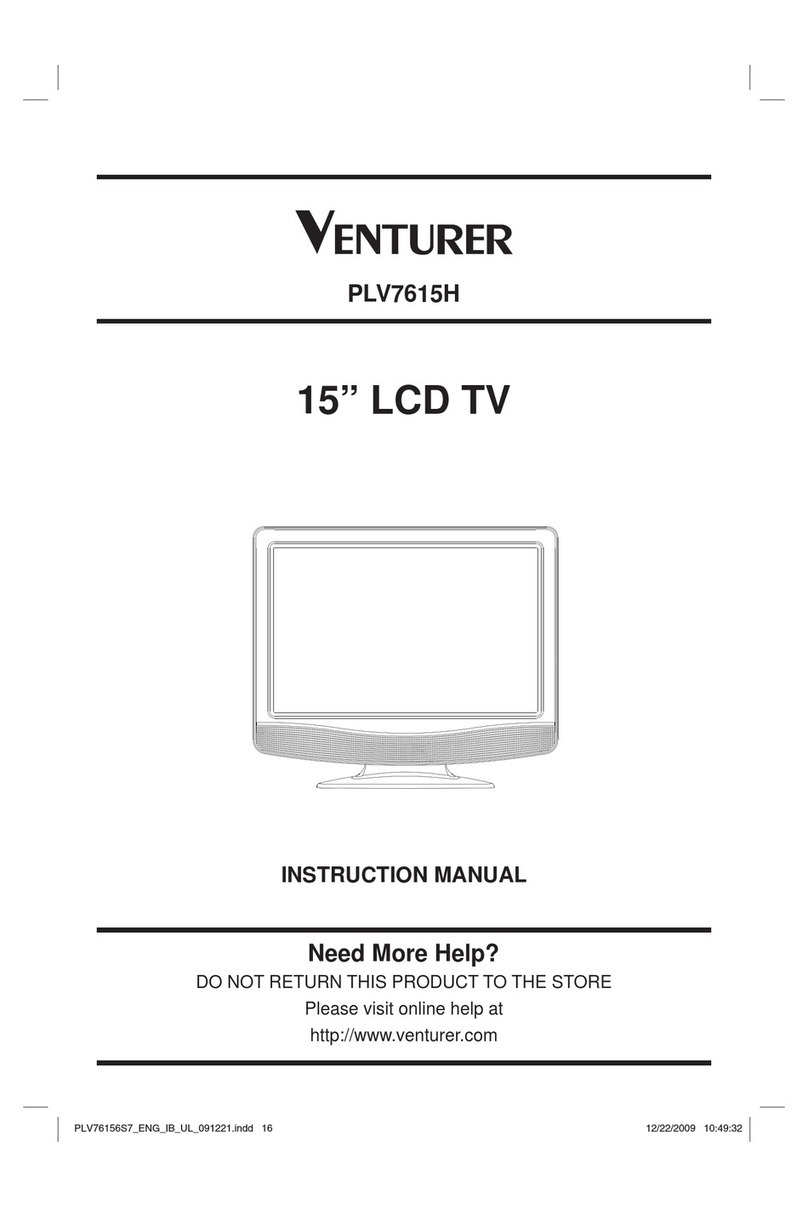
Venturer PLV76156 User manual

E - 16
15” LCD TV
INSTRUCTION MANUAL
Need More Help?
DO NOT RETURN THIS PRODUCT TO THE STORE
Please visit online help at
http://www.venturer.com
PLV76156
PLV76156S7_IB_UL_090727.indd 16 7/28/2009 09:44:22

E - 1
PLACEMENT INFORMATION
• Donotusethisunitinplaceswhichareextremely
hot,cold,dustyorhumid.
• Donotrestricttheairowofthisunitbyplacingit
somewherewithpoorairow,bycoveringitwith
acloth,byplacingitonbeddingorcarpeting.
SAFETY INFORMATION
• WhenconnectingordisconnectingtheACpower
cord,griptheplugandnotthecorditself.Pulling
thecordmaydamageitandcreateahazard.
• Whenyouarenotgoingtousetheunitforalong
periodoftime,disconnecttheACpowercord.
CONDENSATION INFORMATION
• When left in a heated room where it is warm
and damp, water droplets or condensation
mayforminsidetheequipment.Whenthereis
condensationinsidetheunit,theunitmaynot
functionnormally.Lettheunitstandfor1-2hours
beforeturningthepoweronorgraduallyheatthe
roomandlettheunitdrybeforeuse.
RATING PLATE LOCATION
Theratingplateislocatedontherearofunit.
FCC STATEMENTS
ThisdevicecomplieswithPart15oftheFCCRules.
Operationissubjecttothefollowingtwoconditions:
(1)Thisdevicemaynotcauseharmfulinterference,
and (2) this device must accept any interference
received, including interference that may cause
undesiredoperation.
This unit has been tested and found to comply
withthelimitsforaClassBdigitaldevice,pursuant
to Part 15 of the FCC Rules.These limits are
designedtoprovidereasonableprotectionagainst
harmful interference in a residential installation.
This unit generates, uses and can radiate radio
frequencyenergyand,ifnotinstalledandusedin
accordancewiththeinstructions,maycauseharmful
interferencetoradiocommunication.However,there
isnotguaranteethatinterferencewillnotoccurina
particularinstallation.Ifthisunitdoescauseharmful
interferencetoradioortelevisionreception,which
canbedeterminedbyturningtheunitoffandon,the
userisencouragedtotrytocorrecttheinterference
byoneormoreofthefollowingmeasures:
- Reorientorrelocatethereceivingantenna.
- Increase the separation between the unit and
receiver.
- Connecttheunitintoanoutletonacircuitdifferent
fromthattowhichthereceiverisconnected.
- Consult the dealer or an experienced radio/TV
technicianforhelp.
- Shielded cables must be used with this unit to
ensurecompliancewiththeClassBFCClimit.
- This television receiver provides display of
televisionclosed captioninginaccordance with
Section15.119oftheFCCrules.
SAFETY PRECAUTIONS
Thelightningashwith arrowheadsymbol,
withinanequilateraltriangle,isintendedto
alerttheusertothepresenceofuninsulated
“dangerous voltage” within the product’s
enclosure that may be of sufficient magnitude to
constituteariskofelectricshocktopersons.
Theexclamationpointwithinanequilateral
triangle is intended to alert the user to
the presence of important operating and
maintenance (servicing) instructions in the
literatureaccompanyingtheappliance.
CAUTION : TO REDUCE THE RISK OF
ELECTRIC SHOCK, DO NOT REMOVE COVER
(OR BACK). NO USERSERVICEABLE PARTS
INSIDE. REFER SERVICING TO QUALIFIED
SERVICE PERSONNEL.
CAUTION :
• DANGER OF EXPLOSION IF BATTERY IS
INCORRECTLY REPLACED. REPLACE ONLY
WITHTHESAMEOREQUIVALENTTYPE.
• TOPREVENTELECTRICSHOCK,MATCHWIDE
BLADE OF PLUG TO WIDE SLOT OF WALL
OUTLET, THEN FULLY INSERT.
• USE OF CONTROLS ORADJUSTMENTS OR
PERFORMANCE OF PROCEDURES OTHER
THAN THOSE SPECIFIED MAY RESULT IN
HAZARDOUSRADIATIONEXPOSURE.
The symbol for Class II
(DoubleInsulation)
WARNING:
• Toreducetheriskofreorshockhazard,donot
exposethisunittorainormoisture.
• Mainplugisusedasdisconnectdeviceanditshould
remain readily operable during intended use.
• The unit shall not be exposed to dripping or
splashing and that no objects lled with liquids,
suchasvases,shallbeplacedonunit.
• In order to disconnected the unit from the
mains completely, theAC power cord should
be disconnected from the mains socket outlet
completely.
• Battery shall not be exposed to excessive heat
suchassunshine,reorthelike.
WARNING:
• Changesormodicationstothisunitnotexpressly
approved by party responsible for compliance
couldvoidtheuserauthoritytooperateunit.
PLV76156S7_IB_UL_090727.indd 1 7/28/2009 09:41:02

E - 2
IMPORTANT SAFETY INSTRUCTIONS
1) Read these instructions.
2) Keep these instructions.
3) Heed all warnings.
4) Follow all instructions.
5) Do not use this apparatus near water.
6) Clean only with dry cloth.
7) Do not block any ventilation openings. Install in accordance with the manufacturer’s
instructions.
8) Do not install near any heat sources such as radiators, heat registers, stoves, or other
apparatus(Includingampliers)thatproduceheat.
9) Do not defect the safety purpose of the polarized or grounding-type plug. A polarized plug
has two blades with one wider than the other. A grounding type plug has two blades and
a third grounding prong. The wide blade or the third prong are provided for your safety. If
theprovidedplugdoesnottintoyouroutlet,consultanelectricianforreplacementofthe
obsolete outlet.
10) Protect the power cord from being walked on or pinched particularly at plugs, convenience
receptacles, and the point where they exit from the apparatus.
11) Onlyusedetachments/accessoriesspeciedbythemanufacturer.
12) Use only with the cart, stand, tripod, bracket, or table specied by the
manufacturer,orsoldwiththeapparatus.Whenacartisused,usecaution
when moving the cart / apparatus combination to avoid injury form tip-over.
13) Unplug this apparatus during lightning storms or when unused for long periods of time.
14) Referallservicingtoqualiedservicepersonnel.Servicingisrequiredwhentheapparatus
has been damaged in any way, such as power-supply cord or plug is damages, liquid has
been spilled or objects have fallen into the apparatus, the apparatus has been exposed to
rain or moisture, does not operate normally, or has been dropped.
PLV76156S7_IB_UL_090727.indd 2 7/28/2009 09:41:02

E - 3
Beforeturningonyourtelevisionsetforthersttime,besuretoplaceitonasolidstablesurface.Toavoid
danger,donotexposetheTVtowater,oraheatsource(e.g.lamp,candle,radiator).Donotobstruct
theventilationgridattherearandbesuretoleavesufcientgapsaroundtheunitasshown.
QUICK INSTALLATION
7 7/8"
2 3/8"
2 3/8"
TURNING ON THE UNIT FOR THE FIRST TIME
Thersttimeyouturnontheunit,theunitwillenterthesetupmode.Youcaneasilyfollowtheprompt
messageonthescreentocompletebasicTVsettings.
Make sure the TV antenna or CATV cable has been connected properly to the
TV ANTENNA inputjackontherearofthesystem.
1.ConnecttheTVantenna.
2.Connectthepowercord.
3.Pressthe / ONbuttontoturnontheunit.
4.Pressthe / buttontohighlightAntenna,
then use the ENTER or button to select
“Air”,“CableSTD”,“CableHRC”,“CableIRC”
or“CableAuto“.
5.Use the / button to highlightAuto
Scan,thenpresstheENTERor buttonto
conrm.
6.Theunitwillimmediatelysearchallchannels
for those with adequate signal strength and
storethosechannelswithsignalsinmemory.
Theunitwilltakeafewminutestonishauto
scanandafterthisiscompleted,theunitwill
switchtotherstchannelfound.
To Stop
Menu
Analog Air Channel 10
Analog Channels Found
Autoprogram Menu
Digital Channels Found
Progress(%) 5
0
0
Not Found
To Move To Select To Exit
Enter Menu
OSD Language
Antenna
Initial Setup Menu
Auto Scan
Air
English
PLV76156S7_IB_UL_090727.indd 3 7/28/2009 09:41:04

E - 4
CONTENTS
Pleasecheckandidentifythesuppliedaccessories.
RemoteControl(withbatteries)............................................................................................x1
GETTING STARTED
ACCESSORIES
USING THE REMOTE CONTROL
• Pointtheremotecontrolattheremotesensor
locatedontheunit.
• Whenthereisastrongambientlightsource,the
performanceoftheinfraredremotesensormay
bedegraded,causingunreliableoperation.
• Therecommendedeffectivedistanceforremote
operationisabout16feet(5meters).
TO INSTALL BATTERIES
1.Openthebatterydoor.
2.Insert2“AAA”batteries.
BATTERY REPLACEMENT
Whenthe batteries becomeweak,the operating
distanceoftheremotecontrolisgreatlyreduced
andyouwillneedtoreplacethebatteries.
CAUTION: Danger of explosion if battery is
incorrectlyreplaced.Replaceonlywiththesame
orequivalenttype.
NOTES
• Iftheremotecontrolisnotgoingtobeusedfora
longtime,removethebatteriestoavoiddamage
causedbybatteryleakagecorrosion.
• Donotmixoldandnewbatteries.Donotmix
ALKALINE, standard (CARBON-ZINC) or
rechargeable(NICKEL-CADMIUM)batteries.
• Always remove batteries as soon as they
becomeweak.
• Weakbatteriescanleakandseverelydamage
theremotecontrol.
• WARNING:Donotdisposeofbatteriesinare.
Batteriesmayexplodeorleak.
SAFETY PRECAUTIONS ............................. 1
IMPORTANT SAFETY INSTRUCTIONS ........... 2
QUICK INSTALLATION ............................... 3
CONTENTS ................................................. 4
ACCESSORIES .......................................... 4
GETTING STARTED ..................................... 4
CONTROL REFERENCE GUIDE .............. 5 - 6
CONNECTIONS .......................................... 7 - 8
ConnectingaTVAntenna..........................7
ConnectingToAVCR/Camcorder/Video
GameSystem/Cable/SatelliteSystem....7
Connectingthepowercord........................8
USINGHEADPHONES / EARPHONES ............... 8
INSTALLATION ............................................ 9
TV SETUP ............................................. 10 - 12
Picture Menu ....................................... 10
Audio Menu ....................................... 10
TV Menu .............................................. 11
Setup Menu ....................................... 12
TROUBLESHOOTING GUIDE ............... 13
PLV76156S7_IB_UL_090727.indd 4 7/28/2009 09:41:05

E - 5
CONTROL REFERENCE GUIDE
REMOTE CONTROL
1) MUTE Button
Presstoturnoffthesound.
2) MENU Button
Press to display the on-screen menu or switch
backtothepreviousmenuscreen.
3) CURSOR ( , , , ) Buttons
Usetohighlightselectionsonamenuscreenand
adjustcertainsettings.
ENTER Button
Conrmselectiononamenuscreen.
4) DISPLAY Button
Press to display information on the current
channel.
5) VOL + / VOL - Button
Presstoincrease/decreasethevolume.
6) LAST CH
Presstoswitchrepeatedlybetweenthelasttwo
channelsdisplayed.
7) STANDBY/ON Button
PresstoturnONtheunitorputitinSTANDBY
(OFF)mode.
8) FUNCTION Button
PresstoswitchbetweenTV/AV.
9) LCD MODE Button
PresstoSelectfrompresetscreendisplaysettings
tomatchthetypeofshowyouarewatching.
10) CH / CH Buttons
Press to select the channel upward or
downward.
11) NUMERIC Buttons
Presstoenternumbersorgodirectlytoaspecic
channel.
12) •[dot]Button
Presstoenterdigitalsub-channelswiththenumeric
buttons(i.e.11.3or12-1).
PLV76156S7_IB_UL_090727.indd 5 7/28/2009 09:41:05

E - 6
CONTROL REFERENCE GUIDE
FRONT & SIDE VIEWS
1. AUDIO IN (Left/Right) /
VIDEO IN jacks
2. / ON button
Turnstheunitonandoff.
3.MENU button
Enterstheon-screenTVmenu.
4.FUNCTION button
SelectsTV/AV.
5.CH / CH buttons
PresstoconrmselectionsontheTV
menuscreenand / tochangeTV
channels.
6. VOL + / VOL - controls
Adjuststhevolumelevelandhighlights
selections(Left&Right)ontheTVmenu
screen.
7. Color LCD screen
8. Built-in speakers
9. Remote sensor
Pointtheremotecontrolhere.
Standby indicator
10. Removable stand
11. Power cord
12. Headphones jack
13. TV ANTENNA terminal
Connects a TV antenna or CATV
cable.
7
10
9
1312
11
2
3
6
4
5
1
8
PLV76156S7_IB_UL_090727.indd 6 7/28/2009 09:41:07

E - 7
TV ANTENNA
CONNECTIONS
CONNECTING A TV ANTENNA
Toviewtelevisionchannelscorrectly,asignalmustbereceivedfromoneofthefollowingsources:
- Anindoororoutdooraerialantenna
- Acablesystem
- Asatellitesystem
NOTE
Foroptimal reception of over-the-airTVbroadcasts,we recommend that you use an external xed
antenna.Ifusinganindoorantenna,pleaseensurethatyoupurchaseanantennawithsufcientability
toreceivesignalsinyourhome.Orientationandlocationoftheantennaistypicallycriticalforbest
results–youmayndthatplacementoftheantennanearawindow,orinanelevatedlocation,improves
performance.
ToTVAntenna
terminal
ToHomeAntennaterminal
CablewithoutaCATV
converter
Combination VHF /
UHFantenna
(ATSC/NTSCsignal)
SeparateVHForUHF
antenna
(ATSC/NTSCsignal)
CONNECTING TO A VCR / CAMCORDER / VIDEO GAME SYSTEM / CABLE / SATELLITE
SYSTEM
ConnecttheAUDIO/VIDEOcable(notincluded)asshown:
MakesureyouconnectthecablefromtheAUDIO/VIDEOOUTjackoftheotherequipmenttoAUDIO/
VIDEOINjackofthisunit.
NOTE
Pleaserefertotheconnectedequipment’susermanualformoreinformation.
ToAUDIO/VIDEO
INjacks
ToAUDIO/VIDEO
OUTjacks
PLV76156S7_IB_UL_090727.indd 7 7/28/2009 09:41:08

E - 8
CONNECTIONS
CONNECT THE POWER CORD
• ConnecttheACpowercordintoawalloutlet.
• Pressthe / I buttonontheunitorremotecontroltoturnontheunit.
NOTE
• BesuretheACpowercordisdisconnectedandallfunctionsareoffbeforemakingconnections.
• Makesurethatallthecomponentsareconnectedcorrectly.
•To prevent electrical shock, match wide blade of plug to wide slot of wall outlet, then fully
insert.
• Whenyouarenotgoingtousetheunitforalongperiodoftime,disconnectthepowercord.
To AC outlet
USING HEADPHONES / EARPHONES
• Turndownthevolumebeforeconnectingheadphones/earphonestotheunit,thenadjustthevolume
toyourdesiredlevel.
• Whenheadphones/earphonesareconnected,nosoundwillcomefromthefrontspeakers.
NOTE
Excessivesoundpressurefromearphones/headphonescancausehearingloss.
PLV76156S7_IB_UL_090727.indd 8 7/28/2009 09:41:09

E - 9
INSTALLATION
INSTALLING / REMOVING THE BASE STAND
WARNING:TheLCD Displayisveryfragile,and mustbe protectedatalltimeswhenremovingthe
basestand.Besurethatnohardorsharpobject,oranythingthatcouldscratchordamagetheLCD
display,comesintocontactwithit.DoNOTexertpressureonthefrontoftheunitatanytimebecause
thescreencouldcrack.
1. Disconnectallcablesorcordsconnectedtotheunit.
2. Lay the unit down on a at surface with the back side
facing up. Please make sure to place a soft cushioned
material(suchasapilloworthickpieceoffoam)beneath
thescreen.
3. To install the base stand, place the base stand on the
mountingslot,pushthestandtillitlocks.
4. Toremovethebasestand,keeppressingthelockingarea
ofthebasestandandpulldownwardstoreleasethebase
stand.
MOUNTING THE TV UNIT
1) Markthecorrectmountingpositiononthewall.
2) Insertaxingscrew(s)atthemarkedpositiononthewall.
3) Align the slot hole(s) of the speaker over the screw and pull the TV downward until it is rmly
hooked.
NOTE
Removethebasestandbeforemountingtheunitonthewall.
Press and pull downwards
PLV76156S7_IB_UL_090727.indd 9 7/28/2009 09:41:10

E - 10
TV SETUP
PICTURE MENU
1.PresstheMENUbutton.
2.PressENTERor buttontohighlightPicture
Mode.
3.Usethe or buttontoselectotheroptions
(Contrast, Brightness, Sharpness, Color,
Tint, Aspect Ratio & Color Temperature).
4.UsetheENTERor buttontomakeadjustment.
Thescreenwilladjusttoyourselectedsetting
immediately.
5.Repeatsteps3and4toadjustotheroptions.
6.ToexittheTVSETUPMENUandreturntothe
normalscreen,presstheMENU button.
Picture Mode:Selectfrompresetscreendisplaysettingstomatchthetypeofshowyouarewatching
(Standard,Movie,Soft&Personal).
Contrast:Adjusttosharpenthepicturequality.Thedarkportionsofthepicturebecomericherin
darknessandthelightportionsbecomebrighter.
Brightness:Adjusttobrightenordarkenthewholepicture.
Sharpness:Adjustthesharpnessleveltoimprovedetailinthepicture.
Color:Adjustthecolorofthepicture.
Tint:Adjustnaturalskintonesinthepicturequality.
Aspect Ratio: Selectfrompresetaspectratiotomatchthetypeofshowyouarewatching(Full-screen,
4:3,Zoom,Wide&Auto.)
Color Temperature:Adjustthe3colortemperatureofthepicture.ChoosefromNormal(balanced),
Warm(redwhite)orCool(bluewhite)modes.
AUDIO MENU
1.PresstheMENUbutton.
2.Usethe or buttontoselectAudiosetting.
3.Press ENTER or button to highlightAudio
Mode, then use the or button to select
otheroptions(Audio Language, MTS, Bass,
Treble & Balance).
4.
Use the ENTER or
button to make
adjustment.
5.Repeatsteps3to4toadjustotheroptions.
6.ToexittheTVSETUPMENUandreturntothe
normalscreen,presstheMENU button.
Audio Mode: Selectfrompresetaudiosettings(Standard,Movie,Music&Personal)tomatch
thetypeofshowyouarewatching.
Audio Language: SelectfromEnglish/Spanish/French.(Availablefordigitalchannelsifmultiple
audiolanguagesarebroadcasted.)
MTS (Multi Channel Television Sound):SelectStereo/SAP(SecondaryAudioProgram)/Mono.
Bass: Adjustthebassrange.
Treble: Adjustthetreblerange.
Balance: Adjustthebalanceleveltowardtheleftorrightspeakers.
Note:
SomeTVstationsbroadcastaudioinmorethanonelanguage,theSAP(SecondaryAudioPrograms)
featureallowsyoutolistentothis,ifavailable.
Picture Audio Mode
Balance
Treble
Audio Language
Standard
English
Mono
30
30
0
To Move To Select To Exit
Bass
30MTS
Audio
TV
Setup
Enter Menu
Picture Picture Mode
Aspect Ratio
Color Temperature
Tint
Color
Sharpness
Contrast 50
Standard
Full-screen
50
50
55
50
To Move To Change To Exit
Brightness
Audio
TV
Setup
Enter Menu
Normal
PLV76156S7_IB_UL_090727.indd 10 7/28/2009 09:41:11

E - 11
TV SETUP
TV MENU
1.PresstheMENUbutton.
2.Usethe or buttontoselectTVsetting.
3.PressENTERor buttontohighlightAntenna,
then use the or button to select other
options(DTV Signal, Auto Scan, Auto Scan
Add CH, Channel Skip & Channel Labels).
4.Use the ENTER or button to make
adjustment. The screen will adjust to your
selectedsettingimmediately.
5.Repeatsteps3to4toadjustotheroptions.
6.ToexittheTVSETUPMENUandreturntothe
normalscreen,presstheMENU button.
NOTE
ChannelNo.:2-69ChannelforAir,1-135ChannelforCATV.
Antenna : Select“Air,CableSTD,CableHRC,CableIRC&CableAuto”toreceiveover-
the-airsignal/cablesignal.
DTV Signal: Displaythesignalstrength(fordigitalTVchannelsonly).
Auto Scan : Searchforusablestationsandstoretheminmemory.
Auto Scan Add CH : Searchformoreusablestationsandaddtheminmemory.Thestationsstored
beforearestillkept.
Channel Skip: Skipweakchannelsandthechannelsyoudon’tlike.
Channel Labels : Displayandeditthechannellabel.
Picture DTV Signal
To Move To Select To Exit
Audio
TV
Setup
Enter Menu
Auto Scan
Auto Scan Add CH
Channel Skip
Channel Labels
Antenna Cable HRC
PLV76156S7_IB_UL_090727.indd 11 7/28/2009 09:41:11

E - 12
TV SETUP
SETUP MENU
1.PresstheMENUbutton.
2.Usethe or buttontoselectSetupsetting.
3.Press ENTER or button to highlight Time
Setting,thenusethe or buttontoselect
other options (Time Setting, Sleep Timer,
Password Setting, Parental Control, Closed
Caption, OSD Language & Reset).
4.
Use the ENTER or button to make
adjustment.
5.Repeatsteps3to4toadjustotheroptions.
6.ToexittheTVSETUPMENUandreturntothe
normalscreen,presstheMENU button.
Time Setting: Selecttosetthetimemanuallyorautomatically.
Sleep Timer: SettheLCDTVtoturnitselfoffwithinacertaintime(Off/5min/10min/15min
/30min/60min/90min/120min).
Password Setting: Entera4-digitpassword.Onceentered,thescreenwillpromptyoutoenternew
passwordandconrmyournewpassword.
Parental Control: Enterthe4-digitpasswordtosettheparentalcontrol.(Ifyouforgotthepassword,
enter“8888”tounlocktheparentalcontrol.)
OSD Language : SelectthemenulanguagefromEnglish/Español/Français.
Reset : Resetthedefaultsettings.
Picture Sleep Timer
To Move To Select To Exit
Audio
TV
Setup
Enter Menu
Parental Control
Closed Caption
Time Setting
Off
Password Setting
OSD Language
Reset
English
Closed Caption
CC Mode : SelectclosedcaptionOn,OfforCConMute.
Analog Closed Caption : Selecttheanalogclosedcaption.
Digital Closed Caption : Selectthedigitalclosedcaption.
Digital Caption Style : SelectCustomtoactivatethecaptionstyleitemsandsetyourdesired
detailedsettings.
NOTE
This function only works on programs
broadcastwithcaptions.
To Move To Select To Exit
Enter Menu
CC Mode
Analog Closed Caption
Closed Caption
Digital Closed Caption
Digital Caption Style
Service1
CC1
Off
PLV76156S7_IB_UL_090727.indd 12 7/28/2009 09:41:11

E - 13
TROUBLESHOOTING GUIDE
SYMPTOM CAUSE (AND REMEDY)
Theremotedoesnot
function.
• EnsuretheACpowercordisconnected.
• Theunitisnotturnedon.
Nopower.
• Removeanyobstaclesbetweentheremoteandtheunit.
• Usetheremoteneartheunit.
• Pointtheremoteattheremotesensorontheunit.
• Replacethebatteriesintheremotewithnewones.
• Checkthelocationoftheantennaandadjustitifnecessary.
• Makesuretheantennacableisrmlyconnected.
• Makesureallinputcablesarermlyconnected.
TV
BadPicture(snow,
multipleimages,
distortion,blurry)
• CheckthePICTURESETTINGwithintheTVSETUPMENU.
• ChecktomakesuretheprogramyouarewatchingisbroadcastinColor
andnotBlack&White.
Blackandwhite
picture.
• Makesuretheunitispluggedinandturnedon.
• MakesurethatTVmodeisselected.
• Tryanewchanneltocheckforpossiblestationtrouble.
• Makesuretheantennaisconnectedproperly.
• Increasethevolume.
• Make sure the antenna or audio video source device is working
properly.
• Makesureallcablesarermlyconnected.
• Checkforlocalinterference.
Nopictureorsound.
• Makesuretherearenounshieldedelectricaldevicesnearbythatare
causinginterference.
• Turntheunitofffor30minutes,thentryitagain.
Coloredpatchesof
picture.
Specicationsandappearancearesubjecttochangewithoutnotice.
PLV76156S7_IB_UL_090727.indd 13 7/28/2009 09:41:12

E - 14
Modelno................................................................Productname ................................................................
Typeofset........................................................................................................................................................
Serialno.................................................................Invoiceno........................................................................
Datepurchased......................................................Dealername....................................................................
LIMITEDWARRANTY
VENTURER ELECTRONICS (“VENTURER”)makesthefollowinglimitedwarranty.Thislimitedwarrantyextend
totheoriginalconsumerpurchaserandislimitedtonon-commercialuseoftheproduct.
Ninety(90)DayParts&LaborWarranty
VENTURERproductspurchasedin theUnitedStatesarewarranted tobefreefromdefects inmaterialsor
workmanshipforaperiodofninety(90)daysfromthedateoftheiroriginalretailpurchase.Iftheunitfailsto
conformtothiswarranty,wewillservicetheproductusingneworrefurbishedpartsandproducts,atVENTURER’s
solediscretion.
Duringaperiodofninety(90)daysfromtheeffectivewarrantydate,VENTURERwillprovide,whenneeded,
servicelabortorepairamanufacturingdefectatitsdesignatedServiceCenter.Toobtainwarrantyservicein
theUntiedStates,youmustrstcallourCustomer Support Center at 1-800-252-6123 or 1-866-444-6478,
during the hours listed in the box below.ThedeterminationofservicewillbemadebyVENTURERCustomer
Support. PLEASE DO NOT RETURN YOUR UNIT TO VENTURER WITHOUT PRIOR AUTHORIZATION.
NeworremanufacturedreplacementsfordefectivepartsorproductswillbeusedforrepairsbyVENTURERat
itsdesignatedServiceCenterforninety(90)daysfromtheeffectivewarrantydate.Suchreplacementpartsor
productsarewarrantedforanadditionalninety(90)daysfromthedateofrepairorreplacement.TheCustomer
willberequiredtoshiptheunittotheServiceCenterindicatedatthetimeCustomerSupportiscontactedtomake
thenecessaryrepairs.Thecustomerisresponsibleforalltransportationchargestotheservicefacility.
Packaging and Shipping Instruction
WhenyousendtheproducttotheVenturerservicefacilityyoumustusetheoriginalcartonboxandpacking
materialoranequivalentasdesignatedbyVENTURER.
LIMITEDWARRANTY
Your Responsibility
(1) Youmustretaintheoriginalsalereceipttoprovideproofofpurchase.
(2) ThesewarrantiesareeffectiveonlyiftheproductispurchasedandoperatedintheU.S.A.orCanada.
(3) Warrantiesextendonlytodefectsinmaterialorworkmanship,anddonotextendtoanyproductorparts
whichhavebeenlostordiscarded,ordamagetoproductorpartscausedbymisuse,accident,improper
operationormaintenance,oruseinviolationofinstructionsprovidedwiththeproduct,ortoproductwhich
hasbeenalteredormodiedwithoutauthorizationofVenturer,ortoproductsorpartsthereofwhichhave
hadtheserialnumberremovedorchanged.
OutofWarranty
Intheeventyourproductrequiresrepairafterthelimitedwarrantyperiodhasexpired,pleasecontactour
CustomerSupportCenterat1-800-252-6123, 1-866-444-6478orwww.venturer.com
Hours: Monday–Thursday: 9–7, Friday: 9–5, Saturday: 9–12 EST.
Important:
Youareresponsibleforanytransportation,shippingorinsurancerelativetothereturnofproducttoour
ProductReturnsCenter.
Allwarrantiesimpliedbystatelaw,includingtheimpliedwarrantiesofmerchantabilityandtnessforaparticular
purpose,areexpresslylimitedtothedurationofthelimitedwarrantiessetforthabove.Withtheexceptionof
anywarrantiesimpliedbystatelawasherebylimited,theforegoingwarrantyisexclusiveandinlieuofallother
warranties,guarantees,agreementsandsimilarobligationsofmanufacturerorsellerwithrespecttotherepair
orreplacementofanyparts.InnoeventshallVENTURERbeliableforconsequentialorincidentaldamages.
Noperson,agent,distributor,dealerorcompanyisauthorizedtochange,modifyorextendthetermsofthese
warrantiesinanymannerwhatsoever.Thetimewithinactionmustbecommencedtoenforceanyobligationof
VENTURER arisingunderthewarrantyorunderanystatute,orlawoftheUnitedStatesoranystatethereof,is
herebylimitedtoninety(90)daysfromthedateofpurchase.Thislimitationdoesnotapplytoimpliedwarranties
arisingunderstatelaw.
Thiswarrantygivesyouspeciclegalrightsandyoumayalsohaveotherrights,whichmayvary,fromstate
tostate.Somestatesdonotallowlimitationonhowlonganimpliedwarrantylasts,whenanactionmaybe
brought,ortheexclusionorlimitationofincidentalorconsequentialdamages,sotheaboveprovisionsmay
notapplytoyou.
Formoreinformationonotherproductsandservices,pleasevisitoutwebsiteatwww.venturer.com.
Important: Also keep your “Bill of Sale” as proof of purchase.
PLV76156S7_IB_UL_090727.indd 14 7/28/2009 09:41:12

E - 15
UNIT INCH
16
3
13 3/8
5
11 7/8
5 7/8
3 3/4
PrintedinChina
811-761591W020
PLV76156S7_IB_UL_090727.indd 15 7/28/2009 09:41:15
Table of contents
Other Venturer LCD TV manuals

Venturer
Venturer PLV36220S1 User manual

Venturer
Venturer PLV16100 User manual

Venturer
Venturer PLV36199S1 User manual

Venturer
Venturer PLV76198 User manual

Venturer
Venturer PLV16198 User manual

Venturer
Venturer 15" LCD TV PLV7615H User manual

Venturer
Venturer PLV3117i User manual

Venturer
Venturer PLV36190S5W User manual

Venturer
Venturer PLV16198 User manual

Venturer
Venturer PLV16070 User manual