E - 4
TABLE OF CONTENTS
SAFETY PRECAUTIONS ..................................... 2
IMPORTANT SAFETY INSTRUCTIONS ............. 3
NOTES ON COPYRITHT ................................. 3
TABLE OF CONTENTS ...................................... 4
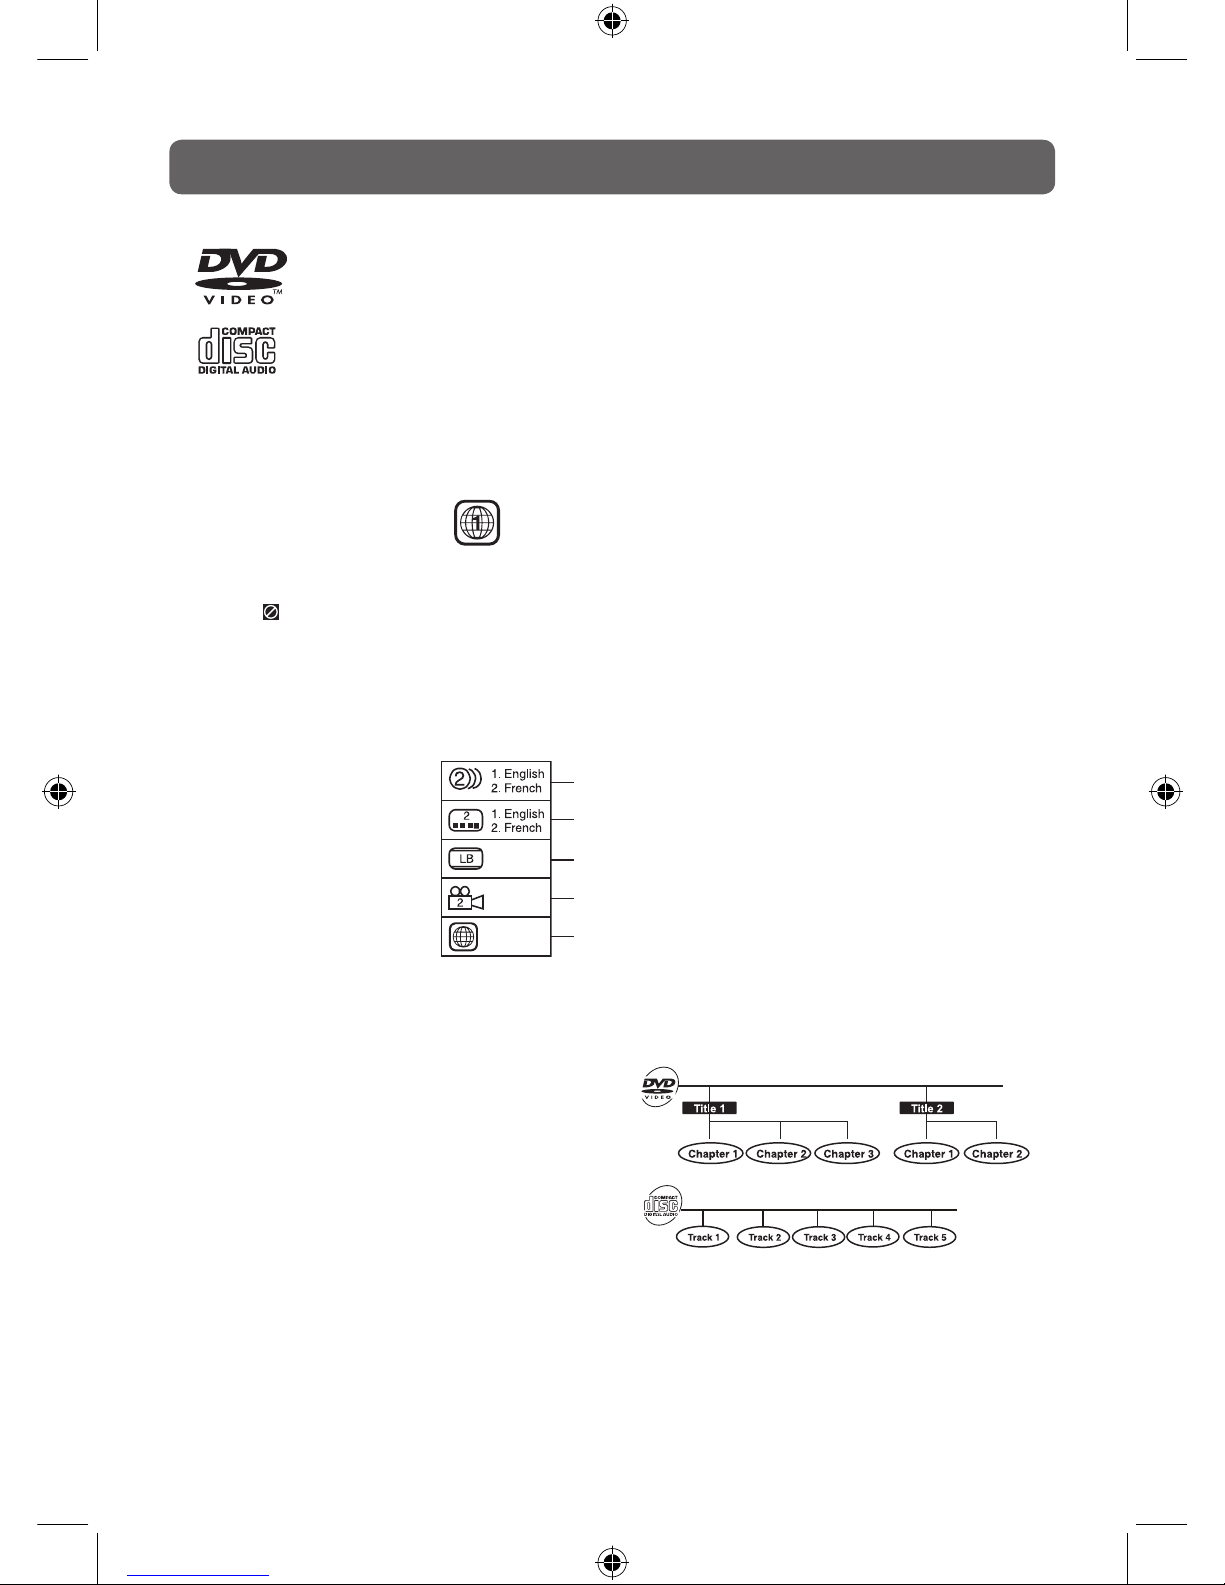
DISC FORMATS ................................................ 5
REMOTE CONTROL ......................................... 6
ACCESSORIES ..................................................6
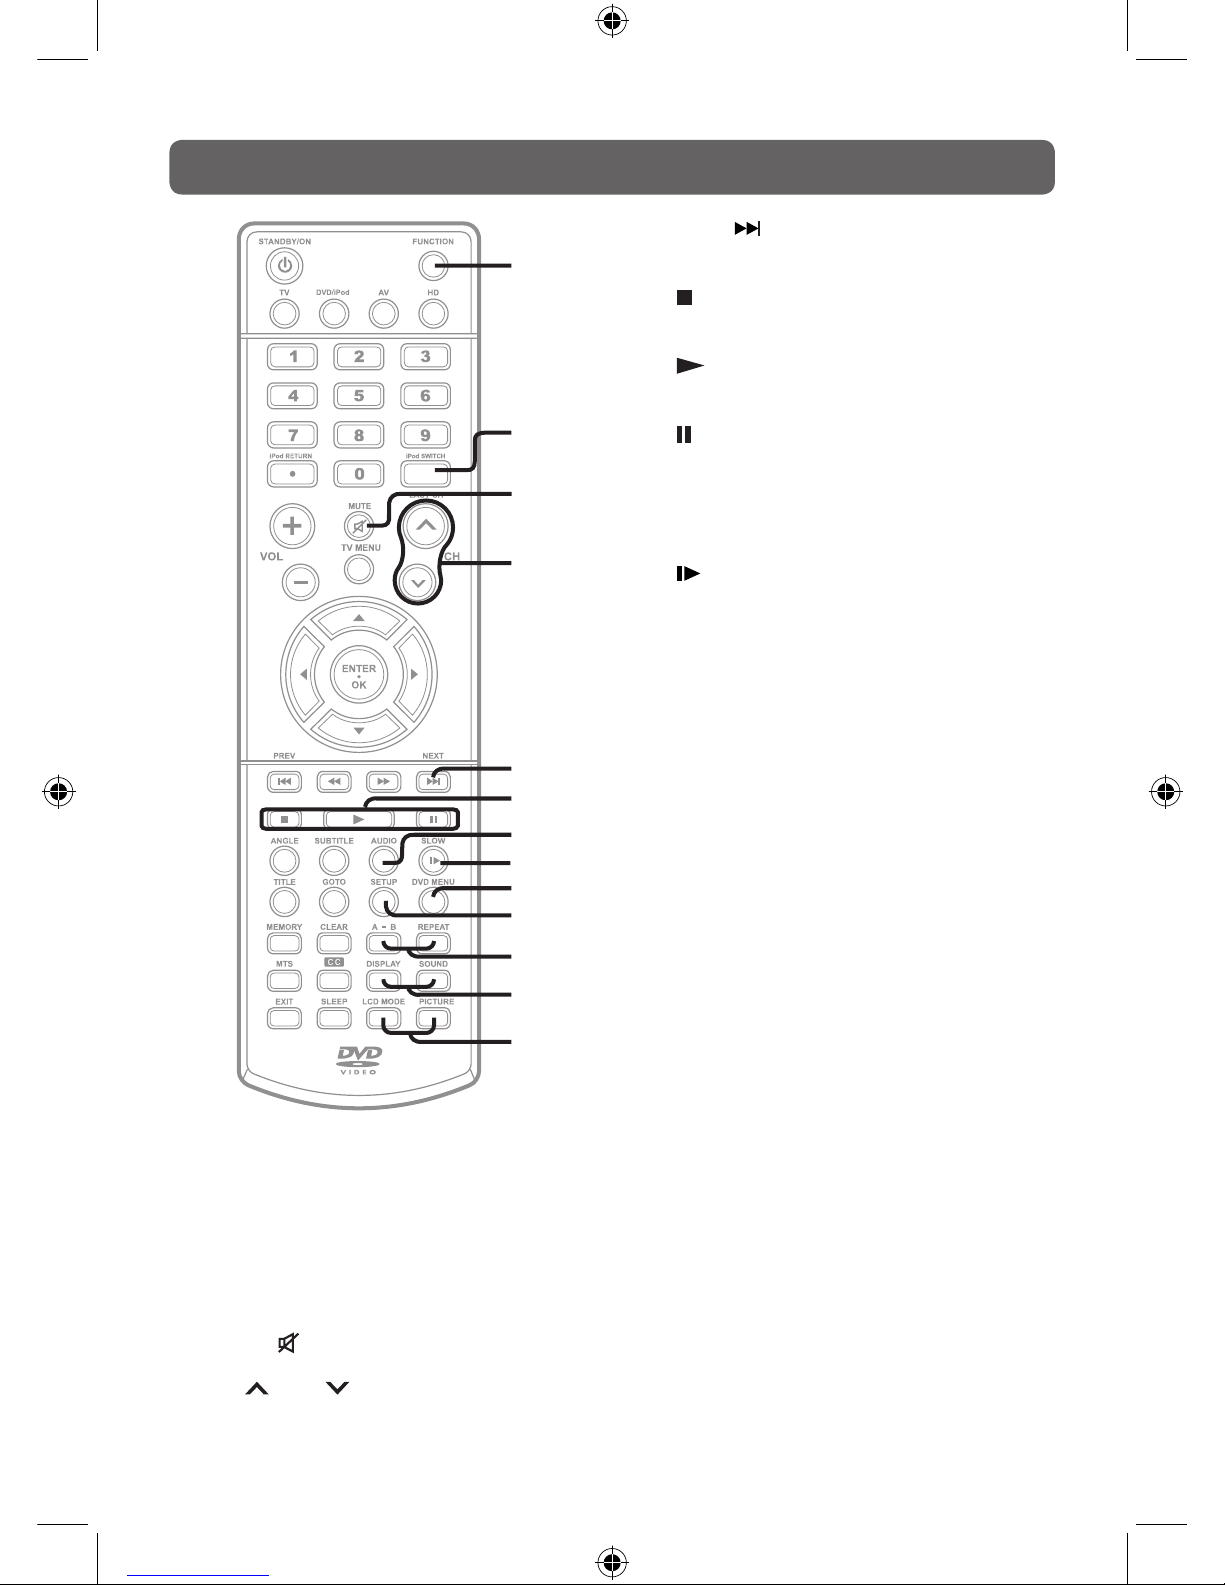
REMOTE CONTROL REFERENCE GUIDE
................................................................. 7 – 8
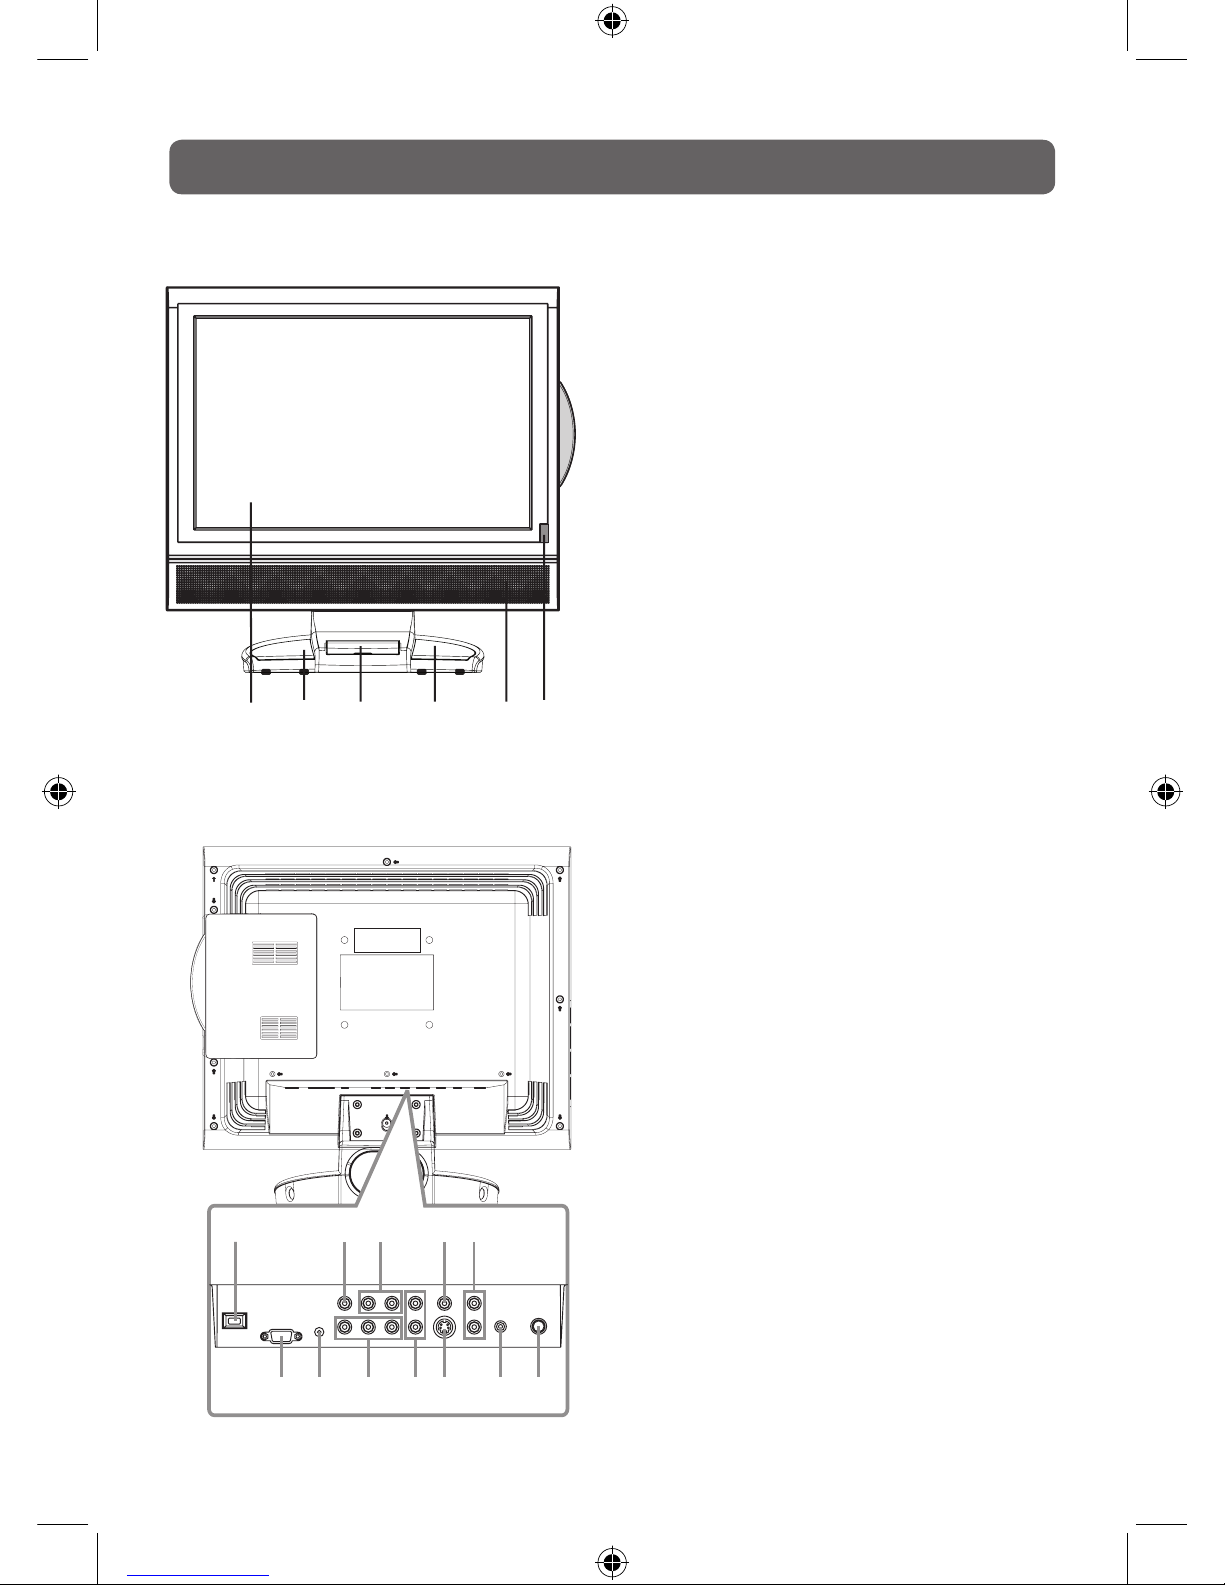
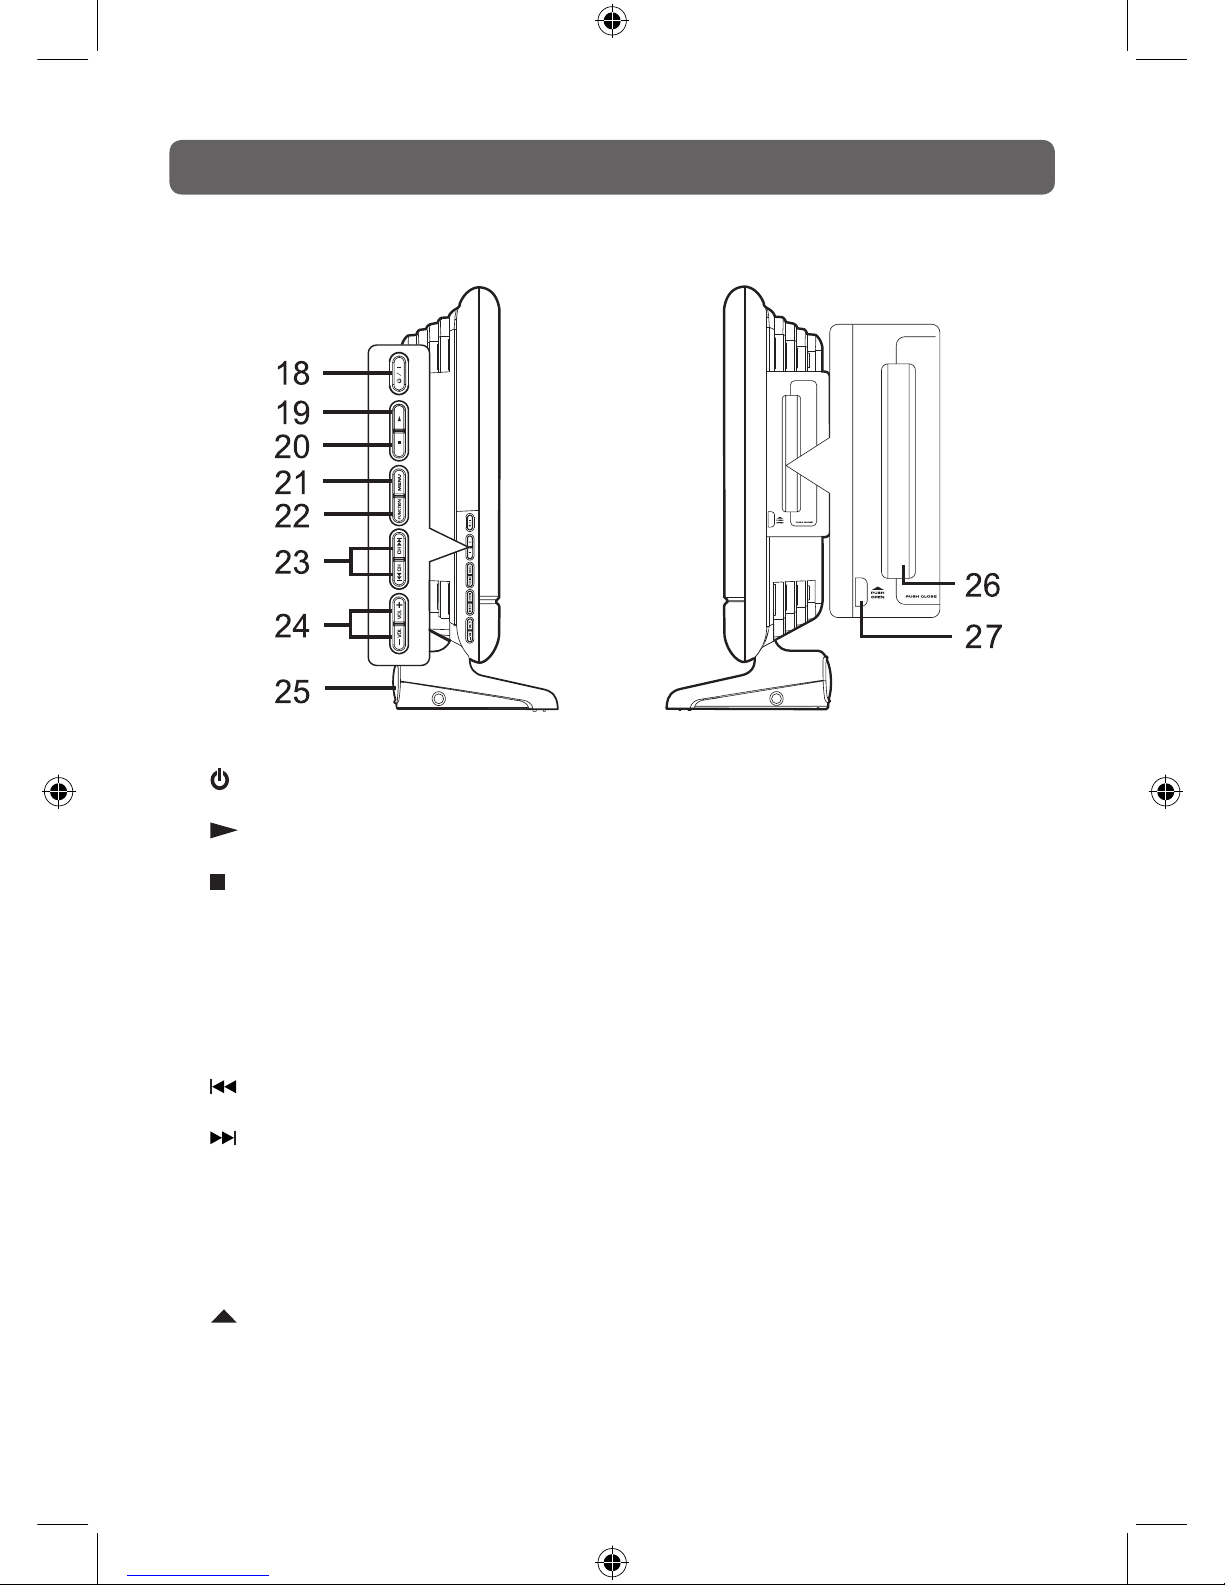
UNIT REFERENCE GUIDE .......................... 9 – 10
CONNECTING A TV ANTENNA/CABLE/
SATELLITE .................................................... 1 1
CONNECTING THE AC POWER CORD ....... 1 1
CONNECTIONS .......................................12–15
SOUND SYSTEM ........................................... 15
INITIAL SETUP ............................................. 1 6
1 6
CD/DVD OPERATION ..............................17–18
17
18
SPECIAL FUNCTIONS ................................... 19
CD/DVD PROGRAMMABLE MEMORY ......... 20
REPEAT PLAYBACK .................................... 20 – 21
2 1
PLAYING A PICTURE FILE DISC ..................... 21
CUSTOMIZING THE DVD FUNCTION
SETTINGS ....................................................... 22
TV Type
Default
TV SETUP ................................................ 23 – 26
PARENTAL
USING TO YOUR IPOD ............................ 27 – 30
MAINTENANCE ............................................. 31
TROUBLESHOOTING GUIDE ..................... 32 – 33