Venturer PLV76198 User manual

PLV76198
19” LCD TELEVISION
OWNER’S MANUAL

GB - 2
CAUTION:
• DANGER OF EXPLOSION IF BATTERY IS
INCORRECTLY REPLACED. REPLACE ONLY
WITHTHESAMEOREQUIVALENTTYPE.
• TO PREVENT ELECTRIC SHOCK, MATCHWIDE
BLADE OF PLUG TO WIDE SLOT OF WALL
OUTLET,THENFULLYINSERT.
• USE OF CONTROLS OR ADJUSTMENTS OR
PERFORMANCEOFPROCEDURESOTHERTHAN
THOSESPECIFIEDMAYRESULTINHAZARDOUS
RADIATIONEXPOSURE.
WARNING:
•TOPREVENTFIREORSHOCKHAZARD,
DONOTEXPOSETHISUNITTORAINOR
MOISTURE. DO NOT PLACE OBJECTS
FILLEDWITHLIQUIDSONORNEARTHIS
UNIT.
• SHOULDANYTROUBLEOCCUR, DISCONNECT
THEACPOWERCORDANDREFERSERVICING
TOAQUALIFIEDTECHNICIAN.
• TOBECOMPLETELYDISCONNECTTHEPOWER
INPUT,THEMAINSPLUGOFAPPARATUSSHALL
BEDISCONNECTEDFROMTHEMAINS.
• THE MAINS PLUG OF APPARATUS SHOULD
NOT BE OBSTRUCTED OR SHOULD BE EASILY
ACCESSEDDURINGINTENDEDUSE.
PLACEMENT INFORMATION
• Donotusethisunitinplacesthatareextremelyhot,
cold,dustyorhumid.
• Do not restrict the airow of this unit by placing it
somewherewithpoorairow,bycoveringitwitha
cloth,byplacingitonbeddingorcarpeting.
• The apparatus shall not be exposed to dripping or
splashingandthatnoobjectslledwithliquids,such
asvases,shallbeplacedonapparatus.
SAFETY INFORMATION
• When connecting or disconnecting the AC power
cord,griptheplugandnotthecorditself.Pullingthe
cordmaydamageitandcreateahazard.
• When you are not going to use the unit for a long
periodoftime,disconnecttheACpowercord.
CONDENSATION INFORMATION
• When left in a heated room where it is warm and
damp, water droplets or condensation may form
inside the equipment.When there is condensation
inside the unit, the unit may not function normally.
Let the unit stand for 1-2 hours before turning the
poweronorgraduallyheattheroomandlettheunit
drybeforeuse.
RATING PLATE LOCATION
Theratingplateislocatedontherearoftheunit.
FCC STATEMENTS
NOTE:Thisunithasbeentestedandfoundtocomply
withthelimitsforaClassBdigitaldevice,pursuantto
Part 15 of the FCC Rules.These limits are designed
to provide reasonable protection against harmful
interference in a residential installation. This unit
generates,usesandcanradiateradiofrequencyenergy
and, if not installed and used in accordance with the
instructions, may cause harmful interference to radio
communication. However, there is not guarantee that
interference will not occur in a particular installation.
If this unit does cause harmful interference to radio
or television reception, which can be determined by
turning theunitoffandon,theuserisencouragedto
try to correct the interference by one or more of the
followingmeasures:
- Reorientorrelocatethereceivingantenna.
- Increase the separation between the unit and
receiver.
- Connecttheunitintoawalloutletonacircuitdifferent
fromthattowhichthereceiverisconnected.
- Consult the dealer or an experienced radio/TV
technicianforhelp.
SAFETY PRECAUTIONS
WARNING: Changes or modications to
this unit not expressly approved by the party
responsibleforcompliancecouldvoidtheuser
authoritytooperatetheunit.
DO NOT EXPOSE THIS UNIT TO RAIN OR MOISTURE
AVIS RISQUE DE CHOC ÉLECTRIQUE -NE PAS OUVRIR
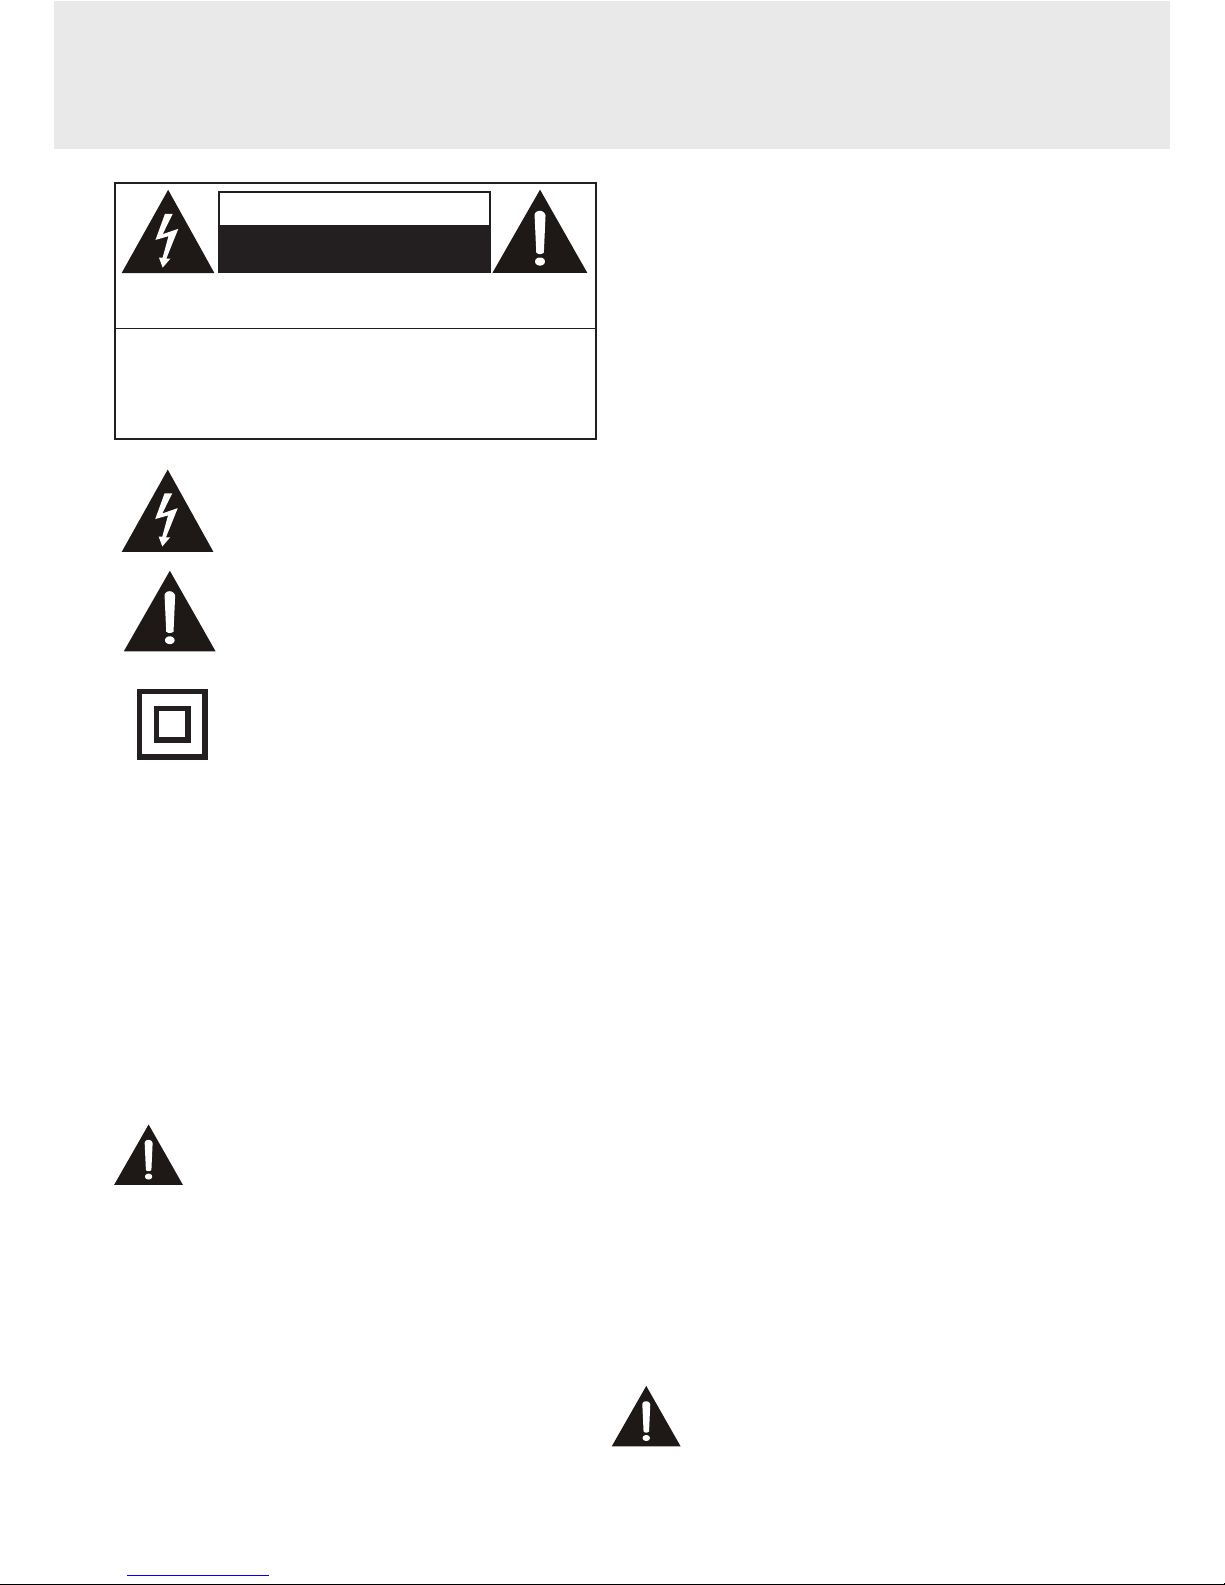
The lightning ash with an arrowhead symbol,
within the equilateral triangle, is intended to
alert the user to the presence of uninsulated
"dangerous voltage" within the product's
enclosurethatmaybeofsufcientmagnitudeto
causeanelectricshock.
The exclamation point within the equilateral
triangle is intended to alert the user to the
presenceofimportantoperatingandmaintenance
(servicing)instructionsinthisownermanual.
caution
RISK OF ELECTRIC SHOCK
DO NOT OPEN
WARNING:TO REDUCE THE RISK OF ELECTRIC
SHOCK, DO NOT REMOVE COVER (OR BACK).
NO USER-SERVICEABLE PARTS INSIDE. REFER
SERVICING TO QUALIFIED PERSONNEL.
ThesymbolforClassII
(DoubleInsulation)

GB - 3
1) Readtheseinstructions.
2) Keeptheseinstructions.
3) Heedallwarnings.
4) Followallinstructions.
5) Donotusethisapparatusnearwater.
6) Cleanonlywithadrycloth.
7) Donotblockanyventilationopenings.Installinaccordancewiththemanufacturer’sinstructions.
8) Donotinstallnearanyheatsourcessuchasradiators,heatregisters,stoves,orotherapparatus(Including
ampliers)thatproduceheat.
9) Donotdefectthesafetypurposeofthepolarizedorgrounding-typeplug.Apolarizedplughastwobladeswith
onewiderthantheother.Agroundingtypeplughastwobladesandathirdgroundingprong.Thewideblade
orthethirdprongisprovidedforyoursafety.Iftheprovidedplugdoesnottintoyourwalloutlet,consultan
electricianforreplacementoftheobsoleteoutlet.
10) Protectthepowercordfrombeingwalkedonorpinchedparticularlyatplugs,conveniencereceptacles,and
thepointwheretheyexitfromtheapparatus.
11) Onlyuseattachments/accessoriesspeciedbythemanufacturer.
12) Useonlywiththecart,stand,tripod,bracket,ortablespeciedbythemanufacturer,orsold
with the apparatus. When a cart is used, use caution when moving the cart / apparatus
combinationtoavoidinjuryfromtip-over.
13) Unplugthisapparatusduringlightningstormsorwhenunusedforlongperiodsoftime.
14) Referallservicingtoqualiedservicepersonnel.Servicingisrequiredwhentheapparatushasbeendamaged
inanyway,suchasthepowercordorplugisdamaged,liquidhasbeenspilledorobjectshavefalleninto
theapparatus,theapparatushasbeenexposedtorainormoisture,doesnotoperatenormally,orhasbeen
dropped.
IMPORTANT SAFETY INSTRUCTIONS

GB - 4
TABLE OF CONTENTS
SAFETYPRECAUTIONS............. 2
IMPORTANTSAFETY
INSTRUCTIONS........................... 3
TABLEOFCONTENTS................ 4
QUICKINSTALLATION................ 5
TURNINGONTHEUNITFORTHEFIRST
TIME..............................................................5
ACCESSORIES............................ 6
GETTINGSTARTED.................... 6
USINGTHEREMOTECONTROL................6
CONTROLREFERENCE
GUIDE....................................... 7-8
REMOTECONTROL.....................................7
TV..................................................................8
CONNECTIONS..................... 9-11
CONNECTINGATVANTENNA/CABLE/
SATELLITE....................................................9
CONNECTINGANA/VDEVICE...................9
CONNECTINGDEVICESWITHA
COMPOSITE(YELLOWRCA-TYPE)VIDEO
OUTPUT........................................................9
CONNECTINGDEVICESWITHA
COMPOSITE(YELLOWRCA-TYPE)VIDEO
INPUT..........................................................10
CONNECTINGAHIGH-DEFINITION(HD)
SOURCE.....................................................10
CONNECTINGAPC...................................11
CONNECTINGANAUDIOAMPLIFIER......11
CONNECTTHEPOWERCORD.................11
INSTALLATION........................... 12
INSTALLING/REMOVINGTHEBASE
STAND.........................................................12
MOUNTINGONTHEWALL........................12
USINGHEADPHONES.............. 12
TVSETUP............................. 13-17
TURNINGTHEUNITON............................13
PICTUREMENU.........................................13
AUDIOMENU..............................................13
TVSETUP...................................................14
TIMEMENU................................................14
SETUPMENU.............................................14
PCSETUP(INPCMODEONLY)..............15
PARENTALMENU.......................................15
TVMENU(FORTVMODEONLY)..............17
CHANNELSKIP..........................................17
CHANNELLABEL.......................................17
TROUBLESHOOTINGGUIDE... 18
MAINTENANCE......................... 18
LIMITEDWARRANTY................ 19
DIGITALTELEVISIONTRANSITION
NOTICE...................................... 20

GB - 5
QUICK INSTALLATION
Whenyouturnonyourtelevisionsetforthersttime,be
suretoplaceitonasolidstablesurface.Toavoiddanger,
do not expose the TV to water, or a heat source (e.g.
lamp, candle, radiator). Do not obstruct the ventilation
grid at the rear and be sure to leave sufcient gaps
aroundtheunitasshown.
TURNING ON THE UNIT FOR THE FIRST TIME
Thersttimeyouturnontheunit,theunitwillenterthesetupmode.Youcaneasilyfollowthepromptmessageon
thescreentocompletebasicTVsettings.
1.Press the / button to select Yes. Press the
ENTERbuttontoproceedwiththeinitialsetup.
2.Usethe / buttontoselectAntenna,thenpress
the / buttontoselectAirorCATV.
3.Usethe / buttontoselectAutoScan,thenpressthe buttontoenterautoscanmenu.Usethe / button
toselectStarttoScan,pressthe buttontobeginscanning.(IfyouselectedCATVonStep2,youneedto
selectCableSystembeforeStarttoScan).Thesystemwillautomaticallystarttoscanandpresetallavailable
TVchannels.
4.AfterscanninghasnishedthesystemwillreturntotherstTVchannelscanned.
Make sure the RF antenna has been
connectedproperlyto theTVantenna
inputjackontherearofthesystem.
2 3/8” 2 3/8”
2 3/8”

GB - 6
ACCESSORIES
PLEASE CHECK AND IDENTIFY THE SUPPLIED ACCESSORIES.
Remotecontrol(withbatteries)...............................................................................................................x1
GETTING STARTED
USING THE REMOTE CONTROL
• Pointtheremotecontrolattheremotesensorlocatedontheunit.
• Whenthereisastrongambientlightsource,theperformanceoftheinfraredremotesensormaybedegraded,
causingunreliableoperation.
• Therecommendedeffectivedistanceforremoteoperationisabout16feet(5meters).
BATTERY REPLACEMENT
Whenthebatteriesbecomeweak,theoperatingdistanceoftheremotecontrolisgreatlyreducedandyouwill
needtoreplacethebatteries.
CAUTION:
Dangerofexplosionifbatteryisincorrectlyreplaced.
NOTES
• Iftheremotecontrolisnotgoingtobeusedforalongtime,removethebatteriestoavoiddamagecausedby
batteryleakagecorrosion.
• Donotmixoldandnewbatteries.DonotmixALKALINE,standard(CARBON-ZINC)orrechargeable(NICKEL-
CADMIUM)batteries.
• Alwaysremovebatteriesassoonastheybecomeweak.
• Weakbatteriescanleakandseverelydamagetheremotecontrol.
WARNING:
•Donotdisposeofbatteriesinare.Batteriesmayexplodeorleak.
•Batteriesshallnotbeexposedtoexcessiveheatsuchassunshine,reorthelike.
TO INSTALL THE BATTERIES
1.Openthebatterydoor. 2.Insert2AAAbatteries
Manyuniversalremotecontrolshavea“learning”feature.Werecommendyouusethatfeaturetoprogramthe
remotecontrol.
Foranyquestionsorproblemsrelatedtoprogrammingauniversalremotecontrol,youmustcontactthecustomer
servicedepartmentoftheuniversalremotecontrolmanufacturerforassistance,orrefertotheinstructionsincluded
withtheuniversalremotecontrol.Wecannotofferassistanceinprogramminguniversalremotecontrols.

GB - 7
REMOTE CONTROL
1. STANDBY / ON button
Press to turn ON the unit or put it in STANDBY
(OFF)mode.
2. TV button
PresstoswitchtoTVmode.
AV button
Press to switch to source connected to AV IN
(composite)inputs.
HD button
Press to switch to source connected to YUV IN
(component)inputs
DISPLAY button
Presstodisplayinformationonthescreen.
3. Number (0 - 9) buttons
4. •[dot]button
Use to enter digital sub-channels. (i.e. 11.3 or
12.7)
5. MENU button
Presstodisplaytheon-screenTVmenu.
6. VOLUME (- / +) buttons
Presstoadjustthevolumelevel.
7. CURSOR ( , , , ) buttons
Presstohighlightselectionsonamenuscreenand
adjustcertainsettings.
ENTER button
Presstoconrmselectionsonamenuscreen.
8. CC button
Press to activate the Closed Captioning feature.
Thisfunctiononlyworksonprogramsbroadcasted
withcaptions.
9. EXIT button
Press to exit the TV SETUP menu and return
directlytonormalviewing.
10. SLEEP button
PresstosettheSLEEPtimer.Theunitwillremain
on for the time that is set, and will automatically
shutoffafterwards.
11. FORMAT Button
Presstoselectthepictureformat.
12. FUNCTION button
PresstoswitchbetweenTV/AVIn/YUVIn/PC
In.
13. LAST CH button
Press to switch repeatedly between the last two
channelsdisplayed.
14. MUTE button
Presstoturnoffthesound.
15. CH / CH buttons
Presstochangethechannels.
16. MTS buttom
PresstoswitchbetweenMONOsound,STEREO
soundandSecondaryAudioProgram(SAP).
17. PICTURE button
Selectfrompresetscreendisplaysettingstomatch
thetypeofshowyouarewatching.(Standard/Soft
/Movie/Personal)
18. SOUND button
Presstoselectfrompresetsoundsettingstomatch
the type of show you are watching. (Standard /
Music/Movie/Personal)
CONTROL REFERENCE GUIDE

GB - 8
1) / I button
Turnstheunitonandoff.
2) MENU button
Presstodisplaytheon-screenTVmenu.
3) FUNCTION button
SelectbetweenTV/AVin/YUVinorPCin.
4) CH ( , ) buttons
Press to change the TV channels and highlight
selections(Up&Down)onthemenuscreen.
5) + VOL – controls
Adjustthevolumelevel.
6) Color LCD Screen
7) Remote Sensor
Donotblockthissensorortheremotecontrolwill
notwork.
StandbyIndicator
Indicates whether the unit is ON or in STANDBY
(OFF)mode.
LightOn:TheunitisinSTANDBY.
LightOff:TheunitisturnedON.
8) RemovableStand
9) PowerCord
10) AVOUTVideoOutputjack
11) AVOUTAudioOutputjacks(Left/Right)
12) AVINVideoInputjack
13) AVINAudioInputjacks(Left/Right)
14) TV Antenna Cable Terminal - Coaxial TV
AntennaInput
15) PCINMonitor/VGAjack
16) PCINAudiojack
17) YUVINComponentVideoInputjacks(Y/Pb/Pr)
18) YUVINAudioInputjacks(Left/Right)
19) AVINS-VideoInputjack
20) Headphonesjack
CONTROL REFERENCE GUIDE
TV

GB - 9
CONNECTIONS
CONNECTING A TV ANTENNA / CABLE / SATELLITE
Toviewtelevisionchannelscorrectly,asignalmustbereceivedfromoneof
thefollowingsources:
- Anindoororoutdooraerialantenna
- Acablesystem
- Asatellitesystem
ConnectingaDigitalAntenna
ThetunerinthisTVreceivesATSCTVsignalsfromanantenna.
This digitalTV can receive standard (SDTV) and high denition (HDTV)
overtheairbroadcasts.
ConnectinganAnalogAntennaorDevice
ThetunerinthisTVreceivesNTSCTVsignals,analogcablesignalsorthe
RFoutputfromasatellitereceiver,VCRorcablebox.
CONNECTING AN A/V DEVICE
Toconnecttootherequipmentsuchas
aVCR, camcorder, satellite system or
cable,etc.
Connecting to aVCR / Camcorder /
SatelliteSystem/Cable
Connect the AUDIO and S-VIDEO
cable(notincluded)asshown.
Makesureyouconnectthecablefrom
theotherequipment(AUDIOOUTand
S-VIDEOOUT) tothis unit(AUDIOIN
andS-VIDEOIN).
NOTE
Pleaserefertotheusermanualforthe
otherequipmentformoreinformation.
Satellite,cableorTVantennacabletoTV
ANTENNAterminal(cablenotincluded)
CONNECTING DEVICES WITH A COMPOSITE (YELLOW RCA-TYPE) VIDEO OUTPUT
ToconnectA/VdevicessuchasaVCR,videogamesystemorcamcorder.
ConnectingtoaVCR/VideoGameSystem/Camcorder
ConnecttheAUDIO/VIDEOcable(notincluded)asshown.
Makesureyouconnectthecablefromtheotherequipment(AUDIOandVIDEOOUT)tothisunit(AUDIOand
VIDEOIN).
NOTE
Pleaserefertotheusermanualfortheotherequipmentformoreinformation.
To AUDIO IN
jacks(AVIN)
To S-VIDEO
INjack
ToS-VIDEOOUT/AUDIO
OUTjacks
To AUDIO / VIDEO
OUTjacks
ToAUDIO/VIDEOIN
jacks(AVIN)

GB - 10
CONNECTIONS
CONNECTING DEVICES WITH A COMPOSITE (YELLOW RCA-TYPE) VIDEO INPUT
ToconnectA/VdevicessuchasaVCR,PVRorcamcorder.
Connecting to a VCR / PVR /
Camcorder
ConnecttheAUDIO/VIDEOcable(not
included)asshown.
Makesureyouconnectthecablefrom
the other equipment (AUDIO and
VIDEO IN) to this unit (AUDIO and
VIDEOOUT).
NOTE
Pleaserefertotheusermanualforthe
otherequipmentformoreinformation.
CONNECTING A HIGH-DEFINITION (HD) SOURCE
High-Denition(HD)DeviceswithcomponentvideooutputmustbeconnectedtotheYUVinput.
Connectthecomponentvideocableandaudiocable(notincluded)asshown.
Makesureyouconnectthecomponentvideocableandaudiocablefromtheotherequipment (COMPONENT
VIDEOOUTandAUDIOOUT)tothisunit(COMPONENTVIDEOINandAUDIOIN-YUVIN).
NOTE
WhenconnectingaDVDplayertothetelevision,thepictureresolutionissolelydependentupontheresolution
supportedbytheDVDplayerattached.DVDplayerresolutionsvaryfrom480ito1080i,andthisunitcansupport
DVDplayersuptoamaximumresolutionof1080i.
To AUDIO
INjacks
(YUVIN) To AUDIO
OUTjacks
To COMPONENT
VIDEOINjacks
(YUVIN)
ToCOMPONENT
VIDEOOUTjacks
*Mayrequireasubscriptionfor
receiving HD channels. Check
withyourcable/satelliteservice
providerfordetails.
To AUDIO /
VIDEO OUT
jacks
ToAUDIO/VIDEOINjacks

GB - 11
CONNECTIONS
CONNECTING A PC
Connectthe15-pinD-SUBPC/VGAconnectorfrom
your computer to the 15-pin D-SUB PC/VGA input
onthisunitusingamonitorcableandanaudiocable
(notincluded)asshown.
Makesureyouconnectthecablefromthecomputer
(PC Connector and AUDIO - PC OUT) to this unit
(MONITOR/VGAandAUDIO-PCIN).
CONNECTING AN AUDIO AMPLIFIER
Thisconnectionallowsyoutouseanaudioamplier
andexternalspeakers.
ConnecttheAUDIOcable(notincluded)asshown.
Make sure you connect the cable from the other
equipment(AUDIOIN)tothisunit(AUDIOOUT).
CONNECT THE POWER CORD
• ConnecttheACpowercordintoawalloutlet.
• Pressthe /Ibuttonontheunitorremotecontroltoturnontheunit.
NOTE
• Be sure the AC power cord is disconnected and all
functionsareoffbeforemakingconnections.
• Make sure that all the components are connected
correctly.
• To prevent electrical shock, match wide blade of plug to
wideslotofwalloutlet,thenfullyinsert.
• Whenyouarenotgoingtousetheunitforalongperiodof
time,disconnectthepowercord.
• The apparatus shall not be exposed to dripping or
splashing and that no objects lled with liquids, such as
vases,shallbeplacedonapparatus.
• Mains plug is used as the disconnect device. It shall
remain readily operable and should not be obstructed
duringintendeduse.Tobecompletelydisconnectedtheapparatusfromsupplymains,themainsplugofthe
apparatusshallbedisconnectedfromthemainssocketoutletcompletely.

GB - 12
INSTALLATION
MOUNTING ON THE WALL
This unit is VESA-compliant, and is designed to be
wall-mounted with aVESA-compliant 3” x 3” (75mm x
75mm) mounting kit designed for at-panel TVs (sold
separately).Mountthisunitaccordingtotheinstructions
includedinthemountingkit.
NOTE
Removethebasestandbeforemountingtheunitonthe
wall.
INSTALLING / REMOVING THE BASE STAND
WARNING:TheLCDDisplayisveryfragile,andmustbeprotectedatalltimeswhenremovingthebasestand.Be
surethatnohardorsharpobject,oranythingthatcouldscratchordamagetheLCDdisplay,comesintocontact
withit.DoNOTexertpressureonthefrontoftheunitatanytimebecausethescreencouldcrack.
1.Disconnectallcablesorcordsconnectedtotheunit.
2.Laytheunitdownonaatsurfacewiththebacksidefacingup.Pleasemakesuretoplaceasoftcushioned
material(suchasapilloworthickpieceoffoam)beneaththescreen.
3.Toinstallthebasestand,placethebasestandonthe
mountingslot,pushthestandtillitlocks.
4.Toremovethebasestand,keeppressingthelocking
areaofthebasestandandpulldownwardstorelease
thebasestand.
USING HEADPHONES/EARPHONES
• Turn down the volume before connecting
headphones/earphonestotheunit,thenadjust
thevolumetoyourdesiredlevel.
• When headphones/earphones are connected,
nosoundwillcomefromthefrontspeakers.
NOTE
Avoidlisteningtosoundathighlevelsforprolonged
periods of time.This may be harmful to you and
maycausehearingloss.
Headphones/earphones
(1/8"[3.5mm]diameterplug)

GB - 13
TURNING THE UNIT ON
WhentheACpowercordisconnected,pressthe /Ibuttonontheunittoturniton.PresstheFUNCTION
buttontoselectthedesiredmode(TV/AVin/YUVinorPCin).
Note:When the unitisnot going tobeused fora longtime,disconnectthe ACpowercordfromACpower
outlet.
TV SETUP
Note: Some setting items on the menu screen may not activate depending on what mode the unit is
currentlyin(TV/AV/HD).
PICTURE MENU
1.PresstheMENUbutton.
2.Pressthe buttontoenterPICTUREsettings.
3.Use the or button to select the options (Picture Mode,
Contrast, Brightness, Sharpness, Tint or Color). Adjust
them using the or button (Screen will change to your
desiredsetting).
4.Repeatstep3toadjustotheroptions.
5.ToexittheMAINMENUandreturntothenormalscreen,press
theEXITorMENUbuttonrepeatedly.
PictureMode: Selectfrompresetscreendisplaysettingstomatchthetypeofshowyouarewatching(Standard,
Soft, Movie and Personal). Select Personal mode to recall your custom settings on contrast,
brightness,sharpness,tintandcolor.
Contrast : Adjusttosharpenthepicturequality.Theblackportionsofthepicturebecomericherindarkness
andthewhitebecomebrighter.
Brightness: Adjustthebrightnessofthepicture.Brightenordarkenthewholepicture.
Sharpness: Adjustthesharpnessleveltoimprovedetailinthepicture.
Tint: Adjustthetintofthepicture.(towardpurple/towardgreen)
Color: Adjustthecolorofthepicture.
AUDIO MENU
1.PresstheMENUbutton.
2.Usethe or buttontoselectAUDIO,thenpressthe button
toentertheAUDIOsettings.
3.Use the or button to select the options (Sound Mode,
Bass, Treble, Balance, Audio Language or MTS). Adjust
themusingthe or button.
4.Repeatstep3toadjustotheroptions.
5.ToexittheMAINMENUandreturntothenormalscreen,press
theEXITorMENUbuttonrepeatedly.
Note:Experimentwithdifferentsoundsettingsuntilyoundthe
settingsyouprefer.
SoundMode: Selectfrompresetsoundsettings(Standard,Music,MovieorPersonal)tomatchthetypeof
showyouarewatching.SelectPersonalmodetorecallyourcustomsettingsonbass,treble
andbalance.
Bass: Adjustthebassrange.
Treble: Adjustthetreblerange.
Balance: Adjustthebalanceleveltowardtheleftorrightspeakers.
AudioLanguage: Select from English / French / Spanish. (Available for digital channels if multiple audio
languagesarebroadcasted.)
MTS(MultiChannelTelevisionSound): SelectStereo/SAP(SecondaryAudioProgram)/Mono.
Note: SomeTV stations broadcast audio in more than one language, the SAP (Secondary Audio Programs)
featureallowsyoutolistentothis,ifavailable.

GB - 14
TV SETUP
TIME MENU
1.PresstheMENUbutton.
2.Usethe or buttontoselectTIME,thenpressthe button
toentertheTIMEsettings.
3.Usethe or buttontoselecttheoptions(OSDDuration,
SleepTimer,TimeZoneorDaySavingTime).Adjustthem
usingthe or button.
4.Repeatstep3toadjustotheroptions.
5.To exit the MAIN MENU and return to the normal screen,
presstheEXITorMENUbuttonrepeatedly.
OSD(OnScreenDisplay)Duration:SelectthelengthoftimefortheOnscreenmenuisdisplayed:15Sec/30
Sec/45Sec/60Sec.
SleepTimer: SelectthelengthoftimebeforetheunitautomaticallychangestoStandbymode:Off->5
Minutes->10Minutes->15Minutes->30Minutes->60Minutes->90Minutes->120
Minutes->Off.
TimeZone: SelectthetimezonefromEastern/Central/Mountain/Pacic/Alaska/Hawaii.
DaySavingTime: SelectOntoactivatedaylightsavingstime.
Clock: Displaythecurrenttime.
SETUP MENU
1.PresstheMENUbutton.
2.Use the or button to select SETUP, then press the
buttontoentertheSETUPsettings.
3.Usethe or buttontoselecttheoptions(OSDLanguage,
ColorMode,PCSetup,ClosedCaptionorRestoreSetting).
Adjustthemusingthe or button(Screenwillchangetoyour
desiredsetting);orpressthe buttontogointothedetailed
settings.
4.PresstheMENUbuttontoreturntothepreviousmenu.
5.Repeatsteps3and4toadjustotheroptions.
6.ToexittheMAINMENUandreturntothenormalscreen,press
theEXITorMENUbuttonrepeatedly.
OSD(OnScreenDisplay)Language: SelectOn-screenmenulanguagefromEnglish/French/Spanish.
ColorMode: Adjustthe threecolortemperatureofthe picture. Choose fromNormal (balanced),Warm
(redwhite),orCool(bluewhite)modes.
RestoreSetting: IfyouresettheTVtothefactorysettings,allyourpresentsettingsonPICTUREandAUDIO
willbeerasedandreplacedbythefactory’sdefaultsettings.

GB - 15
TV SETUP
PC SETUP (IN PC MODE ONLY)
- Resolution:1,440x900
- RefreshFrequency:60Hz
H - Pos : Centertheimagebymovingitleftorright.
V - Pos : Centertheimagebymovingitupordown.
Clock: Adjuststhedisplayclockto change widthof the
image.
Phase: Adjusts the image if there is icker of screen
letters,colormisalignment,orblurring.
AutoAdjust:Adjusttheimageautomatically.
ClosedCaption
CCMode: SelectclosedcaptionOn,OfforCC
onMute.
AnalogClosedCaption: Selecttheanalogclosedcaption.
DigitalClosedCaption: Selectthedigitalclosedcaption.
DigitalCaptionStyle: SelectasBroadcastertousethedefaultdigitalcaptionstyleofthebroadcasterSelect
Customtoactivatethecaptionstyleitemsandsetyourdesireddetailedsettings.
PARENTAL MENU
Password
1.PresstheMENUbutton.
2.Use the or button to select PARENTAL, then press the
buttonto enter the PARENTAL settings.Themenu locked
screenwillbedisplayed.
3.Entera4-digitpassword.Onceentered,thescreenwillenter
theParentalmenu.Thepresetpasswordis0000.
Ifyouforgetthepassword,
enter“8888“tounlockparental
control.
Note
ThisfunctiononlyworksonATSCprogramsbroadcast
withcaptions.

GB - 16
TV SETUP
Parental
1.Usethe or buttontoselectvariousParentalsettings.Adjust
themusingthe or button,orpressthe buttontogointo
thedetailedsettings.
2.PresstheMENUbuttontoreturntothepreviousmenu.
3.Repeatsteps1-2toadjustotheroptions.
4.ToexittheMAINMENUandreturntothenormalscreen,press
theEXIT orMENUbuttonrepeatedly.
TV-Y : Recommendedforallchildren.
TV-Y7 : Recommendedforallchildrenage7andabove.
TV-G : GeneralAudience.
TV-PG : ParentalGuidanceSuggested.
TV-14 : ParentalStronglyCautioned.
TV-MA : MatureAudienceOnly.
N/A :Notrated.
G :GENERALAUDIENCES,Suitableforallages.
PG :PARENTALGUIDANCESUGGESTED-Somematerialmaynotbesuitablefor
children.
PG-13 :PARENTSSTRONGLYCAUTIONED-Somematerialmaybeinappropriatefor
childrenunder13.
R :RESTRICTED, Under 17 requires accompanying parent or adult guardian for
viewinginmovietheaters.
NC-17 : Noone17orunderadmittedinmovietheaters,
X :AdultsOnly.
E : Exempt.
C :Children.
C8+ :Recommendedforchildrenage8andolder.
G :GENERALAUDIENCES,Suitableforallages.
PG :PARENTALGUIDANCESUGGESTED-Somematerialmaynotbesuitablefor
children.
14+ :Viewers14yearsandolder.
18+ :AdultProgramming.
E : Exempt.
G :GENERALAUDIENCES,Suitableforallages.
8ans+ :Notrecommendedforyoungchildren.
13ans+ : Notsuitableforchildrenundertheageof13.
16ans+ : Notsuitableforchildrenundertheageof16.
18ans+ : AdultProgramming.
U.S.MPAA
Ratings
U.S.TV
Ratings
Canadian
English
Ratings
Canadian
French
Ratings
ChangePassword:Entertheoldpassword(thepresetpassword
is0000ifyoudidnotchangeit),thenenter
new password and conrm it.(Remember
yourpassword!)
RatingEnable: Select On to edit the following parental
items.SelectOfftodisableparentalcontrol.
US: SetTVandMPAAratings.
Canada: SetCanadaEnglishandCanadaFrenchratings.
RRTSetting: SetRatingRegionTable.
Reset RRT: ResetRatingRegionTabletothedefaultsettings.

GB - 17
TV SETUP
Antenna: Air(over-the-airbroadcasts,Ch2-69)orCATV(cable/satellitebroadcasts,CH1-135)mode
areavailable.
Auto Scan: Searchforusablestationsandstoretheminmemory.
AutoScanAddCH:Searchformoreusablestationsandaddtheminmemory.Thestationsstoredbeforearestill
kept.
ChannelSkip: Skipweakchannelsandthechannelsyoudon’tlike.
ChannelNo.: SelectadifferentTVchannel.
ChannelLabel: Displayandeditthechannellabel.
DTVSignal: Displaythesignalstrength(fordigitalTVchannelsonly).
TV MENU (FOR TV MODE ONLY)
1.PresstheMENUbutton.
2.Usethe or buttontoselectTV,thenpressthe buttonto
entertheTVsettings.
3.Use the or buttonto select theoptions(Antenna, Auto
Scan, Auto Scan Add CH, Channel Skip, Channel No.,
ChannelLabelorDTVSignal).Adjustthemusingthe or
button,orpressthe buttontogointothedetailedsettings.
4.PresstheMENUbuttontoreturntothepreviousmenu.
5.Repeatsteps3and4toadjustotheroptions.
6.ToexittheMAINMENUandreturntothenormalscreen,press
theEXITorMENUbuttonrepeatedly.
CHANNEL SKIP
1.Usethe or buttontoselectachannel.(Pressthe button
toselectthelastchannelofthepage;pressagaintogotothe
nextpage.Pressthe buttontoselecttherstchannelofthe
page;pressagaintoreturntothepreviouspage.)
2.PresstheENTERbuttontoshiftbetweenOn/Off.(SelectOn
toskiptheselectedchannel.Thechannelwillnotappearwhen
youpresstheCH /CH button.)
CHANNEL LABEL
Youcaneditalabelforeachchannel.
1.Usethe or buttontoselectthenumberorletter.Usethe
or buttontomoveandeditthenextcharacter.
2.Afterediting,theChannelandChannelLabelwillbeshownon
thescreenwhenyoupresstheDISPLAYbutton.
CATV
2-0

GB - 18
SYMPTOM CAUSE (AND REMEDY)
TROUBLESHOOTING GUIDE
• CheckthattheACpowercordisconnected.
• Theunitisnotturnedon.
• Removeanyobstaclesbetweentheremoteandtheunit.
• Usetheremoteneartheunit.
• Pointtheremoteattheremotesensorontheunit.
• Replacethebatteriesintheremotewithnewones.
• Checkthelocationoftheantennaandadjustitifnecessary.
• Makesuretheantennacableisrmlyconnected.
• Makesureallinputcablesarermlyconnected.
• CheckthePICTUREMENUwithintheTV/DTV/RADIOSETUP.
• ChecktomakesuretheprogramyouarewatchingisbroadcastinColorandnot
Black&White.
• Makesuretheunitispluggedinandturnedon.
• MakesureTVmodeisselected.
• Tryanewchanneltocheckforpossiblestationtrouble.
• Makesuretheantennaisconnectedproperly.
• Increasethevolume.
• Makesuretheantennaoraudiovideosourcedeviceisworkingproperly.
• Makesureallcablesarermlyconnected.
• Checkforlocalinterference.
• Make sure there are no unshielded electrical devices nearby that are causing
interference.
• Undertheinuenceofelectrostaticphenomenon,theproductmaymalfunctionand
requireusertopowerreset.
• Unplugandre-plugtheACpowercord.
Nopower.
Theremotedoesnot
function.
TV
BadPicture(snow,
multipeimages,
distortion,blurry)
Blackandwhitepicture.
Nopictureorsound.
Coloredpatchesof
picture.
Function key does not
respondcorrectly.
CLEANING THE UNIT
• BesuretoturntheunitoffanddisconnecttheACpowercordbeforemaintainingtheunit.
• Wipetheunitwithadrysoftcloth.Ifthesurfacesareextremelydirty,wipecleanwithacloththathasbeen
dippedinaweaksoap-and-watersolutionandwrungoutthoroughly.Wipewithadrycloth.
• Neverusealcohol,benzine,thinner,cleaninguidorotherchemicals.DoNOTusecompressedairtoremove
dust.
MAINTENANCE

GB - 19
VENTURER ELECTRONICS (“VENTURER”)makesthefollowinglimitedwarranty.Thislimitedwarrantyextendstothe
originalconsumerpurchaserandislimitedtonon-commercialuseoftheproduct.
Ninety(90)DayParts&LaborWarranty
VENTURERproductspurchasedintheUnitedStatesarewarrantedtobefreefromdefectsinmaterialsorworkmanship
foraperiodofninety(90)daysfromthedateoftheiroriginalretailpurchase.Iftheunitfailstoconformtothiswarranty,
wewillservicetheproductusingneworrefurbishedpartsandproducts,atVENTURER’ssolediscretion.
Duringaperiodofninety(90)daysfromtheeffectivewarrantydate,VENTURERwillprovide,whenneeded,service
labortorepairamanufacturingdefectatitsdesignatedServiceCenter.ToobtainwarrantyserviceintheUnitedStates,
youmustrstcallourCustomerSupportCenterat1-866-444-6478or1-800-252-6123,duringthehourslistedinthe
boxbelow.ThedeterminationofservicewillbemadebyVENTURERCustomerSupport.PLEASE DO NOT RETURN
YOURUNITTOVENTURERWITHOUTPRIORAUTHORIZATION.Neworremanufacturedreplacementsfordefective
partsorproductswillbeusedforrepairsbyVENTURERatitsdesignatedServiceCenterforninety(90)daysfromthe
effectivewarrantydate.Suchreplacementpartsorproductsarewarrantedforanadditionalninety(90)daysfromthe
dateofrepairorreplacement.TheCustomerwillberequiredtoshiptheunittotheServiceCenterindicatedatthetime
CustomerSupportiscontactedtomakethenecessaryrepairs.Thecustomerisresponsibleforalltransportationcharges
totheservicefacility.
PackagingandShippingInstruction
WhenyousendtheproducttotheVENTURERservicefacilityyoumustusetheoriginalcartonboxandpackingmaterial
oranequivalentasdesignatedbyVENTURER.
LIMITED WARRANTY
YourResponsibility
(1) Youmustretaintheoriginalsalesreceipttoprovideproofofpurchase.
(2) ThesewarrantiesareeffectiveonlyiftheproductispurchasedandoperatedintheU.S.A.orCanada.
(3) Warrantiesextendonlyto defectsinmaterialor workmanship, anddonot extendtoanyproductorpartswhich
havebeenlost or discarded,ordamage to product orparts causedbymisuse,accident,improperoperation or
maintenance,oruseinviolationofinstructionsprovidedwiththeproduct,ortoproductwhichhasbeenalteredor
modiedwithoutauthorizationofVENTURER,ortoproductsorpartsthereofwhichhavehadtheserialnumber
removedorchanged.
OutofWarranty
In the event your product requires repair after the limited warranty period has expired, please contact our
CustomerSupportCenterat1-866-444-6478,1-800-252-6123orwww.venturer.com.
Hours:Monday-Thursday:9am-7pm,Friday:9am-5pm,Saturday:9am-Noon,Easterntime.
Important:Youareresponsibleforanytransportation,shippingorinsurancerelativetothereturnofproducttoour
ProductReturnsCenter.
Allwarrantiesimpliedbystatelaw,includingtheimpliedwarrantiesofmerchantabilityandtnessforaparticularpurpose,
are expressly limited to the duration of the limited warranties set forth above.With the exception of any warranties
impliedbystatelawasherebylimited,theforegoingwarrantyisexclusiveandinlieuofallotherwarranties,guarantees,
agreementsandsimilarobligationsofmanufacturerorsellerwithrespecttotherepairorreplacementofanyparts.Inno
eventshallVENTURERbeliableforconsequentialorincidentaldamages.
Noperson,agent,distributor,dealerorcompanyisauthorizedtochange,modifyorextendthetermsofthesewarranties
inanymannerwhatsoever.ThetimewithinactionmustbecommencedtoenforceanyobligationofVENTURERarising
underthewarrantyorunderanystatute,orlawoftheUnitedStatesoranystatethereof,isherebylimitedtoninety(90)
daysfromthedateofpurchase.Thislimitationdoesnotapplytoimpliedwarrantiesarisingunderstatelaw.
Thiswarrantygivesyouspeciclegalrightsandyoumayalsohaveotherrights,whichmayvary,fromstatetostate.
Some states do not allow limitation on how long an implied warranty lasts, when an action may be brought, or the
exclusionorlimitationofincidentalorconsequentialdamages,sotheaboveprovisionsmaynotapplytoyou.
Formoreinformationonotherproductsandservices,pleasevisitourwebsiteatwww.venturer.com.
Important:Alsokeepyour“BillofSale”asproofofpurchase.
Serialno......................................................................... Invoiceno.....................................................................
Datepurchased............................................................. Dealername................................................................
FORSERVICEANDREPAIR,PLEASEVISITwww.venturer.com
LIMITED WARRANTY

DigitalTelevisionTransitionNotice:
Thisdevicecontainsadigitaltelevisiontuner,soitshouldreceivedigitalover
theairTV programming,withasuitable antenna, after the endoffull-power
analogTVbroadcastingintheUnitedStatesonFebruary17,2009.Someolder
televisionreceivers,iftheyrelyonaTVantenna,willneedaTVConverterto
receiveovertheairdigitalprogramming,butshouldcontinuetoworkasbefore
forotherpurposes(e.g.,forwatchinglow-powerTVstationsstillbroadcasting
inanalog,watchingpre-recordedmovies,orplayingvideogames).
Formoreinformation,pleaseseewww.DTV.govorcall1-888-CALL-FCC.For
information ontheTVConverterprogram,and ongovernmentcouponsthat
maybeused toward thepurchaseof one,seewww.dtv2009.gov,orcall the
NTIAat1-888-DTV-2009.
811-711991W080
PrintedinChina
Table of contents
Other Venturer LCD TV manuals

Venturer
Venturer PLV16198 User manual

Venturer
Venturer 15" LCD TV PLV7615H User manual

Venturer
Venturer PLV3117i User manual

Venturer
Venturer PLV16100 User manual

Venturer
Venturer PLV1615S User manual

Venturer
Venturer PLV76198E User manual

Venturer
Venturer PLV36190S5W User manual

Venturer
Venturer PLV16070 User manual

Venturer
Venturer PLV36199S1 User manual

Venturer
Venturer PLT37260 User manual