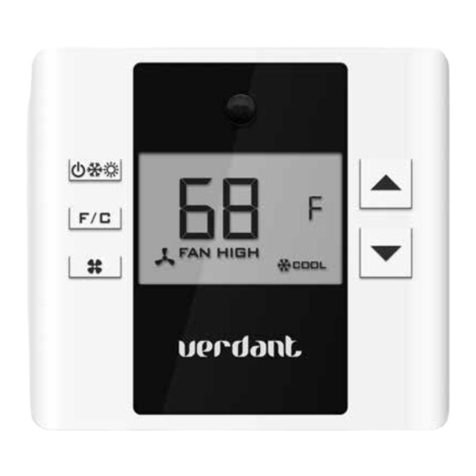
Verdant V8-BB-7S User manual

INSTRUCTION MANUAL
V8-BB-7S
7-day Programmable / Non-programmable
Thermostat with Occupancy Sensor

- 3 -
Table of Contents
INSTALLATION
Mounting the Thermostat to the Wall ........4
INTRODUCTION
Control Buttons Overview ............................6
Main Screen Overview ................................... 7
CONFIGURATION
Thermostat Modes .........................................8
Thermostat Modes Description ..................8
Changing the Thermostat Mode ................8
Equipment Modes ..........................................9
Equipment Modes Description ...................9
Changing the Equipment Mode ................9
Maximum Temperature Setting ................. 10
Maximum Temperature ............................ 10
Setting the Maximum Temperature ........ 10
Temperature Display Units .......................... 11
Changing the Temperature Display Unit ... 11
USING THE THERMOSTAT
Temperature Control Modes ........................12
Temperature Control Modes Description ..12
Changing the Temperature Control Mode 12
Temperature Setpoint ..................................13
Changing the Temperature Setpoint .........13
Time and Day Settings .................................14
Time and Day Settings ...............................14
Program Settings ..........................................15
Accessing the Program Settings Screen ....15
Modifying the Event Settings ....................15
Copying the Day Settings ......................... 16
Energy-Saving Occupancy Detection .......... 17
Accessing Occupancy Settings ..................17
Short Vacancy Settings ..............................18
Long Vacancy Settings ...............................19
Occupancy Detection Example .................20
Warranty ....................................................... 22

- 4 - - 5 -
INSTALLATION
Mounting the Thermostat to the Wall
INSTALLATION
Mounting the Thermostat to the Wall
1. Remove the old thermostat from the wall and
disconnect wires from the old thermostat.
2. Using the wire connectors provided, connect
the wires to your new thermostat. The
thermostat wires are not polarized and can
be connected to either of the two (2) wires
from the electric box in the wall.
If there are four (4) wires coming out the
electric box in the wall, use a solderless wire
connector (not supplied) to join one load
wire from the electric box to one power
supply wire from the electric box and then
connect the remaining two (2) wires to the
thermostat.
If you are unable to identify the load and
power supply wires correctly, consult
with an electrician. Incorrectly wiring
your thermostat can cause severe
damage to the thermostat.
3. Mount your new thermostat to the wall
using the supplied mounting screws. Use
either the two holes on the right or the left
side depending on the desired positioning.
4. Plug four (4) mounting-screw holes with
supplied screw covers.
5. If you wish, apply the supplied instructions
sticker onto the left thermostat panel.
BEFORE YOU BEGIN
Turn off all heating equipment by switching off the power
supply located at the electrical service panel.
All heating equipment should be OFF.
Use the provided wire connector caps to connect
the thermostat wires with the wires from the electrical box.
The thermostat wires are not polarized and can be connected
to either of the wires from the wall (load or power supply).
Mount the thermostat onto the electrical box in the wall
using the supplied mounting screws.
Use either the two holes on the right or the left side
depending on the desired positioning.

- 6 - - 7 -
INTRODUCTION
Control Buttons Overview
Verdant intuitive user interface uses several control-buttons to access all features and menus of the
thermostat. Please familiarize yourself with control buttons as they will be referenced in the rest of
this manual to explain the thermostat operation.
INTRODUCTION
Main Screen Overview
Large LCD screen with on-demand back-light clearly display current ambient temperature, time, day
and heating control parameters at all times.
YES
HOME
MODE
NO
SET TEMPERATURE
PRESS OR
CHANGE TO (RUN PROGRAM)
OR (STOP PROGRAM) PRESS
SET TIME PRESS OR
SET PROGRAM /
ADVANCE TO NEXT PROGRAM EVENT PRESS
CHANGE TO °F OR °C HOLD PRESS
MAXIMUM TEMPERATURE LIMIT HOLD HOLD
CHANGE TO “PROGRAMMABLE” OR
“NON-PROGRAMMABLE” THERMOSTAT
HOLD HOLD
ENERGY SAVING OCCUPANCY
DETECTION SETTINGS HOLD
Occupancy Sensor
LCD Screen
Temperature Up [ ]
Set Time Forward [ ]
Instructions Sticker
Temperature Down [ ]
Program [ ]
Home/Mode [ ]
Set Time Back [ ]
Day
[Programmable Mode Only]
Time
[Programmable Mode Only]
Temperature
Power-Meter
[Radiant Mode Only]
Temperature Setpoint
Temperature Control Mode
Indicator or
[Programmable Mode Only]
Fan Activity Indicator
[Fan Forced Mode Only]

- 8 - - 9 -
CONFIGURATION
Thermostat Modes
Changing the Thermostat Mode
To switch between “Programmable” and “Non-
programmable” thermostat mode:
Press and hold the Program button [ ] and
the Home/Mode button [ ] for four (4)
seconds until the thermostat mode changes.
Energy-saving occupancy detection is
available in both “Programmable” and “Non-
programmable” thermostat mode.
Thermostat Modes Description
Verdant thermostat can be used as a 7-day
programmable thermostat or a simple-to-use
non-programmable thermostat.
Programmable thermostat mode allows
pre-programming up to four (4) automatic
temperature changes (events) for each day of
the week.
Non-programmable thermostat mode allows
turning the thermostat into a simple-to-use
thermostat with only basic temperature
control options.
Changing the Equipment Mode
To switch between “Radiant” and “Fan Forced”
equipment modes:
Press and hold the
Program button [ ].
While holding the
Program button [ ],
press the Time Back
button [ ].
Equipment Modes Description
Verdant thermostat has two (2) distinctive
equipment modes for operating different
kinds of heating equipment.
Select the “Radiant” operation mode if you are
using the thermostat to control an electric
baseboard or radiant heater.
Select the “Fan Forced” operation mode if you
are using the thermostat to control a convector
heater with a built-in fan.
CONFIGURATION
Equipment Modes
In the “Programmable”
mode, the thermostat
displays time and day
information.
In the “Non-programmable”
mode, the thermostat does
not display time and day
information.
In the “Fan Forced” mode,
the animated fan indicator
shows the fan activity.
In the “Radiant”
mode, a power-meter
proportionally shows
power consumption.

- 10 - - 11 -
CONFIGURATION
Maximum Temperature Setting
Setting the Maximum Temperature
Press and hold the Program button [ ] and
the Temperature Up button [ ] for four (4)
seconds until the Maximum Temperature
screen appears.
Use the Temperature Up and Down buttons
[ and ] to select the maximum setpoint
(61 – 91°F / 16 – 33°C).
Press the Home/Mode button [ ] to confirm
your selection and return to Home screen.
Maximum Temperature
You can limit the maximum temperature that
can be selected using thermostat temperature
control options.
The maximum setpoint setting will limit the
maximum setpoint that can be selected with
any of the thermostat temperature control
options, including Program Settings.
NOTE: Changing maximum setpoint will not
affect existing temperature setpoints in the
Program Settings.
Changing the Temperature Display Unit
Your new thermostat can display the
temperature in °F or °C.
To switch between °F and °C display:
Press and hold the
Program button [ ].
While holding the
Program button [ ],
press the Time Forward
button [ ].
CONFIGURATION
Temperature Display Units

- 12 - - 13 -
USING THE THERMOSTAT
Temperature Control Modes
Changing the Temperature Control Mode
To change the temperature control mode:
Press the Home/Mode
button [ ] to switch
between and
temperature control
modes.
Temperature Control Modes Description
AUTO Temperature Control mode
initiates a custom temperature
control program.
To set up a custom temperature
control program refer to the
Program Settings section.
HOLD Temperature Control mode
maintains the room temperature
at a selected temperature setpoint.
USING THE THERMOSTAT
Temperature Setpoint
Changing the setpoint in AUTO mode will only
change the setpoint until the next event start.
In this situation, “Temporarily Set to” screen
indicator will indicate that the temperature
setpoint will change when the next event
starts.
Changing the Temperature Setpoint
To change the temperature setpoint:
Use the Temperature
Up and Down buttons
[ and ] to raise or
lower the temperature
setpoint.
When adjusting the temperature setpoint,
the setpoint value will temporarily take the
place of the ambient temperature.
AUTO Temperature
Control Mode Indicator
HOLD Temperature
Control Mode Indicator
While adjusting the set-
point, setpoint value will
temporarily take place of
the ambient temperature
“Temporarily Set to”
Indicator

- 14 - - 15 -
USING THE THERMOSTAT
Time and Day Settings
Press the Home/Mode button [ ] to
confirm the time and day and to return to the
Home Screen.
Accurate Time and Day settings are crucial
for the proper functioning of various
thermostat features.
Time and Day Settings
Use the Time Forward and Time Back buttons
[ and ] to set time and day.
The longer you hold the Time Forward and
Time Back buttons [ and ] the faster the
time and day setting will move.
USING THE THERMOSTAT
Program Settings
Modifying the Event Settings
1. Use the Time Forward and Time Back
buttons [ and ] to select the start
time for the event.
2. Use the Temperature Up and Down buttons
[ and ] to select the temperature
setpoint for the event.
3. Press the Program button [ ] to advance
to the next event you wish to program.
Repeat steps 1 – 3 to program settings for
other events.
Accessing the Program Settings Screen
The Program Settings feature allows you to
program automatic temperature changes to fit
your schedule and reduce energy consumption.
You can customize the program with up to
four (4) temperature changes (events) for
each day of the week.
Press the Program button [ ] to access the
Program Settings screen.
Press the Program button [ ] again to
advance to the next event you wish to program.
Temperature Setpoint for
the event
Start time for the eventTime of the day
Event number for the
selected day of the week
Day of the weekDay of the week

- 16 - - 17 -
USING THE THERMOSTAT
Program Settings
If you choose to copy the program
settings, settings for all events from the
previously modified day will be copied to
the newly selected day. The thermostat
will automatically prompt you to copy the
settings to the following day.
If you select “No”, repeat steps 1 – 3 to modify
program settings for the selected event.
Repeat the described procedure to program
temperature changes for the whole week.
Copying the Day Settings
If you choose to modify settings for a
different day of the week, the thermostat will
prompt you to copy the previously modified
day settings to the newly selected day.
Press the “YES” button [ ] to copy the
program settings.
Press the “NO” button [ ] to modify the
program settings for the selected event.
USING THE THERMOSTAT
Energy-Saving Occupancy Detection
Accessing Occupancy Detection Settings
Hold the Home/Mode
button [ ] for four
(4) seconds to access
the Energy-Saving
Occupancy Detection
Settings.
Built-in occupancy sensor enables
advanced energy saving features that allow
incrementally adjusting the temperature when
the room is unoccupied, whether you are in
AUTO or HOLD temperature control mode.
You can start saving the energy only minutes
after the room becomes unoccupied as well
as completely eliminate unnecessary energy
consumption if the room remains unoccupied
for longer periods of time.
Short Vacancy Setting
Short Vacancy Setting allows reducing the
temperature setpoint by a selected number
of degrees, if the room is unoccupied for a
selected number of minutes.
Long Vacancy Setting
Long Vacancy Setting allows reducing
the temperature setpoint to a selected
temperature, if the room is unoccupied for a
selected number of hours.

- 18 - - 19 -
USING THE THERMOSTAT
Energy-Saving Occupancy Detection
Short Vacancy Settings
Use the Temperature Up and Down buttons
[ and ] to select by how many degrees
(0-10°F/0-5°C) you wish to reduce the
temperature.
Pressthe Home/Mode button [ ] to confirm
your settings and access the Long Vacancy
settings.
Short Vacancy Settings
Use the Temperature Up and Down buttons
[ and ] to select a number of minutes
(00-99) room needs to be unoccupied before
the thermostat reduces the temperature
setpoint.
Selecting “00” as the number of minutes will
disable Short Vacancy feature.
Press the Home/Mode button [ ] to
confirm your selection and advance to the
next configuration screen.
USING THE THERMOSTAT
Energy-Saving Occupancy Detection
Long Vacancy Settings
Use the Temperature Up and Down buttons
[ and ] to select the desired
temperature.
Press the Home/Mode button [ ] to
confirm your selection and return to Home
Screen.
Long Vacancy Settings
Use the Temperature Up and Down buttons
[ and ] to select a number of hours
(0-12) room needs to be unoccupied before
the thermostat reduces the setpoint to the
desired temperature.
Selecting “0” as the number of hours will
disable Long Vacancy feature.
Press the Home/Mode button [ ] to
confirm your selection and advance to the
next configuration screen.

- 20 - - 21 -
USING THE THERMOSTAT
Energy-Saving Occupancy Detection
...if the room becomes unoccupied
If the room is unoccupied for 15 minutes, the
thermostat will automatically reduce the
temperature setpoint to 70° (72° - 2°).
Occupancy Detection Example
If the temperature setpoint is 72°F and the
occupancy settings are the same as the
examples shown on previous pages:
Short Vacancy Setting
If unoccupied 15 minutes
Reduce Temperature by 2;
Long Vacancy Setting
If Unoccupied 2 Hours
Reduce Temperature to 64;
Then the following will happen...
USING THE THERMOSTAT
Energy-Saving Occupancy Detection
...when occupancy is detected
If at any point occupancy is detected, the
thermostat will automatically restore the
temperature setpoint to the original value (in this
example 72°)
NOTE: If the thermostat is in the AUTO
temperature control mode, the thermostat
will reset occupancy timers and restore
temperature to the temperature setpoint
programmed for the event every time the new
event starts.
When occupancy is detected, the thermostat
will flash the “unoccupied” temperature
five (5) times and then flash the restored
temperature five (5) times to indicate the
setpoint change.
...if the room remains unoccupied
If the room is unoccupied for 2 hours, the
thermostat will automatically reduce the
temperature setpoint to 64°.

- 22 -
Warranty
Hardware
Verdant Environmental Technologies warrants the original end user (“Customer”) that new Verdant branded products will be free
from defects in workmanship and materials and will perform in substantial conformance to its specifications, under normal use,
for one (1) year from the original purchase date.
Exclusions
This warranty excludes (1) physical damage to the surface of the product, including cracks or scratches on the touch-screen or
outside casing; (2) damage caused by misuse, neglect, improper installation, unauthorized attempts to open, repair, or modify the
product, or any other cause beyond the range of intended use; (3) damage caused by accident, fire, power changes, other hazard,
or Acts of God; or (4) use of the product with any device if such device causes the problem.
Exclusive Remedies
Should a covered defect occur during the warranty period and Customer notifies Verdant Environmental Technologies, Customer’s
sole and exclusive remedy will be, at Verdant Environmental Technologies’s sole option and expense, to repair or replace the
product. Replacement products or parts may be new or reconditioned or a comparable version of the defective item. Verdant
Environmental Technologies warrants any replaced product or part for a period of ninety (90) days from shipment, or through
the end of the original warranty, whichever is longer.
Obtaining Warranty Service
Customer must contact and return product to a local Verdant Environmental Technologies product dealer or installer within the
applicable warranty period to obtain warranty service. Dated proof of original purchase will be required. Verdant Environmental
Technologies will not be responsible for Customer’s memory data contained in, stored on, or integrated with any products
returned to Verdant Environmental Technologies for repair, whether under warranty or not.
Warranty Exclusive
THE FORGOING WARRANTIES AND REMEDIES ARE EXCLUSIVE AND IN LIEU OF ALL OTHER WARRANTIES, EXPRESS OR IMPLIED,
INCLUDING WARRANTIES OF MERCHANTABILITY, FITNESS FOR A PARTICULAR PURPOSE, CORRESPONDENCE WITH DESCRIPTION,
AND NON-INFRINGEMENT, ALL OF WHICH ARE EXPRESSLY DISCLAIMED BY VERDANT ENVIRONMENTAL TECHNOLOGIES AND
ITS SUPPLIERS.
Disclaimer
NEITHER VERDANT ENVIRONMENTAL TECHNOLOGIES NOR ITS SUPPLIERS SHALL BE LIABLE FOR INCIDENTAL, CONSEQUENTIAL,
INDIRECT, SPECIAL, OR PUNITIVE DAMAGES OF ANY KIND, OR FINANCIAL LOSS ARISING OUT OF OR IN CONNECTION WITH THE
SALE OR USE OF THIS PRODUCT, WHETHER BASED IN CONTRACT, TORT (INCLUDING NEGLIGENCE) OR ANY OTHER THEORY,
EVEN IF VERDANT ENVIRONMENTAL TECHNOLOGIES HAS BEEN ADVISED OF THE POSSIBILITY OF SUCH DAMAGES. VERDANT
ENVIRONMENTAL TECHNOLOGIES’S ENTIRE LIABILITY SHALL BE LIMITED TO REPLACEMENT OR REPAIR OF THE PRODUCT.

Verdant Environmental Technologies
5667 Royalmount Avenue
Montreal, QC, H4P 2P9, Canada
www.verdant.info
Verdant products and software are protected by copyright, international treaties,
and various patents including one or more of the following US patents:
RE40,437; 7,232,075; 7,185,825; 7,156,318; 7,152,806; 7,145,110; 7,058,477; 7,050,026;
7,028,912; 6,902,117; 6,789,739; 6,786,421; 6,619,555; 6,581,846; 6,578,770;
Other patents are registered or pending in the US and various countries around the world.
DIMENSIONS
Case: 5” x 5” x 1.25”
Screen: 1.75” x 1.875”
ELECTRICAL RATING
2 Wire Non-Polarized
Minimum Load
2A (resistive only)
500W @ 240V AC
250W @ 120VAC
Maximum Load
12.5A (resistive only)
3,000W @ 240V AC
1,500W @ 120V AC
ACCURACY RATING
±0.3°F (
±0.15°C)
v. BB7S100301
Table of contents
Other Verdant Thermostat manuals

Verdant
Verdant VX Series User manual

Verdant
Verdant VX-TR Installation and maintenance instructions
Verdant
Verdant VX Series Operating and maintenance instructions
Verdant
Verdant VX-TW User manual

Verdant
Verdant VX-TW Installation and maintenance instructions

Verdant
Verdant VX Series User manual

Verdant
Verdant VX Series User manual

Verdant
Verdant Wireless User manual