VERITAS HSP 157 User manual

Replacing hot-swappable disk drives: Veritas 2U12 Storage Shelf
Document Number: 157
Version: 4.1 (05/04/2020)
Purpose
This document provides instructions to replace a hot-swappable disk drive in a Veritas 2U12 Storage
Shelf.
Affected appliance models
• 5240 Appliance
• 5250 Appliance
Electrical Safety
The static discharged by human bodies can damage static-sensitive components on the boards.
When installing and maintaining the equipment, observe appropriate electrostatic safety precautions
to prevent personnel injuries or device damage.
When operating a device in an electrostatic sensitive area, you must take electrostatic-discharge
(ESD)-preventive measures. These include wearing ESD-preventive gloves, an ESD-preventive wrist
strap, and ESD-preventive clothes to avoid personnel injury or device damage.
To prevent damage to the device, pay attention to the following during operations:
• Do not touch devices with bare hands because ESD from the human body may damage the
electrostatically sensitive elements on a board.
• When dealing with the server or any of the internal components, wear an ESD-preventive wrist
strap, ESD-preventive gloves, and ESD-preventive suit.
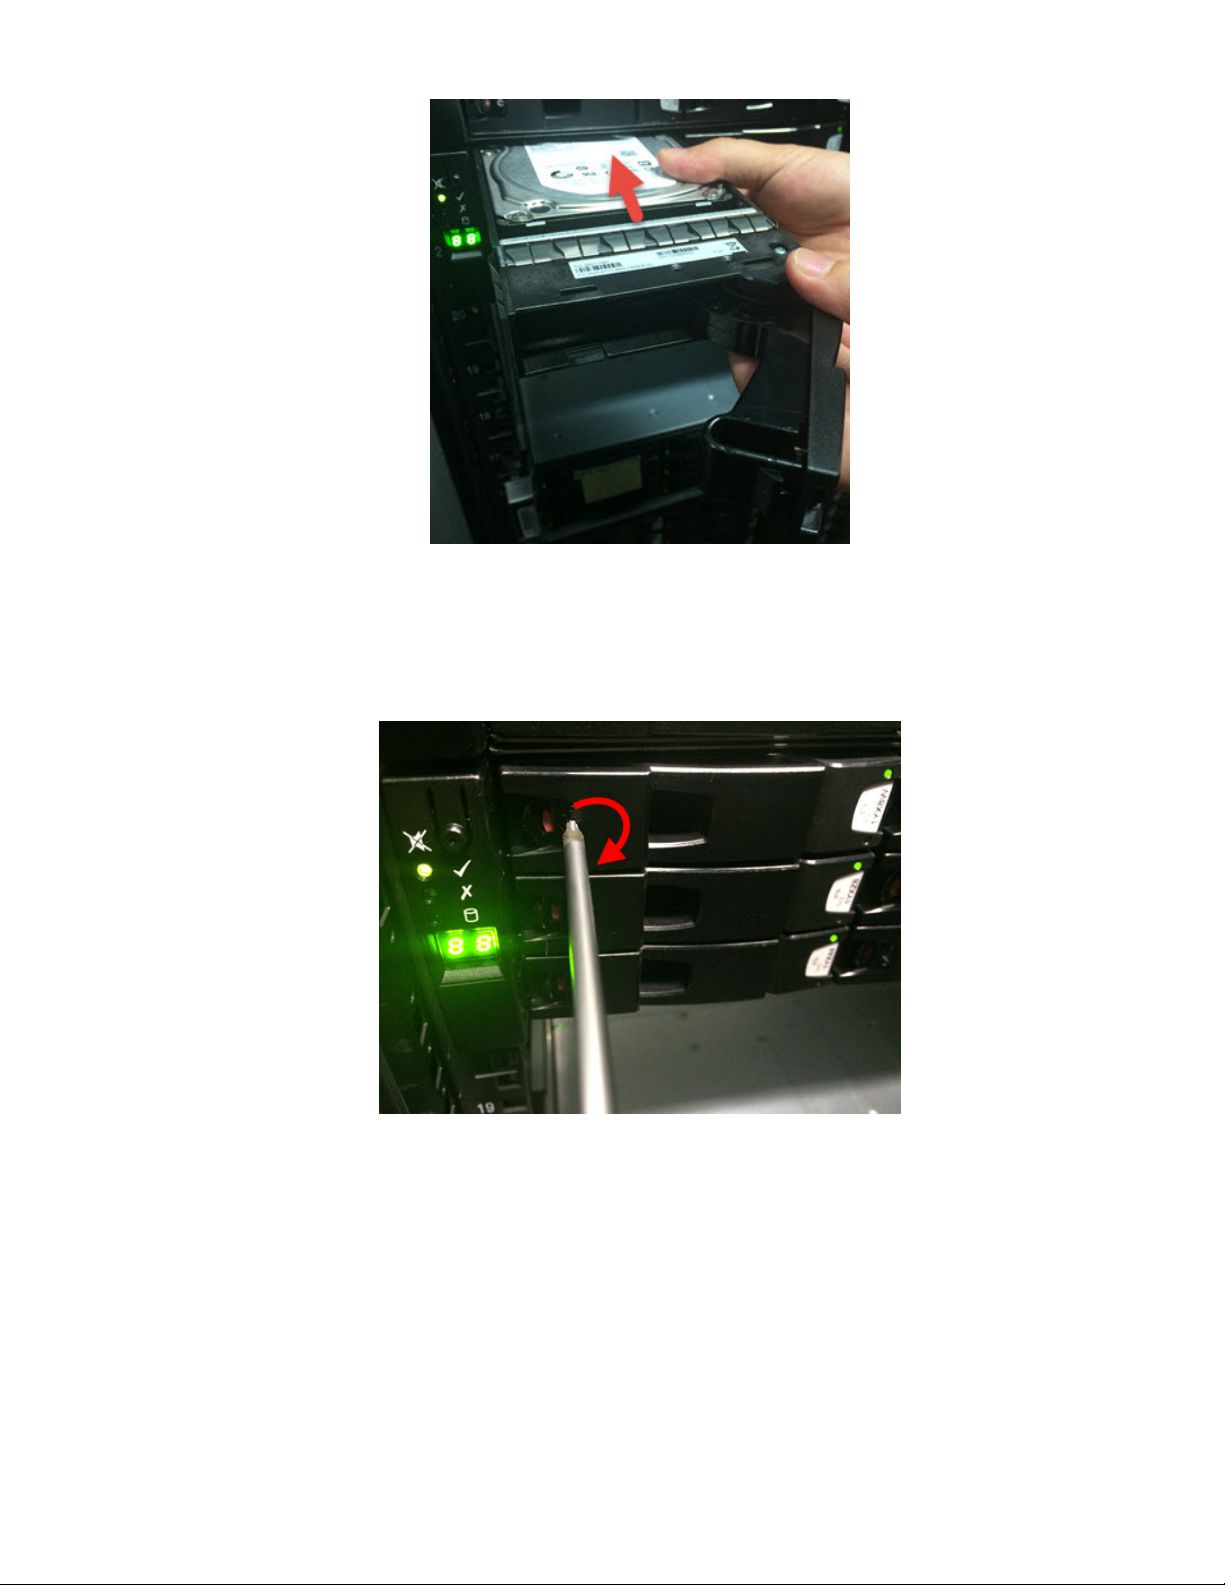
About removing and replacing a disk drive
This section describes how to remove and replace a hot-swappable storage disk drive together with
its carrier in a Veritas 2U12 Storage Shelf.
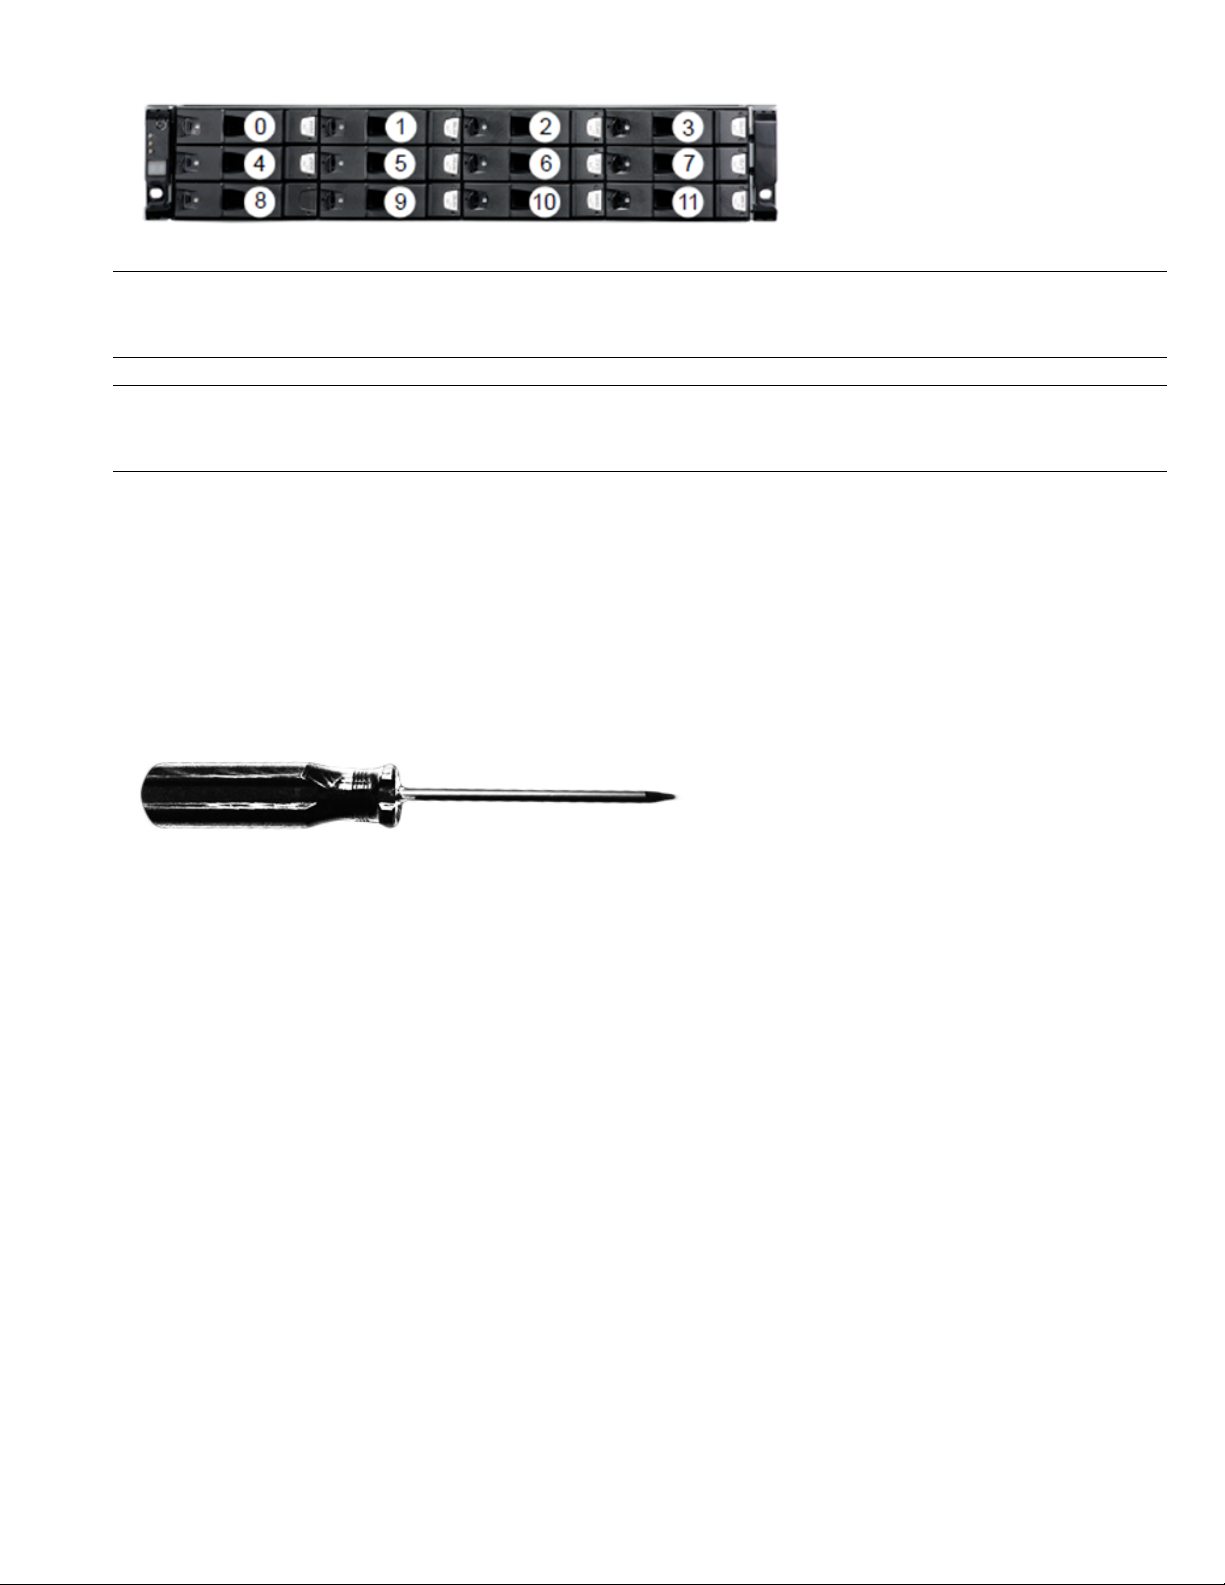
The diagram below shows the drive slot numbering for the 2U12 Storage Shelf.
1
Veritas Appliance
Hardware Service Procedure

Caution: You must complete a drive swap within two minutes. Leaving the drive slot open for longer
than two minutes can result in the appliance overheating and cause other components to fail.
Caution: Swap one drive at a time only. Removing more than one drive at one time can affect system
functionality.
Requirements
Verify that you have the following items:
• 6TB Disk Drive (5240 Appliance)
• 8TB Disk Drive (5250 Appliance)
• A T10 screwdriver
• ESD wrist strap
Locating the appliance with the faulty component
Use the following steps to locate the appliance with the faulty component.
To locate the appliance with the faulty component
1Have the customer take you to the unit with the faulty component.
2Verify the appliance compute node serial number. The serial number is located on the rear panel
of the appliance and begins with letters SYM or VTAS.
2
HSP 157: Disk Drive Replacement: Veritas 2U12 Storage Shelf

The 2U12 storage shelf serial number - Verify the storage shelf serial number. The storage shelf
serial number is located on a white tab on the left side of the rear panel, between the left power
supply and the chassis case. Pull out the tab to display the serial number.
Removing a storage shelf hot-swap disk drive
Use the following procedure to remove a storage shelf hot-swap disk drive.
To remove a storage shelf hot-swap disk drive
1Put on an ESD-compliant wrist strap or take other ESD-protective measures.
Note: The static discharged by human bodies can damage static-sensitive components on the
boards. When installing and maintaining the equipment, you must observe appropriate electrostatic
safety precautions to prevent personnel injuries or device damage.
2Remove the front bezel. Grip the bezel on the sides and pull it from the appliance.
3Locate the drive that you want to replace. Check the status of both LEDs.
3
HSP 157: Disk Drive Replacement: Veritas 2U12 Storage Shelf

Activity LED
Fault LED
Release Button
Drive Carrier Unlock Key Drive Capacity
The disk drive is not working properly in any one of the following situations:
• The activity LED is on and the fault LED is on.
• The activity LED is off and the fault LED is on.
• The activity LED is on and the fault LED flashes on for three seconds and then flashes off for
one second.
4If the drive carrier is locked, unlock it by using the T10 screwdriver to rotate the drive carrier unlock
key to the left till the red lock icon is no longer visible.
5Push the release button to the right-hand direction to release the disk drive lever.
4
HSP 157: Disk Drive Replacement: Veritas 2U12 Storage Shelf

6Once the latch opens, hold the drive carrier lever and pull it open completely. Allow the drive to
spin down, which may take about 30 seconds.
7Hold the drive carrier and part of the disk drive, and gently slide the faulty disk out of the slot.
5
HSP 157: Disk Drive Replacement: Veritas 2U12 Storage Shelf

Caution: You must complete the hard disk drive swap within two minutes. Leaving the disk drive
slot open for longer than two minutes can result in the appliance overheating and cause other
components to fail.
8Place the faulty disk in an ESD-protective bag.
Installing a storage shelf hot-swap disk drive
Use the following procedure to install a storage shelf hot-swap disk drive.
To install a storage shelf hot-swap disk drive
1Put on an ESD-compliant wrist strap or take other ESD-protective measures.
Note: The static discharged by human bodies can damage static-sensitive components on the
boards. When installing and maintaining the equipment, you must observe appropriate electrostatic
safety precautions to prevent personnel injuries or device damage.
2Remove the replacement drive from the ESD-protective wrapper.
3Verify that the capacity of the drive is the same as the capacity of the drive that is being replaced.
4Unlock the drive carrier unlock key if needed by using the T10 screwdriver to rotate the drive
carrier unlock key to the left till the red lock icon is no longer visible.
5Press the release button to release the lever.
6Pull the lever open completely.
7Insert the replacement drive to the correct slot and gently slide it into the slot completely.
6
HSP 157: Disk Drive Replacement: Veritas 2U12 Storage Shelf

8Close the lever to secure the drive carrier in the slot. The carrier clicks when contact is secure.
9Lock the drive carrier by using the T10 screwdriver to rotate the drive carrier unlock key to the
right until the red lock icon is visible.
10 Check the status of the LEDs on the drive that you replaced. The activity LED is on when the
connection is good. After a short period, the fault LED flashes one second on and one second
off to indicate that the rebuild is in progress.
7
HSP 157: Disk Drive Replacement: Veritas 2U12 Storage Shelf

8
HSP 157: Disk Drive Replacement: Veritas 2U12 Storage Shelf
Table of contents