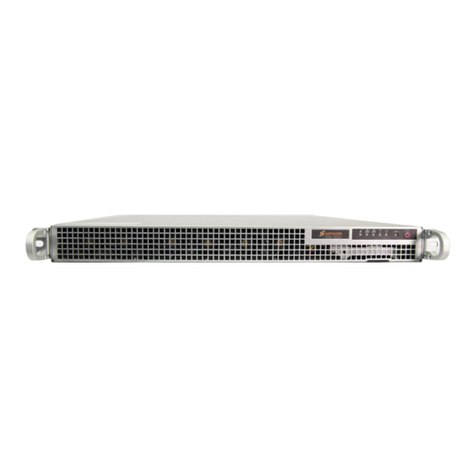
VGP Koryuu Transcoder User manual

Koryuu Transcoder - Quick Start Guide
This document is copyright © VGP Media Ltd 2020
All rights reserved worldwide
VideoGamePerfection com is a trading name of VGP Media Ltd
Registered in Republic of Ireland number 637539

Koryuu Transcoder Quick Start Guide
VideoGamePerfection com
Koryuu Transcoder - Quick Start Guide
Contents
Important safety information 3
Overview 4
Koryuu Transcoder Front 4
Koryuu Transcoder Back 6
Koryuu Transcoder Side 7
Koryuu Transcoder LEDs 8
Using the Koryuu Transcoder 9
Using the Koryuu Transcoder with the OSSC 9
Using the Koryuu Transcoder with other devices 9
Troubleshooting 10
More information 11
Disposing of your Koryuu Transcoder 11
Thank you for purchasing the Koryuu Transcoder Please take time to read through this short
document before you start using the unit
Page 2

Important safety information
Please observe the following safety precautions when using your Koryuu Transcoder
Use the correct power supply – The Koryuu Transcoder is designed to run with a 5 volt barrel jack
power supply unit (PSU) supplying at least 1 amp of current The tip must be 2 1 x 5 5mm and
centre positive Please ensure your power supply meets these requirements Never connect a power
supply that supplies more than 5 volts Doing so can damage the Koryuu Transcoder
Turn off the power before connecting/disconnecting equipment – To prevent damage of the
Koryuu’s integrated circuits, always turn off the power before connecting to a display or a device
Be careful when connecting and disconnecting cables – Do not apply excessive force Some
component video cables attach too tightly and can damage your Koryuu Use a cable that fits firmly
without needing excessive force to insert or remove it
Do not expose to moisture – Droplets of moisture may contact the PCB and cause a short circuit
Never submerge the unit in water
Keep away from fire or high heat sources – Koryuu Transcoder is not flammable but high
temperatures, such as those from a fire or electric heater may melt the plastic casing
Please supervise children – Koryuu Transcoder is not a toy and is not designed for use by children
Please supervise children if they use the Koryuu Transcoder

Koryuu Transcoder Quick Start Guide
VideoGamePerfection com
Overview
Koryuu Transcoder Front
ption Button – This button is reserved for options available in future firmware updates
Currently, pressing the button will toggle a smoothing filter, but this feature is not correctly
implemented yet
Input change button – Press this button to cycle through the input modes There are currently four
input modes:-
1 Composite video (CVBS)
2 Composite video + pedestal (7 5 IRE mode)
3 S-Video (YC)
4 S-Video + pedestal (7 5 IRE mode)
When powered on, the Koryuu defaults to input mode 1 Press the Input change button to cycle
through the available modes When in mode 4, pressing the input change button again will cycle
back to mode 1
7 5 IRE mode may be required for certain sources (e g video cassettes) If the picture is too light, try
7 5 IRE mode
Composite video in – Connect a standard composite video (CVBS, usually a single yellow cable)
to this input
Page 4

S-Video in – Connect a standard S-Video (separate video or Y/C) cable to this input Insert the
cable carefully and check for the correct orientation Inserting the cable at an angle or forcing it into
place can damage the cable and/or the Koryuu
If your device has both composite video and S-Video outputs, you should use S-Video for the best
picture quality
Power Switch – Toggle power on and off using this switch

Koryuu Transcoder Quick Start Guide
VideoGamePerfection com
Koryuu Transcoder Back
Component video output – Connect a component video cable from the output connectors to your
OSSC, display, capture card or other video device All three component video cables must be
connected in the correct order to achieve the correct video output Please match the colours of the
plugs with the colours on your target display or video device and remember the order of the plugs
may not be consistent across devices
On the Koryuu the plugs are colour coded as follows:-
•Pr – Red
•Y – Green
•Pb - Blue
Note that Koryuu cannot work in reverse, it cannot convert component video to composite or S-
video
Connector J5 – This connector is used for debugging and development and is not needed in normal
operation
Connector J3 – This connector is used for firmware updates A USB Asp or similar programmer is
required for this As firmware updates are launched, a tutorial on how to update your Koryuu will
be posted on our website
Note that the Koryuu does not input or output audio signals Connect any required audio input
directly to your display or video processor
Page 6

Koryuu Transcoder Side
Power connector – The Koryuu Transcoder is designed to run with a 5 volt barrel jack power
supply unit (PSU) supplying at least 1 amp of current The tip must be 2 1 x 5 5mm and centre
positive Please ensure your power supply meets these requirements Never connect a power supply
that supplies more than 5 volts Doing so can damage the Koryuu Transcoder

Koryuu Transcoder Quick Start Guide
VideoGamePerfection com
Koryuu Transcoder LEDs
The Koryuu Transcoder has four LED (light emitting diodes) that illuminate to indicate various
modes of operation In the picture above we can see the location of these LEDs
Power LED – This LED will illuminate green whenever the Koryuu is powered on
ption LED – This LED will illuminate red whenever the Koryuu’s option mode is enabled This
is expected to be utilised in future firmware revisions
Input mode LEDs – There are two LEDs located at this position When the unit is in composite
video input mode, the bottom LED will illuminate red When the unit is in S-Video input mode, the
top-most LED will illuminate green
Page 8

Using the Koryuu Transcoder
Connect a suitable 5 volt DC power adapter to your Koryuu transcoder
Connect your Koryuu transcoder to your display, capture device or secondary video processor using
component video cables
Power on your display, your Koryuu and your other video device, if applicable If everything is
connected correctly, you will see a test pattern showing vertical bars of colour Each bar should be a
unique colour
You can now power off the Koryuu and attach a video source to either the composite video or S-
video input If connecting an S-video source, use the Input change button to select the correct input
Using the Koryuu Transcoder with the OSSC
The Koryuu Transcoder is ideal for use with the OSSC and can add composite video and S-video
connections to your OSSC device
Simply connect your Koryuu to the AV2 input on the OSSC, select AV2 (YPbPr) input on your
OSSC and then feed your source signal into the Koryuu using either of the two inputs
All picture processing modes are available on the OSSC as normal Please remember that composite
video in particular produces a significantly degraded image compared to RGB or native
YPbPr/component video sources Always use S-Video or better where possible
Using the Koryuu Transcoder with other devices
Koryuu can be used with any video device that accepts standard component video (YPbPr) input
Professional video monitors, capture cards or recording devices should all be compatible
Note that Koryuu has been designed for use with classic computers and video game consoles
specifically Compatibility or trouble free operation with video cassette/VHS players in particular
cannot be guaranteed, due to the often unstable nature of the signal from these devices
Koryuu Transcoder Quick Start Guide
VideoGamePerfection com
Trou leshooting
Symptom Possible Cause Solution
No image Sync lost Power cycle Koryuu Transcoder
No image or image with wrong
colours
Output cables not connected correctly Check that the output cables are
connected in the correct order
Koryuu shows only static colour bar
image
Wrong input selected Press Input change button repeatedly
until the correct image appears If no
image appears after 4 presses, check
composite or S-video cable
connection and status of source
device
Blurry image Option button pressed Press option button again to disable
this mode This button is reserved for
future options and does not work yet
Image has a vertical flicker/shimmer
effect
Interlace source connected This is normal, no action is required
Picture is black and white Poor quality or off-spec composite
video signal
Try another composite video cable,
adjust tracking on VCR if applicable
For modified games consoles, change
the consoles region
Koryuu Transcoder resets itself Power supply insufficient Use a different PSU that provides at
least 1 amp of current
Page 10

More information
For technical support with your Koryuu, visit the support forums here -
https://videogameperfection com/forums/forum/koryuu-transcoder/
Disposing of your Koryuu Transcoder
If your Koryuu Transcoder malfunctions, please contact us via e-mail or through
our website to arrange repair or replacement All Koryuu Transcoder units sold by
VideogamePerfection com/VGP Media Ltd come with one years warranty
Please consider contacting us before disposing of your Koryuu Transcoder, even if
you no longer want it If you do need to dispose of the unit, in most countries you
can recycle the unit for free at your local recycling centre To find your nearest
centre in the UK, visit the Recycle More website at http://www recycle-more co uk and type in your
postcode In the Republic of Ireland, visit https://www weeeireland ie/household-recycling/where-
can-i-recycle/
If you live outside of the UK or ROI, please check with local authorities or contact us to arrange for
a return of your unit
Table of contents