U.S. Patent No. 8,714,275 and other patents pending SNT3, Rev 7/5/2019
Copyright © 2019 Vibrant Yard Company LLC, Wichita, Kansas, USA. All rights reserved. Page 2of 8
1. INTRODUCTION
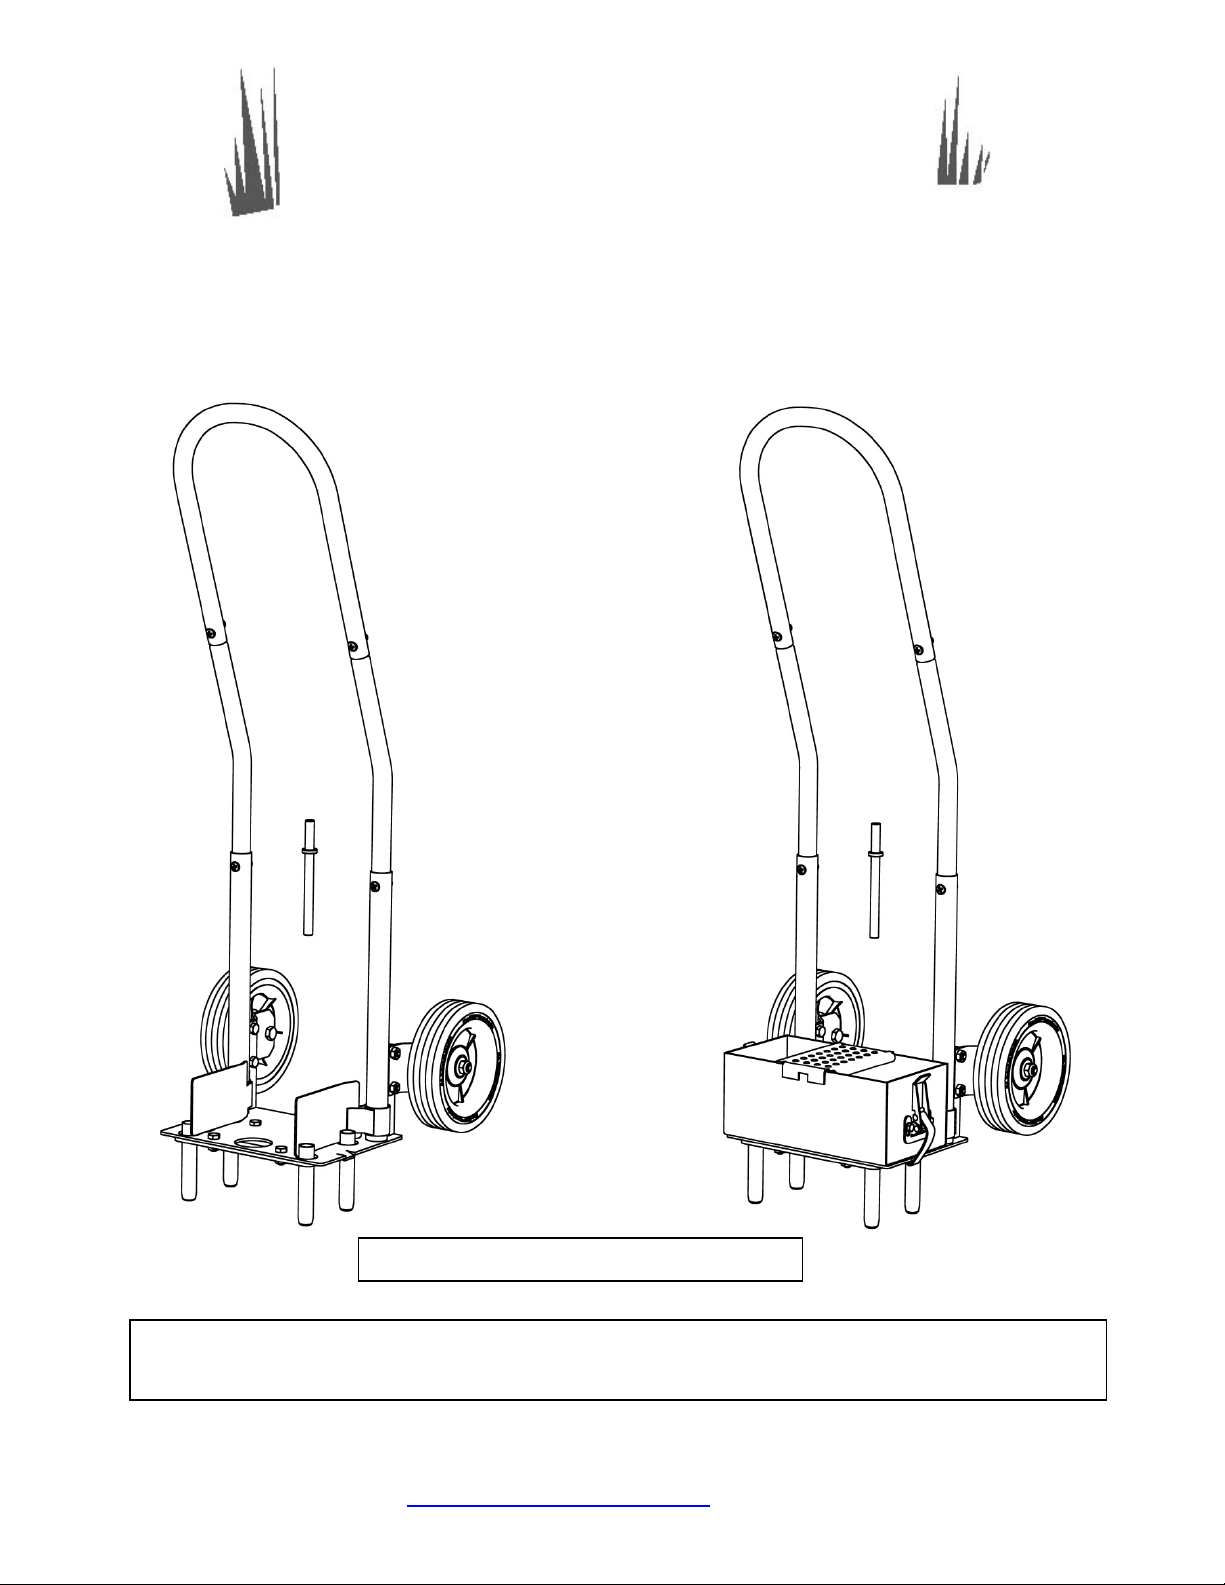
Congratulations on your purchase of the Step ’N Tilt™Lawn Aerator 3. We are confident that you will be amazed by its
capabilities. For your safety, please read and understand all installation and operating procedures in this manual before
attempting to install and use your Step ’N Tilt ™. It is designed for operators weighing at least 90 lb and up to 6 feet, 6
inches tall. In addition to lawn aeration, your Step ’N Tilt™ is also a very capable 60 lb capacity hand truck.
WARNING: The use of Step ’N Tilt™involves physical activity similar to climbing stairs and requires a sense of
balance. Do not use if you are unable to climb stairs without holding onto a handrail. Although moderate physical
activity such as using the Step ’N Tilt™is safe for most people, health experts suggest that you talk to your doctor before
you start a new physical activity or an exercise program. Do not use when the ground is wet or on slopes where you
might lose traction, slip, or fall.
Important Helpful Hints:
1. Although the tines are designed to prevent clogging in clay soil, the tines may still clog if the soil is too wet. Please
aerate two or three days after at least one inch of rain or irrigation. Please wait one or two more days if the tines clog.
The tines will be able to aerate heavy clay soil without clogging if the soil is not too wet.
2. If the tines are unable to penetrate the ground, the soil may be too dry. The tines may wear prematurely if the ground
is too dry. Therefore, the soil should not be too dry or too wet.
3. If your area has experienced prolonged drought, a short rain or irrigation may not provide sufficient moisture for
aeration. It may take a few days for water to be absorbed into compacted clay soil.
4. The soil cores left in your lawn as a result of using the Step ’N Tilt™ will promote beneficial biological activity that
helps decompose thatch and grass clippings. The soil cores will disintegrate back into the soil within a couple of
weeks.
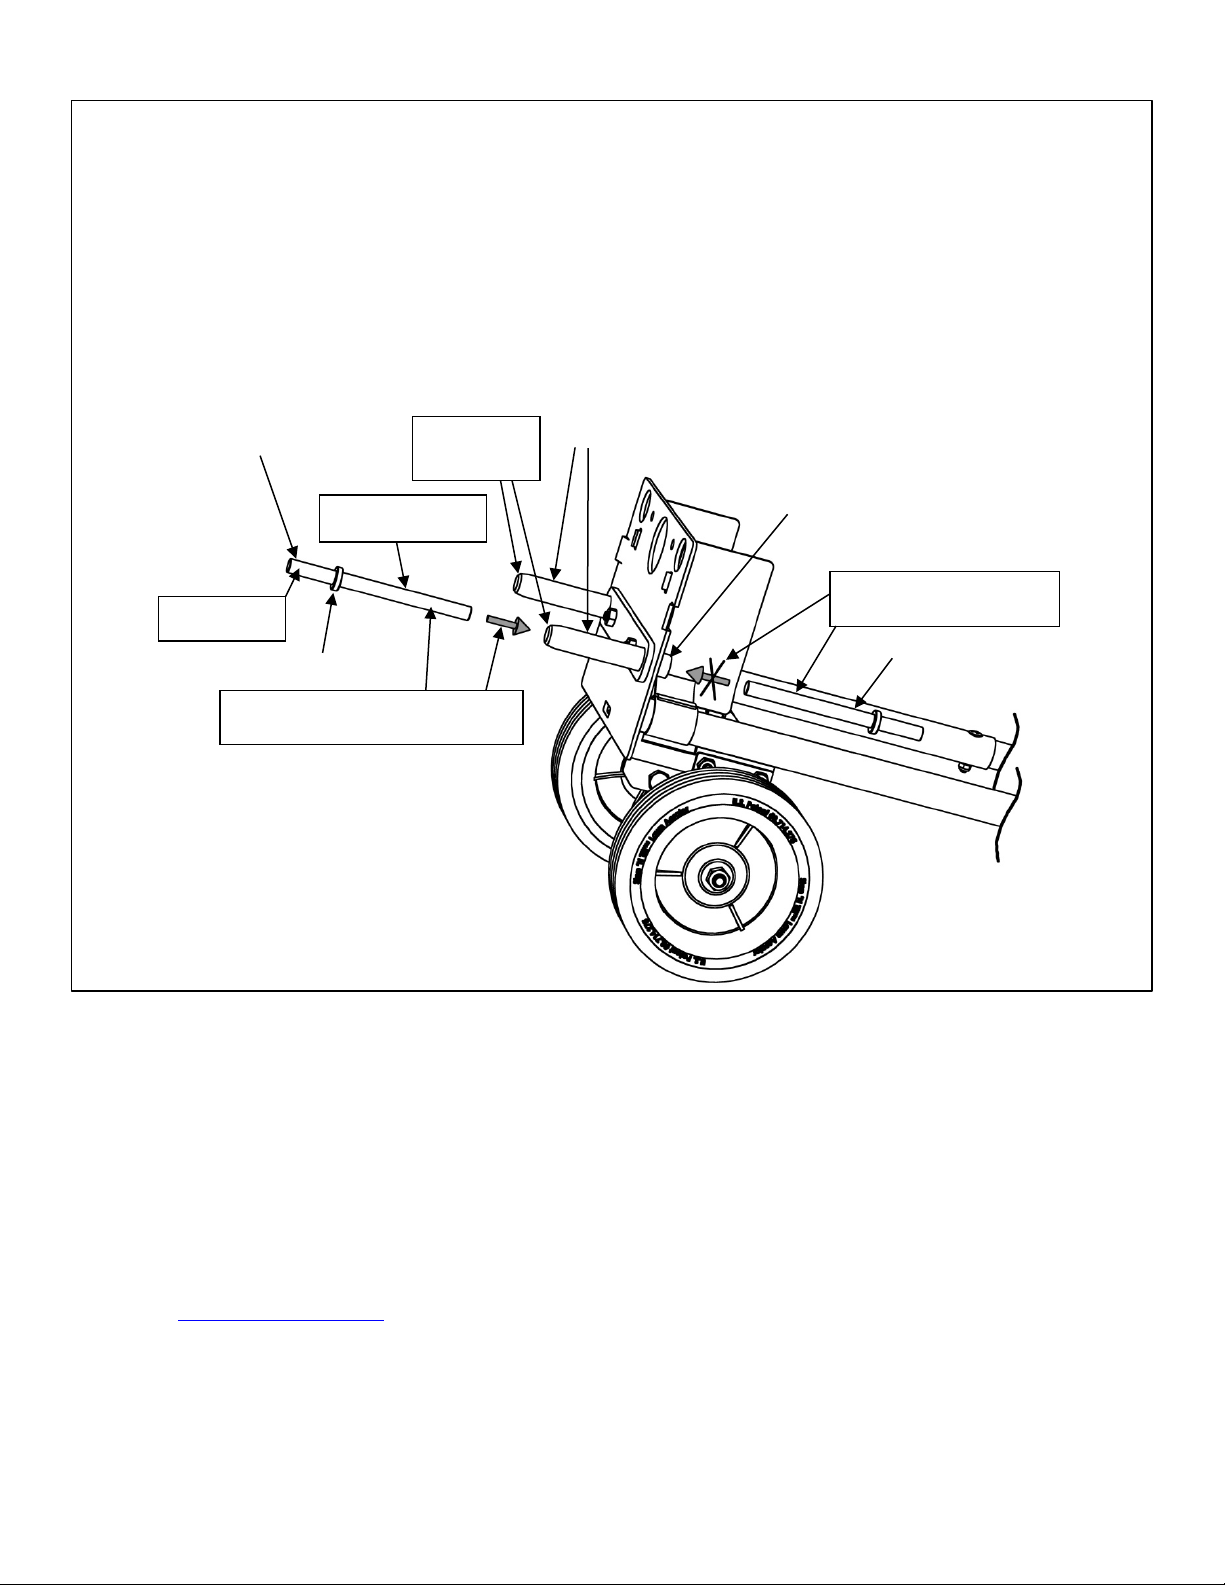
2. INSTALLATION
Note: Please use metric size wrenches or adjustable wrenches.
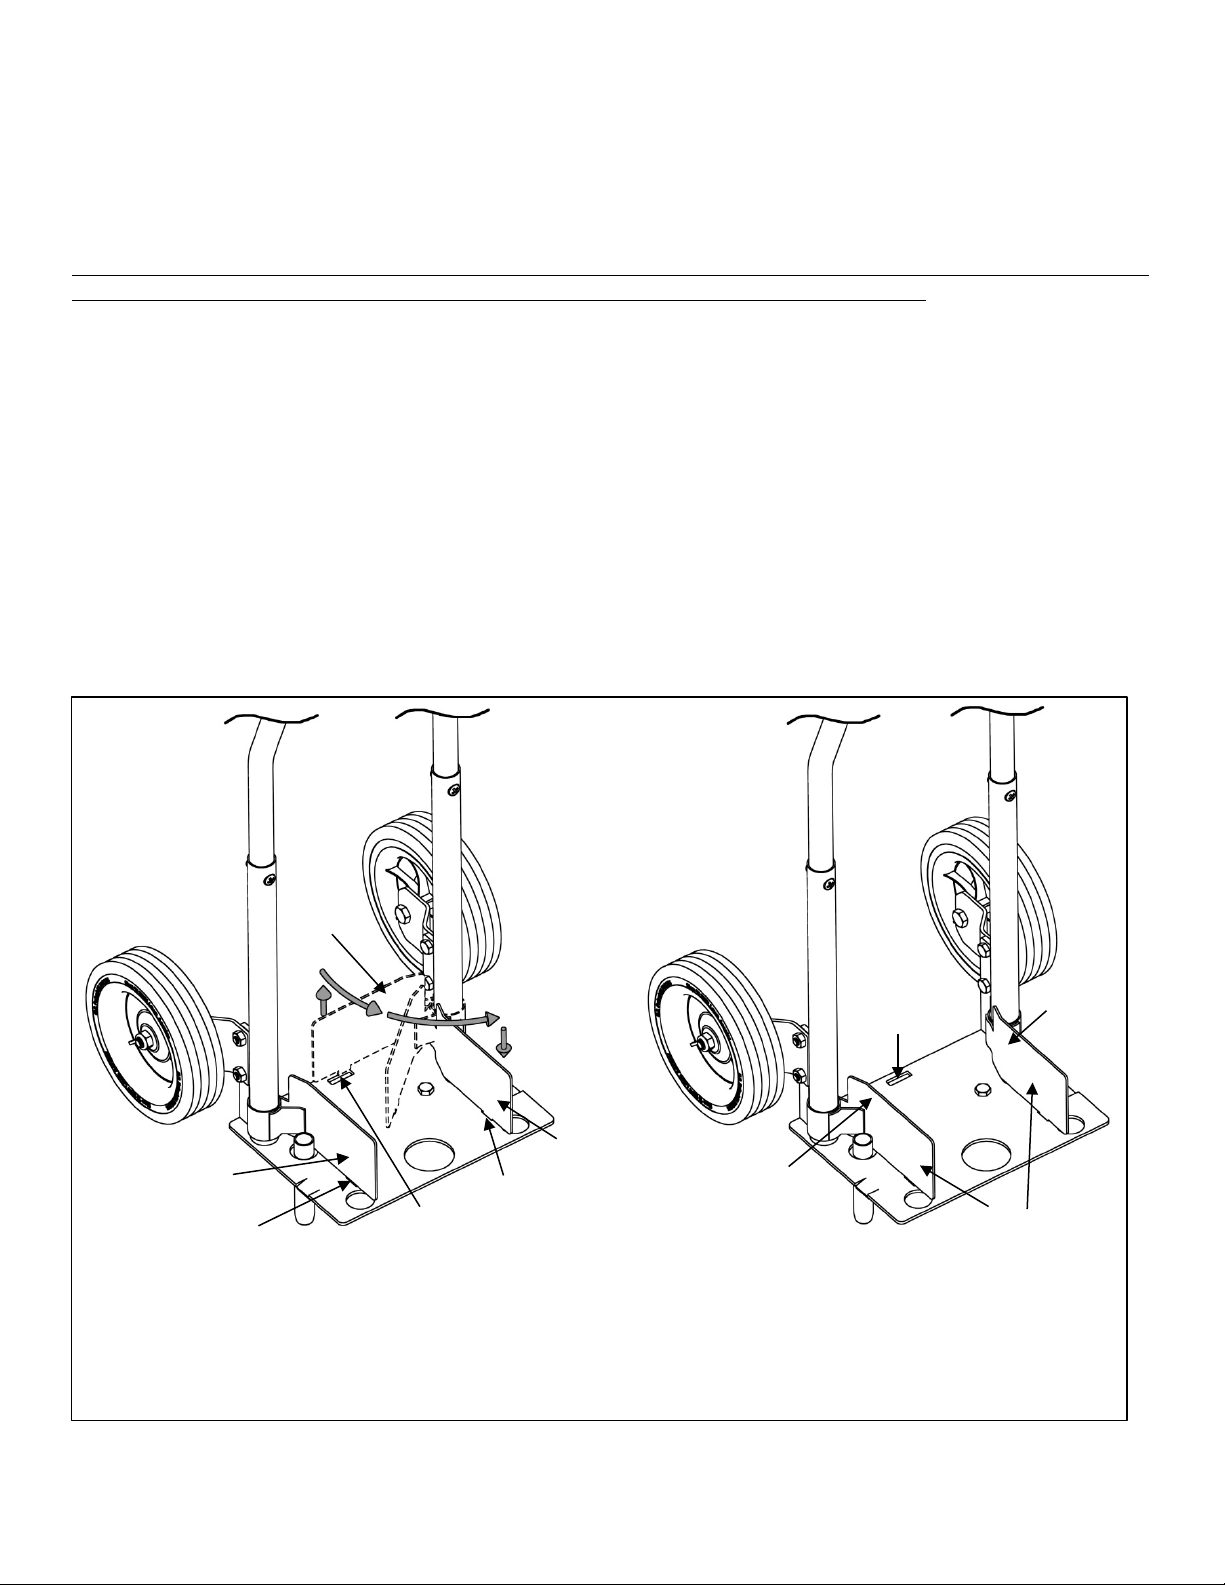
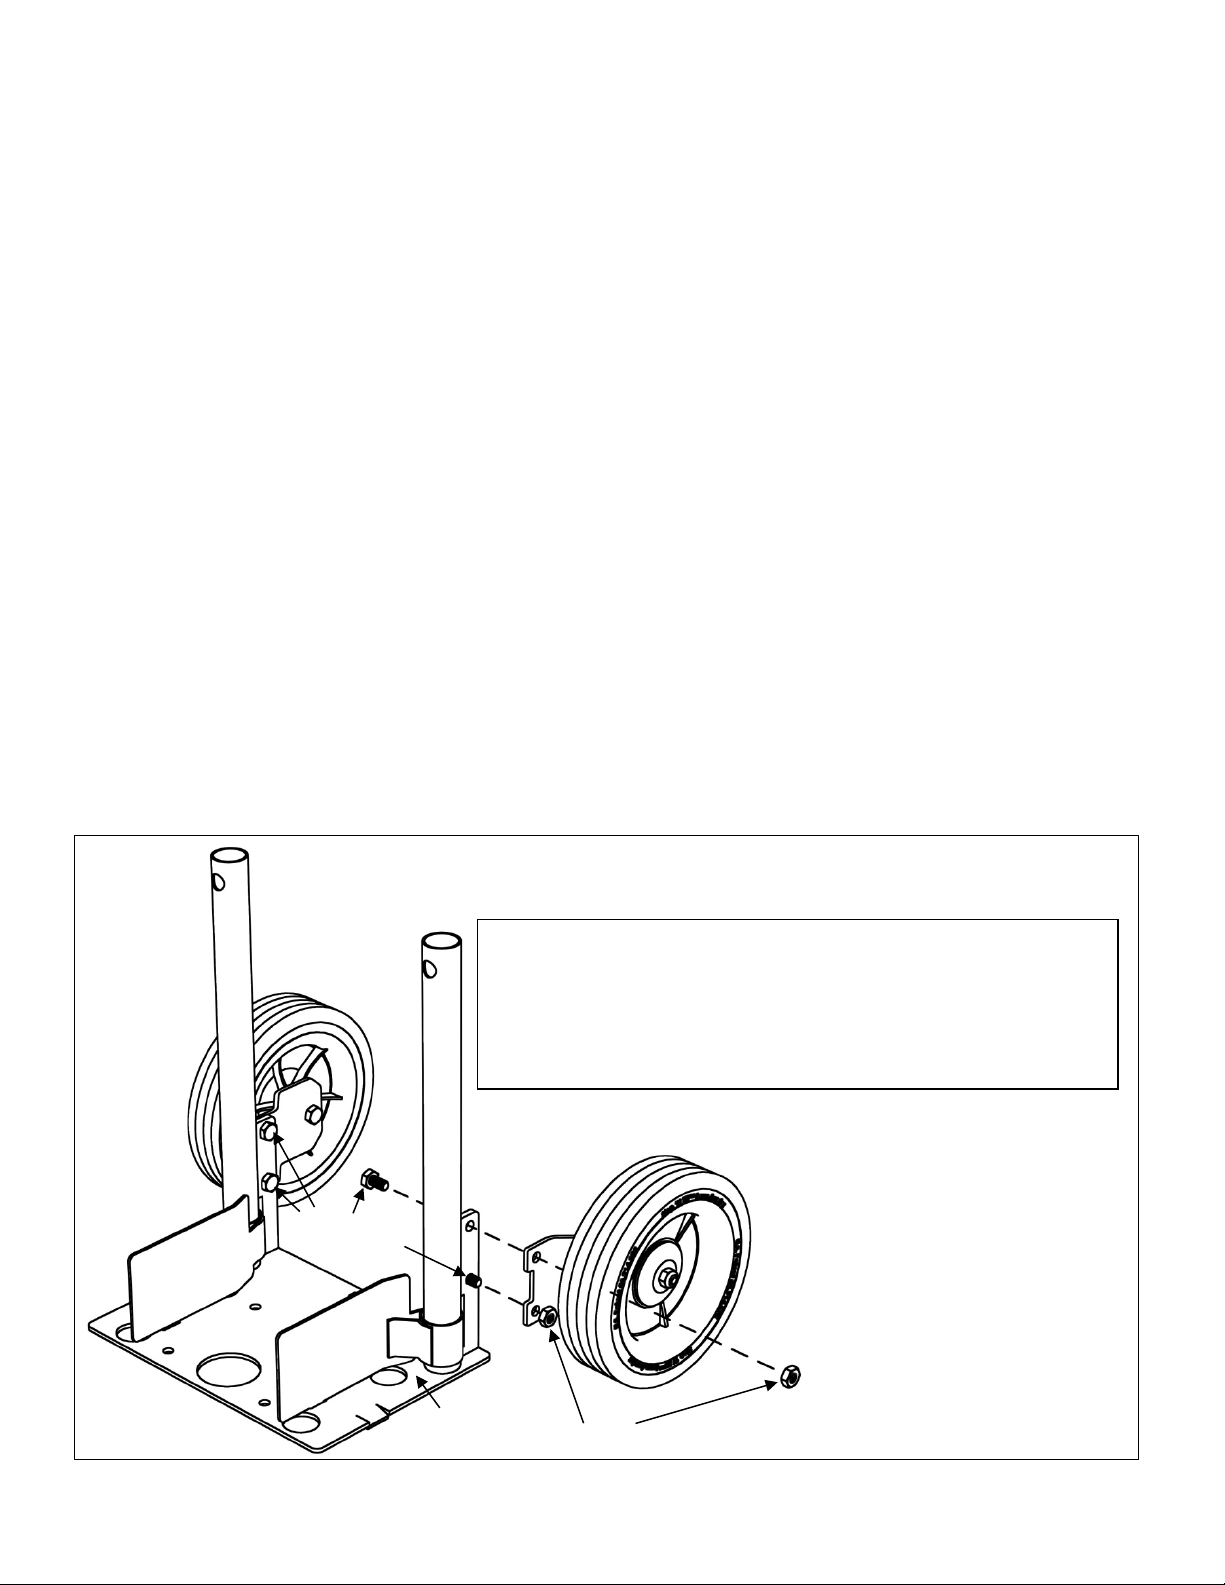
Step 1: Install the wheels to the baseplate. Two bolts and two
nuts are required for each wheel. Use a 14mm wrench to hold
the nut and a 12mm wrench to tighten the hex head bolt.
hex head bolt
(12mm wrench)