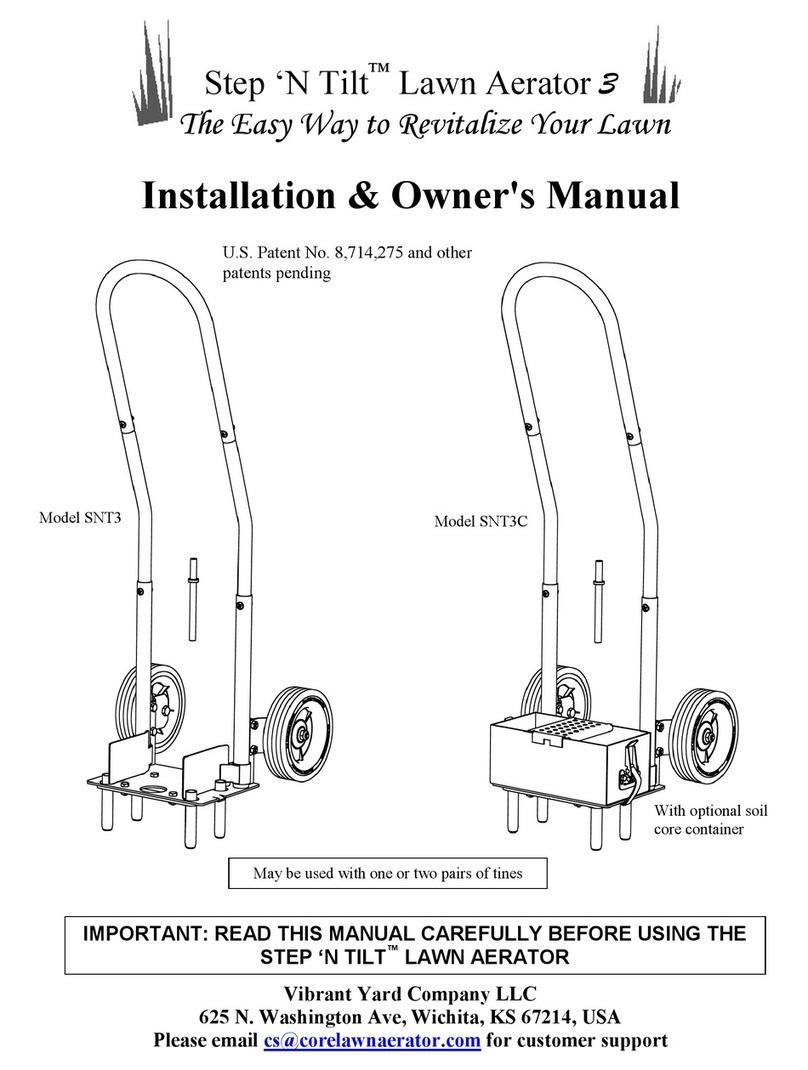
Vibrant Yard Step 'N Tilt Lawn Aerator 4 Operating instructions

Step ‘N Tilt®Lawn Aerator 4
The Easy Way to Revitalize Your Lawn
Installation & Owner's Manual
Vibrant Yard Company LLC
625 N. Washington Ave, Wichita, KS 67214, USA
Please email support@vibrantyard.com for customer support
U.S. Patent 8714275, U.S.
Patent 11147202, UK Design
Number 6152191, EU
Community Design Number
008638126-0001 and other
patents pending
With optional soil
core container
May be used with one or two pairs of tines
Please begin by using one pair of tines only
Model SNT4C
Model SNT4
PLEASE READ THIS MANUAL BEFORE USING THE STEP ‘N TILT®LAWN AERATOR

SNT4, Rev 03/21/2022
Copyright © 2022 Vibrant Yard Company LLC, Wichita, Kansas, USA. All rights reserved. Page 2of 10
Important Helpful Hints
1. The tines may clog if the soil is too dry or too wet. Please aerate one day after at least one inch of rain or
irrigation. If you have a sprinkler system, each sprinkler zone will need to run for 60-90 minutes. It
takes time for water to be absorbed into the soil, especially clay soil, so it is essential to wait one day. In
other words, the soil must be thoroughly moist to a depth of 3-4 inches. The tines will be able to aerate
heavy clay soil without clogging if the soil is thoroughly moist, but not soaking wet.
2. Pencil Test:
a) One day after at least one inch of rain or irrigation, prior to lawn aeration, insert a wooden pencil
into the soil to test for proper moisture content. You must be able to insert the pencil into the
soil to a depth of 4 inches with one hand without too much effort or breaking the pencil.
b) Upon removing the pencil from the soil, inspect the surface of the pencil. The surface should be
clean and virtually free of mud. If the surface is covered with mud, the soil is too wet and soggy
for lawn aeration. Please wait one day before testing again.
c) If your clay soil is highly compacted or has never been aerated, water may not readily absorb
into the clay soil. Water will simply run off the surface of the compacted soil during rain or
irrigation. Highly compacted clay soil may seem moist at the surface after rain or irrigation but
remains dry and compacted underneath the surface. You may only be able to insert a pencil
about 1-2 inches into the soil even after a day of heavy rain or irrigation. During lawn aeration, a
compacted soil plug may stick to the tip of the aerator tine and impede soil core extraction. We
suggest you proceed with aerating the lawn anyway although no soil core is extracted. Use one
set of tines only. Note that the tine tips may wear more quickly, especially if the soil contains
rock. The tines will create holes in the ground which will serve as little reservoirs to collect
water during the next rain or irrigation and allow water to reach deeper into the ground. Conduct
a second pencil test one day after at least one inch of rain or irrigation. The second pencil test
should show deeper moisture absorption. A second aeration should yield better results and
should extract soil cores more successfully. So, it may take two lawn aerations to loosen a
highly compacted soil. The tine tips may be sharpened with a grinding stone if they become dull
or chipped.
3. If your area has experienced prolonged drought, a short rain or irrigation will not provide sufficient
moisture for aeration. If the tines are unable to penetrate the ground, the soil is definitely too dry. The
tines may wear prematurely if the ground is too dry.
4. Core aeration should not be performed in bare areas without grass; the aerator tines will clog if used in
bare soil. Please use a tiller or cultivator to loosen the soil in bare areas.
5. The soil cores left in your lawn as a result of using the Step ’N Tilt® will promote beneficial biological
activity that helps decompose thatch and grass clippings. The soil cores will disintegrate back into the
soil within a couple of weeks.
We design and manufacture the Step 'N Tilt® to be durable and last a lifetime. In the event that something is
broken, we carry all the replacement parts including all the bolts and nuts at https://vibrantyard.com
Step ’N Tilt®is a registered trademark of Vibrant Yard Company LLC

SNT4, Rev 03/21/2022
Copyright © 2022 Vibrant Yard Company LLC, Wichita, Kansas, USA. All rights reserved. Page 3of 10
1. INTRODUCTION
Congratulations on your purchase of the Step ’N Tilt®Lawn Aerator. We are confident that you will be amazed by its
capabilities. For your safety, please read and understand all installation and operating procedures in this manual before
attempting to install and use your Step ’N Tilt®. It is designed for operators weighing at least 80 lb and up to 6 feet, 6
inches tall. In addition to lawn aeration, your Step ’N Tilt®is also a very capable 60 lb capacity hand truck.
WARNING: The use of Step ’N Tilt®involves physical activity similar to climbing stairs and requires a sense of balance.
Do not use if you are unable to climb stairs without holding onto a handrail. Although moderate physical activity such as
using the Step ’N Tilt®is safe for most people, health experts suggest that you talk to your doctor before you start a new
physical activity or an exercise program. Do not use on slopes where you might lose traction, slip, or fall.
2. INSTALLATION
Note: Please use metric size wrenches or adjustable wrenches.
Step 1: Install the wheels to the baseplate. Two bolts and two
nuts are required for each wheel. Use a 14mm wrench to hold
the nut and a 12mm wrench to tighten the hex head bolt.
Nut (14mm wrench)
hex head bolt
(12mm wrench)
baseplate
Check to make sure the
bolts and locknuts are tight

SNT4, Rev 03/21/2022
Copyright © 2022 Vibrant Yard Company LLC, Wichita, Kansas, USA. All rights reserved. Page 4of 10
Step 2: Let the U-tube lay horizontally on a flat surface such as
a table or floor. Slide the bent tubes into the U-tube. Install the
shorter Phillips head screw and locknuts to hand tightness
only. DO NOT tighten the nuts yet; you will tighten them in
step 3.
Step 3: Install the upper handle bar onto the baseplate. Take note of the
orientation of the handle bar; it should be tilted forward as shown in the
picture. Secure the hex locknut with a 10mm or adjustable wrench while
tightening the Phillips head screw with a screwdriver (four locations).
locknut
long
Phillips
screw
The Phillips head will recess in the large
circular cutout.
locknut
short Phillips
screw
short Phillips
screw
locknut
large circular
cutout
long Phillips
Screw
locknut
large circular
cutout
large circular
cutout
bent tube
U-tube
baseplate

SNT4, Rev 03/21/2022
Copyright © 2022 Vibrant Yard Company LLC, Wichita, Kansas, USA. All rights reserved. Page 5of 10
Step 4: Let the Step ’N Tilt®rest horizontally as shown to install the aerator tines. Please begin by using
the one pair of tines only. Two pairs of tines are much harder to use than one pair of tines. Two pairs of
tines may be used after you have become familiar with its operation, if faster aeration is desired.
Please begin by using one pair of tines only. One pair of tines is intended for general purpose use. Two pairs
of tines will require significantly more force to push the tines into the ground. It is intended for maintenance of
healthy lawn and thoroughly moist soil only. The grass must have a very healthy root system. Soil may stick to
the spaces between the tines if the root system is poor.
Core aerator should be used in areas with grass only; the tines will clog if used in bare soil (i.e. areas without
grass).
All core lawn aerators require that the soil be VERY and THOROUGHLY moist. This Step 'N Tilt® is no
exception. Tine clogging and difficulties in performing lawn aeration are most often caused by insufficient
moisture in the soil. Please aerate one day after at least one inch of rain or irrigation. If you have a
sprinkler system, each sprinkler zone must run for 60-90 minutes. In other words, the soil must be very
moist. Refer to the Pencil Test in step 2 of page 2 for more details.
STOP: Do not install the second
pair of aerator tines unless you have
gained enough experience with using
one pair of aerator tines. In addition,
you must weigh at least 150lbs and
the soil must be very moist.
Install one pair of aerator
tines only in this location
Nut (use 14mm wrench)
Bolt (use 12mm wrench)
aerator tine

SNT4, Rev 03/21/2022
Copyright © 2022 Vibrant Yard Company LLC, Wichita, Kansas, USA. All rights reserved. Page 6of 10
Step 5a: The height of the latches, which is adjustable,
controls the tightness of the latches. The following
procedures have been shown to achieve an acceptable level
of tightness. Install the latches using the hex bolts,
washers, and nuts as shown on the right. Tighten the nuts
to the bolts by hand only and then back off the nut by a
quarter turn so that the latches can slide freely on the
container. DO NOT tighten the bolts and nuts yet; you will
tighten them in step 5b below.
latch body
FOR OPTIONAL SOIL CORE CONTAINER ONLY
Step 5b: Place the container on a table or floor as shown below. Allow the latch body to slide down to its
lowest position by gravity. Push the latch arm against the container. Make sure that latch arm is in contact
with the edge and bottom of the container and the floor or table as shown. Tighten the bolts with your
hand to temporarily secure the latches. Finally, tighten the bolts and nuts with 10mm wrenches.
PUSH
contact
latch
latch arm
latch handle
nut
washer
hex
bolt
Gently bend the latch arm with pliers, if needed, to adjust the latch
arm length
latch arm
flat surface
latch body
latch arm
latch handle

SNT4, Rev 03/21/2022
Copyright © 2022 Vibrant Yard Company LLC, Wichita, Kansas, USA. All rights reserved. Page 7of 10
3. USING THE STEP ’N TILT®
Always wear leather shoes or rubber boots while operating the Step ’N Tilt®. The Step ’N Tilt®aerator tines are very
sharp. Serious injury to legs and feet can occur if it is not handled carefully.
Aerate your lawn one day after an inch (or more) of rain or irrigation. The tines may clog if the soil is too dry or too wet.
The tines will not be able to penetrate the ground if the soil is too dry. If the tines clog but can very easily penetrate the
ground and the ground is wet and soggy, please wait one day before aerating again. The Step ’N Tilt®lawn aerator tines
are designed to aerate clay soil but the moisture content must be at a correct level. Refer to the Pencil Test in step 2 of
page 2 for a procedure to determine the optimal level of soil moisture for lawn aeration. Note that the soil cores are
usually shorter than the depth of the holes because the soil is compressed during the core removal process.
If you wish to leave the soil cores on the ground, adjust the deflectors to the open position as shown in
the right picture above. To open a deflector, (1) lift the deflector up above the rear deflector slot, (2)
swing the deflector open, and (3) push the deflector down to insert it into the front deflector slot as
shown in the left picture above.
(2)
SWING
OPEN
(3)
PUSH
DOWN
(1)
LIFT
UP
deflector in
open position
rear
deflector
slot
DO NOT HOLD
HERE TO LIFT
deflector in
open position
deflector
in closed
position
front
deflector
slot
front
deflector
slot
rear deflector
slot for use in
closed position
only
HOLD HERE
TO LIFT
HOLD HERE
TO LIFT
Please aerate one day after at least one inch of rain or irrigation. If you have a sprinkler system, each sprinkler
zone will need to run for 60-90 minutes. In other words, the soil must be thoroughly moist.
Question: Why must I wait one day?
Answer: It takes time for water to be absorbed by the soil, particularly clay soil.

SNT4, Rev 03/21/2022
Copyright © 2022 Vibrant Yard Company LLC, Wichita, Kansas, USA. All rights reserved. Page 8of 10
If you wish to collect the soil cores, close the deflectors and place the container (an optional accessory) onto
the baseplate. To secure the container using the latches, (step 1) push the latch arm against the bottom of
the baseplate while (step 2) lifting the latch handle up against the container as shown in the left picture
above. The latch handle will snap securely into place if the height of the latch has been adjusted correctly.
If needed, readjust the tightness of the latches by adjusting the height of the latch bodies or bending the
latch arm (see step 5b in page 6).
(step 1) Push
latch arm
(step 2) Lift
latch handle
latch handle
latch arm
latch arm
latch handle
baseplate
baseplate
latch body
OPERATING PROCEDURES
Tips: The aerator tines will penetrate the ground
only a few inches so it will typically not damage
underground sprinkler pipes because they are
typically buried much deeper. However, the
aerator tines may damage sprinkler heads. We
recommend flagging the sprinkler heads prior to
aerating so that you can avoid hitting them during
lawn aeration.
Lawn aeration procedures are as simple and
effortless as POSITION-STEP-TILT as follow:
POSITION: Determine a safe location to aerate,
position the aerator tines vertically, and place your
foot on the baseplate. If you are using the optional
soil core container, place your foot on the top plate
of the container.
top plate
top plate
aerator tine
THOROUGHLY MOIST SOIL
Please aerate one day after at least
one inch of rain or irrigation.

SNT4, Rev 03/21/2022
Copyright © 2022 Vibrant Yard Company LLC, Wichita, Kansas, USA. All rights reserved. Page 9of 10
STEP: Step on the baseplate directly above the aerator
tines (do not push down on the handle with your hands).
Soil cores will stay inside the aerator tines the first time
you perform this task. The second time you perform this
task, the second soil cores will push the first soil cores out
of the aerator tines through the top opening, as shown in
the figure on the right. Note that the soil cores are usually
shorter than the depth of the holes because the soil is
compressed during the core removal process. The
deflectors will prevent soil cores from dropping onto the
baseplate so your shoes will stay clean. If the optional
soil core container is used, step on the top plate of the
container. The soil cores will be deposited directly into
the container.
TILT: Remove your foot from the baseplate and take a small step back. Tilt the
handle back to remove the tines from the ground. Repeat the steps POSITION-
STEP-TILT to create holes that are between 2 to 6 inches apart. Alternate your left
and right feet occasionally to reduce fatigue.
Tips: If the aerator tines clog, remove the clog in accordance with the procedures
in the next page. If the tines continually clog, the soil may be too wet or muddy.
Wait 1-2 days before aerating again. If the tines cannot penetrate the ground, the
soil may be too dry. To avoid excessive tine wear, please do not use the Step ’N
Tilt®lawn aerator when the ground is too dry. Bare soil (areas without grass) may
also cause the tines to clog. Please use a tiller or cultivator instead of a core
aerator to loosen bare soil.
S
T
E
P
TILT
soil core
deflector
THOROUGHLY MOIST SOIL
Please aerate one day after at least one
inch of rain or irrigation.
THOROUGHLY MOIST SOIL
Please aerate one day after at least one
inch of rain or irrigation.

SNT4, Rev 03/21/2022
Copyright © 2022 Vibrant Yard Company LLC, Wichita, Kansas, USA. All rights reserved. Page 10 of 10
4. MAINTENANCE
Remove soil cores from the tines using the soil core remover prior to storage. Spray a thin coat of oil (WD-40 or
equivalent) on the inside surfaces of the tines after each use to prevent corrosion/rust. Corrosion on the inside surfaces
of the tines may impede core removal and cause clogging.
Occasionally, the fasteners may become loose. Tighten the fasteners as needed but do not over-tighten.
Through the normal use, the paint or finish may deteriorate due to abrasion. In addition, the aerator tines may become
dull and require sharpening. The steel tines may be sharpened with a grinding wheel. Due to its high hardness, the
tines cannot be easily sharpened with a file. Alternatively, you may purchase replacement parts from
https://vibrantyard.com.
5. LIMITED WARRANTY
Vibrant Yard Company, LLC. will repair or replace without cost to the owner any part or parts of the Step ’N Tilt®
found to have manufacturing defect for a period of one year from the date of purchase.
HOW TO USE THE SOIL CORE REMOVER
CORRECT: Tilt the Step ’N Tilt®to a horizontal position if the soil core is to be removed while the aerator
tine is installed on the Step ’N Tilt®. Push the soil core from the bottom opening of the aerator tine. Do not
use a screwdriver or any sharp object to remove the soil core as this will cause the soil to stick to the inside
surfaces of the tine, which will cause further clogging.
INCORRECT: Never push the soil core from the top opening of the aerator tine; doing so will cause the soil
to stick to the inside surfaces of the tine, which will cause further clogging.
NO, do not insert soil core remover
from the top opening, because doing
so will exacerbate clogging problem.
safety guard
CAUTION
Sharp Edges!
bottom opening
soil core remover
aerator tine
top opening
soil core remover
YES, please insert the soil core remover
from the bottom opening in order to
remove soil core from the tine.
hold here only
to avoid injury
DO NOT hold here
tine tip is very sharp!
This manual suits for next models
2
Table of contents
Other Vibrant Yard Tiller manuals