Caution: Please read carefully all the following important safeguards to en-
sure safe operation.
1. Read Instructions - All the safety and operating instructions should be
read before the appliance is operated.
2. Retain Instructions - The safety and operating instructions should be
retained for future reference.
3. Follow Instructions - All operating instructions should be followed.
4. Heed Warnings - All warnings on the appliance and in the operating
instructions should be adhered to.
5. Power Source - The appliance should be connected to a power supply
only of the type specified in the operating instructions or as marked on
the appliance.
6. Power-cord Protection - Power-supply cords should be routed so that
they are not likely to be walked on or pinched by items placed upon or
against them, pay particular attention to cords at plugs, convenience
receptacles, and the point where they exit from the appliance.
7. Water and Moisture - The appliance should not be used near water
(for example, near a bathtub, washbowl, kitchen sink, laundry tub, in a
wet basement, or near a swimming pool, etc.)
8.Ventilation - The appliance should be situated so that its location or
position does not interfere with its proper ventilation. Do not use the
appliance on a bed, sofa, rug or similar surface that may block the
ventilation openings.
IMPORTANT SAFEGUARDS
2
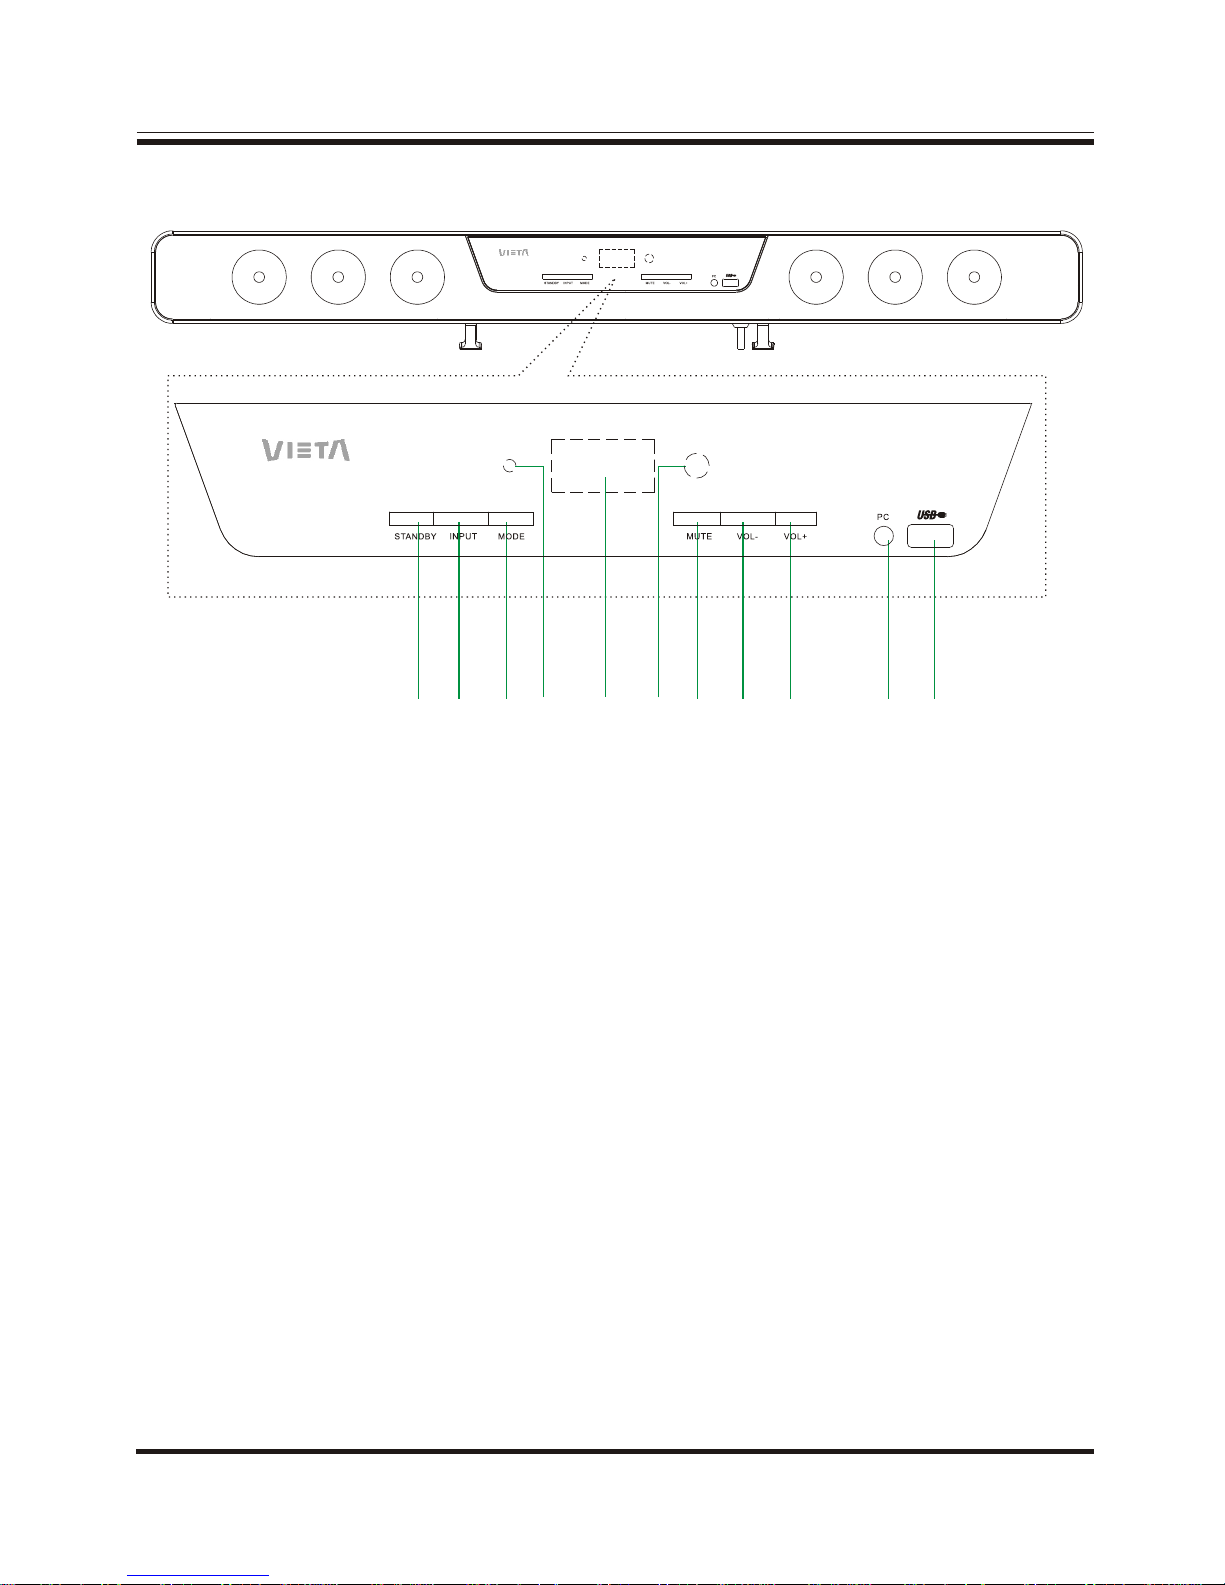
A. Switch On/Off the Product
1. Before turning on the system, please connect it according to
the System Connection Instruction.
2. Connect AC power supply with this product.
(Caution: Power source must be consistent with this product.)(Caution: Power source must be consistent with this product.)
3. Press on the POWER switch button on the Rear Panel of the main
unit to switch on the system, the standby indicator will light up.
Then press the STANDBY button on the remote controller to enter
The normal status. Press the button on the remote controller once
again to keep power in standby status.
B. VOLUME Selection
1. Press the VOL+ on the front panel of the mainturn-knob
or VOL + button on the remote controller to maximizeUnit the
sound output.
2. Press the VOL- on the front panel of the mainturn-knob
or VOL - button on the remote controller to minimizeunit the
sound output.
C. MUTE Selection
1. Press the MUTE button on the remote controller once to
keep the performance silent.
Press the RESET button on the remote controller and it will reset
all settings including Speaker output to Factory Default settings.
D. RESET
OPERATION
9