Vigilant Guardian 10 User manual

2
Guardian Humidification System
Operating Instructions
Congratulations! You have purchased the finest humidification system ever created for the preservation
of guitars. The Guardian Humidification System has been designed to provide your premium guitars with
the optimal storage environment. The Guardian microprocessor constantly monitors the humidity level
of your cabinet interior and will maintain the relative humidity (RH) to within 2% of your desired setting.
Should you have any questions regarding the installation or operation of Vigilant’s Guardian
Humidification System, please call us toll-free at 888-812-4427. We will be happy to assist you.
Please read this entire manual before operating your Guardian Humidification System. By following
these instructions, you will guarantee the proper conditions for your prized guitar collection.
Parts
•Humidification system –consists of water reservoir, controller, and sensor
•Zip ties (2)
•Wire anchors (5)
•24-volt wall adapter
•Wicking filter (located inside system)
Guardian 10 model
Guardian 100/150 model

3
Installation and Start-Up Operation
IMPORTANT:
•DO NOT OVERFILL THE RESERVOIR AS OVERFILLING WILL CAUSE DAMAGE TO YOUR CABINET!
•DO NOT POUR WATER ON THE FAN THIS CAN CAUSE DAMAGE TO THE ELECTRONICS.
•DO NOT MOVE CABINET WITH WATER IN IT.
1. Remove all packing material from the reservoir area and make sure the parts list is complete.
Leave the white mesh wicking filter in the reservoir.
2. Place the Guardian Humidification System in the bottom of your cabinet.
3. Insert the small end of the power cord through a hole in your cabinet and plug it directly into the
power jack on the side of the controller of your system.
4. Placement of sensor: Determine a suitable location for the sensor, preferably two-thirds up from
the back panel or side wall, and/or as close to the horizontal center of the back panel as possible.
5. Extra support for the sensor can be gained using the included wire anchors and zip ties.
6. Slowly fill the reservoir with distilled water to the max fill line. The reservoir is outfitted with an
overflow vent that will prevent damage to your system. Make sure that the white mesh wicking
filter is sitting vertically upright in your reservoir.
7. Plug your humidification system into a surge protector that is attached to a grounded outlet. The
digital display will activate within 6 seconds and a 10-minute stabilization program will begin.
8. Next, the unit will automatically begin to operate at the factory set point of 47% relative
humidity. Allow the unit to run at the factory set point for at least 24 hours before adjusting or
adding guitars.
•In the winter month of some regions, the system may use large amounts of water during the
first several days of operation in a new un-seasoned cabinet. Once the cabinet has been
seasoned (3 –4 days), water use will greatly diminish, and the guitars can safely be added.
•It is recommended that you do not set the humidity level above 55%, as guitars stored at
humidity levels higher than 55% can swell, causing finish damage, failed joints, and neck
angles to go bad.
•If you choose to make an adjustment to the humidity level, limit the change to no more than
2% in a 10-day period.

4
Adjusting the Humidity
Your Guardian Humidification System has been pre-set at 47% relative humidity and operates on a
range (hysteresis) of approximately 2%. The system, therefore, will operate between 46% and 48%,
as set. As the controller system is fully automatic, the only controller feature you need to be familiar
with is the set point adjustment.
PLEASE NOTE: Your humidifier system cannot remove excess moisture without special options. If you
choose to make an increase, limit the change to no more than 2% in a 10-day period to prevent
overshoot.
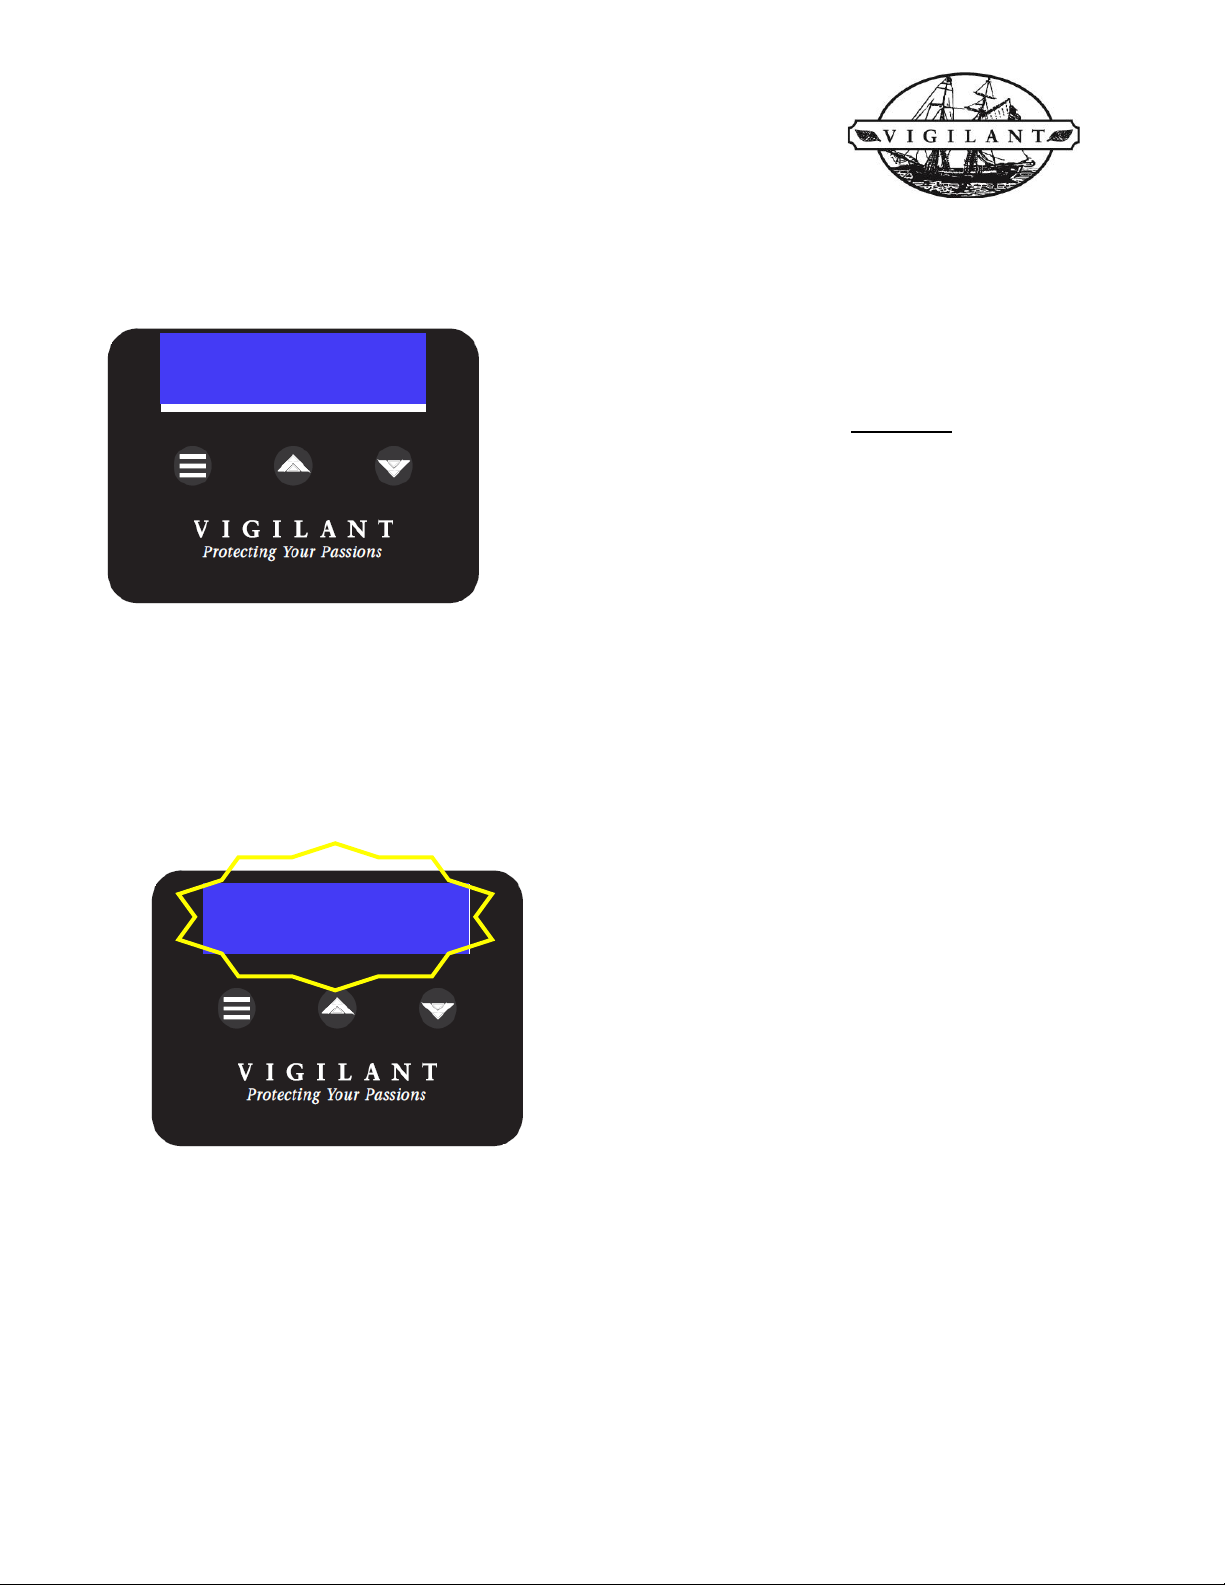
The digital display will indicate the actual humidity level inside of your cabinet. To view and/or adjust
the set point, read this manual completely before proceeding then simply follow these steps:
1. Tap the Menu key to index to the RH SET option.
2. To adjust humidity upward, tap the Raise key until desired level of humidity is reached.
3. To adjust humidity downward, tap the Lower key until desired level of humidity is
reached.
Maintenance of Reservoir and Wicking Filter
When the display indicates low water, it is time to fill the water reservoir. Frequency of filling will vary
depending on climatic conditions and cabinet size.
As the reservoir and wicking filter(s) are constantly exposed to moisture and dirt collected from the
circulating air, they must be cleaned periodically. We recommend that you clean the reservoir and filter
each time you add distilled water.
1. Unplug the system from its power outlet before you begin cleaning the reservoir and filter.
2. Remove the humidification system from your cabinet, being careful not to spill any water on your
cabinet. Remove the thumbscrews, lift the cover off and remove the filter.
3. Wipe the walls of the reservoir with a damp paper towel
4. Wicks should be changed every 90-120 days and can be ordered directly from Vigilant’s online
store at https://store.vigilantinc.com/.
5. Insert clean filter into the reservoir and return it to your cabinet.
6. To fill the reservoir, add DISTILLED water only. Never overfill the reservoir. Watch the water level
carefully while filling. Slowly fill reservoir to the max fill line.

5
Suggestions
The installation and maintenance of your Guardian Humidification System will directly affect its
performance. Here are some factors to consider:
•Do NOT block the system fan airflow. Instruments should never be directly above the system.
•Do NOT block the sensor.
•Keep the water reservoir and wicking filter clean by servicing at least every 90-120 days.
•Avoid frequent opening of your cabinet door(s). If the cabinet is used for commercial
environments, nighttime recovery will be crucial for maintaining an optimal environment.
TROUBLESHOOTING
Cabinet appears not to maintain desired humidity level
•Check the set point adjustment on the control panel. If the set point is not at your desired
relative humidity level, reset by following the “Adjusting the Humidity” instructions.
•Check the seal(s) of the door(s) and drawer(s) of your cabinet. The system may not be able to
maintain adequate humidity levels in a cabinet that is not well sealed.
•Check the water level in the reservoir. If it is empty, the display should indicate. If not, carefully
fill your reservoir to approximately 1" below the overflow hole.
•Be certain that fan and airflow intake are clear of any obstructions that could impede air
circulation.
•Verify that the wicking filter is fresh and vertically positioned inside the reservoir.
Cabinet is too moist or too dry
•Your humidity set point is too high or too low.
•Remember that the system will run up to 2% above or below the set point. It is recommended
that the system is started at the pre-set level of 47% RH to maintain an interior humidity level
between 46-48%.
Fan does not work
•Check power source and connections.
•If the set point is below the humidity level of the cabinet’s interior, the fan will not run.
•Press the far-left button on the control panel to check set point.
If these troubleshooting recommendations do not correct the problem, call Vigilant at
888-812-4427 and a service representative will gladly assist you.

6
Guardian Digital Controller Overview
Designed in-house to be the most advanced
micro-climate controller in the industry, the new
Guardian is the culmination of 25 years in
producing the finest long-term storage and
preservation devices.
A bright, intuitive display and easy-to-navigate
menu makes setup and operation simple, while
the powerful microprocessor automatically keeps
conditions in check.
Before you power up the Guardian controller, please take a moment to read
this guide and familiarize yourself with the controller, menu, and options.
•DO NOT make alterations or additions to the terminal at the back of this control without
contacting us. All controls are built and wired to order, and permanent damage to this
device or your collection could occur if incorrect changes are made. Please contact us if
changes are needed and we are happy to assist.
•Several OPTIONAL features listed may not be enabled on your device.
•If you are operating the control with a remote wired sensor, be sure to adjust the slide
switch located on the side of the control before the unit is powered. Information about
this feature is listed under the “Keys & Switches” section.
•A flashing alarm will display during the initial process and after major changes to the set
points. This is normal. Alarms will automatically clear once the conditions near the
desired set point. Information about alarms is listed in Settings.

7
DIMENSIONS
KEYHOLE MOUNTING LOCATIONS

8
CONNECTIONS
Sensor local / remote switch
Local Sensor
Remote control wire connection
Wired remote sensor connection
Power input connection
Back
I/O Terminals
Bottom
I/O Terminal screws

9
KEYS & SWITCHES
Menu Key.Each menu keypress press will index
through user settings.
Raise Key. Adjusts setting value up.
Lower Key. Adjusts setting value down.
SENSOR LOCAL / REMOTE SWITCH
LOC:Controller uses onboard sensor
REM:Controller uses wired remote sensor
! Disconnect power before making selection

10
POWER-UP STABILIZATION MODE
The Guardian sensor requires an initial stabilization period
when first powered. At this time, the controller will run a
stabilization program.
This program will delay operation for 10 minutes and all outputs
will be OFF.
During this mode, the display will read “STANDBY” and the
current sensor reading.
Initially the sensor reading will be blank. After a short period
(less than 15 seconds), the sensor output will begin to increase.
The final stabilization time will depend on the ambient
conditions. The longest stabilization is required when the
ambient parameter is near full scale, typically no longer than 24
hours.
ALARMS
The Guardian controller is equipped with several alarms.
When in alarm, the display brightness and alarm message will
flash. All alarms will automatically clear once the condition is
corrected.
Temperature and Humidity: T&H alarms will automatically adjust with the set point to activate 5°/ 5%
both above and below the current set point.
Low Water: Low water will be indicated with “LOW WATER” message and flashing display. This alarm will
automatically clear once the reservoir is replenished.
TEMP: --F RH: --%
STANDBY
TEMP: 70F RH:62%
RH LOW

11
ICON KEY
Cabinet Lights*
Circulation Fans*
Heating *
Cooling*
Humidification
Dehumidification*
* Optional Equipment
Icons will only appear onscreen when the feature is ON or active.
TEMP: 70F RH:70%

12
SETTINGS
Menu Key.Each menu keypress press will index through enabled user settings in the following
order:
•If no key is pressed for 20 seconds the display will return to the home screen.
•Press and hold the key anywhere in the user menu for 3 seconds to force return to the
home screen.
•Indexing after the last option will return to the home screen
Cabinet lights*
Raise. Cabinet lights ON.
Lower. Cabinet lights OFF.
Leave setting to “ON” if internal dimming is used
*Lights are optional equipment. You may not see this option.
Circulation fans*
Raise. Circulation fans ON.
Lower. Circulation fans OFF.
Fans are “always on/off” and not controlled
*Circulation fans are optional equipment. You may not see this option.
FAN
ON
LIGHTS
ON

13
SETTINGS (continued)
Temperature set point*
Raise. Temperature set point
Lower. Temperature set point
Temperature set point range is 60-80°F unless specified
*Temperature is optional equipment. You may not see this option.
Relative Humidity (RH SET)
Raise. Humidity set point
Lower. Humidity set point
Operates both Humidification and *Dehumidification (DRH)
*Dehumidification is optional equipment. DRH outputs may be disabled.
TEMPERATURE SET
70F
RH SET
70%

14
SETTINGS (continued)
Temperature Units
Raise. Fahrenheit Selection
Lower. Celsius Selection
Temperature (TEMP) offset
Raise. Temperature Offset
Lower. Temperature Offset
Factory may adjust during set up. Use this number as Default.
Use this feature to offset the display if needed. Offset Max is +10 F/C°. Offset minimum is -10 F/C°
UNITS
F
TEMP OFFEST
0F

15
SETTINGS (continued)
Relative Humidity (RH) offset
Raise. RH Offset
Lower. RH Offset
Factory may adjust during set up. Use this number as Default
Use this feature to offset the display if needed. Offset Max is +10 %. Offset minimum is -10 %
Brightness
Raise. Brightness
Lower. Brightness
Contrast
Raise. Contrast
Lower. Contrast
RH OFFEST
0%
BRIGHTNESS
100
CONTRAST
50

16
SETTINGS (continued)
Sleep Mode
Select option
Select option
Options
•NONE. Display stays on
•OFF. Display turns off after 20 seconds. Wakes up with button press.
•DIM. Display dims to 25% of set brightness after 20 seconds. Wakes up with button
press.
SLEEP MODE
NONE

17
MANUALLY CHANGING MODE
Hold for 3 seconds to enable standby
mode.
Hold for 3 seconds to disable standby
mode.
When STANDBY is enabled, all devices will switch OFF and display will remain active.
When STANDBY is disabled, the controller will resume normal operation
VIEW SAVED MIN/MAX LEVELS
Press to show MIN/MAX
Press again to clear or press
to return to the home screen
TEMP: 70F RH:70%
STANDBY
MIN: 70F MAX: 72F
MIN: 68% MAX: 71%

18
CABLES
Sensor assembly
DC power extension –36”
Remote control wire (optional)
Power supply –60”
FILTER ACCESS
1. Remove thumb screws
2. Lift cover off
ADDING WATER
•Display will indicate low water.
•Fill the reservoir with distilled water. Treat the water
with Bacteriostat at this time if desired.
•DO NOT fill beyond the MAX FILL line.

19
CONTROLLER REMOVAL/ATTACHMENT
Controller can be detached from reservoir and mounted remotely. Contact Vigilant for optional remote
control wires.
1. Slide the controller back on the mounts
2. Lift the controller off the reservoir and press lever to disconnect the control wire
3. Tuck the control wire back into the housing

20
4. Locate the control wire inlets on both the controller and reservoir.
5. Push the remote control wire onto the inlet and thread clockwise to secure.
4
5
Other manuals for Guardian 10
1
This manual suits for next models
2
Table of contents