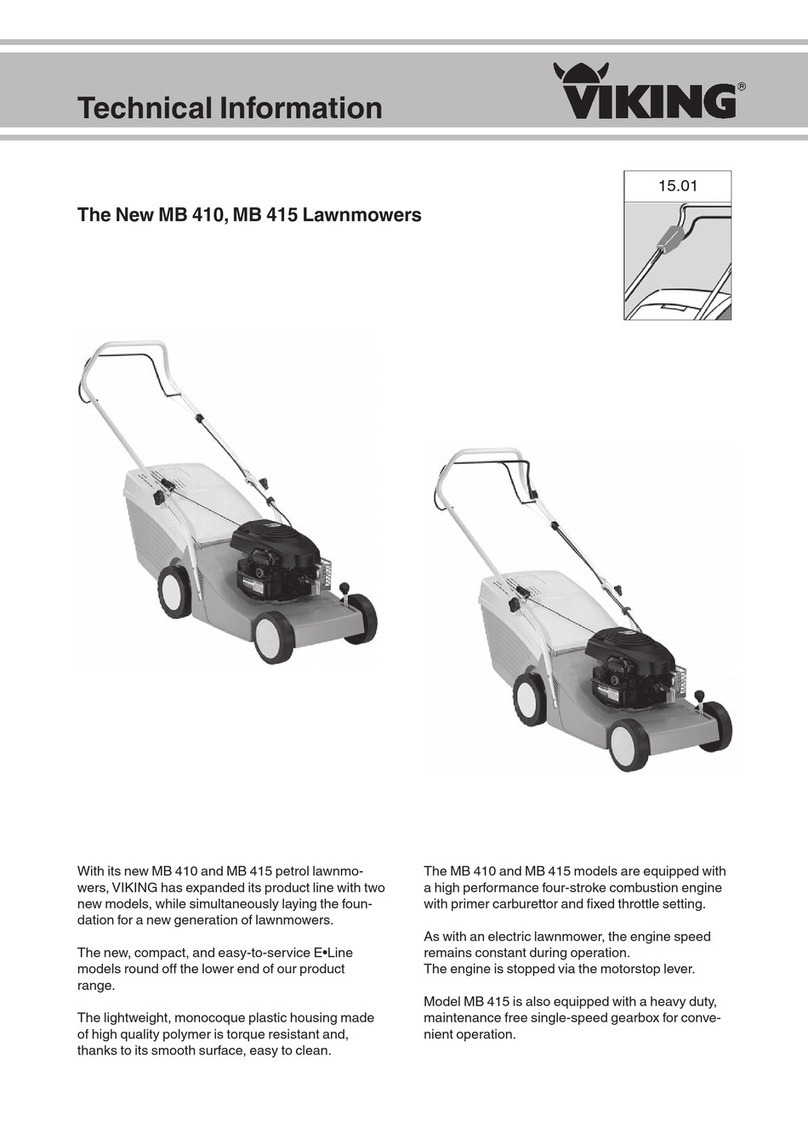
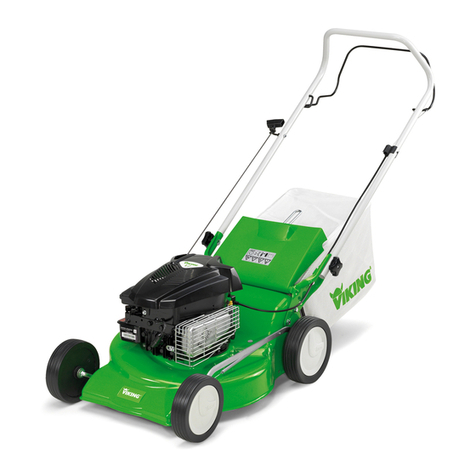
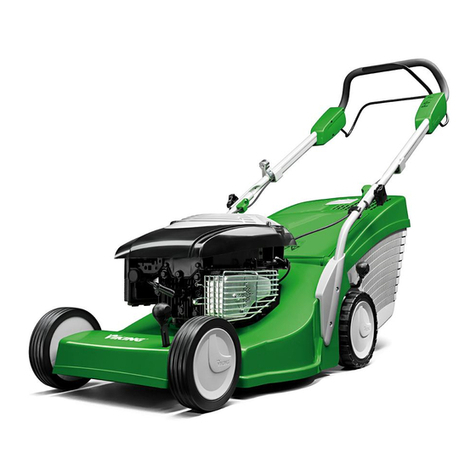
Viking MB 248 User manual

Cwww.viking-garden.com
B 248
Gebrauchsanleitung
Instruction manual
anuel d'utilisation
Gebruiksaanwijzing
Istruzioni per l’uso
anual de instrucciones
anual de utilização
Bruksanvisning
Bruksanvisning
Käyttöohjeet
Betjeningsvejledning
Instrukcja obsługi
Navodila za uporabo
Návod na obsluhu
Kullanım Kılavuzu
DE
EN
FR
NL
IT
ES
PT
NO
SV
DA
FI
PL
SL
SK
RO
LT
EL
RU
BG
ET
K
Használati útmutató
Uputstvo za upotrebu
Priručnik
Návod k použití
Lietošanas instrukcija
Naudojimo instrukcija
Instrucţiuni de utilizare
Οδηγίες χρήσης
Инструкция по
эксплуатации
Упътване за употреба
Kasutusjuhend
Упътване за употреба
HU
SR
HR
CS
LV
TR
MB 248.0
INT 1

2009 - 2011 VIKING GmbH, A - 6336 Langkampfen / Kufstein0478 111 9916 C. M4,5. I11. Eco. Printed in Germany

0478 111 9916 C I
1

0478 111 9916 C
II
2
1 2 3
4 5 6
3

0478 111 9916 C III
4
5

0478 111 9916 C
IV
6
7
8

0478 111 9916 C V
9
11
10

0478 111 9916 C
VI
12
13

0478 111 9916 C - EN 1
Dear Customer,
Thank you for choosing a VI-
KING quality product.
This product has been produ-
ced using state-of-the-art pro-
duction methods and
extensive quality assurance
procedures, because our goal
is only achieved if you, the
customer, are satisfied with
your machine.
If you have any questions con-
cerning your machine, please
contact your dealer or our
sales agency directly.
I hope that your VIKING ma-
chine will give you great en-
joyment.
Dr. Peter Pretzsch
anager
VIKING is continually striving
to further develop its range of
products; we therefore reserve
the right to make alterations to
the form, technical specificati-
ons and equipment level of our
standard equipment.
The information and illustrati-
ons in this manual are there-
fore subject to alterations.
01. Table of contents 1
02. Notes on the instruction manual 2
03. achine overview 2
04. For your safety 2
04.01 General 2
04.02 Transport 3
04.03 Preparatory measures 3
04.04 Mowing procedure 4
04.05 Maintenance and storage 5
04.06 Warning: petrol is poisonous and ex-
tremely inflammable 6
04.07 Disposal 7
05. Description of symbols 7
06. Standard equipment 7
07. Preparing the machine for operation 8
07.01 Assembling the handlebar 8
07.02 Folding down the upper handlebar 8
07.03 Attaching and detaching the recoil
starter rope 8
07.04 Assembling the grass catcher bag 8
07.05 Attaching and detaching the
grass catcher bag 9
07.06 Central cutting height adjustment 9
07.07 Fuel and engine oil 9
08. Safety device 10
08.01 Motorstop lever 10
09. Notes on mowing 10
10. Initial operation of the machine 10
10.01 Starting the engine 10
10.02 Stopping the engine 10
10.03 Emptying the grass catcher bag 10
11. aintenance 11
11.01 Cleaning the machine 11
11.02 Combustion engine 11
11.03 Wheels 11
11.04 Wear limit for mowing blades 11
11.05 Mowing blade maintenance 11
11.06 Storage and winter break 12
12. Transport 12
13. inimising wear and preventing
damage 13
14. Environmental protection 13
15. Standard spare parts 13
16. Technical specifications 14
17. CE - anufacturer’s declaration
of conformity 14
18. Troubleshooting 15
19. Service schedule 16
01. Table of contents
Note:
This instruction manual constitutes original ma-
nufacturer’s instructions in the sense of EC
Directive 2006/42/EC.
DEENFRNLITESPTNOSVFIDAPLSLSK
TR
Printed on chlorine-free bleached paper. Paper is recycleable. Cover is halogen free.

0478 111 9916 C - EN
2
Illustration symbols
This symbol serves to link
the Figs. on the illustration
pages with the correspon-
ding text passages in the
instruction manual.
The figures can be found at the
front of the instruction manual.
Designation of text passages
The operating steps described
may be designated in different
ways.
Operating step with direct refe-
rence to the relevant figure to
be found in the illustration
pages (at the front of the in-
struction manual), with a corre-
sponding reference to the item
number in the figure.
Example:
• Release bolt (1), operate
lever (2).
In addition to descriptions of
operating steps, this instruction
manual includes text passages
containing important additional
information. Such passages
are identified using the symbols
described below in order to
especially emphasise them in
the instruction manual:
General lists, which do not
refer to the illustrations.
Example:
- use of the product for spor-
ting or competitive events
Danger of accident and
risk of injury to persons
and serious damage to
property.
Information for better use
of the machine and in
order to avoid possible
operating errors, which
may result in damage to
the machine or to the in-
dividual components.
Viewing direction when “left“
and “right“ is used in the in-
struction manual:
the user is standing behind the
machine (working position) and
is looking forwards in the direc-
tion of travel.
AUpper handlebar
BRecoil starter rope
CRotary handle
DLower handlebar
ECutting height adjustment
lever
FRear wheel
GHousing
HFront wheel
IEngine
JDischarge flap
KGrass catcher bag (fabric)
LMotorstop lever
04.01 General
These safety regulati-
ons must be observed
when working with the
lawn mower.
Read the whole in-
struction manual be-
fore using the machine
for the first time and keep in a
safe place for future reference.
• Observe the operating and
maintenance instructions
contained in the separate
engine instruction manual.
• Ensure that you are familiar
with the controls and use of
the machine.
• Before initial use, advice
should be obtained from the
specialised dealer or other
technician.
• The lawn mower should not
be operated after the con-
sumption of alcohol, medica-
tions which impair reactions,
or drugs.
•Caution!
The lawn mower is only in-
tended for mowing lawns; its
use for other purposes is not
permitted and may be dan-
gerous or result in damage
to the machine.
Risk of injury!
1
02. Notes on the instruc-
tion manual 03. achine overview 04. For your safety
1

0478 111 9916 C - EN 3
• Particular care is required
during use in public green
spaces, parks, sports fields,
along roads and in agricultu-
ral and forestry businesses.
• Objects hidden in the grass
(lawn sprinkler systems,
posts, water valves, founda-
tions, electrical wires, etc.)
must be avoided. Never in-
tentionally run over any such
foreign objects.
• This machine is not suitable
for use by persons (including
children) with impaired physi-
cal, sensory or mental facul-
ties or those lacking the
appropriate experience
and/or knowledge, unless su-
pervised by a person respon-
sible for their safety or having
received instructions on use
of the machine from such
person.
Children must be supervised,
in order to ensure that they
do not play with the machine.
• Due to the physical danger
to the user, the lawn mower
must not be used, for exam-
ple, for the following applica-
tions (incomplete list):
- trimming bushes, hedges
and shrubs,
- cutting creepers, care of
lawn roofs and balcony
boxes,
- shredding and chopping tree
and hedge cuttings,
- levelling earth mounds,
e.g. mole hills.
Caution! Danger to
health due to vibrati-
ons.
• Excessive exposure to vi-
brations can result in da-
mage to the cardiovascular
or nervous system, particu-
larly in persons with cardio-
vascular problems. Please
consult your physician if you
experience symptoms that
may have been caused by
vibrational loads.
Such symptoms include loss
of feeling, pain, muscular
weakness, skin discoloura-
tion or an unpleasant ting-
ling sensation. These
symptoms principally affect
the fingers, hands or wrists.
• This machine is not suitable
for use by persons (including
children) with impaired physi-
cal, sensory or mental facul-
ties or those lacking the
appropriate experience
and/or knowledge, unless su-
pervised by a person respon-
sible for their safety or having
received instructions on use
of the machine from such
person.
04.02 Transport
• Always wear gloves in order
to prevent injuries
due to sharp-edged
and hot compo-
nents.
• Switch off the machine prior
to transport, detach the
spark plug socket and allow
the blade to come to a
standstill.
• Only transport the machine
once the engine has cooled
down and with an empty fuel
tank.
• Pay particular attention to
the information in the
“Transport” section.
04.03 Preparatory measures
• Never allow children under
the age of 16 to use the
lawn mower. Local regulati-
ons may specify a minimum
age for users.
• Persons who are not familiar
with the instruction manual
are not authorised to use the
machine.
• Never use the machine in
the vicinity of other persons,
particularly children, or ani-
mals.
- Be aware that the person
operating the machine or the
user is responsible for acci-
dents involving third parties
or their property.
• Always wear robust shoes
and long trousers
when working.
Never work bare-
foot or in sandals.
DEENFRNLITESPTNOSVFIDAPLSLSK
TR

0478 111 9916 C - EN
4
• Carefully inspect the com-
plete area on which the ma-
chine is to be used and
remove any stones, sticks,
wires, bones and other fo-
reign objects which could be
thrown up by the machine.
• Before using the machine,
always visually inspect the
cutting tool, the fastening
bolts and the entire cutting
unit for wear or damage
(notches or cracks).
Replace worn or damaged
parts.
• The wear limit of the mowing
blade must be checked be-
fore each use.
(11.04)
• Never use the lawn mower if
the safety devices (e.g. mo-
torstop lever, discharge flap,
housing, protective grille)
are missing, damaged or
worn.
• For safety reasons, the
grass catcher bag must only
be used if undamaged.
• The switch mechanisms in-
stalled in the machine must
not be removed or bypas-
sed, e.g. by tying the motor-
stop lever to the handlebar.
• Only give (or lend) the ma-
chine to persons who are fa-
miliar with this model and
how to operate it. Always
provide them with the in-
struction manual.
• Please observe the local re-
gulations regarding permit-
ted operation times for
gardening power tools.
04.04 owing procedure
• Keep other persons away
from the danger area.
• Do not run the combustion
engine in an enclosed
space, where dangerous
carbon monoxide can accu-
mulate.
Danger to life through poi-
soning!
• Only work during the day or
with good artificial light.
• If possible, avoid using the
machine when the ground is
wet, otherwise, exercise par-
ticular caution to prevent
yourself from slipping. The
risk of accidents is higher if
the ground is wet (increased
danger of slipping for opera-
tor).
• Always ensure good stability
on slopes. Avoid mowing on
excessively steep slopes in
order to prevent loss of con-
trol of the machine.
• Never attach any objects to
the handlebar (e.g. work
clothing).
• Only mow at walking speed.
Working quickly with the ma-
chine increases the risk of
injury due to stumbling, slip-
ping etc.
• Only mow at right-angles to
the slope and never up or
down the slope, in order to
avoid being run over by the
running lawn mower in the
case of loss of control of the
machine or of falling.
• Be particularly careful when
changing direction on a
slope.
• For safety reasons, the ma-
chine must not be used on
slopes with an incline of
more than 25° (46.6 %).
Risk of injury!
A slope inclination of 25°
corresponds to a vertical
height increase of 46.6 cm
for a 100 cm horizontal di-
stance.
In order to ensure an ade-
quate oil supply for the en-
gine, the information in the
accompanying engine in-
struction manual must be
additionally observed when
using the machine on slo-
pes.
• Be particularly careful when
turning the lawn mower
around or pulling it towards
you.
Risk of stumbling!
• Do not alter the basic setting
of the engine or run at ex-
cessive engine speeds.
• Exercise particular care
when starting the lawn
mower and observe the in-
structions contained in the
“Initial operation of the ma-
chine” section.
100
46.6

0478 111 9916 C - EN 5
• Switch off the engine:
- When the machine has to
be tilted for transportation.
- When the machine is being
pushed to and from the
area to be mown.
- Before pushing the lawn
mower onto a surface not
covered with grass.
- When you open or remove
the grass catcher bag.
• Switch off the engine and
detach the spark plug sok-
ket:
- Before remedying blocka-
ges, including those in the
discharge chute.
- Before checking, cleaning
or working on the lawn
mower.
- After hitting a foreign ob-
ject. Inspect the machine,
in particular the cutting
unit, for damage and have
any necessary repairs car-
ried out by a technician
before starting and wor-
king with the machine
again.
VIKING recommends VI-
KING specialist dealers.
- If the lawn mower begins
to vibrate excessively, in-
spect the machine, in par-
ticular the cutting unit
(blade, blade shaft, blade
fastening), for damage
and have any necessary
repairs carried out by a
technician. Strong vibrati-
ons are generally an indi-
cation of a fault.
VIKING recommends VI-
KING specialist dealers.
• Switch off the engine:
- Whenever you leave the
lawn mower unattended.
- Before re-filling the tank.
Allow the engine to cool
down before filling the
tank.
Fire hazard!
04.05 aintenance and sto-
rage
If you do not have the neces-
sary expertise or auxiliary
equipment, please always
contact a specialist dealer. (VI-
KING recommends VIKING
specialist dealers).
Always detach the
spark plug socket be-
fore performing any
work on the machine.
Warning
Danger of burns!
The engine can be-
come extremely hot. In order
to prevent burns, allow the en-
gine exhaust and exhaust
guard to cool down before per-
forming maintenance operati-
ons and before storing the
machine.
Risk of injury!
Always wear gloves.
• Only carry out maintenance
operations that are descri-
bed in this instruction ma-
nual. All other work should
be carried out by a specialist
dealer.
• VIKING recommends that
you have maintenance ope-
rations and repairs perfor-
med exclusively by a
VIKING specialist dealer.
• VIKING specialist dealers
regularly attend training
courses and are provided
with technical information.
• Only use high-quality tools,
accessories and spare
parts, otherwise there may
be a risk of accidents resul-
ting in personal injury or da-
mage to the machine.
• Ensure that you keep your
feet far enough away from
the work tools. The safety
distance provided by the
correctly installed handlebar
must be maintained.
• The machine must not be til-
ted when starting the en-
gine. Observe the
instructions contained in the
“Initial operation of the ma-
chine” section.
• Do not start the engine if the
discharge chute is not co-
vered by the discharge flap
or the catcher bag.
•Warning - risk of injury:
Never put hands or
feet on or underne-
ath rotating parts. Al-
ways keep away from the
discharge opening. Always
observe the safety distance
provided by the handlebar.
• Beware of the work tools
running on for seve-
ral seconds before
coming to a stand-
still.
• Switch off the engine and
detach the spark plug socket
before lifting or carrying the
lawn mower.
DEENFRNLITESPTNOSVFIDAPLSLSK
TR

0478 111 9916 C - EN
6
• VIKING recommends the
use of genuine VIKING
tools, accessories and spare
parts. Their properties are
optimally adapted to the ma-
chine and the user’s require-
ments..
Genuine VIKING spare parts
can be recognised from the
VIKING spare parts number,
by the VIKING logo and, if
present, by the VIKING
spare parts symbol.
On smaller parts, only the
symbol may be present.
• Carefully clean the lawn
mower following use. Re-
move accumulated clipping
deposits using a stick.
Clean the underside of the
mower with a brush and
water.
• Never use high-pressure
cleaners and do not clean
the lawn mower under run-
ning water (e.g. using a gar-
den hose).
Do not use aggressive
cleaning agents. These
cleaners can damage pla-
stics and metals, impairing
safe operation of your VI-
KING machine.
Observe the instructions in
the “Maintenance” section.
• Ensure that all nuts, pins,
bolts and screws are secu-
rely tightened, so that the
machine is in a safe opera-
ting condition at all times.
• Replace danger signs and
warnings on the machine
which have become illegible.
Your VIKING dealer has a
stock of replacement stik-
kers.
• Check the complete ma-
chine and the grass catcher
bag regularly
– particularly before storing
the machine for prolon-
ged periods (over winter)
– for wear or damage. Re-
place worn or damaged
parts to ensure that the
machine is always in a
safe operating condition.
• In order to prevent fire ha-
zards, keep the engine, ex-
haust, and the area around
the fuel tank free from grass,
straw, moss, leaves or
emerging grease.
• Store the cooled lawn
mower safely in a dry, well-
ventilated and locked place
that is inaccessible to chil-
dren.
04.06 Warning: petrol
is poisonous and ex-
tremely inflammable
• Petrol must only be stored in
appropriate containers.
• Keep petrol away from
sparks, naked flames, pilot
lights, heat sources,
and other ignition
sources.
• Re-fill the tank out of doors
and do not smoke during re-
filling.
• Do not fill fuel tank comple-
tely, but fill to approx. 4 cm
below the edge of the filler
neck so that the fuel has
room to expand.
• Re-filling with petrol must be
performed before the engine
is started. When the engine
is running or is hot, the tank
cap must not be removed
and the tank must not be re-
filled with petrol. Petrol may
be spilled.
Fire hazard!
• If the petrol tank overflows,
no attempt must be made to
start the engine. The ma-
chine must be removed from
the area contaminated with
petrol. All attempts at star-
ting must be avoided until
the petrol fumes have di-
spersed (wipe dry).
• Screw on caps of fuel tank
and canister properly and
tightly.
• For safety reasons, the fuel
line, fuel tank, tank cap and
connections must be chek-
ked regularly for damage,
ageing (brittleness), firm
seating and leaks. Replace
if necessary (consult a spe-
cialist dealer; VIKING re-
commends a VIKING
specialist dealer).

0478 111 9916 C - EN 7
Warning:
Read the instruction
manual before initial
use.
Risk of injury!
Keep other persons
away from the dan-
ger area.
Risk of injury!
Cutting tool runs on
for several seconds
after switching off
(engine / blade
brake)
Risk of injury!
Detach the spark
plug socket before
performing work on
the cutting tool or
maintenance and
cleaning work.
Item Designation Qty.
1Basic unit 1
2Grass catcher
bag frame 1
3Guiding plate
(grass catcher bag) 1
4Grass catcher
bag fabric 1
5Lock nut 3
6Screw 3
•Instruction manual 1
•Instruction manual
Engine 1
• Replace damaged mufflers
and guard plates. The lawn
mower may not be used with
a defective muffler.
• Never store the machine
with petrol in the tank inside
a building in which the petrol
fumes could come into con-
tact with naked flames or
sparks and could be ignited.
• Allow the engine to cool be-
fore storing the machine in
an enclosed space.
• The machine generates poi-
sonous exhaust
gases when the
engine is run-
ning.
These gases may be odour-
less and invisible. Never
work with engine-powered
machines in closed or poorly
ventilated spaces.
Danger to life through poi-
soning!
• If it is necessary to drain the
tank, this must be done out
of doors (e.g. by driving until
empty). Drained fuel should
be stored in a special contai-
ner intended for that pur-
pose, or disposed of with
special care.
04.07 Disposal
Read the information in the
“Environmental protection”
section.
Ensure that an old lawn
mower, engine oil and petrol
are disposed of properly.
Render the machine unusable
prior to disposal. Remove the
ignition lead, empty the fuel
tank and drain the engine oil in
particular. Observe regional
regulations.
05. Description of sym-
bols 06. Standard equipment
2
DEENFRNLITESPTNOSVFIDAPLSLSK
TR

0478 111 9916 C - EN
8
When installing the guiding
plate (3), the grass catcher
bag fabric (4) must be posi-
tioned between the retaining
plate (10) on the grass cat-
cher bag frame and the gui-
ding plate (3).
NOTE
Danger of pinching!
When folding it up, hold the
upper handlebar (A) with
one hand at its highest point
while you screw in both ro-
tary knobs (C).
WARNING
• Pull the grass catcher bag
fabric (4) over the catcher
bag frame (2) as shown.
Ensure that the handle (8)
on the top of the grass cat-
cher bag is not covered by
the fabric (4).
• Fasten the clips (9) of the
grass catcher bag fabric (4)
at the top and sides of the
grass catcher bag frame (2).
Do not pull the grass catcher
bag fabric (4) over the
handle (8) of the grass cat-
cher bag frame (2) during
assembly.
NOTE
07.04 Assembling the
grass catcher bag 4
• Press and hold the motor-
stop lever (L) against the
upper handlebar (A).
• Fold the upper handle-
bar (A) upwards as shown
and hold in position.
• Screw in and tighten the ro-
tary knob (C) on each side
by turning clockwise.
• Release the motorstop
lever (L) and upper handle-
bar (A).
07. Preparing the ma-
chine for operation
07.01 Assembling the
handlebar 1
Risk of injury!
The engine must be swit-
ched off and the spark plug
socket detached prior to fol-
ding down the handlebar. No
loads must be placed on the
upper hand lebar (e.g. han-
ging work clothing over the
handlebar).
Danger of pinching!
The upper handlebar (A)
can be folded down by re-
leasing the rotary knobs (C).
For this reason, always hold
the upper handlebar (A) with
one hand at its highest point
when you unscrew the ro-
tary knobs (C).
WARNING
Fold down the upper handle-
bar (A) for space-saving trans-
port and storage of the mower.
• Detach the recoil starter
rope (B).(07.03)
• Press and hold the motor-
stop lever (L) against the
upper handlebar (A).
• Loosen the handles (C) on
each side (by turning anti-
clockwise).
• Fold down the upper handle-
bar (A) forwards.
• Release the motorstop
lever (L).
07.02 Folding down
the upper handlebar 1
Attaching:
Detach the spark plug socket
from the engine.
• Press and hold the motor-
stop lever (L).
• Slowly pull out the recoil
starter rope (B) and attach it
at the rope holder (7).
• Slowly release the recoil
starter rope (B) and motor-
stop lever (L).
Connect the spark plug sok-
ket.
Detaching:
Detach the spark plug socket
from the engine.
• Press and hold the motor-
stop lever (L).
• Slowly pull out the recoil
starter rope (B) and detach it
from the rope holder (7).
• Slowly return the recoil star-
ter rope (B) and release the
motorstop lever (L).
07.03 Attaching and
detaching the recoil
starter rope 3
Avoid damage to the ma-
chine.
In order to prevent damage
to the engine hood when fol-
ding up the upper handlebar
(A), the motorstop lever (L)
must be pressed and held.
NOTE

0478 111 9916 C - EN 9
Engine oil
Please consult the en-
gine instruction manual for the
type of engine oil to be used
and the oil capacity.
Check the engine oil level at
regular intervals (engine in-
struction manual).
Avoid exceeding or falling
below the correct oil level.
Fuel
Recommendation:
Fresh good quality fuel,
normal unleaded petrol (en-
gine instruction manual).
It is recommendable to use a
funnel when filling the tank
with fuel (not included in stan-
dard equipment).
Note the warnings in the “For
your safety” section.
• Position the grass catcher
bag fabric (4) on the retai-
ning plate (10) of the grass
catcher bag frame, bringing
the bores into alignment.
• Place the guiding plate (3)
onto the grass catcher bag
fabric (4) and the retaining
plate (10) from above as
shown.
• Insert three screws (6)
through the bores from
above.
• Screw in nuts (5) and tighten
to 5 - 7 Nm.
Hold the grass catcher bag (K)
by the handle (8) and guide it
to the discharge chute on the
lawn mower. Position the gui-
ding plate (3) on the grass cat-
cher bag over the
crossbar (11) in the discharge
chute of the lawn mower.
• Attach both snap-in hooks
(12) of the grass catcher
bag to the grass catcher bag
mount (13) from above.
• Slowly close the discharge
flap (F) again.
Detaching:
• Open and hold the disch-
arge flap (F).
• Hold the grass catcher
bag (K) by the handle (8)
and lift it until both snap-in
hooks (12) are detached
from the grass catcher bag
mount (13).
Remove the grass catcher
bag (K) rearwards while care-
fully pulling the guiding plate
(3) on the grass catcher bag
out of the discharge chute.
• Slowly close the discharge
flap (F) again.
Attaching:
• Open the discharge flap (F)
and hold.
Top up engine oil before in-
itial start (engine instruc-
tion manual).
NOTE
07.07 Fuel and
engine oil 7
Risk of injury!
The engine must be swit-
ched off before attaching or
detaching the grass catcher
bag.
WARNING
07.05 Attaching and
detaching the grass
catcher bag 5
Risk of injury!
The engine must be swit-
ched off before adjusting the
cutting height.
WARNING
There are 8different cutting
height settings available,
from 23 mm to 73 mm.
The lowest cutting height level
is selected when the cutting
height adjustment lever (E) is
in the uppermost position.
The highest cutting height
level is selected when the cut-
ting height adjustment lever
(E) is in the lowermost posi-
tion.
• Press the cutting height ad-
justment lever (E) to the rear
wheel (F) and hold in posi-
tion.
• Set the cutting height adjust-
ment lever (E) to the requi-
red position.
• Slowly release the cutting
height position lever again
and allow it to engage.
07.06 Central cutting
height adjustment 6
DEENFRNLITESPTNOSVFIDAPLSLSK
TR

0478 111 9916 C - EN
10
10. Initial operation of the
machine
Risk of injury!
Carefully read and observe
the “For your safety” section
and the safety instructions
before operating the lawn
mower.
WARNING
Risk of injury!
The engine must be swit-
ched off before removing the
grass catcher bag.
WARNING
10.01 Starting the en-
gine 8
Start procedure when the
engine is cold:
• Press the primer (14) three
times.
• Press and hold the motor-
stop lever (L).
• Slowly pull the recoil starter
rope (B) to the point of resi-
stance.
Then pull vigorously and
quickly to arm’s length.
Slowly return the recoil star-
ter rope (B) so that it is gra-
dually rolled up again.
Repeat until the engine
starts.
Start procedure when en-
gine is warm:
• The start procedure is the
same as when the engine is
cold.
However, it is not necessary
to press the primer (14).
Do not start the engine in
high grass or when the
mower is set to the lowest
cutting height, as this makes
starting difficult.
Thanks to the fixed throttle
setting, the engine always
operates at the optimum
working speed after start-up.
NOTE
When the engine is at ope-
rating temperature, the pri-
mer must no longer be
pressed.
However, it should be noted
that the engine can cool
down very rapidly in very
cold weather.
NOTE
To switch off the engine, re-
lease the motorstop lever (L).
The engine and blade come to
a standstill following a brief
run-down time.
10.02 Stopping the en-
gine 9
• Detach and empty the grass
catcher bag (K).
(07.05)
• Reattach the grass catcher
bag (K).
(07.05)
10.03 Emptying the
grass catcher bag
The lawn mower is equipped
with a motorstop device.
The engine with the mowing
blade stops immediately when
the motorstop device is trigge-
red (release of the motorstop
lever (L)) and comes to a com-
plete standstill within a few se-
conds.
To ensure a perfect, thick
lawn, mow regularly and keep
the grass short. Do not cut it
too short in hot, dry conditions
as the lawn will dry out or burn
in the sun and become un-
sightly.
The cutting pattern will be bet-
ter with a sharp blade than
with a blunt one. The blade
must therefore be sharpened
regularly (dealer).
08. Safety device
08.01 otorstop lever
1
09. Notes on mowing

0478 111 9916 C - EN 11
aintenance interval:
Before each use.
The mowing blade (15) must
be cleaned before checking.
• Tilt the lawn mower upwards
into the cleaning position.
(11.01)
owing blade thickness:
The blade thickness must be
at least 2 mm (M) at any point.
The most important points are
marked in the illustration.
(Check using slide calliper).
Wear limit of the cutting
edges:
The cutting edges may not be
ground back by more than
5 mm (N) during sharpening.
When checking, place a
ruler (16) against the front
blade edge (17) and inspect
for wear.
11.04 Wear limit for
mowing blades 11
aintenance interval:
Every 25 operating hours
Remove mowing blade:
Use a wooden block (20) (ap-
prox. 60 x 60 mm) to counter-
hold the mowing blade (15)
during removal.
• Remove blade fastening
screw (18).
Sharpen the mowing blade:
The following points must be
observed when re-sharpening
the mowing blade (15):
- Cool the mowing blade
when sharpening, e.g. with
water. The blade must not
be allowed to display blue
colouring, as this would re-
duce its cutting quality.
- Sharpen blades evenly to
prevent vibrations due to im-
balance.
11.05 owing blade
maintenance 12
11. aintenance
Risk of injury!
Carefully read section 04,
particularly subsection
04.05, before performing
any maintenance or
cleaning operations on the
lawn mower, and strictly ob-
serve all the safety instructi-
ons.
WARNING
Risk of injury!
Carefully read and observe
the “For your safety” section
(04.), particularly the
“Maintenance and storage”
section (04.05).
WARNING
Risk of injury!
Carefully read and observe
the “For your safety” section
(04.), particularly the
“Maintenance and storage”
section (04.05).
It is recommendable to
have the mowing blade
re-sharpened by a specialist
dealer.
WARNING
Risk of injury!
Detach the spark plug sok-
ket from the engine and
empty the fuel tank (drive
until empty).The dimensions
of the wooden support must
be strictly observed in order
to prevent the lawn mower
from tipping over.
WARNING
aintenance interval:
After each use.
• Select the lowest cutting
level. (07.06)
• Fold down the upper handle-
bar. (07.02)
• Tilt up and lift the lawn
mower as shown. Position
the wooden support (22)
(approx. 10x10x30 cm) un-
derneath so that the lawn
mower is prevented from tip-
ping over.
11.01 Cleaning the ma-
chine 10
aintenance interval:
See engine instruction ma-
nual.
Observe the operating and
maintenance instructions con-
tained in the engine instruction
manual provided.
To achieve a long service life,
it is always particularly impor-
tant to maintain a sufficient
level of oil and to change the
oil and air filter regularly.
The recommended oil change
intervals as well as information
on engine oil and oil capacities
can also be found in the en-
gine instruction manual.
The cooling ribs must always
be kept clean to ensure that
the engine is adequately coo-
led.
11.02 Combustion en-
gine
The ball bearings of the
wheels are maintenance-free.
11.03 Wheels
DEENFRNLITESPTNOSVFIDAPLSLSK
TR

0478 111 9916 C - EN
12
Carefully read and observe
subsection “Maintenance
and storage” (04.05) be-
fore storing the machine.
NOTE
Note the following points when
storing the lawn mower for
long periods (winter break):
- Thoroughly lubricate/grease
all moving parts.
- Empty the fuel tank and car-
burettor (e.g. by running
empty).
- Unscrew the spark plug and
pour approx. 3 cm3of en-
gine oil into the engine via
the spark plug hole. Turn the
engine several times with
the spark plug removed.
11.06 Storage and win-
ter break
Fire hazard!
Keep the spark plug socket
away from the spark plug
hole due to danger of igni-
tion.
WARNING
- Re-install the spark plug.
- Perform oil change
(engine instruction ma-
nual)
- Cover the engine well and
store the machine in a dry,
dust-free room in the normal
position.
12. Transport
13
Lifting or carrying the lawn
mower
• Only lift or carry the lawn
mower at the lifting
point (20), and the upper
handlebar (A) or, when the
upper handlebar is folded,
by the lower handlebar sec-
tions (D).
Transporting the lawn
mower:
When transporting the lawn
mower on a load floor (trailer,
car etc.) always use suitable
fastening material to prevent it
from slipping. Attach rope or
straps at the following points
on the machine:
- Front wheel, rear wheel
- Lower handlebar sections
- Housing strut under disch-
arge flap
Risk of injury!
Carefully read and observe
the “For your safety” section
(04.), particularly the
“Transport” section
(04.02).
The lawn mower must al-
ways be carried by two per-
sons wearing suitable safety
clothing (safety shoes, glo-
ves).
Detach the spark plug sok-
ket.
WARNING
- Check blade for damage be-
fore installing. The blade
must be replaced if notches
or cracks are identified, if
the cutting edges have been
sharpened back by more
than 5 mm, or if the blade is
thinner than 2 mm at any
point (wear limits (11.04)).
Install the mowing blade:
Install the mowing blade (15)
with the curved edges pointing
upwards.
Use a wooden block (20) (ap-
prox. 60 x 60 mm) to counter-
hold the mowing blade (15)
during installation.
• Fit the mowing blade (15)
onto the blade mount (21)
and tighten the blade faste-
ning screw (18) with retai-
ning washer (19) to a torque
of 60 - 65 Nm.
CAUTION
Risk of injury!
A worn blade may break off
and cause serious injuries.
The instructions for blade
maintenance must therefore
always be observed.
Blades are subjected to dif-
fering degrees of wear de-
pending on the location and
duration of use. If you use
the mower on sandy ground
or use it frequently under dry
conditions, the blade will be
subjected to greater loads
and will wear more quickly
than the average.
Always replace the blade fa-
stening screw (18) and retai-
ning washer (19) when
replacing the mowing blade.
CAUTION
Risk of injury!
The prescribed tightening
torque for the blade faste-
ning screws of
60 - 65 Nm must be strictly
observed.
Replace the retaining was-
her (19) each time the blade
is installed.
Additionally secure the
blade fastening screw (18)
with Loctite 243.
Other Viking Lawn Mower manuals

Viking
Viking MT 5112 Z User manual

Viking
Viking ME 235 User manual

Viking
Viking MB 443 User manual

Viking
Viking MB 650 Setup guide

Viking
Viking ME 545 V User manual

Viking
Viking MB 6 RH User manual

Viking
Viking ME 339 User manual

Viking
Viking LB 540 User manual

Viking
Viking MA 339 C User manual

Viking
Viking MB 248 T User manual

Viking
Viking MR 4082 User manual

Viking
Viking MF 860 User manual

Viking
Viking MB 248 T User manual

Viking
Viking MB 410 Manual

Viking
Viking ME 443 C User manual

Viking
Viking MB 2 RT User manual

Viking
Viking MB 4 RTP User manual

Viking
Viking MI 632 PC User manual

Viking
Viking LB 540 User manual

Viking
Viking MA 339 C User manual