manuals.online logo
Brands
  1. Home
  2. •
  3. Brands
  4. •
  5. Viking
  6. •
  7. Refrigerator
  8. •
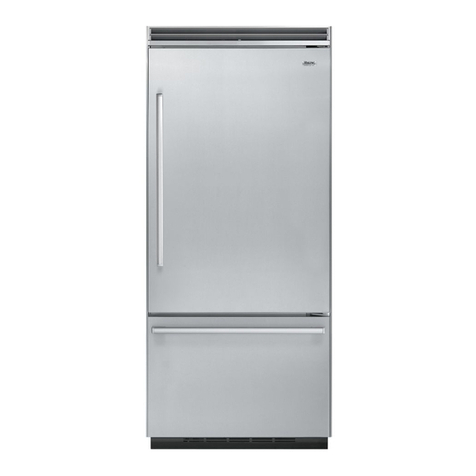
  9. Viking FDBB5362R User manual

Viking FDBB5362R User manual

Other manuals for FDBB5362R

2

This manual suits for next models

1

Other Viking Refrigerator manuals

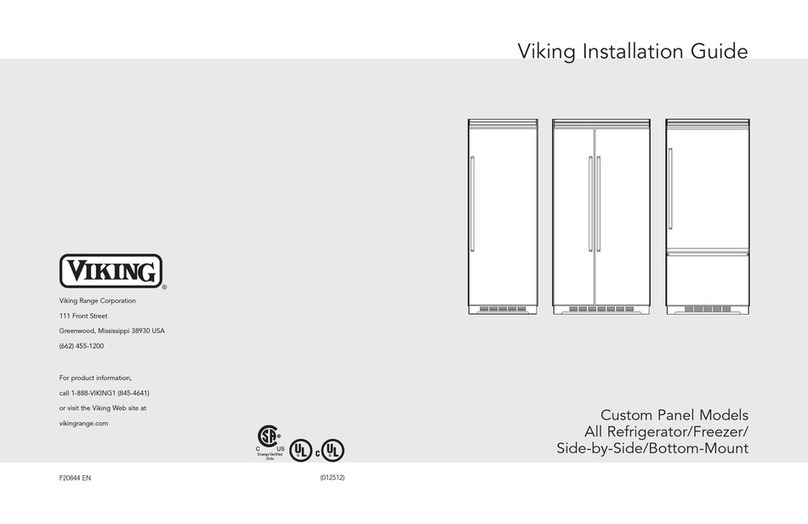
Viking Built-in French Door Bottom-Freezer... User manual

Viking

Viking Built-in French Door Bottom-Freezer... User manual

Viking Quiet Cool FDBB5361R User manual

Viking

Viking Quiet Cool FDBB5361R User manual

Viking VUAR143TRSS Technical manual

Viking

Viking VUAR143TRSS Technical manual

Viking RDDFF236SS User manual

Viking

Viking RDDFF236SS User manual

Viking Designer DUAR140R User manual

Viking

Viking Designer DUAR140R User manual

Viking VRDO1240DSS User manual

Viking

Viking VRDO1240DSS User manual

Viking VURD140 User manual

Viking

Viking VURD140 User manual

Viking Quiet Cool VCSB5421 User manual

Viking

Viking Quiet Cool VCSB5421 User manual

Viking VCBF136 Series User manual

Viking

Viking VCBF136 Series User manual
Viking FDFB5301R User manual

Viking

Viking FDFB5301R User manual

Viking High-Performance Kitchen User manual

Viking

Viking High-Performance Kitchen User manual

Viking F20497 Technical manual

Viking

Viking F20497 Technical manual

Viking FDSB5481 Series Guide

Viking

Viking FDSB5481 Series Guide

Viking Designer DFBB363 User manual

Viking

Viking Designer DFBB363 User manual

Viking FDSB5481D Series Assembly instructions

Viking

Viking FDSB5481D Series Assembly instructions

Viking DDFB530 Series User manual

Viking

Viking DDFB530 Series User manual

Viking Designer DDRB536R User manual

Viking

Viking Designer DDRB536R User manual

Viking CVRI7240 User manual

Viking

Viking CVRI7240 User manual

Viking Designer DFBB536 User guide

Viking

Viking Designer DFBB536 User guide

Viking DFSB548 Series User manual

Viking

Viking DFSB548 Series User manual

Viking VCBB360R User manual

Viking

Viking VCBB360R User manual

Viking DFSB483D User guide

Viking

Viking DFSB483D User guide

Viking D3 RDFN536D User manual

Viking

Viking D3 RDFN536D User manual

Viking VUWC244DRSS User manual

Viking

Viking VUWC244DRSS User manual

Popular Refrigerator manuals by other brands

Frigidaire FRS26TS7DW2 Use & care manual

Frigidaire

Frigidaire FRS26TS7DW2 Use & care manual

Fisher Scientific 10ECEEFSA manual

Fisher Scientific

Fisher Scientific 10ECEEFSA manual

Summit FF22BDRSS user manual

Summit

Summit FF22BDRSS user manual

Frigidaire FFRU17B2QWE use & care

Frigidaire

Frigidaire FFRU17B2QWE use & care

Hotpoint ENBGH 19xxx FW operating instructions

Hotpoint

Hotpoint ENBGH 19xxx FW operating instructions

Hitachi R-SG28KPH instruction manual

Hitachi

Hitachi R-SG28KPH instruction manual

Dometic RMH 7390 L operating instructions

Dometic

Dometic RMH 7390 L operating instructions

AEG S71700TSW0 user manual

AEG

AEG S71700TSW0 user manual

Electrolux ENB3669 Instruction book

Electrolux

Electrolux ENB3669 Instruction book

Electrolux ERN 2930 Instruction book

Electrolux

Electrolux ERN 2930 Instruction book

Beko GNE 60520 X user manual

Beko

Beko GNE 60520 X user manual

Jenn-Air JUR248LBES00 Use & care guide

Jenn-Air

Jenn-Air JUR248LBES00 Use & care guide

Dometic RGE 4000 Installation and operating manual

Dometic

Dometic RGE 4000 Installation and operating manual

Dometic L-0191B Brochure & specs

Dometic

Dometic L-0191B Brochure & specs

LG LRBP1031W - 10 Cu. Ft. Cabinet Depth Bottom Freezer... owner's guide

LG

LG LRBP1031W - 10 Cu. Ft. Cabinet Depth Bottom Freezer... owner's guide

Daewoo RN-33 Series user manual

Daewoo

Daewoo RN-33 Series user manual

Haier RF-8888-174 Service manual

Haier

Haier RF-8888-174 Service manual

Blaupunkt 5CK2 Series user manual

Blaupunkt

Blaupunkt 5CK2 Series user manual

manuals.online logo
manuals.online logoBrands
  • About & Mission
  • Contact us
  • Privacy Policy
  • Terms and Conditions

Copyright 2025 Manuals.Online. All Rights Reserved.

Viking Range Corporation
111 Front Street
Greenwood, Mississippi 38930 USA
(662) 455-1200
For product in ormation,
call 1-888-VIKING1 (845-4641)
or visit the Viking Web site at
vikingrange.com
F21023 EN (042012)
Viking Installation Guide
Built-In Refrigeration Top Grille Installation
(Dual Installation)
3
Grille Kit Components
2
NOTE: These instructions include in ormation on how to remove the current grilles and re-install
the grille kits. For in ormation on dimensions, speci ications and re rigerator installation, please
re er to the Installation Guides included with the re rigerators.
1. Grille Assembly (1)
2. "Z" shaped side trim (1)
3. "J" shaped center trim (1)
4. Side trim screws (12)
5. Center trim screws (8)
1
2
Place both units in ront o cutout. Pull the center grille louver up
at an angle and pull out.
3
4
Using an 8” magnetic nut driver, remove
the two 1/4” screws rom each grille. Retain the screws
or installation o the new grille kit.
Remove grille assemblies.
Grille Removal
Side Trim Installation - Pro essional ModelsSide Trim Installation - Pro essional Models
•Remove cabinet side trim mounted on the le t hand side o the re rigerator to be installed
on the right side o the installation. Replace with the “Z” shaped side trim provided in the
grille kit using the 12 screws included with the grille kit.
4
Cabinet Side Trim
“Z” Sha e
Cabinet Cabinet
Right Hand Door Unit
Left Hand Door Unit
Anti-Ti
Lag Bolts
2x4 mounting board astened to
wall at top o cabinet opening
•Engage the right hand re rigerator’s le t side trim into the “J” shaped portion o the le t side
re rigerator’s right side trim.
•Finish unit installation according to installation instructions provided in each unit.
NOTE: Pro essional models ship with standard mount cabinet side trim attached to both sides.
For standard installations, leave the cabinet side trims attached to the right side o the
re rigerator to be installed on the right and the le t side o the re rigerator to be installed on the
le t.
OR
For lush installations, replace the cabinet side trims attached to the right side o the re rigerator
to be installed on the right and le t side o the re rigerator to be installed on the le t with the
lush mount side trim included in the boxes attached to the backs o the re rigerators.
NOTE: Cutouts are di erent or standard and lush installations. Please re er to Installation Guide
included with re rigerators or more complete dimension and speci ication in ormation.
Le t Hand
Cabinet Side
Trim
Cabinet Side Trim
“J” Sha e
5
76
Side Trim Installation - Custom Panel ModelsSide Trim Installation - Custom Panel Models
•Remove cabinet side trim mounted on the le t hand side o the re rigerator to be installed
on the right side o the installation. Replace with the “Z” shaped side trim provided in the
grille kit using the 12 screws included with the grille kit.
•Remove cabinet side trim mounted on the right side o the re rigerator to be installed on
the le t side o the installation. Replace with the “J” shaped side trim provided in the grille
kit using the 8 screws included with the grille kit.
Cabinet Side Trim
“Z” Sha e
Cabinet Cabinet
Right Hand Door Unit
Left Hand Door Unit
Anti-Ti
Lag Bolts
2x4 mounting board astened to
wall at top o cabinet opening
•Engage the right hand re rigerator’s le t side trim into the “J” shaped portion o the le t side
re rigerator’s right side trim.
•Finish unit installation according to installation instructions provided in each unit.
Le t Hand
Cabinet Side
Trim
Cabinet Side Trim
“J” Sha e
98
Grille Assembly Install -
Pro essional Models
Grille Assembly Bracket Placement -
Pro essional Models
For 66” grille, excluding Custom Panel, Add/Remove brackets to ull length grille as required.
See illustration below.
TOP
Use this bracket i 36” W. product is
on right side ( acing unit), otherwise
remove.
Use this bracket i 30” W. product is
on le t side ( acing unit), otherwise
remove.
Use this bracket i 30” W. product is
on right side ( acing unit), otherwise
remove.
Use this bracket i 36” W. product is
on le t side ( acing unit), otherwise
remove.
*NOTE: Depending on unit con iguration, two brackets should be removed and discarded. The
72” W. and 60” W. grille assemblies have all our (4) brackets mounted in the proper location.
66” Grille (back view)
•Remove center grille blade by li ting up and pulling orward.
•Insert grille into re rigerators. Screw grille assembly into units with (4) screws removed in
Step 3 (See Grille Removal Section).
1110
Grille Assembly -
Custom Panel Models
On Custom Panel models, grill spacers rom original unit grilles must be reused:
•Remove grille brackets rom grille included in the grille kit by removing 4 screws on each
grille bracket located on the back o the grille assembly.
•Remove grille brackets and spacers rom original unit grilles by removing 4 screws on each
grille bracket located on the back o each grille assembly.
•Install grille brackets and spacers rom original unit grilles onto grille rom the kit using the
original grille hardware. Important: The spacers must be oriented on the new grille the
same way they were on the original grille. Also, remember to install the spacers on the
corresponding side o the installation (i installing a unit on the le t side o an installation, its
grille spacers should be installed on the le t side o the uni ied grille.)
Grille Assembly Bracket Placement -
Custom Panel Models
For 66” grille, excluding Custom Panel, Add/Remove brackets to ull length grille as required.
See illustration below.
TOP
Use this bracket i 36” W. product is
on right side ( acing unit), otherwise
remove.
Use this bracket i 30” W. product is
on le t side ( acing unit), otherwise
remove.
Use this bracket i 30” W. product is
on right side ( acing unit), otherwise
remove.
Use this bracket i 36” W. product is
on le t side ( acing unit), otherwise
remove.
*NOTE: Depending on unit con iguration, two brackets should be removed and discarded. The
72” W. and 60” W. grille assemblies have all our (4) brackets mounted in the proper location.
66” Custom Grille (back view)
1312
Grille Assembly Install -
Custom Panel Models
•Remove center grille blade by li ting up and pulling orward.
•Insert grille into re rigerators. Screw grille assembly into units with (4) screws removed in
Step 3 (See Grille Removal Section).
1514