manuals.online logo
Brands
  1. Home
  2. •
  3. Brands
  4. •
  5. Viking
  6. •
  7. Refrigerator
  8. •
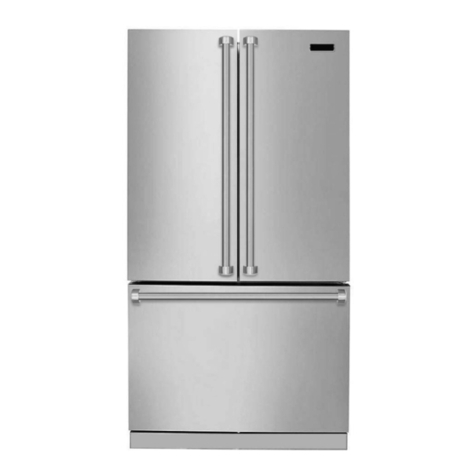
  9. Viking RDFN536D User manual

Viking RDFN536D User manual

Other manuals for RDFN536D

2

Other Viking Refrigerator manuals

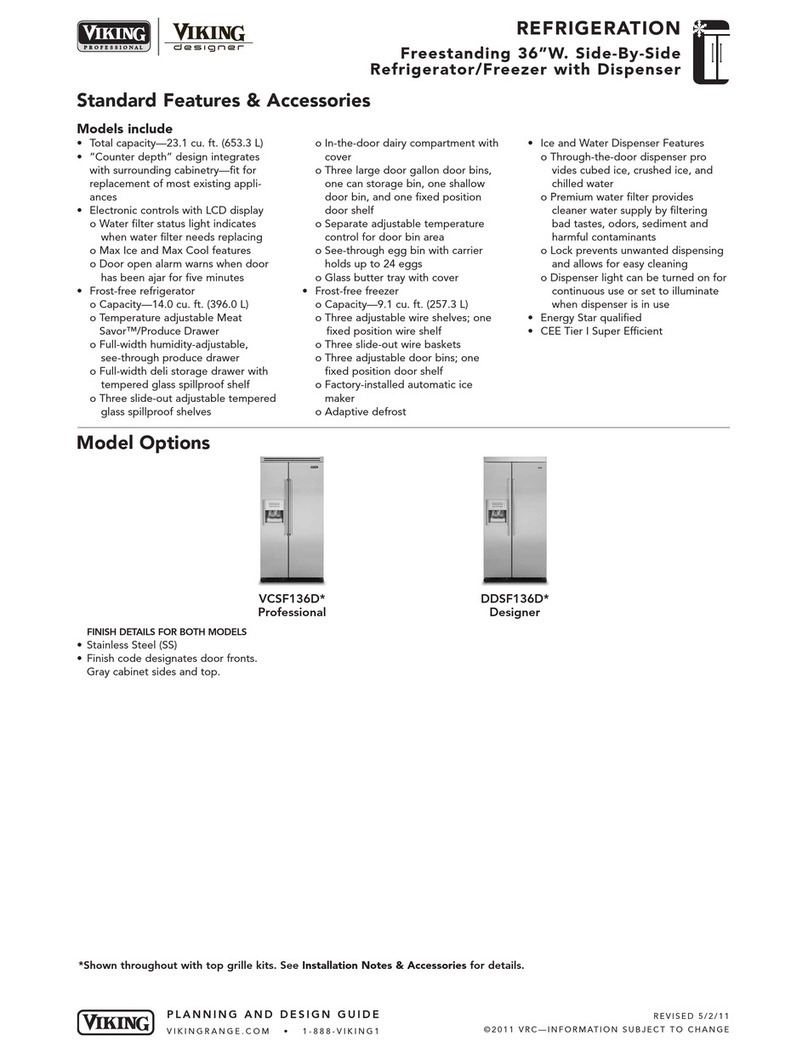
Viking RDDFF236 User manual

Viking

Viking RDDFF236 User manual

Viking FDSB5421D Series Assembly instructions

Viking

Viking FDSB5421D Series Assembly instructions

Viking Quiet Cool FDBB5361R User manual

Viking

Viking Quiet Cool FDBB5361R User manual

Viking Side-By-Side & Bottom-Mount... User manual

Viking

Viking Side-By-Side & Bottom-Mount... User manual

Viking DDSB542SS User manual

Viking

Viking DDSB542SS User manual

Viking Built-in French Door Bottom-Freezer... User manual

Viking

Viking Built-in French Door Bottom-Freezer... User manual

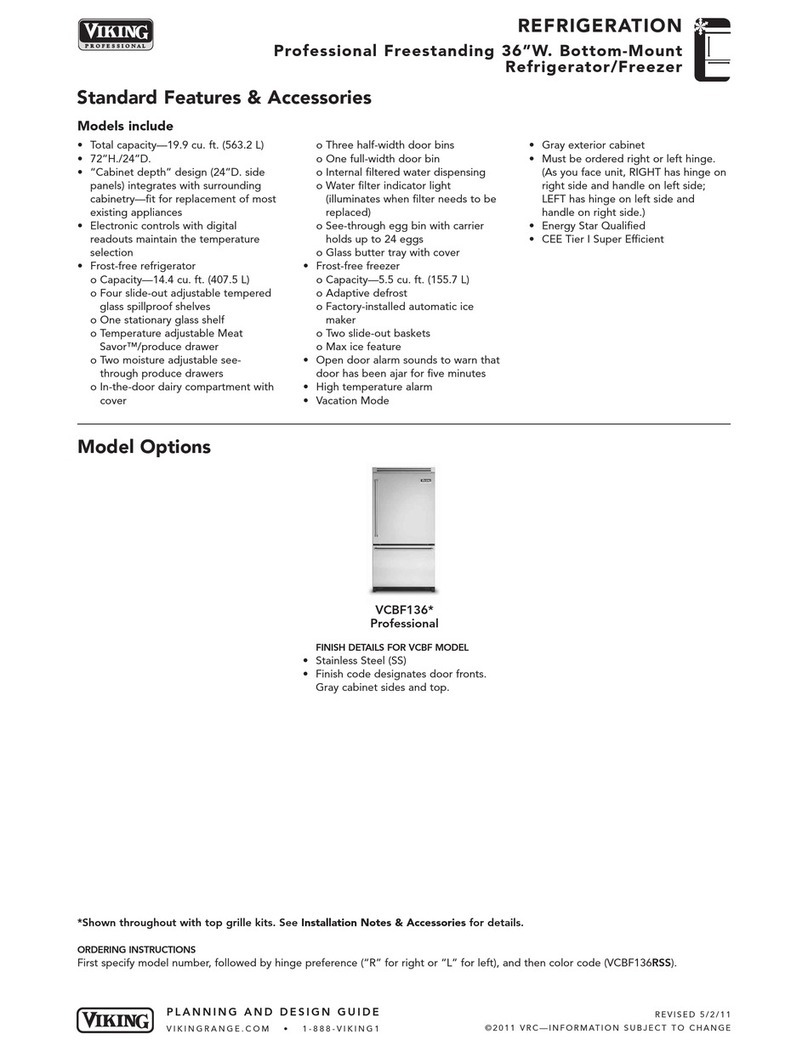
Viking VCBF136 Series User manual

Viking

Viking VCBF136 Series User manual

Viking VURD140 User manual

Viking

Viking VURD140 User manual

Viking Professional VCSF036SS Product guide

Viking

Viking Professional VCSF036SS Product guide

Viking Designer DFBB536 User manual

Viking

Viking Designer DFBB536 User manual

Viking DDBB536RSS Assembly instructions

Viking

Viking DDBB536RSS Assembly instructions

Viking Professional VISB548BR User manual

Viking

Viking Professional VISB548BR User manual

Viking DDSB542SS Assembly instructions

Viking

Viking DDSB542SS Assembly instructions

Viking FDBB5362R User manual

Viking

Viking FDBB5362R User manual

Viking RDDFF236SS Assembly instructions

Viking

Viking RDDFF236SS Assembly instructions

Viking Designer DDSB423 User manual

Viking

Viking Designer DDSB423 User manual

Viking VURD144T User manual

Viking

Viking VURD144T User manual

Viking DDFB530 Series User manual

Viking

Viking DDFB530 Series User manual

Viking Freestanding Side-by-Side Refrigerator User manual

Viking

Viking Freestanding Side-by-Side Refrigerator User manual

Viking Designer DDSF136DSS User manual

Viking

Viking Designer DDSF136DSS User manual

Viking F20413 User manual

Viking

Viking F20413 User manual

Viking EDDBB363R User manual

Viking

Viking EDDBB363R User manual

Viking RDDFF236SS User manual

Viking

Viking RDDFF236SS User manual

Viking VCBF136RSS Assembly instructions

Viking

Viking VCBF136RSS Assembly instructions

Popular Refrigerator manuals by other brands

Frigidaire FRS26TS7DW2 Use & care manual

Frigidaire

Frigidaire FRS26TS7DW2 Use & care manual

Fisher Scientific 10ECEEFSA manual

Fisher Scientific

Fisher Scientific 10ECEEFSA manual

Summit FF22BDRSS user manual

Summit

Summit FF22BDRSS user manual

Frigidaire FFRU17B2QWE use & care

Frigidaire

Frigidaire FFRU17B2QWE use & care

Hotpoint ENBGH 19xxx FW operating instructions

Hotpoint

Hotpoint ENBGH 19xxx FW operating instructions

Hitachi R-SG28KPH instruction manual

Hitachi

Hitachi R-SG28KPH instruction manual

Dometic RMH 7390 L operating instructions

Dometic

Dometic RMH 7390 L operating instructions

AEG S71700TSW0 user manual

AEG

AEG S71700TSW0 user manual

Electrolux ENB3669 Instruction book

Electrolux

Electrolux ENB3669 Instruction book

Electrolux ERN 2930 Instruction book

Electrolux

Electrolux ERN 2930 Instruction book

Beko GNE 60520 X user manual

Beko

Beko GNE 60520 X user manual

Jenn-Air JUR248LBES00 Use & care guide

Jenn-Air

Jenn-Air JUR248LBES00 Use & care guide

Dometic RGE 4000 Installation and operating manual

Dometic

Dometic RGE 4000 Installation and operating manual

Dometic L-0191B Brochure & specs

Dometic

Dometic L-0191B Brochure & specs

LG LRBP1031W - 10 Cu. Ft. Cabinet Depth Bottom Freezer... owner's guide

LG

LG LRBP1031W - 10 Cu. Ft. Cabinet Depth Bottom Freezer... owner's guide

Daewoo RN-33 Series user manual

Daewoo

Daewoo RN-33 Series user manual

Haier RF-8888-174 Service manual

Haier

Haier RF-8888-174 Service manual

Blaupunkt 5CK2 Series user manual

Blaupunkt

Blaupunkt 5CK2 Series user manual

manuals.online logo
manuals.online logoBrands
  • About & Mission
  • Contact us
  • Privacy Policy
  • Terms and Conditions

Copyright 2025 Manuals.Online. All Rights Reserved.

F20875 EN
W10476844
(062012)
Viking Range Corporation
111 Front Street
Greenwood, Mississippi 38930 USA
(662) 455-1200
For produ t information, all 1-888-VIKING1 (845-4641)
or visit the Viking Web site at vikingrange. om
Use & Care
Standard-Depth Freestanding French Door
Bottom-Mount Refrigerator/Freezer
Getting Started
Refrigerator Safety ____________________________________________4
Important Safety Instru tions ___________________________________5
Proper Disposal (of old refrigerator)_____________________________6
Product Controls
Using the Controls ____________________________________________7
Adjusting the Controls ________________________________________7
Cooling On/Off ______________________________________________9
Additional Features __________________________________________10
Operation
Adjustable Humidity Zone and Adjustable Cold Zone ____________12
Opening and Closing Doors __________________________________12
I e Maker and I e Storage Bin ________________________________13
Water and I e Dispensers_____________________________________14
Dispenser Light and Dispenser Lo k ___________________________19
Water Filtration System_______________________________________20
Water Filter _________________________________________________23
Water Filter Certifi ations_____________________________________24
Product Care
Cleaning ___________________________________________________25
Changing the Light Bulb _____________________________________27
Troubleshooting _____________________________________________28
Servi e Information __________________________________________34
Warranty ___________________________________________________35
Table of Contents
Congratulations and wel ome to the elite world of Viking ownership.
We hope you will enjoy and appre iate the are and attention we have
put into every detail of your new, state-of-the-art refrigerator.
Your Viking applian e is designed to offer years of reliable servi e. This
Use and Care Guide will provide you with the information you need to
be ome familiar with your refrigerator’s are and operation.
Your omplete satisfa tion is our ultimate goal. If you have any
questions or omments about this produ t, please onta t the dealer
from whom you pur hased it, or onta t our Consumer Support Center
at 1-888-VIKING1.
We appre iate your hoi e of a Viking refrigerator and hope that you
will again sele t our produ ts for your other major applian e needs.
For more information about the omplete and growing sele tion
of Viking produ ts, onta t your dealer or visit us online at
vikingrange. om
Congratulations
3
2
5
Getting Started
Your safety and the safety of others are very important.
We have provided many important safety messages in this manual and
on your appliance. ALWAYS read and obey all safety messages.
This is the safety alert symbol.
This symbol alerts you to potential hazards that can
kill or hurt you and others.
All safety messages will follow the safety alert symbol
and either the word “DANGER” or “WARNING.”
You can be killed or seriously injured if you don't immediately follow
instructions.
You can be killed or seriously injured if you don't follow
instructions.
All safety messages will tell you what the potential hazard is, tell you how
to reduce the chance of injury, and tell you what can happen if the
instructions are not followed.
DANGER
WARNING
4
Refrigerator Safety
Getting Started
WARNING: To redu e the risk of fire, ele tri sho k, or injury when
using your refrigerator, follow these basi pre autions:
• Plug into a grounded 3-prong outlet.
•DO NOT remove ground prong.
•DO NOT use an adapter.
•DO NOT use an extension ord.
• Dis onne t power before servi ing.
• Repla e all parts and panels before operating.
• Remove doors from your old refrigerator.
• Use nonflammable leaner.
• Keep flammable materials and vapors, su h as gasoline, away from
refrigerator.
• Use two or more people to move and install refrigerator.
• Dis onne t power before installing i e maker (on i e maker kit ready
models only).
• Use a sturdy glass when dispensing i e (on some models).
SAVE THESE INSTRUCTIONS
Important Safety Instru tions
7
The refrigerator and freezer ontrols are lo ated on the dispenser
panel.
IMPORTANT:
The display s reen on the dispenser ontrol panel will turn OFF
automati ally and enter “sleep” mode when the ontrol buttons and
dispenser levers have not been used for 2 minutes or more. While in
“sleep” mode, the first press of a ontrol button will only rea tivate the
display s reen, without hanging any settings. After rea tivation,
hanges to any settings an then be made. If no hanges are made
within 2 minutes, the display will re-enter “sleep” mode.
• Tou h any ontrol button on the dispenser panel to a tivate the
display s reen. The home s reen will appear as shown.
Adjusting the Controls
For your onvenien e, your refrigerator and freezer ontrols are preset
at the fa tory. When you first install your refrigerator, make sure that
the ontrols are still set to the “mid-settings.” The fa tory re ommended
set points are 38°F (3°C) for the refrigerator and 0°F (-18°C) for the freezer.
IMPORTANT:
• Wait 24 hours before you put food into the refrigerator. If you
add food before the refrigerator has ooled ompletely, your food
may spoil.
•NOTE: Adjusting the set points to a colder than recommended
setting will not cool the compartments any faster.
• If the temperature is too warm or too old in the refrigerator or
freezer, first he k the air vents to be sure they are not blo ked
before adjusting the ontrols.
Using the Controls
Product Controls
6
Proper Disposal (of old refrigerator)
Getting Started
IMPORTANT:
Child entrapment and suffo ation are not problems of the past. Junked
or abandoned refrigerators are still dangerous—even if they will sit for
“just a few days”. If you are getting rid of your old refrigerator, please
follow these instru tions to help avoid a idents.
Before You Throw Away Your Old Refrigerator or
Freezer:
• Take off the doors.
• Leave the shelves in pla e so that hildren may not easily limb
inside.
WARNING
Suffocation Hazard
Remove doors from your old refrigerator.
Failure to do so can result in death or brain damage.
9
When adjusting temperature set points, use the following hart as a
guide.
The set point range for the refrigerator is 33°F to 45°F (0°C to 7°C).
The set point range for the freezer is -5°F to 5°F (-21°C to -15°C).
Cooling On/Off
Your refrigerator and freezer will not ool when ooling is turned off.
• To turn ooling off, press and hold the LOCK and MEASURED FILL
buttons at the same time for 3 se onds.
IMPORTANT: To avoid unintentionally lo king the dispenser or
hanging other settings, be sure to press both buttons at exa tly the
same time
When ooling is off, “Refrigeration Cooling is Off” will appear on the
display s reen as shown.
• Press and hold LOCK and MEASURED FILL together for 3 se onds
again to turn ooling ba k on.
Product Controls
8
• The preset temperatures should be orre t for normal household
usage. The ontrols are set orre tly when milk or jui e is as old as
you like and when i e ream is firm.
• Wait at least 24 hours between adjustments. Re- he k the
temperatures before other adjustments are made.
To view and adjust the set points, press and hold the TEMPERATURE
button for 3 se onds. When adjust mode is a tivated, adjusting
information will appear on the display s reen.
NOTE: To view Celsius temperatures, press the LIGHT button when
adjust mode is activated. To return the display setting to Fahrenheit,
press LIGHT again.
• When adjust mode is a tivated, the display s reen shows the
refrigerator set point and “REFRIGERATOR” appears.
• Press LOCK to raise the set point, or press OPTIONS to lower the set
point.
• When you have finished viewing (and adjusting if desired) the
refrigerator set point, press TEMPERATURE to hange the display to
show the freezer set point. When the zone has been hanged,
“FREEZER” appears on the display s reen.
• Press LOCK to raise the set point, or press OPTIONS to lower the set
point.
• When you have finished viewing (and adjusting if desired) both the
refrigerator and freezer set points, press MEASURED FILL to save the
settings.
NOTE: To exit without saving changes, press ICE MODE at any time
while in adjust mode, or allow about 60 seconds of inactivity and
adjust mode will turn off automatically.
Using the Controls ( ont.) Using the Control ( ont.)
Product Controls
Condition
Temperature Adjustment
Refrigerator too old Refrigerator
setting 1° higher
Refrigerator too warm Refrigerator
setting 1° lower
Freezer too old Freezer
setting 1° higher
Freezer too warm/too little i e Freezer
setting 1° lower
11
Product Controls
10
Additional Features
Max Cool
The Max Cool feature assists with periods of high refrigerator use, full
gro ery loads, or temporarily warm room temperatures.
• To turn on the Max Cool feature, press the OPTIONS
button to enter Options mode, then press OPTIONS
again to a tivate the feature. When the feature is on,
the Max Cool i on will appear on the dispenser display
s reen. The Max Cool feature will remain on for 24
hours unless manually turned off.
• To manually turn off the Max Cool feature, press the OPTIONS
button to enter Options mode (unless you are already in Options
mode), then press OPTIONS again. When the feature has been
turned off, the Max Cool i on will disappear on the dispenser display.
NOTE: Setting the freezer to a colder temperature may make some
foods, such as ice cream, harder.
Sabbath Mode
Sabbath Mode is designed for those whose religious observan es
require turning off the lights and dispensers.
In Sabbath Mode, the temperature set points remain un hanged, but
the interior and dispenser lights turn off, all sounds and alarms are
disabled, the dispenser display s reen ba klight turns off, and the
dispenser levers are disabled. The i e maker is also disabled; however,
the “I e Maker Off” i on will not appear in the display.
• To turn on Sabbath Mode, press and hold LIGHT and OPTIONS at
the same time for 3 se onds. When the feature turns on, “Sabbath
Mode” will appear on the dispenser display.
• To turn off Sabbath Mode, press and hold LIGHT and OPTIONS at
the same time for 3 se onds again. The s reen will display the
settings as they were before Sabbath Mode was turned on. The Max
Cool feature, however, will remain off until it is sele ted again.
Power Outage Indicator
The power outage indi ator lets you know if the power
supply to the refrigerator has been ut off and the freezer
temperature has risen to 18°F (-8°C) or higher. When
power has been restored, “PO” repeatedly flashes on the
display s reen and the red Power Outage i on appears.
Product Controls
Using the Controls ( ont.)
Power Outage Indicator ( ont.)
When the indi ator is on, all other ontrol and dispenser fun tions are
disabled until you onfirm that you are aware of the power outage.
• To enable other fun tions, press MEASURED FILL to reset the display
s reen to its normal status.
Door Ajar Alarm
The Door Ajar Alarm feature sounds an alarm when the
refrigerator or freezer door is open for 5 minutes and the
produ t ooling is turned on. The alarm will repeat every
2 minutes. Close both doors to turn it off. The feature then
resets and will rea tivate when either door is left open
again for 5 minutes.
NOTE: To mute the audible alarm while keeping the doors open, such
as while cleaning the inside of the refrigerator, press any button on the
control panel. The alarm sound will be temporarily turned off, but the
Door Ajar icon will still be displayed on the dispenser control panel.
Disabling Sounds
• To turn off all ontrol and dispenser sounds, press and hold ICE and
MEASURED FILL at the same time for 3 se onds.
• To turn all sounds ba k on, press and hold ICE and MEASURED FILL
at the same time for 3 se onds again.
Water Filter Status Light and Filter Reset
The filter reset ontrol allows you to restart the water filter status
tra king feature ea h time you repla e the water filter. See “Water
Filtration System.”
• After hanging the water filter, reset the status light. Press the
OPTIONS button to enter Options mode, then press LOCK to initiate
the reset, then press MEASURED FILL to onfirm that you want to
reset the status light. When the system is reset, the “ORDER” and
“REPLACE” i ons will disappear from the display s reen.
Using the Controls ( ont.)
12 13
Operation
Adjustable Humidity Zone™
You an ontrol the amount of humidity in the Adjustable Humidity
Zone drawer. Adjust the ontrol to any setting between LOW and
HIGH.LOW (open) for best storage of fruits and vegetables with skins.
HIGH ( losed) for best storage of fresh, leafy vegetables.
Adjustable Cold Zone™
The refrigerator drawer holds more fresh food in more ways than ever
before, and is ideal for storing popular food items that need to be readily
a essible. In addition the drawer’s lo ation allows hildren to serve
themselves from the refrigerator.
Use the full-width drawer to store large party platters or deli trays, or
use a drawer organizer to store smaller items su h as yogurt, jui e
boxes and lun h meat within easy a ess.
To Adjust the Temperature Control:
The refrigerated drawer has a separate temperature ontrol whi h
regulates only the temperature of the drawer. The temperature ontrol
regulates how mu h refrigerated air is allowed to ir ulate into the
drawer. Adjusting the ontrol allows more or less air to ir ulate.
• Slide the ontrol toward Produ e for less old air and toward Deli for
more old air.
Opening and Closing Doors
There are two refrigerator ompartment doors.
The doors an be opened and losed either
separately or together. There is a verti ally-hinged
seal on the left refrigerator door.
• When the left side door is opened, the hinged seal
automati ally folds inward so that it is out
of the way.
• When both doors are losed, the hinged seal
automati ally forms a seal between the two doors.
A
A. Hinged seal
IMPORTANT: Flush the water system before turning on the i e maker.
See “Water and Ice Dispensers” section.
Turning the Ice Maker On/Off
The i e maker has an automati shutoff. When the i e maker is on,
sensors will automati ally stop i e produ tion when the storage bin is
full. The i e maker will remain set to ON, and i e produ tion will
resume when the bin is no longer full.
To manually turn off the ice maker:
Press OPTIONS to display the OPTIONS s reen. Pressing ICE MAKER,
if the i e maker is urrently on, will turn off the i e maker. The “I e
Maker Off” i on will flash three times and then stay lit. When the i e
maker is set to OFF, it will stop produ ing i e.
Pressing ICE MAKER, if the i e maker is urrently off, turns on the i e
maker. The “I e Maker Off” i on will disappear.
Removing and Replacing Ice Storage Bin
To Remove the Ice Storage Bin:
1. Hold the base of the storage bin and press the release button.
2. Pull out the storage bin.
To Replace the Ice Storage Bin:
IMPORTANT: It may be ne essary to turn the auger
driver, behind the i e bin, ounter lo kwise to
properly align the i e bin with the auger driver. The
i e storage bin must be lo ked in pla e for proper
i e dispensing.
1. Slide the i e bin into the guide rails lo ated on
either side of the en losure.
2. Push the i e bin in until resistan e is felt. Raise the
front slightly and push the i e bin in until an audible “ li k” is heard.
Ice Production Rate
• Allow 24 hours to produ e the first bat h of i e. Dis ard the first
three bat hes of i e produ ed.
• The i e maker should produ e approximately 8 to 12 bat hes of i e
in a 24-hour period.
• To in rease i e produ tion, lower the freezer and refrigerator temperature.
See “Using the Controls.” Wait 24 hours between adjustments.
NOTE: Setting the freezer to a older temperature may make some
foods, su h as i e ream, harder.
A. Auger driver
A
I e Maker and I e Storage Bin
Adjustable Humidity Zone and
Adjustable Cold Zone
Operation
15
Operation
14
Remember
• The quality of your i e will be only as good as the quality of the
water supplied to the i e maker. AVOID onne ting the i e maker
toa softened water supply. Water softener hemi als (su h as salt)
an damage parts of the i e maker and lead to poor quality i e. If a
softened water supply annot be avoided, make sure the water
softener is operating properly and is well maintained.
• DO NOT use anything sharp to break up the i e in the bin. This an
ause damage to the i e bin and dispenser me hanism.
•DO NOT store anything on top of the i e maker or in the i e storage bin.
Water and I e Dispensers
IMPORTANT:
• After onne ting the refrigerator to a water sour e or repla ing the
water filter, flush the water system. Use a sturdy ontainer to depress
and hold the water dispenser lever for 5 se onds, then release it for
5 se onds. Repeat until water begins to flow. On e water begins to
flow, ontinue depressing and releasing the dispenser paddle (5
se onds on, 5 se onds off) until a total of 4 gal. (15 L) has been
dispensed. This will flush air from the filter and water dispensing
system, and prepare the water filter for use. Additional flushing may
be required in some households. As air is leared from the system,
water may spurt out of the dispenser.
• Allow 24 hours for the refrigerator to ool down and hill water.
• The dispensing system will not operate when refrigerator door is open.
Calibrate Measured Fill
Low water pressure may affe t the a ura y of the Measured Fill
feature. So, for optimum performan e of your water dispenser, you
must first alibrate Measured Fill.
IMPORTANT: Flush the water system
before alibrating Measured Fill.
1. Pla e a sturdy measuring up (1 up
size) on the dispenser tray entered in
front of the water dispenser paddle.
Operation
I e Maker and I e Storage Bin ( ont.)
A. Water dispenser paddle
B. Measuring cup (1 cup)
A
B
2. Press and hold the OPTIONS and LOCK buttons at
the same time for 3 se onds. The words “Ba k” and
“1 Cup” will appear on the display s reen. Also, the
Calibrate Measured Fill i on will illuminate and
remain lit while the Measured Fill feature is being
alibrated
NOTE: You may press the ICE MODE button under the word “Back”
at any time to exit calibration mode. The Calibrate Measured Fill
icon will turn off.
3. Press and release the water dispenser paddle, as
needed, to dispense water to the 1 up fill line.
NOTE: If overfilling or spilling occurs, discard
the water and press “Back” to restart the
calibration process.
4. When 1 up of water has been orre tly
dispensed into the measuring up, press the
MEASURED FILL button under the word
“Confirm” to onfirm the alibration.
5. When Measured Fill alibration has been
onfirmed the i ons will disappear and the
display will return to the home s reen.
Water and I e Dispensers ( ont.)
A. 1 cup of water
A
17
Operation
16
Operation
The Water Dispenser
IMPORTANT: Dispense at least 1 qt (1 L) of water every week to
maintain a fresh supply.
To Dispense Water (Standard):
1. Press a sturdy glass against the water dispenser lever.
NOTE: While dispensing water and for 3 seconds after dispensing has
stopped, the digital display will show how much water has been
dispensed.
2. Remove the glass to stop dispensing.
To Dispense Water (Measured Fill):
Measured Fill allows you to dispense a spe ified amount of water with
the tou h of a few buttons.
NOTE: The amount of water you select will be dispensed. Be sure that
the container is empty and can hold the entire volume. If ice is in the
container, you may need to adjust your selection.
1. Press MEASURED FILL to turn the feature on. When the feature is
on, the Measured Fill s reen appears on the display.
Press ICE MODE to manually turn off the Measured Fill feature.
NOTE: The dispenser will automatically turn off Measured Fill after 1
minute of inactivity. When Measured Fill is turned off, any changes
you have made will be lost and all defaults will be restored.
Water and I e Dispensers ( ont.) Water and I e Dispensers ( ont.)
2. You an dispense water by the oun e, up, or liter. The default unit
is oun es. To swit h to ups or liters, press the LIGHT button.
Default, minimum, and maximum volumes are listed below.
3. Press the LOCK and OPTIONS buttons to adjust the volume as
desired. The LOCK button in reases the volume, and the OPTIONS
button lowers the volume.
NOTE: Most offee ups ( ommonly 4 to 6 oz [118 to 177 mL] per
cup) are not the same size as a measuring cup (8 oz [237 mL]). You
may need to adjust the volume to avoid unintentionally overfilling
coffee cups.
4. To dispense water, press a sturdy glass against the water dispenser
lever OR pla e the glass below the water dispenser and press the
MEASURED FILL button.
NOTE: While dispensing water, the digital display will count down
how much water remains to be dispensed, according to the volume
you selected. The flow of water will automatically stop once the
desired volume has been dispensed.
5. To stop dispensing before the sele ted volume has been dispensed,
remove the glass from the dispenser lever OR press the MEASURED
FILL button a se ond time.
NOTE: If you stop dispensing before the desired volume has been
dispensed, the digital display will continue to show how much water
remains to be dispensed. The display will turn off after 1 minute of
inactivity.
• To sele t a new volume or start dispensing the same volume again,
you must first finish dispensing the sele ted volume, or turn off the
Measured Fill feature (either by waiting 1 minute so it will
automati ally turn off or by pressing ICE MODE to manually turn it
off) and then turn it ba k on.
Units
Default Minimum Maximum
Oun es 8
1 28
Cups 1
1/4 16
Liters 0.25
0.05 4.00
19
Operation
18
Operation
Water and I e Dispensers ( ont.)
The Ice Dispenser
I e dispenses from the i e maker storage bin in the freezer when the
dispenser lever is pressed. To turn off the i e maker, see “I e Maker
and Storage Bin.”
Your i e maker an produ e both rushed and ubed i e. Before
dispensing i e, sele t whi h type of i e you prefer by pressing the ICE
MODE button.
The display s reen indi ates whi h type of i e
is sele ted.
For rushed i e, ubes are rushed before
being dispensed. This may ause a slight delay
when dispensing rushed i e. Noise from the
i e rusher is normal, and pie es of i e may
vary in size. When hanging from rushed to
ubed, a few oun es of rushed i e will be dispensed along with the
first ubes.
To Dispense Ice:
1. Make sure the desired type of i e is sele ted. To swit h between
ubed and rushed, press ICE MODE.
2. Press a sturdy glass against the i e dispenser lever. Hold the glass
lose to the dispenser opening so i e does not fall outside of the glass.
IMPORTANT: You do not need to apply a lot of pressure to the lever
in order to a tivate the i e dispenser. Pressing hard will not make
the i e dispense faster or in greater quantities.
CUBED
CRUSHED
Cut Hazard
Use a sturdy glass when dispensing ice.
Failure to do so can result in cuts.
WARNING
To Dispense Ice (cont.):
3. Remove the glass to stop dispensing.
NOTE: Ice may continue to dispense for several seconds after
removing the glass from the lever. The dispenser may continue to
make noise for a few seconds after dispensing.
Dispenser Light and
Dispenser Lo k
The Dispenser Light
When you use the dispenser, the light
will automati ally turn on. If you want
the light to be on ontinuously, you may
hoose either ON or PADS. The display
s reen indi ates whi h mode is sele ted.
•ON: Press LIGHT to turn on the dispenser light and the light behind
the dispenser paddles.
•PADS: Press LIGHT a se ond time to sele t Pads mode. The
dispenser light will turn off, but the light behind the dispenser
paddles will remain on.
•OFF: Press LIGHT a third time to turn off the dispenser light.
The dispenser lights are LEDs that annot be hanged. If it appears
that your dispenser lights are not working, see “Troubleshooting” for
more information.
The Dispenser Lock
The dispenser an be turned off for easy
leaning or to avoid unintentional
dispensing by small hildren and pets.
NOTE: The lock feature does not shut off
power to the refrigerator, to the ice maker, or
to the dispenser light. It simply deactivates the controls and dispenser
levers. To turn off the ice maker, see “Ice Maker and Storage Bin.”
• Press and hold LOCK for 3 se onds to lo k the dispenser.
• Pess and hold LOCK a se ond time to unlo k the dispenser.
The display s reen indi ates when the dispenser is lo ked.
PADS OFFON
LOCKED UNLOCKED
Water and I e Dispensers ( ont.)