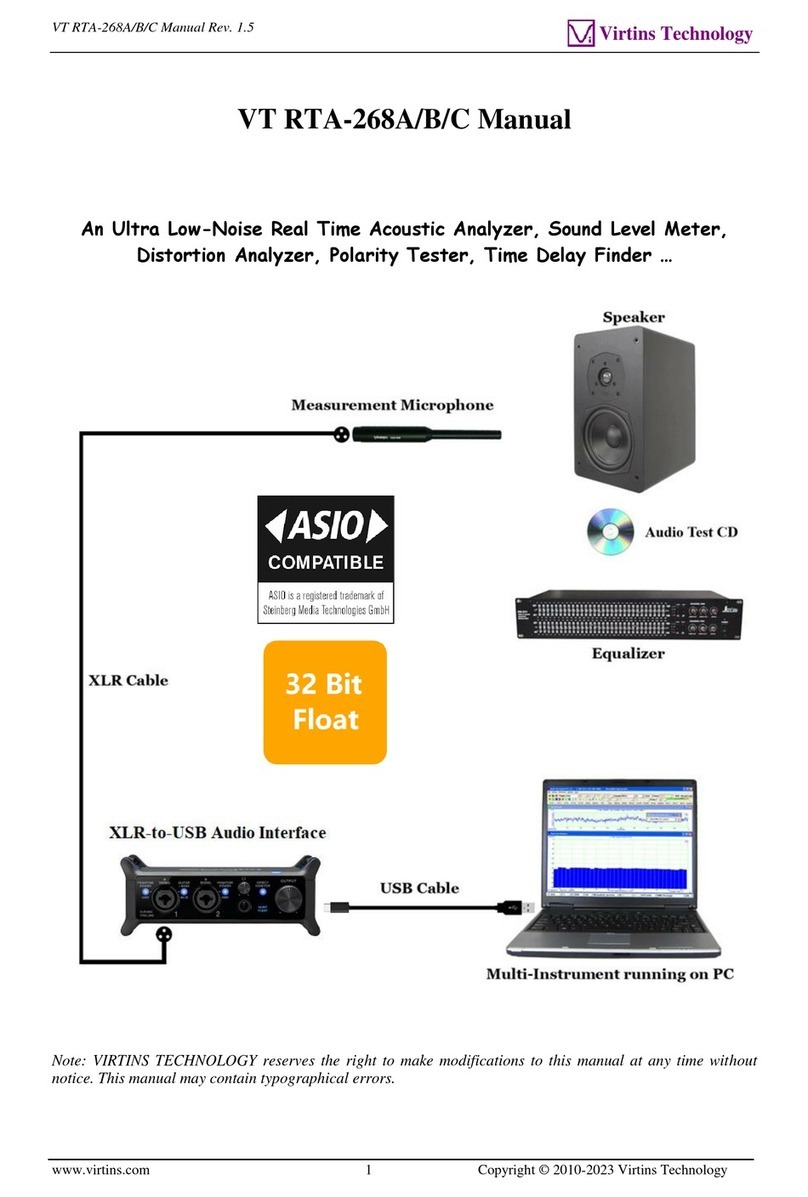
VIRTINS VT RTA-168A/B User manual

VT RTA-168A/B Manual Rev. 1.5
www.virtins.com 1 Copyright © 2010-2020 Virtins Technology
Virtins Technology
VT RTA-168A/B Manual
A Real Time Acoustic Analyzer, Sound Level Meter, Distortion Analyzer,
Polarity Tester, …
Note: VIRTINS TECHNOLOGY reserves the right to make modifications to this manual at any time without
notice. This manual may contain typographical errors.

VT RTA-168A/B Manual Rev. 1.5
www.virtins.com 2 Copyright © 2010-2020 Virtins Technology
Virtins Technology
TABLE OF CONTENTS
1 INSTALLATION AND QUICK START GUIDE..........................................................................................3
1.1 PACKAGE CONTENTS....................................................................................................................................3
1.2 HARDWARE CONNECTION DIAGRAM............................................................................................................4
1.3 HARDWARE DRIVER INSTALLATION.............................................................................................................5
1.4 MULTI-INSTRUMENT SOFTWARE INSTALLATION AND CONFIGURATION.......................................................6
1.4.1 Install Multi-Instrument.......................................................................................................................6
1.4.2 Start Multi-Instrument..........................................................................................................................6
1.4.3 Configure Multi-Instrument.................................................................................................................8
1.5 INPUT OF SOUND LEVEL CALIBRATION DATA AND ADJUSTMENT OF INPUT GAIN......................................10
1.5.1 Under Windows XP or a Windows Version Before XP.....................................................................11
1.5.2 Under Windows Vista........................................................................................................................11
1.5.3 Under Windows 7 ..............................................................................................................................12
1.5.4 Under Windows 8/8.1/10 ...................................................................................................................14
1.5.5 Adjustment of Input Gain via Hardware Gain Switch .......................................................................15
1.5.6 0dB Reference Vr ..............................................................................................................................16
1.6 MICROPHONE FREQUENCY COMPENSATION ...............................................................................................16
1.7TWENTY MOST FREQUENTLY USED MEASUREMENT SETTINGS .................................................................18
1.8 MORE ACOUSTIC ANALYSIS FUNCTIONS AVAILABLE IN MULTI-INSTRUMENT PRO OR ABOVE..................21
1.9 LIST OF AUDIO TEST WAV FILES (AUDIOTESTCD.ZIP) .............................................................................21
1.10 OPERATION NOTES ...................................................................................................................................23
2 SPECIFICATIONS.........................................................................................................................................24
2.1 VT RTA-168A/B HARDWARE CONFIGURATION ........................................................................................24
2.2 OVERALL VT RTA-168A/B SPECIFICATIONS.............................................................................................24
2.3 MEASUREMENT MICROPHONE ECM999 SPECIFICATIONS (FOR VT RTA-168A)........................................24
2.4 MEASUREMENT MICROPHONE EMM-6 SPECIFICATIONS (FOR VT RTA-168B)..........................................26
2.5 VT XLR-TO-USB PRE SPECIFICATIONS .....................................................................................................27
2.6 MULTI-INSTRUMENT SOFTWARE SPECIFICATIONS......................................................................................28
3 MULTI-INSTRUMENT SOFTWARE LICENSE INFORMATION ........................................................37
3.1 LICENSE TYPES...........................................................................................................................................37
3.2 LICENSE UPGRADE FROM ONE LEVEL TO ANOTHER...................................................................................37
3.3 SOFTWARE UPGRADE IN THE SAME LICENSE LEVEL...................................................................................37
4 WARRANTY...................................................................................................................................................37
5 DISCLAIMER.................................................................................................................................................38

VT RTA-168A/B Manual Rev. 1.5
www.virtins.com 3 Copyright © 2010-2020 Virtins Technology
Virtins Technology
1 Installation and Quick Start Guide
1.1 Package Contents
A standard VT RTA-168A/B Package contains the following items:
1) Measurement microphone and its accessories (a windshield, a microphone clip and stand)
2) XLR-to-USB sound card
3) USB cable (1.5 m)
4) CD (containing the copy-protected Multi-Instrument Software)
The latest software can always be downloaded from www.virtins.com/MIsetup.exe.
5) USB hardkey (containing a Multi-Instrument Standard License)
6) Audio Test WAV files (containing a list of audio test tones and noises)
Measurement Microphone
Windshield
Microphone Clip and Stand

VT RTA-168A/B Manual Rev. 1.5
www.virtins.com 4 Copyright © 2010-2020 Virtins Technology
Virtins Technology
They can be downloaded at: www.virtins.com/AudioTestCD.zip and then burnt into a CD
or saved into a USB memory stick. They can also be generated directly from the Signal
Generator of Multi-Instrument.
7) 1/8” TRS cable (1.8m)
8) Black Soft Pouch Case
9) Unique Sound Level Calibration Data (in CD)
10) Unique Microphone Calibration Data (only provided in RTA-168B, in CD)
1.2 Hardware Connection Diagram
There are two connection methods, with or without the XLR cable between the measurement
microphone and the XLR-to-USB sound card.
Connection Method 1 (without XLR cable):
Unscrew the XLR shield on the XLR-to-USB sound card and connect the sound card directly
to the measurement microphone. Then connect the corresponding ends of the USB cable to
the XLR-to-USB sound card and the PC’s USB port. When this is complete, the red LED
light will light up indicating that it is receiving power.
without XLR cable
Connection Method 2 (with XLR cable):

VT RTA-168A/B Manual Rev. 1.5
www.virtins.com 5 Copyright © 2010-2020 Virtins Technology
Virtins Technology
The XLR cable is not provided in the product package. So you need to find an XLR cable
with a female connector at one end and a male connector at the other end.
Plug the female end of the XLR cable into the measurement microphone and the male end
into the XLR-to-USB sound card. Then connect the corresponding ends of the USB cable to
the XLR-to-USB sound card and the PC’s USB port. When this is complete, the red LED
light will light up indicating that it is receiving power.
with XLR cable
Software Activation
The USB hardkey needs to be plugged into any USB port of the PC in order to activate the
Multi-Instrument software. Otherwise the software will run under the 21-day fully functional
free trial mode before the trial period expires.
Test Signal Generation
You can generate the test signals from the Signal Generator of Multi-Instrument. The XLR-
to-USB sound card does not have any audio output channels, so you need to use your
computer’s built-in sound card or any other sound card for audio test signal output. The
quality of the test signals would depend on the sound card used. Generally, the built-in sound
card of a laptop is good enough for generating quality test signals for magnitude frequency
response measurement of an audio system.
The 1/8” TRS cable provided in the product package can be used to connect the sound card’s
audio output (e.g. Line Out, Headphone, Speaker) to the AUX input of the audio system
under test.
Alternatively, you can play the test signals from an audio CD or a memory stick.
1.3 Hardware Driver Installation
No hardware driver installation is required. It is supported by Windows natively.

VT RTA-168A/B Manual Rev. 1.5
www.virtins.com 6 Copyright © 2010-2020 Virtins Technology
Virtins Technology
1.4 Multi-Instrument Software Installation and Configuration
Multi-Instrument is a powerful multi-function virtual instrument software. It supports a
variety of hardware ranging from sound cards which are available in almost all computers to
proprietary ADC and DAC hardware such as NI DAQmx cards, VT DSOs and so on. It
consists of multiple test instruments such Oscilloscope, Spectrum Analyzer, and Multimeter,
etc.
1.4.1 Install Multi-Instrument
Insert the Multi-Instrument installation CD into your computer’s CD-ROM drive and follow
the instruction on the screen to install the Multi-Instrument software. The installation file
can also be downloaded from www.virtins.com/MIsetup.exe.
1.4.2 Start Multi-Instrument
To start Multi-Instrument, on the Windows desktop, select [Start]>[All Programs]>[Multi-
Instrument]>[VIRTINS Multi-Instrument], or simply double click the MI icon.
If the software is started for the very first time after installation, it will prompt the user to
select a default device (see figure below). Select VT RTA-168A or VT RTA-168B according
to the hardware device to be used.

VT RTA-168A/B Manual Rev. 1.5
www.virtins.com 7 Copyright © 2010-2020 Virtins Technology
Virtins Technology
The default device can also be changed later via [Setting]>[ADC Device], [Setting]>[DAC
Device], and [Setting]>[Configure Hot Panel Setting Toolbar], or simply [Setting]>[Restore
to Factory Default]. However, if [Restore to Factory Default] command is executed, all
calibration data entered manually via [Setting]>[Calibration] after software installation
will be reset to the default values of the selected product. To avoid the loss of the
manually entered calibration data, you can save them as a calibration file first.
Otherwise, you will have to enter the unique calibration data that come with the
product package again.
After the default device is selected, the software will prompt the user to select a default color
scheme (Skin). The default skin can also be changed later via [Setting]>[Display].

VT RTA-168A/B Manual Rev. 1.5
www.virtins.com 8 Copyright © 2010-2020 Virtins Technology
Virtins Technology
The main window of the software will open after the above skin selection. The following
figure shows a typical screen layout (obtained by clicking the “OCT3” button in the Hot
Panel Setting Toolbar after the launch of the software). Please refer to the software manual
for detailed functions of the software. The software manual can be accessed via [Start]>[All
Programs]>[Multi-Instrument]>[VIRTINS Multi-Instrument Manual] (in PDF format) or
[VIRTINS Multi-Instrument Help] (in HTML format) on Windows Start menu, or
[Help]>[Software Manual] or F1 inside the software.
1.4.3 Configure Multi-Instrument
In Multi-Instrument, the menu items are enabled/disabled based on context. Many menu
items are disabled when the Oscilloscope or the Signal Generator is running. To do the
configuration, stop the oscilloscope first by pressing the green button at the upper left corner
of the screen (see figure below). The button will turn red once the Oscilloscope is stopped.
1.4.3.1 Configure Sound Recording Devices for Multi-Instrument
Go to [Setting]>[ADC Device], and choose “USB Audio CODEC” , “Microphone (USB
Audio CODEC)”, “Line (USB Audio CODEC)” and the like in the “Device No.” field (see
figure below). This is to configure the XLR-to-USB sound card as the sound recording

VT RTA-168A/B Manual Rev. 1.5
www.virtins.com 9 Copyright © 2010-2020 Virtins Technology
Virtins Technology
device for the software. Note that the displayed name of the XLR-to-USB sound card may
vary a bit under different Windows versions. The “Device Model”field must be set to
“Sound Card MME”.
Under Windows XP or a Windows Version Before XP
Under a Windows Version after XP
Now, if you start the oscilloscope by pressing the red button at the upper left corner of the
screen, and then talk before the measurement microphone, you should be able to see your
“voices” in the Oscilloscope and Spectrum Analyzer.
1.4.3.2 Configure Sound Playback Devices for Multi-Instrument
The XLR-to-USB sound card does not have any audio output channels, but you can use your
computer’s built-in sound card or any other sound card for audio test signal output, if you
want to use the Signal Generator in Multi-Instrument to generate the test signals. To
configure the sound card for the Signal Generator, go to [Setting]>[DAC Device] and choose

VT RTA-168A/B Manual Rev. 1.5
www.virtins.com 10 Copyright © 2010-2020 Virtins Technology
Virtins Technology
the corresponding sound card’s name in the “Device No.” field. By default, Multi-
Instrument will use the computer’s built-in sound card for signal output. Again, the “Device
Model”field must be set to “Sound Card MME”.
Now, if you press the Signal Generator button (see figure above), the Signal Generator panel
will be opened (see figure below). Press the red triangle button at the upper right corner of
the Signal Generator panel, you should hear a 1kHz test tone from the speaker or earphone
connected to the selected playback sound card. Press it again to stop the sound.
1.5 Input of Sound Level Calibration Data and Adjustment of Input Gain
Sound Level Calibration is not required for those relative measurements such as frequency
response, THD, THD+N, IMD, etc.. It is required only if you want to measure the absolute
sound level.
The measurement microphone and the XLR-to-USB sound card have been calibrated in pair
in the factory. The sound level calibration data are provided in a separate sheet inside the

VT RTA-168A/B Manual Rev. 1.5
www.virtins.com 11 Copyright © 2010-2020 Virtins Technology
Virtins Technology
product package. Please refer to the calibration data sheet provided and enter the calibration
data in the respective highlighted fields in the Calibration Setting dialog box (see figures
below). Note that different calibration data are required for different Windows versions. The
Calibration Setting dialog box is opened via [Setting]>[Calibration] in Multi-Instrument.
You can adjust the sound level measurement range by adjusting the input gain of the XLR-
to-USB sound card through its hardware gain switch and/or the software.
1.5.1 Under Windows XP or a Windows Version Before XP
Input of the Sound Level Calibration Data
Note the calibration data in the following figure are examples only, you should enter the
actual calibration data provided inside the product package.
Adjustment of Input Gain via Software
Under Windows XP or a Windows version before XP, the input gain of the XLR-to-USB
sound card is not adjustable. Neither the Recording Control under Windows Control Panel
nor Multi-Instrument can adjust the input gain.
1.5.2 Under Windows Vista
Input of the Sound Level Calibration Data

VT RTA-168A/B Manual Rev. 1.5
www.virtins.com 12 Copyright © 2010-2020 Virtins Technology
Virtins Technology
Note the calibration data in the following figure are examples only, you should enter the
actual calibration data provided inside the product package.
Adjustment of Input Gain via Software
Under Windows Vista, the input gain of the XLR-to-USB sound card is not adjustable in the
Sound Recording Tab under Windows Control Panel. However, you can adjust it by clicking
the respective radio buttons beside the “Mic 100%”, “Mic 80%”, “Mic 60%”, “Mic 40%”
and “Mic 20%” in the above figure. It should be noted that the selection status of these radio
buttons does not necessarily reflect the actual input gain (For example, when you open the
Calibration Setting dialog box, if the selected radio box is “Mic 80%”, it does not necessarily
mean the current input gain is set at 80%.). The actual input gain is reflected by the “Mixer”
status under the “Sound Card Input Status” in the above figure. You can press the “Refresh”
button to make sure the status display has been refreshed.
1.5.3 Under Windows 7
Input of the Sound Level Calibration Data
Note the calibration data in the following figure are examples only, you should enter the
actual calibration data provided inside the product package.

VT RTA-168A/B Manual Rev. 1.5
www.virtins.com 13 Copyright © 2010-2020 Virtins Technology
Virtins Technology
Adjustment of Input Gain via Software
Similar to Windows Vista, you can adjust the input gain by clicking the respective radio
buttons beside the “Mic 100%”, “Mic 80%”, “Mic 60%”, “Mic 40%” and “Mic 20%” in the
above figure. It should be noted that the selections status of the radio button does not
necessarily reflect the actual input gain (For example, when you open the Calibration Setting
dialog box, if the selected radio box is “Mic 80%”, it does not necessarily mean the current
input gain is set at 80%.). The actual input gain is reflected by the “Mixer” status under the
“Sound Card Input Status” in the above figure. You can press the “Refresh” button to make
sure the status display has been refreshed.
Unlike Windows Vista, the input gain is adjustable in the Sound Recording Tab under
Windows Control Panel. You can access the Sound Recording Tab by clicking the “Windows
Recording Control” button (see figure below) in Multi-Instrument.
This will bring up the Sound Recording Tab (see left part of the figure below).

VT RTA-168A/B Manual Rev. 1.5
www.virtins.com 14 Copyright © 2010-2020 Virtins Technology
Virtins Technology
If you right click “Microphone (USB Audio CODEC)” and select “Properties”, the right part
of the figure above will be shown. You can then adjust the input gain through the
“Microphone” slider.
1.5.4 Under Windows 8/8.1/10
Input of the Sound Level Calibration Data
Note the calibration data in the following figure are examples only, you should enter the
actual calibration data provided inside the product package.

VT RTA-168A/B Manual Rev. 1.5
www.virtins.com 15 Copyright © 2010-2020 Virtins Technology
Virtins Technology
Adjustment of Input Gain via Software
Same as Windows 7
1.5.5 Adjustment of Input Gain via Hardware Gain Switch
You can also adjust the input gain by changing the switch position on the XLR-to-USB
sound card. You can change among three positions: HI, MED, LO (see figure above). The
MED and LO positions provide roughly 5dB (×1.778279) and 9.56dB (×3.006076)’
attenuation with respect to the HI position (×1). The accurate gain differences are provided in
the sound level calibration data in the product package.
If the input gain is adjusted through the software, the software will automatically take the
change of the input gain into account. However, if the input gain is adjusted through the
hardware gain switch, you will have to change the “Probe” switch position (see figure below)
accordingly in Multi-Instrument’s toolbar to account for the change. Note: The hardware
gain switch positions: HI, MED and LO correspond to “HI”, “MED” and “LO” in the
“Probe” switch position combo box respectively. For example, if the hardware gain switch is
at LO, you must choose “LO” in the “Probe” switch position combo box.

VT RTA-168A/B Manual Rev. 1.5
www.virtins.com 16 Copyright © 2010-2020 Virtins Technology
Virtins Technology
1.5.6 0dB Reference Vr
The “0dB Reference Vr”in the Calibration Setting dialog box is used to finally calibrate the
input voltage to dBSPL. The input voltage here should be considered as a relative value as
the actual input is not a voltage but a sound pressure. The “0dB Reference Vr”is the
parameter to be recalibrated if a sound level recalibration is necessary. To do the
recalibration, simply enter the actual sound level value into the “Actual Value”edit box and
the measured sound level value into the “Read Value”edit box, and then press the
“Calculate”button once.
1.6 Microphone Frequency Compensation
The measurement microphone in RTA-168 series has an extremely flat frequency response in
the audio frequency range. Generally, there is no need to compensate for the microphone
frequency response. However, a higher degree of accuracy can be achieved if the
microphone comes with a frequency response file or a frequency compensation file. The
difference between these two files is the sign of the gain values (in dB). For example, a gain
of 3dB in a frequency response file should have a gain of -3dB in its equivalent frequency
compensation file.
The microphone ECM999 in RTA-168A does not come with a calibration file and thus no
frequency compensation is required.
The microphone EMM-6 in RTA-168B comes with an individually calibrated frequency
compensation file RTA.fcf. This file is located in the CD directory “\Microphone
Frequency Compensation File”. Please copy this file to the “\fcf”subdirectory under
the root directory of Multi-instrument in the hard disk (if the file already exists,
overwrite it), so that you can use it later. This file is also used by the twenty default panel
settings configured in the Hot Panel Setting Toolbar (The third toolbar from the top).
You can load the frequency compensation file by right clicking anywhere within the
Spectrum Analyzer window and selecting [Spectrum Analyzer Processing]> “Intra-Frame
Processing”> “Compensation 1” and load that frequency compensation file (see figure
below). If you want to apply it to the twenty most frequently used panel settings in the Hot
Panel Setting Toolbar, you will need to configure and save the corresponding panel setting
files one by one. Luckily, this has already been done for the twenty default panel settings.

VT RTA-168A/B Manual Rev. 1.5
www.virtins.com 17 Copyright © 2010-2020 Virtins Technology
Virtins Technology
The above frequency compensation file RTA.fcf is actually converted from the original
calibration file supplied by the manufacturer of EMM-6. It is also possible to directly use
EMM-6’s original calibration file without conversion. To do that, simply select “Original
Frequency Response File (*.txt)”instead of “Frequency Compensation File (*.fcf)”as the
file filter in the following file selection dialog box, and then select the original calibration file.
The original calibration file can also be found in the CD directory “\Microphone
Frequency Compensation File”. Its file name is something like xxxxxx.txt where xxxxx
is the serial no. labelled on the EMM-6 microphone body.

VT RTA-168A/B Manual Rev. 1.5
www.virtins.com 18 Copyright © 2010-2020 Virtins Technology
Virtins Technology
1.7 Twenty Most Frequently Used Measurement Settings
Multi-Instrument bundled with VT RTA-168 comes with many pre-configured panel setting
files. This saves you time to configure various parameters for some frequently performed
measurements by yourself. You can load these panel setting files via [Setting]>[Load Panel
Setting]. Furthermore, 20 most frequently used panel setting files are pre-configured in the
Hot Panel Setting Toolbar (The third toolbar from the top). You can load one of them by a
single mouse click. These 20 measurement settings are:
(1) Home: Default Setting
The factory default panel setting. It is equivalent to the [File]>[New] command.
(2) OCT1: 1/1 Octave Analysis (Avg. 10)
Pink noise will be generated by pressing the start button of the Signal Generator. The pink
noise will be injected into the DUT (Device Under Test), and the response of the DUT will
be captured and analyzed by the Oscilloscope and Spectrum Analyzer. A flat curve in the
Spectrum Analyzer would indicate a flat magnitude frequency response of the DUT. The
equivalent continuous sound level in dB will be displayed in the Multimeter window.
(3) OCT3: 1/3 Octave Analysis (Avg. 10)
Same as OCT1, but with a finer frequency resolution.
(4) OCT3ppn: 1/3 Octave Analysis
Same as OCT3, but periodic pink noise instead of ordinary (non-periodic) pink noise is used
as the stimulus. One advantage of using periodic pink noise is that its spectrum is ideally flat
under octave analysis even without inter-frame averaging.

VT RTA-168A/B Manual Rev. 1.5
www.virtins.com 19 Copyright © 2010-2020 Virtins Technology
Virtins Technology
(5) Polarity: Speaker, Microphone, Amplifier Polarity Tester with Crest Factor Check
A polarity test signal will be generated by pressing the start button of the Signal Generator.
Point the microphone close to the center of the speaker under test along its axis, and observe
the polarity of the captured pulse in the oscilloscope window. If the pulse goes positive
initially, then the polarity of the speaker under test is positive, and vice versa.
Positive Negative
(6) THD: THD,THD+N,SNR,SINAD,Noise Level, ENOB (Avg. 10 )
A 1 kHz (to be precise, a frequency very close to 1 kHz) sine wave will be generated by
pressing the start button of the Signal Generator. The sine wave will be injected into the DUT
(Device Under Test), and the response of the DUT will be captured and analyzed by the
Oscilloscope and Spectrum Analyzer. All the above parameters of the DUT will be measured
and displayed. This panel setting should be used only if the same sound card is used for
signal input and output.
(7) THDcd: THD,THD+N,SNR,SINAD,Noise Level, ENOB (Avg. 10 )
A 1 kHz sine wave will be generated by pressing the start button of the Signal Generator. The
sine wave will be injected into the DUT (Device Under Test), and the response of the DUT
will be captured and analyzed by the Oscilloscope and Spectrum Analyzer. All the above
parameters of the DUT will be measured and displayed. This panel setting should be used if
different sound cards are used for signal input and output, such as the case of RTA-168. It
should also be used if the 1 kHz test tone is played from an audio CD or a memory stick.
(8) IMDsmp: IMD SMPTE (60 Hz + 7 kHz, 4:1) (Avg. 10)
A 60 Hz and a 7 kHz sine waves mixed at an amplitude ratio of 4:1 will be generated by
pressing the start button of the Signal Generator. The mixed signals will be injected into the
DUT (Device Under Test), and the response of the DUT will be captured and analyzed by the
Oscilloscope and Spectrum Analyzer. The SMPTE IMD value of the DUT will be measured
and displayed.
(9) IMDdin: IMD DIN (250 Hz + 8 kHz, 4:1) (Avg. 10)
A 250 Hz and a 8 kHz sine waves mixed at an amplitude ratio of 4:1 will be generated by
pressing the start button of the Signal Generator. The mixed signal will be injected into the
DUT (Device Under Test), and the response of the DUT will be captured and analyzed by the
Oscilloscope and Spectrum Analyzer. The DIN IMD value of the DUT will be measured and
displayed.
(10)IMDccif: IMD CCIF2 (19 kHz + 20 kHz, 1:1) (Avg. 10)
A 19 kHz and a 20 kHz sine waves mixed at an amplitude ratio of 1:1 will be generated by
pressing the start button of the Signal Generator. The mixed signal will be injected into the
DUT (Device Under Test), and the response of the DUT will be captured and analyzed by the

VT RTA-168A/B Manual Rev. 1.5
www.virtins.com 20 Copyright © 2010-2020 Virtins Technology
Virtins Technology
Oscilloscope and Spectrum Analyzer. The CCIF2 IMD value of the DUT will be measured
and displayed.
(11)FRwhite: Magnitude Frequency Response (White Noise, Avg. 30)
White noise will be generated by pressing the start button of the Signal Generator. The white
noise will be injected into the DUT (Device Under Test), and the response of the DUT will
be captured and analyzed by the Oscilloscope and Spectrum Analyzer. The curve in the
Spectrum Analyzer indicates the magnitude frequency response of the DUT.
(12)FRpwn: Magnitude Frequency Response (Periodic White Noise)
Periodic white noise will be generated by pressing the start button of the Signal Generator.
The periodic white noise will be injected into the DUT (Device Under Test), and the
response of the DUT will be captured and analyzed by the Oscilloscope and Spectrum
Analyzer. The curve in the Spectrum Analyzer indicates the magnitude frequency response
of the DUT. One advantage of using periodic white noise is that its spectrum is ideally flat
even without inter-frame averaging.
(13)FRswLin: Magnitude Frequency Response (Frequency Sweep, Linear)
A 0.68266667-second 20Hz-to-20kHz linear frequency swept sine wave will be generated by
pressing the start button of the Signal Generator. The signal will be injected into the DUT
(Device Under Test), and the response of the DUT will be captured by the Oscilloscope and
Spectrum Analyzer. The curve in the Spectrum Analyzer indicates the magnitude frequency
response of the DUT. Note that you will need to adjust the trigger level so that the
Oscilloscope will be triggered just upon the start of the sweep.
(14)FRswLog: Magnitude Frequency Response (Frequency Sweep, Log)
A 0.68266667-second 20Hz-to-20kHz logarithmic frequency swept sine wave will be
generated by pressing the start button of the Signal Generator. The signal will be injected into
the DUT (Device Under Test), and the response of the DUT will be captured by the
Oscilloscope and Spectrum Analyzer. The curve in the Spectrum Analyzer indicates the
magnitude frequency response of the DUT. Note that you will need to adjust the trigger level
so that the Oscilloscope will be triggered just upon the start of the sweep.
(15)FRmt: Magnitude Frequency Response (MultiTone, 31 1/3 Octave Bands)
A multitone consists of 31 1/3 octave band center frequencies from 20 Hz to 20kHz will be
generated by pressing the start button of the Signal Generator. The signal will be injected into
the DUT (Device Under Test), and the response of the DUT will be captured by the
Oscilloscope and Spectrum Analyzer. The curve in the Spectrum Analyzer indicates the
magnitude frequency response of the DUT.
(16)sLeq: Short Equivalent Continuous Sound Level (Short Leq, 125ms)
This panel setting will display the short equivalent continuous sound level. The value is time-
averaged over continuous 125 ms.
(17)sLeqA: Short Equivalent Continuous Sound Level (Short Leq, 125ms) (A-Weighted)
This panel setting will display the A-weighted short equivalent continuous sound level. The
value is time-averaged over continuous 125 ms.
(18)sLeqC: Short Equivalent Continuous Sound Level (Short Leq, 125ms) (C-Weighted)
Table of contents
Other VIRTINS Measuring Instrument manuals
Popular Measuring Instrument manuals by other brands

Endress+Hauser
Endress+Hauser Proline Promag P 100 operating instructions

Metronic
Metronic MPI-D Series user manual

Kestrel Ballistics
Kestrel Ballistics 2700 user guide

Medisana
Medisana HG 100 instruction manual

PCB Piezotronics
PCB Piezotronics IMI Sensors Y604B11 Installation and operating manual

Chauvin Arnoux
Chauvin Arnoux AEMC True Megohmmeter 3528 user manual