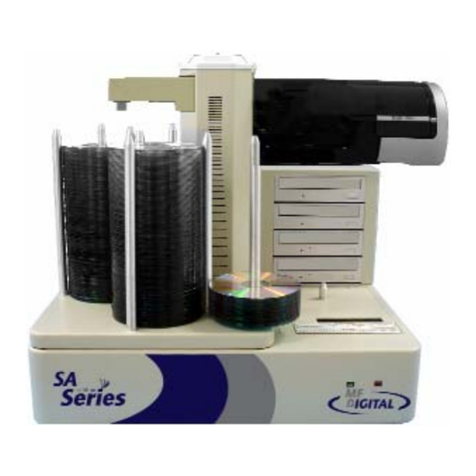
Virtual Vision CopyBox Standard User manual

CopyBox
Standard
CD/DVDDuplicator
User Manual
v10.0

UserManualCopyBoxStandardCD-DVDDuplicator-
Page2van29

UserManualCopyBoxStandardCD-DVDDuplicator- TableofContents
Page3van29
TableofContents
Page
Table ofContents................................................................................................................................................................................................................................3
Introduction..........................................................................................................................................................................................................................................4
Warranty...............................................................................................................................................................................................................................................4
Disclaimer.............................................................................................................................................................................................................................................4
Installation............................................................................................................................................................................................................................................5
Instructions............................................................................................................................................................................................................................................5
1. Copy.................................................................................................................................................................................................................................................6
2. Test....................................................................................................................................................................................................................................................6
3. Test& Copy......................................................................................................................................................................................................................................6
4. Verify.................................................................................................................................................................................................................................................7
5. Compare..........................................................................................................................................................................................................................................7
6. Prescan.............................................................................................................................................................................................................................................8
7. Disc Info............................................................................................................................................................................................................................................8
8. SelectSource...................................................................................................................................................................................................................................8
9. Image...............................................................................................................................................................................................................................................9
9.1 Load..........................................................................................................................................................................................................................................9
9.2 DeleteImage..........................................................................................................................................................................................................................9
9.3 ImageInfo..............................................................................................................................................................................................................................10
9.4 CompareImage...................................................................................................................................................................................................................10
9.5 SelectImage.........................................................................................................................................................................................................................10
9.6 ImageSourceDrive..............................................................................................................................................................................................................11
9.7 ImageFormat Info................................................................................................................................................................................................................11
9.8 Edit..........................................................................................................................................................................................................................................11
9.9 FormatHDD...........................................................................................................................................................................................................................11
9.10 Load ImageMethod..........................................................................................................................................................................................................12
10. EditTrack......................................................................................................................................................................................................................................13
10.1 CD toCD Edit......................................................................................................................................................................................................................13
10.2 CD to HDD Edit....................................................................................................................................................................................................................14
10.3 CloseSession.......................................................................................................................................................................................................................14
11. Setup.............................................................................................................................................................................................................................................15
11.1 Language............................................................................................................................................................................................................................15
11.2 BurnSpeed...........................................................................................................................................................................................................................15
11.3 Read Speed.........................................................................................................................................................................................................................15
11.4 Auto StartDrive...................................................................................................................................................................................................................16
11.5 StartupMenu.......................................................................................................................................................................................................................16
11.6 Auto Verify...........................................................................................................................................................................................................................16
11.7 Auto Compare....................................................................................................................................................................................................................16
11.8 AutoPrescan.......................................................................................................................................................................................................................16
11.9 EjectDisc..............................................................................................................................................................................................................................17
11.10BurnOn TheFly..................................................................................................................................................................................................................17
11.11BurnMode .........................................................................................................................................................................................................................17
11.12DisplayTime.......................................................................................................................................................................................................................17
11.13ButtonSound.....................................................................................................................................................................................................................18
11.14DeviceInfo.........................................................................................................................................................................................................................18
11.15SystemInfo.........................................................................................................................................................................................................................18
11.16Quick Erase........................................................................................................................................................................................................................18
11.17Full Erase.............................................................................................................................................................................................................................18
11.18 AutoCloseTray*................................................................................................................................................................................................................19
11.19Quick Compare*...............................................................................................................................................................................................................19
11.20TrayIn/Out*........................................................................................................................................................................................................................19
11.21BootTimeDelay*...............................................................................................................................................................................................................19
11.22StartTrayEject*.................................................................................................................................................................................................................20
11.23Disc Redetect*..................................................................................................................................................................................................................20
11.24ShowBurn Speed*............................................................................................................................................................................................................20
12. Advanced Setup.........................................................................................................................................................................................................................21
12.1 UnderRunProtect................................................................................................................................................................................................................21
12.2 Overburn..............................................................................................................................................................................................................................21
12.3 Read ErrorSkip.....................................................................................................................................................................................................................21
12.4 FormatHDD.........................................................................................................................................................................................................................22
12.5 VerifyHDD............................................................................................................................................................................................................................22
12.6 Burn-in...................................................................................................................................................................................................................................22
12.7 UpdateFirmware................................................................................................................................................................................................................23
12.8 CompareFirmware............................................................................................................................................................................................................23
12.9 H/WDiagnostic...................................................................................................................................................................................................................23
12.10Load Default......................................................................................................................................................................................................................23
12.11CD+G..................................................................................................................................................................................................................................23
12.12ISRC & MCN.......................................................................................................................................................................................................................24
12.13 USBOption*........................................................................................................................................................................................................................24
12.14CD-TEXT...............................................................................................................................................................................................................................24
12.15Password............................................................................................................................................................................................................................24
12.16Disc Counter*....................................................................................................................................................................................................................24
12.17 Auto SaveImage* ............................................................................................................................................................................................................25
12.18F1 HotbuttonSetup*.........................................................................................................................................................................................................25
12.19F1 HotbuttonSetup*.........................................................................................................................................................................................................25
12.20Index...................................................................................................................................................................................................................................25
12.21 AutoRunTime...................................................................................................................................................................................................................25
InstallingPC-Connected CopyBox 3, 5, 7,9..................................................................................................................................................................................26
SwitchingUSBConnectionOn/Off .................................................................................................................................................................................................26
InstallationCopyBox 1withUSBConnection.................................................................................................................................................................................28
Technical information.......................................................................................................................................................................................................................29
SafetyPrecautions............................................................................................................................................................................................................................29
Technical Issues.................................................................................................................................................................................................................................29
*Notavailable ontheCopyBox 1

UserManualCopyBoxStandardCD-DVDDuplicator- Introduction
Page4van29
Introduction
The CopyBoxStandardduplicatorisastand-alone CD/DVDcopysystemspecificallydesignedtoquicklyandeasilyduplicate
DVD’sandCD’s.TheCopyBoxStandardduplicatorsareavailable inthreeversions;Stand-Alone,with built-inharddriveandPC-
connected. The CopyBoxStandardduplicatorsareavailable with 1,3,5,7,9and11burners.
MainadvantagesoftheCopyBox:
•Quick,easyandinexpensiveduplicationofrecordableCDandDVD.
•Suitableforall users, withnocomputerknowledgerequired.
•Standaloneoperation,noPC orsoftwarerequired.
•Fastcopyingat upto24xDVDwrite speed. (One copyin5minutes)
•Supportforall recordableCDand DVDformats.
•Supportfordual-layer(8.5GB)DVDrecordable.
•Simple operationthroughbuttons andaLCDdisplayonthe controlpanelatthefront.
•Available inthree versions (Stand-Alone,withHDD,PC-connected)forall specificcopyingneeds.
Warranty
General Warranty
Onall CopyBoxsystems astandardcarry-inwarrantyof twoyearsapplies. The warrantycoversbreakdownsorfaultsdue to
defect inmaterialsorworkmanship. Itdoesnotcoverwear&tear,gradual deteriorationinperformance,failurecausedby,use
of unauthorisedorunsuitablesoftware,connectiontoincompatible equipment, ingress of moisture,fluidorforeignbodies,
physicalorelectricalstress,connectiontoanelectrical supplyforwhichithasnotbeenadjusted, lightning strike, incorrect
storage, operation oruseoftheproduct inunsuitableenvironmentsorinappropriate applications, incorrect installation,
accidentaldamageordamage causedbynegligenceormisuse, unauthorisedmodification,incorrect adjustmentorrepairby
personsotherthantrainedpersonnel. Thefollowingadditionalwarrantyprovisionsshallalso apply:
Thewarranty willautomaticallyexpireif thewarranty sealshavebeenbrokenorremoved.
TheopticaldrivesinaCopyBoxduplicatoraresensitivetocertaintypesof pollution. Weadvise:
§Do notsmokeneartheCopyBoxduplicator.
§Do notplacetheCopyBoxinthesame room aslaserprinters and photocopymachines.
§Do notexposetheCopyBoxtofinedustparticalssuchasconstructiondebris.
PollutionoftheCD/DVD drivesisnot coveredunderwarranty.
Disclaimer
ThemainfunctionoftheCopyBox ismaking copiesofDVD’sand CD’swhichare inuserspossessionand duplicationofself-
producedCD’sorDVD’s.Copyingandduplicating DVD’sandCD’swhicharenot inuserspossessionisillegalandmayresultin
criminalprosecution.

UserManualCopyBoxStandardCD-DVDDuplicator- Installation
Page5van29
Installation
Contentsofthepackage
The CopyBoxpackagecomeswith:
•CopyBoxduplicator
•Powercord
•PrintedUserManual
•USB cable(PC-Connectedversion)
•SoftwareCD(PC-Connectedversion).
Before installationcheckthepackageandsuppliedpartsforphysicaldamage.Also check the warrantyseal onthe CopyBox is
notdamagedormissing. Ifthe product isdamaged,please contactyourdealerimmediately.
CopyBoxInstallation
•Placement
TaketheCopyBox duplicatorfrom thepackagingandplaceitonadry, dust-freeandstable
surface.Toavoiddangeroussituations,donotplaceanyobjectswhichcovertheCopyBox
(rug),are full of liquid(vase)orproducerheat(lamp).
•Connection
Plugthepowercordintothepowercordsocketontheback of theCopyBox.(1)Connectthe
powercordintoanelectricaloutlet. Pushthepowerswitchonthe frontsideoftheCopyBox to
turnonthepower.
The CopyBoxisnowreadyforuse.
Installationof the CopyBox1withUSB connection
Forinstallationof the CopyBox1withUSBconnectorpleaseseepage26 of thismanual.
Installationof CopyBox3,5,7and 9"PC-connected"
Forinstallationof the CopyBoxPCconnectedduplicatorsplease seepage24 of thismanual.
Instructions
The CopyBoxduplicatoroffersacontrolpanelonthefront. Using thiscontrol panel,the variousfunctionscanbeset. The control
panel consistsofthefollowingcomponents:
1. LCDDisplay
2. Selectorbutton“Up”
3. Selectorbutton“Down”
4. Selectorbutton“Enter”
5. Selectorbutton“Escape”
6. FunctionbuttonF1(Speed)
7. FunctionbuttonF2(Source)
8. FunctionbuttonF3(Copy)
9. FunctionbuttonF4(Load)
10. FunctionbuttonF5(Select)
Functionbuttons F1toF5arepre-
programmedtouseanumberof frequently
usedfeatures. Itispossibletoassignfunctions
yourselftothe F1andF2buttonsfromthe
AdvancedSetupmenu.(13-18and13-19)
Usingthe control panel thefollowingtwelvemainmenufunctions canbe selected:
1.
Copy
2. Test
3. Test& Copy
4. Verify
5. Compare
6. Prescan
7.
Disc Info
8. SelectSource
9. Image
10. EditTrack
11. Setup
12. USBMode (PC-Connectedmodels)

UserManualCopyBoxStandardCD-DVDDuplicator- 1. Copy
Page6van29
1.Copy
The"Copy" function isintendedtocopydata froma"Source"disc(master)directlytoblankDVD±R orCD-Rdiscs(targets). The
CopyBoxcancopyboth"OnThe Fly"(directlyfromdisctodisc)andfromthe(optional)internalharddrive.Forcopyingfrom
harddrivepleaseseemenu8(SelectSource)and 9menu(Image).Fordirectcopying fromdisctodiscusethefollowing
procedure:
•Selectthe"Copy"functionwiththe "Up" or"Down"button.
•Openthe drawersoftheDVDreaderandDVDwriters.
•Placethe MasterdiscintheDVDreader.
•PlaceDVDorCDRecordablesinoneormoreDVDwritersandclose the
drawersoftheDVDreaderand DVDwriters.
•Press"Enter"button tostartthecopyprocess. Iftherearealready
recordedDVD±RWdiscsusedthesewill first be erasedautomatically.
•During the copyprocessdisplayedtimeandnumberofMB’swill reduce
whilethe completedpercentageincreases.
•Whenthecopyprocess isfinished,theresultisdisplayedonthe LCD
screen.TheDVDwritersareautomaticallyopened.
•Ifdata isnotduplicated"Onthe Fly"butfromtheoptionalharddrive
(see Chapter8and9)the selectedharddrivepartitionwill be displayed
on the LCDscreen.
2.Test
The"Test" functionisalmost identical tothe"Copy" function. Thedifference isthe copyingprocess issimulatedwithoutthe DVD
orCDrecordablesactuallybeing written. Thisfunction canbe usedwhenthereareproblems readingfromamasterdiscor
burningrecordablediscs.Usingoption12.6(Burn-In)the testmodecanbeautomaticallyrepeatedseveral times.
Attention!Thisfunction canbeusedwith CD-RorDVD-Rsdisc. DVD+Rdiscsdonot supportthisfeature.
•Selectthe"Test" functionwiththe"Up"or"Down"button.
•Openthe drawersoftheDVDreaderandDVDwriters.
•Placethe MasterdiscintheDVDreader.
•InsertDVD -RorCD-RdiscsinoneormoreDVDwritersand close the
drawersoftheDVDreaderand DVDwriters.
•Tostart, pressthe"Enter"button.
•Whenthetest processiscompleted,the resultisdisplayedontheLCD
screen.
3.Test &Copy
Thisfunctionisusedtofirsttest amasterdiscandcopythediscafterwards.
PleaseNote!ThisfunctioncanbeusedwithCD-RorDVD-Rdiscs. DVD+Rdiscsdonot supportthisfeature.
•Selectthe"Test & Copy" functionwiththe"Up"or"Down"button.
•Openthe drawersoftheDVDreaderandDVDwriters.
•Placethe MasterdiscintheDVDreaderreader.
•InsertDVD-RorCD-RdiscsinoneormultipleDVD±RWdrivesandclose
the drawersoftheDVDreaderandDVD±RWdrives.
•Pressthe"Enter"button tostartthetest-andcopyprocess. Ifthereare
already recordedDVD±RW’susedthesewill first be erased
automatically.
1.Copy
4300MB
OK:07
Time:00:05:10
Testing –16x0%
4300MB
06:30
2.Test
4300MB
OK:07
Time:00:05:10
Testing –16x0%
4300MB
06:30
3.Test&Copy
4300MB
Copying –16x0%
4300MB
06:30
1.Copy P:A
4300MB

UserManualCopyBoxStandardCD-DVDDuplicator- 4. Verify
Page7van29
•The testing processwillnowbegin.
•Once the testingprocessiscompletedsuccessfully,thecopying
processwill start.
•Once theentireprocessiscompleted,the LCDdisplayshowstheresult.
Youcannowstartthenexttest andcopysessionusing the samemasterdiscorplaceanotherdiscintotheDVDreader.
4. Verify
Withthisfunction,thecopieddiscscanbe checkedforreaderrors.Afterduplicating, leave the CD’sorDVD’sintotheDVD
writers.
•Selectthe"Verify"functionusingthe"Up"or"Down"button.
•Press"Enter"button tostarttheverifyprocess.
•Once the verificationiscomplete,the LCDdisplayshowstheresult.
5.Compare
Usingthe Comparefunctionthemasterdiscandtherecordable discscanbecomparedafterduplicating. Itcheckswhether
the masterdiscandcopiesare100% identical. The Comparefunctioncannotbe usedwithAudio-CDandVideo-CDformats.
•Selectthe"Compare" functionwith the"Up"or"Down"button.
•Press"Enter"button,the compareprocess willnowstart.
•Once theprocessiscompleted,the LCDdisplayshowstheresult.
•The drawersoftheDVDwritersareopened.Press"Enter"buttontoview
the detailsofthemasterdisc.
•Pressthe"Enter"button tosee detailsof the targetdiscs. Ifthe discsare
identical the followingappearson the LCDdisplay:
•Whenanerroroccursduring the compare processthiswill showonthe
LCDdisplayas"failure".Bytwicepressing the"Enter"button,theerroris
displayedontheLCDdisplay.
Copying –16x0%
4300MB
06:30
OK:07
Time:00:05:10
4.Verify
4300MB
Verify –16x0%
4300MB
06:30
OK:07
Time:00:05:10
Compare –16x0%
4300MB
06:30
5.Compare
4300MB
Compare OK:7
Fail:0
Diff:0
Src:01 DVD-ROM
Total:
4300MB
Tgt:02 DVD-RW
Identical
Tgt:02 DVD-RW
TOC
notmatch

UserManualCopyBoxStandardCD-DVDDuplicator- 6.Prescan
Page8van29
6.Prescan
The"Prescan" function isusedtotestwhetherthemasterdisccanbereadcorrectly.Also the readspeedof theDVDreader
drive canbe testedwith thisfunction.
•Selectthe"Prescan"functionwiththe"Up" or"Down"buttons.
•Openthe draweroftheDVDreader.
•Placethe MasterdisctheDVDreader.
•Press"Enter"button tolaunchthe"Prescan"feature.
•Whenthe"Prescan"process isterminatedandthe source disccanbe
readcorrectly,theLCDscreenshowsthefollowingresult:
7. DiscInfo
The"DiscInfo"functionisusedtoviewinformationaboutthesourceand targetdiscs.
•Selectthe"DiscInfo" functionwith the"Up" or"Down"button.
•Selectthedesireddisc(thesource oroneofthetargets)withthe"Up"or
"Down" button andpress"Enter"button.Thediscinformationisnow
displayedontheLCDdisplay:
8.SelectSource
The"SelectSource" functionallowseithertheDVDreader, oneof theDVDwritersorthe(optional)harddrive tobe selectedas
sourcedrive."The sourcedrive" isthedrivefromwhichdataisloadedforduplication.
•Selectthe"SelectSource"functionwiththe"Up"or"Down"buttons
•Press"Enter"button anduse the "Up"and "Down"buttonstoselectthe
desiredsource.CH00isusedfortheoptionalinternal harddrive, CH01 is
usedfortheCD/DVDreader;the topdrive.
•Afterthedesiredsourceisselectedpressthe"Enter"button andtheLCD
displaywillshowthe selectedsource:
Iftheoptional harddrive isselectedasthesource, andnoneofthepartitionscontaindata,anerrormessagewillappearonthe
LCDdisplay. Youcannowselectany othersourceorcopydatatooneoftheharddrivepartitions. Moreinformationaboutthe
useoftheharddrivecanbefoundundermenu9.
6.Prescan
4300MB
Scanning-DVD0%
4300MB
06:30
PrescanOK!
7.DiscInfo
4300MB
DiscType: DVD+R
Capacity:
4300MB
8.SelectSource
Src:SUPER MULTI
0
1CH01
S
-
MULTIselected

UserManualCopyBoxStandardCD-DVDDuplicator- 9. Image
Page9van29
9.Image
Function9isonlyusable iftheoptionalinternal harddrive isinstalled.Thismenuconsistsofthefollowingtencomponents:
1. Load
2. Delete Image
3. Image Info
4. CompareImage
5. SelectImage
6. SelectSourceDrive
7. Image FormatInfo
8. Edit
9. FormatHDD
10. LoadImage Method
MasterCD’sandDVD’scanbe loadedontothe internal harddriveof the CopyBoxas"imagefile".Animagefile isanexact
copyof anentire CDorDVD.The internalharddriveof the CopyBox isdividedintopartitionsof 1GB. WhenloadingaCDor
DVDimage the first available partitionletterisautomaticallyassigned. Ifdesired,thepartitionID canalsobeassignedmanually
(see function 9.8)Dependingonthesizeof theimagemultiple succeeding1GB partitionsareused.
Example; a4.7GB DVDisloadedtotheinternal harddrive.Here, thefirstfree partition(A)isassignedtothe imagefile.Asa
4.7GB DVDrequiresfivepartitions of1GB,partition lettersB, C,DandEalsowillbe reserved.Thenextfree partition,afterloading
the DVD will bepartition"F".
Selectthe"Image"functioninthemainmenuusingthe"Up"or"Down"button andpressthe "Enter"button toselectfunction9.1.
9.1Load
•Selectthe "Load"functionwiththe "Up" or"Down"button.The"Load"
featureallowsanimagefilefromtheDVD readerdrive tobeloadedon
theinternal harddrive. P:Ameans "partitionA" isselected.
•Press"Enter"button tocopythe imagefiletotheharddrive.
•WhentheDVDimage wascopiedsuccessfully,thefollowingmessage
wilshowontheLCDdisplay:
9.2DeleteImage
Toremoveanimagefilefromapartitionthe"DeleteImage"function isused.
•Selectthe"Delete Image"functionwiththe"Up"or"Down"button and
press"Enter"button.
•TheCopyBox willaskwhetherthe imageshouldberemoved.Select
"Yes"or"No" withthe"Up"or"Down"button andpress"Enter"button.
•Aftertheimage file isremovedthe followingmessageappearsonthe
LCDdisplay:
9-01.Image P:A
Load
Load-A –16x 100%
4300MB
05:10
ImageloadOK
9-02.Image P:A
DeleteImage
DeleteImage?Yes
A:
DVD
4300MB
Partition:A
Imageisdeleted

UserManualCopyBoxStandardCD-DVDDuplicator- 9. Image
Page10van29
9.3ImageInfo
Thisfeaturedisplaysinformationabout animagefileonaspecificpartition.
•Selectthe"ImageInfo"functionwiththe"Up"or"Down"button.
•Press "Enter"button toviewthe imagefile information
9.4CompareImage
The"CompareImage"functionisusedtocomparethemasterdiscandthe copiedimagefileon theharddrive.Itchecksifthe
masterdiscandthecopiedimagefile are100%identical. TheComparefunctioncannotbeusedwith Audio-CDand Video-
CDformats.
•Selectthe"Compare Image" function with the"Up"or"Down" button.
•Press the 'Enter' button tostartthecompareprocess. The LCDdisplay
will showthefollowinginformation:
•Once the"Compare"functioniscompleted,thefollowinginformation
showsonthe LCDdisplay:
•Pressthe'Enter'button toviewthedetailsof themasterdisc:
•Press"Enter"button againtoviewthe detailsofthetarget image. Ifthe
comparisonissuccessful,the followinginformationwill appearon the
LCDdisplay:
•Ifanerrorisdetectedduringthe comparisonthiswill be reportedonthe
LCDdisplay. Presstwicethe"Enter" button toget informationaboutthe
error.
9.5SelectImage
Usingthisfunctionthedesiredpartitionontheharddrivecanbe selectedforduplication.
•Selectthe "Select Image"functionwiththe"Up"or"Down"button and
press"Enter"button.
•Selectapartitionwiththe"Up" or"Down"button.
•Afterthe partitionisselected,theLCDdisplayshowstheselectedresult.
Confirmyourselectionwith the"Enter"button.
9-03.ImageP:A
Ima
geInfo
ImgType: DVD+R
Capacity:
4300MB
9-04.ImageP:A
CompareImage
Comp-A-16x100%
4300MB
05:10
CompareOK:1
Fail:0
Diff:0
Src:01SUPER MUL
Total:
4300.0MB
Tgt:00HDD P: A
Identical
Tgt:00HDD P:A
TOCnotma
tch
9-05.ImageP:A
SelectImage
SelectPartition
A:
DVD
4300MB
SetPartitionto
A

UserManualCopyBoxStandardCD-DVDDuplicator- 9. Image
Page11van29
9.6ImageSourceDrive
Usingthisfunction,theDVDreaderoranyDVDwritercanbe selectedas"source"drive.Fromthe sourcedriveimagefilesare
copiedtotheharddrivepartitions.Bydefault,the topdriveissetasthesourcedrive.
•Selectthe"Image SrcDrive"functionwith the"Up"or"Down"button.
•Selectthe desiredsourcedrive withthe"Up"or"Down"button.
•Once thedesiredsource isselected,press the"Enter"button and the
LCDdisplaywillshowthefollowing information:
9.7ImageFormatInfo
Usingthisfunction,theformatoftheharddrivepartitionscanbe viewed. The CopyBoxusesF_S asthedefaultformat.
•Selectthe"Image Format Info"functionwiththe"Up"or"Down"button.
•Press "Enter"button. The LCDdisplayshowstheharddrivepartitions
format.
9.8Edit
Thisfeatureisusedtoaddatitle tothedifferentharddrivepartitions.Besidesamaintitle, alsotwosub-titlescanbeenteredfor
eachpartition.Eachlinecancontain12lettersornumbers.
•Selectthe"Edit" functionwiththe"Up"or"Down"button.
•Press "Enter"button. Nowthe firstcharacterofthe titlecanbe entered.
Usethe"Up"or"Down"button toselectthedesiredcharacterandpress
"Enter"button.Repeatthisprocess toenterthe followingcharacters.
•Ifneeded,thetwosub-titlesforthe partitioncanalsobeentered.
Repeattheprocedure describedaboveinordertoenterthe
characters.
9.9FormatHDD
Usingthisfunction,theoptionalharddrivecanbereformatted.
Please Note! All existingdataon the harddrive will beerasedwhen formatting.
•Selectthe "Format HDD"optionwiththe"Up"or"Down"button and
press"Enter"button.
•The CopyBoxusestheF_Sformattingasdefault.
9-06.ImageP:A
ImageSrcDrive
SelectImgScr:
0
1
CH01
S
-
MULTI
LoadImagefrom
DriveID
-
0
1
9-07.ImageP:A
Image
FormatInfo
ImageFormatInfo
F_S
9-08.ImageP:A
Edit
EditTitle
?
EditSub1Title
?
9-09.ImageP:A
FormatHDD
HDPartition
FormatSelect?
F_S

UserManualCopyBoxStandardCD-DVDDuplicator- 9. Image
Page12van29
•Press "Enter"button. The CopyBox will ask iftheharddriveneeds tobe
formatted.Select"Yes"or"No" with the"Up"or"Down"buttonandpress
"Enter"button.
•Afterformattingtheharddrive canbecheckedusingtheVerify
function.Select "Yes"or"No"withthe"Up"or"Down"button andpress
"Enter"button.
9.10Load ImageMethod
Bydefault, thepartitionlettersareautomaticallyassignedtoimage filesontheinternal harddrive.Thisfunctionallowspartition
letterstobeselectedmanually.
•Selectthe"LoadImage Method" functionwith the"Up"or"Down"
button.
•Press "Enter"button. Therecannowbe selectedfor"Auto" (default
setting)or"Manual". Use the "Up" or"Down"button toselectthedesired
setting andpress"Enter"button.
Alldatawill be
lost,format?
Yes
FormatHDDOK !
verifyHDD?
No
9-10.ImageP:A
LoadImageMethod
LoadImageMethod
Auto

UserManualCopyBoxStandardCD-DVDDuplicator- 10. Edit Track
Page13van29
10. EditTrack
UsingthisspecialfeatureanewAudio-CDcanbe composedfrom severaldifferentAudio-CD’s.The"EditTrack" functionconsists
of three parts:
1. CDtoCDEdit
2. CDtoHDDEdit
3. Close Session
•From themainmenuselectthe "EditTrack"functionwiththe"Up" or"Down"button andpressthe"Enter"buttontoselect
1.10 function.
10.1CDtoCDEdit
Thisfeatureallowstocopyone ormultipleaudiotracksfroman Audio-CDtoablankCD-R orCD-RWdisc.
•InsertanAudio-CDintheDVDreader.
•Placeone(ormore)CD-RdiscsintheDVDwriters.
•Press "Enter"button toselectthedesiredaudiotracks.1/10 indicates
track 1of 10, 03:25 indicatesthelengthof the track.
•Usingthe"Up"or"Down"button varioustrackscanbe selected.Press
"Enter"button toselect atrack. Onceatrackisselectedyouwill seea
"+"beforethetracknumber.Atrack canbedeselectedagainby
pressingthe"Enter"button again.
•Whenfinishedselectingthedesiredtracksusethe"End"functionwith
the "Up" or"Down"button:
•Toend the CDcompositionpress the"Enter"button and choose"Yes"or
"No".
•The CopyBoxwill burntheselectedaudiotracksonthetarget CD’s.
Afterthe tracksarecopiedpress the"Enter"button.The CopyBox will
nowaskifputting togetherthe CDneeds tobe continued.Select"Yes"
or"No"using the"Up"or"Down"button andpress"Enter"button.
•Ifyouhave chosentocontinuecomposingthesourceCD
automaticallyejects.TheCopyBox willnowask foranextmasterAudio-
CD.
•Once thenextAudio-CDisinsertedintotheDVDreaderdrive, the "Edit
Track"process canbe repeated.Oncealldesiredaudiotracksare
selectedthe"No"optionneedstobeselectedwiththe"Up"or"Down"
button whenthe CopyBoxaskstocontinue editing.
•Confirm"No" with the"Enter"button.TheCopyBox willnowask ifthe
discshouldbeclosed.Select"Yes" withthe"Up"or"Down"button
andpress"Enter"button.
•IftheCDiscompletedthefollowingmessageappearsonthe LCD
display:
The AudioCDisnowreadyforuse.
SelectTrack:
1/10
03:25
10-01.EditTrack
CD
to
CD
Edit
SelectTrack:
+1/10
03:25
SelectTrack:
End
1Trk
03:25
Endeditdisc
andburn?
Yes
Continueedit
nextDisc?
Yes
Insertnextdisc
Continueedit
nextDisc?
No
Closealldiscs
sessions?
Yes
CloseComplete
OK:7
Fail:0

UserManualCopyBoxStandardCD-DVDDuplicator- 10. Edit Track
Page14van29
10.2CDtoHDDEdit
Thisfeatureallowsseveral audiotrackstobeselectedandplacedonthe internalharddrivebeforeburningaCD-RorCD-RW.
ThisfeatureisavailableonlyiftheCopyBox isequippedwith theoptional harddrive.
•From the"EditTrack"menu(10)selectthe"CDtoHDD"functionwiththe
"Up"or"Down" button andconfirmwiththe "Enter" button.
•Thenwalkthroughthestepsdescribedinsection10.1until all desired
audiotracksarewrittentoatemporarypartitionoftheharddrive.
WhentheCopyBox askswhethereditingneedstobe continuedwitha
nextdisc;choose"No" withthe"Up"or"Down" button andpress"Enter"
button.
•Nowthe CopyBoxwill askwhetherthe tracksneedtobeburnedontoa
CDorwrittentoadiscimage. Choose"Burn"withthe"Up"or"Down"
button ifthe tracksneedtobe burnedtoaCDand confirmusing the
"Enter"button.
•The CopyBoxwill nowwrite theselectedaudiotrackstotheCD
recordablediscs.Oncethe writingprocesshasbeencompletedthe
followingmessageappearsonthe LCDdisplay:
•Iftheselectedaudiotracksmustfirstbe writtentoaharddrivepartition
select"Move"with the"Up"or"Down"button.Confirmyourselection
with the"Enter"button.
•Thenchooseaharddrivepartitionwheretheaudiotracksneedbe
movedto:
•Confirmyourselectionwith the"Enter"button.All audiotrackswillbe
movedtotheselectedpartition.Oncethemove iscompletethe
followingmessageappearsonthe LCDdisplay:
•Iftheselectedpartitionalreadycontainsdata theCopyBox will ask
whetherexistingdatashouldbeoverwritten.Select"Yes"or"No""Up" or
"Down" button andconfirmwiththe"Enter"button.
10.3CloseSession
Usingthisfunction,Audio-CD’swillbeclosedsonomoredata canbeadded.Afterclosingthe Audio-CD’scanbeplayedin
anyconventional AudioCDplayer.
•From the"EditTrack"menu(10)select"Close Session"with the"Up"or
"Down" button andpress"Enter"button.
•The CopyBoxwill askwhetherall sessions needtobeclosed.Select
"Yes"or"No" withthe"Up"or"Down"button andpress"Enter"button.
If"Yes"isselected,theLCDdisplaywill showthe followingmessage:
•Once the CDisclosedthefollowingmessagewillbedisplayedon
the LCDdisplay:
10.02.EditTrack
CD
toHDD Edit
Continueedit
nextDisc?
No
BurnorMoveto
partition?
Burn
BurnComplete!
OK:07
BurnorMoveto
partition?
Move
SelectPartition
A
MovingtoP:A
OK!
ImageExists
Overwrite?
Yes
10.04.EditTrack
CloseSession
ClosingSession
Pleasewait….
ClosingComplete
OK:7
Fail:0

UserManualCopyBoxStandardCD-DVDDuplicator- 11. Setup
Page15van29
11. Setup
Usingthe "Setup"menuall CopyBox settings canbeadjusted. However, it isadvisable nottochange thedefaultsettings aslong
asthere isnoneedforthis. The"Setup"menuconsistsof the followingitems:
1.
Language
2. Burn Speed
3. Read Speed
4. Auto StartDrive
5. StartupMenu
6. Auto Verify
7. Auto Compare
8. Auto Prescan
9. EjectDisc
10. Burn On The Fly
11. Burn Mode
12. DisplayTime
13.
Button Sound
14. Device Info
15. SystemInfo
16. QuickErase
17. Full Erase
18. Auto Close Tray
19. QuickCompare
20. TrayIn/Out
21. BootTime Delay
22. StartTray Eject
23. Disc Redetect
24. Show Burn Speed
PleaseNote! Whenasettingischangedremembertoconfirmthisbypressing the"Enter"button.
•Selectthe"Setup"menufromthemainmenuusing the"Up"or"Down"button andconfirmwith the"Enter"button.
11.1Language
Withthisfunction,the language canbe set. ThedefaultsettingisEnglish.
•Selectthe"Language"optioninthe"Setup"menuwith the"Up" or
"Down" button andpress"Enter"button.
•Selectthe desiredlanguageand confirmwith the"Enter"button.
11.2BurnSpeed
Thisfunctionallowsthedifferentmaximumwrite speedsforCD, DVDandAudioCDtobesetmanually.Whenusingthedefault
setting "Auto" the CopyBoxdeterminesthemaximumspeedaccordingtotheusedrecordablemedia. Insomecasesit maybe
desirabletomanuallylowerthemaximumburnspeed.
•Selectthe"BurnSpeed"optionfrom the"Setup" menuwiththe"Up"or
"Down" button andpress"Enter"button.
•Withthe"Up"or"Down"button,thesettingscanbeselectedforCD,
DVDandAudio-CD.Confirmyourselectionwith the"Enter"button.
•Selectthedesiredmaximumwritingspeedwith the"Up"or"Down"
button.Confirmbypressingthe "Enter"button.
11.3ReadSpeed
The"ReadSpeed"functionallowsthe readspeedoftheDVDreadertobe set manually.
•Select"ReadSpeed"optionfromthe"Setup"menuwiththe"Up" or
"Down" button andpress"Enter"button.
•Thedefaultsettingis"Maximum".Lowerspeeds canalsobe selected
using the"Up"or"Down"button.Confirmyourselectionwiththe"Enter"
button.
11-01.Setup
Language
Language
English
11-02.Setup
BurnSpeed
BurnSpeed
DVDBurnSpeed
11-03.Setup
ReadSpeed
ReadSpeed
Maximum
DVDBurnSpeed
16x

UserManualCopyBoxStandardCD-DVDDuplicator- 11. Setup
Page16van29
11.4AutoStartDrive
Thisfunctiondeterminesifthe CopyBoxmustautomaticallystartthe copyortestfunction.See alsofunction11.18 (AutoClose
Tray).
•Selectthe"AutoStartDrive"optionfromthe"Setup"menuwiththe "Up"
or"Down"button andpress "Enter"button.
•Thedefaultsettingis"Off".Selectthe desiredsetting with the"Up"and
"Down" buttons.Confirmyourselectionwith the"Enter"button.
11.5Startup Menu
Thisoption allowseachmenuitem(exceptforthe"AdvancedSetup"menu)tobeselectedasfirst menuwhenthe CopyBoxis
turnedon.
•Selectthe"Startup Menu"optionfromthe"Setup"menuwiththe"Up"or
"Down" button andpress"Enter"button.
•Thedefaultsettingis"Copy".Selectthe desiredsettingwiththe "Up"or
"Down" button.Confirmyourselectionwiththe"Enter"button.
11.6AutoVerify
ThisfeatureallowsDVDorCDdiscstobeautomaticallycheckedforreadabilityaftercopying.
•Selectthe"AutoVerify" optionfrom the"Setup" menuwiththe"Up"or
"Down" button andpress"Enter"button.
•The defaultsettingis"Off".Selectthe desiredsetting with the"Up"or
"Down" button.Confirmyourselectionwiththe"Enter"button.
11.7AutoCompare
Thisfeatureallowsthemasterdiscandthe copiedtargetdiscsbecomparedautomaticallyaftercopying.
•Selectthe"AutoCompare"option fromthe"Setup"menuwith the"Up"
or"Down"button andpress "Enter"button.
•The defaultsettingis"Off".Selectthe desiredsetting with the"Up"or
"Down" button.Confirmyourselectionwiththe"Enter"button.
11.8AutoPrescan
Thisfeatureallowsthemasterdisctobe automaticallycheckedforgood readabilitypriortotheburningprocess.
•Selectthe"AutoPrescan"optionfromthe"Setup"menuwiththe"Up"or
"Down" button andpress"Enter"button.
•The defaultsettingis"Off".Selectthe desiredsetting with the"Up"and
"Down" buttons.Confirmyourselectionwith the"Enter"button.
11-04.Setup
AutoStartDrive
AutoStartDrive
Off
11-05.Setup
StartupMenu
StartupMenu
1.Copy
11-06.Setup
AutoVerify
AutoVerify
Off
11-07.Setup
AutoCompare
AutoCompare
Off
11-08.Setup
AutoPrescan
AutoPrescan
Off

UserManualCopyBoxStandardCD-DVDDuplicator- 11. Setup
Page17van29
11.9EjectDisc
Thisfunctiondetermineswhat happens with discsafterthewriting process.Thisfunctionoffersthreepossibilities:
1. EjectGoodOnly:Onlysuccessfullyburneddisk areautomaticallyejected(defaultsetting).
2. Eject AllDisc:Alldiscsareautomaticallyejectedaftertheburningprocess.
3. Do Not Eject:Nodiscsare ejectedafterthe burnprocess.
•Selectthe"Eject Disc" optionfromthe"Setup"menuwiththe"Up" or
"Down" button andpress"Enter"button.
•Selectthedesiredsettingwith the"Up"and "Down"buttons.Confirm
yourselectionwiththe"Enter"button.
11.10BurnOn TheFly
Usingthisfunction,thecopymodecanbeset. Thedefaultsetting"On"copiesdata directlyfrom themasterdisctotheDVD
writers.When"Off" isselected, dataisfirstcopiedtothe(optional)harddriveandthencopiedtotheDVDwriters.
PleaseNote!Once "BurnontheFly"isdisabled, the word"safe" intheLCDappearstomenus1, 2and3
•Selectthe"BurnOnThe Fly"option fromthe"Setup"menuwith the"Up"
or"Down"button andpress "Enter"button.
•Selectthedesiredsettingwith the"Up"or"Down"button.Confirmyour
selectionwith the"Enter"button.
•Iftheoptional harddrive isnot installedandthe"Off"option isselected,
the followingmessageappearsontheLCDdisplay:
11.11BurnMode
Thisfeatureallowsthedifferentwriting methods tobe selected;
1. DAO (DiscAtOnce)Thisisthedefaultsetting.
2. TAO (Track AtOnce)
•Selectthe"BurnMode"optionfrom the"Setup" menuwith the"Up"or
"Down" button andpress"Enter"button.
•Selectthedesiredsettingwith the"Up"or"Down"button.Confirmyour
selectionwith the"Enter"button.
11.12DisplayTime
Thisfunctioncanturnon andoffthedisplayofthetotal burntimeaftertheburningprocess. Thedefaultsetting is"Off".
•Selectthe"DisplayTime"optionfromthe"Setup"menuwiththe"Up"or
"Down" button andpress"Enter"button.
•Selectthedesiredsettingwith the"Up"or"Down"button.Confirmyour
selectionwith the"Enter"button.
11-09.Setup
EjectDisc
EjectDisc
EjectGoodOnly
11-10.Setup
BurnOnThe Fly
BurnOnThe Fly
On
NoValidHDD!
11-11.Setup
BurnMode
BurnMode
DAO
11-12.Setup
DisplayTime
DisplayTime
O
ff

UserManualCopyBoxStandardCD-DVDDuplicator- 11. Setup
Page18van29
Alldatawill be
Losterase?Yes
11.13ButtonSound
Thisfeatureallowstheaudiosignalsfromthe controllerbuttons tobeturnedOnorOff.Thedefaultsettingis"On".
•Selectthe "SoundButton"optionfromthe"Setup"menuwiththe"Up"or
"Down" button andpress"Enter"button.
•Selectthedesiredsettingwith the"Up"or"Down"button.Confirmyour
selectionwith the"Enter"button.
11.14DeviceInfo
Thisfunctionshowsinformationaboutthe installedDVDreaderandDVDwriters.
•Select "DeviceInfo"optioninthe"Setup"menuwith the"Up"or"Down"
button andpress"Enter"button.
•Selectthedesireddriveusing the"Up"or"Down"button.Confirmyour
selectionwith the"Enter"button.
•Byagainpressingthe "Enter"button more informationaboutthedrive
canbedisplayed.
11.15SystemInfo
ThisfunctionshowssysteminformationabouttheCopyBox duplicator.
•Selectthe "SystemInfo"optioninthe"Setup"menuwith the"Up" or
"Down" button andpress"Enter"button.
•Press"Enter"button toviewmoreinformationaboutthe CopyBox
controller.
11.16Quick Erase
Usingthisfunction,rewritableDVD andCDdiscsalready containingdata canbeerasedquickly. The Quick Erase functiononly
reasestheTOC (TableOfContent)from therewritablediscs.
•Selectthe"QuickErase"option from the"Setup"menuwith the"Up"or
"Down" button andpress"Enter"button.
•Press"Enter"button.TheCopyBox will ask whetherthe rewritablediscs
must beerased.Select"Yes"or"No"with the"Up"or"Down"button and
press"Enter"button.
11.17FullErase
Usingthisfunction,rewritableDVD andCDdiscscanbe completelyerased.Comparedtothe"QuickErase" function,this
processtakesmuchmore time.
•Selectthe"Full Erase"option fromthe"Setup"menuwiththe"Up" or
"Down" button andpress"Enter"button.Forthenextsteps, seemenu
11.16 (QuickErase).
11-13.Setup
ButtonSound
ButtonSound
On
11-17.Setup
FullErase
11-14.Setup
DeviceInfo
01CH01
S
-
MULTI:Optiarc
11-15.Setup
SystemInfo
5105PXver:2.9FS
2011/7/18
ACARD
11-16.Setup
QuickErase
DVDRWAD-7280S
1.01

UserManualCopyBoxStandardCD-DVDDuplicator- 11. Setup
Page19van29
11.18AutoCloseTray*
Thisfunctionsetsthe numberofsecondsafterwhichthe traysof theDVDwriterswillbe closedautomaticallyafteratestsession.
Thisfeatureworksinconjunctionwithfunction 11.4(AutoStartDrive).The functioncanalsobe usefulwhentheCopyBox system
must performseveralindependenttestsessionsconsecutively.Seealsofunction12.6.
•Selectthe "AutoCloseTray"optionfromthe"Setup"menuwith the"Up"
or"Down"button andpress "Enter"button.
•Selectthe desirednumberof seconds (5,10,15,20,25, 30,35,40,45,
50)with the"Up"or"Down"button andconfirmwith the"Enter" button.
*Not availableontheCopyBox1
11.19Quick Compare*
Aftercopyingasmall partoftheburneddiscscanautomaticallybecomparedwiththemasterdisc. Thedefaultsetting is"Off".
•Selectthe"QuickCompare" optionfromthe"Setup"menuwith the"Up"
or"Down"button andpress "Enter"button.
•Selectthe desiredamount of datatobeautomaticallycomparedwith
the masterdisc(1byte,1Kbytes,10 Kbytes,100 Kbytes,1Mbytes,10
Mbytes,100 Mbytes)with the"Up" or"Down"button andconfirmwith
the "Enter"button.
*Not availableontheCopyBox1
11.20TrayIn/Out*
Thisfunctionsetsthe openingand closingofthedrivetrays. Theavailable optionsare"All Once"or"Divide 2".The lattersetting
allowstofirst openthetophalfof thetrays,thenthebottom half. "All Once" isthedefaultsetting.
•Selectthe"TrayIn/Out" optionfrom the"Setup"menuwith the"Up"or
"Down" button andpress"Enter"button.
•Selectthedesiredsettingwith the"Up"or"Down"button andconfirm
with the"Enter"button.
*Not availableontheCopyBox1
11.21BootTimeDelay*
Thisfunctionsetsthe total timetheCopyBox waitsduring startup forthedrive detectionphase.
•Selectthe"Boot TimeDelay"optionfromthe"Setup"menuwith the"Up"
or"Down"button andpress "Enter"button.
•The defaultis5seconds.Othervalues(5to99seconds)canbe selected
using the"Up"or"Down"button.Confirmyourselectionwiththe"Enter"
button.
*Not availableontheCopyBox1
11-18.Setup
AutoCloseTray
AutoCloseTray
10
11-21.Setup
BootTimeDelay
BootTimeDelay
5
11-19.Setup
QuickCompare
QuickCompare
10MBytes
11-20.Setup
TrayIn/Out
Tray-In/Out
AllOnce

UserManualCopyBoxStandardCD-DVDDuplicator- 11. Setup
Page20van29
11.22StartTrayEject*
Thisfunctionsetsifthedrivetrays areopenedautomaticallyafterstartingtheCopyBox.Thedefaultsettingis"On".
•Selectthe"StartTrayEject" option fromthe"Setup"menuwith the"Up"or
"Down" button andpress"Enter"button.
•Selectthedesiredsettingwith the"Up"or"Down"button.Confirmyour
selectionwith the"Enter"button.
*Not availableontheCopyBox1
11.23DiscRedetect*
ThisfunctionsetswhethertheCopyBoxwill trytodetect arecordablediscsforasecondtime whenitthefirsttimefails.This
optioncanbeusedwhendiscsof poorqualityareusedorwhendiscsaredirtyorscratched. The defaultsettingis"Off".
•Selectthe"DiscRedetect" option fromthe"Setup"menuwith the"Up"or
"Down" button andpress"Enter"button.
•Selectthedesiredsettingwith the"Up"or"Down"andb ttachthe
choicewith the"Enter"button.
*Not availableontheCopyBox1
11.24Show BurnSpeed*
Thisfunctionsetsiftheactual CD/DVDwritespeedisdisplayedontheLCDdisplaywhile duplicating. The defaultsettingis"On".
•Selectthe"ShowBurnSpeed" optionfromthe"Setup"menuwith the
"Up"or"Down" button andpress"Enter"button.
•Selectthedesiredsettingwith the"Up"or"Down"button.Confirmyour
selectionwith the"Enter"button.
*Not availableontheCopyBox1
11-22.Setup
Start
TrayEject
StartTrayEject
On
11-23.Setup
DiscRedetect
DiscRedetect
Off
11-24.Setup
ShowBurnSpeed
ShowBurnSpeed
On
Table of contents
Popular Disc Duplicator manuals by other brands
MicroBoards Technology
MicroBoards Technology Orbit II Reference manual
Savin
Savin 3150DNP operating instructions
Renkforce
Renkforce ATS018T-W050V Important information
Disc Makers
Disc Makers Forte quick start guide
General International
General International 25-036 Setup & operation manual
Aluratek
Aluratek AHDDUB100 quick start guide
