Virutex SCB324 User manual

Sierra de Calar a batería
Cordless jig saw
Scie sauteuse à batterie
Akku-stichsäge
Seghetto alternativo a batteria
Serra tico tico a bateria
Лобзик электрический
Wyrzynarka Akumulatorowa
SCB324
MANUAL DE INSTRUCCIONES
OPERATING INSTRUCTIONS
MODE D’ EMPLOI
GEBRAUCHSANWEISUNG
MANUALE D’ISTRUZIONI
MANUAL DE INSTRUÇÕES
ИНСТРУКЦИЯ ПО ЭКСПЛУАТАЦИИ
INSTRUKCJA OBSŁUGI

2
ESPAÑOL
SIERRA DE CALAR A BATERÍA SCB324
(Ver imágenes pag. 63 - 66)
Importante
1. INSTRUCCIONES DE SEGURIDAD
1.1INSTRUCCIONESGENERALESDESEGURIDAD
Antes de utilizar la máquina lea atenta-
menteésteMANUALDEINSTRUCCIONES
Asegúrese de haberlo comprendido antes
de empezar a operar con la máquina.
Conserve todas las advertencias e instrucciones para
referenciaenel futuro.Eltérmino "herramientaeléctrica"
en las advertencias se refiere a la herramienta eléctrica
accionada por la red eléctrica (con cable) o a una he-
rramienta eléctrica accionada por batería (sin cable).
Leaestasinstrucciones. La no observación
de todas las instrucciones relacionadas a
continuación puede dar como resultado
un choque eléctrico, fuego y/o una le-
sión seria.
1) Área de trabajo
a) Mantenga el área de trabajo limpia y bien iluminada.
Las áreas desordenadas y oscuras provocan accidentes.
b) No maneje herramientas eléctricas en atmósferas ex-
plosivas,tales comoenpresenciadelíquidos inflamables,
gases o polvo. Las herramientas eléctricas crean chisaps
que pueden encender el polvo o humos.
c) Mantenga alejados a los niños y curiosos mientras
maneja una herramienta eléctrica. Las distracciones
pueden causarle la pérdida del control.
2) Seguridad eléctrica
a) La clavija de la herramienta eléctrica debe coincidir
con la base de la toma de corriente. No modificar nunca
la clavija de ninguna manera. No usar ningún adaptador
de clavijas con herramientas eléctricas puestas a tierra.
Clavijas no modificadas y bases coincidentes reducirán
el riesgo de choque eléctrico.
b) Evite el contacto del cuerpo con superficies puestas
a tierra como tuberías, radiadores, cocinas eléctricas y
refrigeradores. Hay un riesgo aumentado de choque
eléctrico si su cuerpo está puesto a tierra.
c) No exponga las herramientas eléctricas a la lluvia
o a condiciones de humedad. El agua que entre en la
herramienta aumentará el riesgo de choque eléctrico.
d) No abuse del cable. No usar nunca el cable para
llevar, levantar o desenchufar la herramienta eléctrica.
Mantenga el cable lejos del calor, aceite, cantos vivos
o piezas en moviento. Los cables dañados o enredados
aumnetan el riesgo de choque eléctrico.
MANUAL DE INSTRUCCIONES
OPERATING INSTRUCTIONS
MODE D'EMPLOI
GEBRAUCHSANWEISUNG
MANUALE D'ISTRUZIONI
MANUAL DE INSTRUÇÕES
ИНСТРУКЦИЯ
ПО
ЭКСПЛУАТАЦИИ
INSTRUKCJA OBSŁUGI
página/page
Seite/pagina
страница/strona
ESPAÑOL Sierra de calar a batería SCB324
2
ENGLISH SCB324 Cordless jig saw
9
FRANÇAIS Scie sauteuse à batterie SCB324
16
DEUTSCH Akku-stichsäge SCB324
24
ITALIANO Seghetto alternativo a batteria SCB324
31
PORTUGUÉS Serra tico tico a bateria SCB324
39
РУССКИЙ Лобзик электрический SCB324
46
РOLSKI Wyrzynarka Akumulatorowa SCB324
54

3
e) Cuando maneje una herramienta eléctrica en el
exterior, use una prolongación de cable adecuada para
uso en el exterior. El uso de una prolongación de cable
adecuada para uso en el exterior reduce el riesgo de
choque eléctrico.
f) Si fuese imprescindible utilizar la herramienta eléc-
trica en un entorno húmedo, es necesario conectarla
a través de un fusible diferencial. La aplicación de un
fusible diferencial reduce el riesgo a exponerse a una
descarga eléctrica.
3) Seguridad personal
a)Esté alerta, vigile lo que está haciendo y use el sentido
común cuando maneje una herramienta eléctrica. No
use una herramienta eléctrica cuando esté cansado o
bajola influenciade drogas,alcohol omedicamentos. Un
momento de distracción mientras maneja herramientas
eléctricas puede causar un daño personal serio.
b)Useequipo deseguridad.Lleve siempreprotecciónpara
losojos. Lautilización paralas condicionesapropiadas de
un equipo de seguridad tal como mascarilla antipolvo,
zapatos no resbaladizos, gorro duro, o protección para
los oídos reducirá los daños personales.
c) Evite un arranque accidental. Asegúrese de que el
interruptor está en posición “abierto” antes de enchufar
laclavija.Transportar herramientaseléctricas coneldedo
sobre el interruptor o enchufar herramientas eléctricas
que tienen en interruptor en posición “cerrado” evita
accidentes.
d) Retire llave o herramienta antes de arrancar la herra-
mienta eléctrica. Una llave o herramienta dejada unida
a una pieza rotativa de una herramienta eléctrica puede
causar un daño personal.
e) No se sobrepase. Mantenga los pies bien asentados
sobre el suelo y conserve el equilibrio en todo momento.
Estopermiteun mejorcontrol dela herramientaeléctrica
en situaciones inesperadas.
f) Vista adecuadamente. No vista ropa suelta o joyas.
Mantenga su pelo, su ropa y guantes elejados de las
piezas en movimiento. La ropa suelta, las joyas o el pelo
largo pueden ser cogidos en las piezas en movimiento.
g) Si hay dispositivos para la conexión de medios de
extracción y recogida de polvo, asegúrese de que éstos
estén conectados y se usen correctamente. El uso de
estos dispositivos puede reducir los riesgos relacionados
con el polvo.
4) Utilización y cuidados de las herramientas eléctricas.
a)No fuerce laherramienta eléctrica. Usela herramienta
eléctrica correcta para su aplicación. La herramienta
eléctrica correcta hará el trabajo mejor y más seguro
al ritmo para la que fue concebida.
b)No usela herramientaeléctrica siel interruptorno gira
“cerrado” y “abierto”. Cualquier herramienta eléctrica
que no pueda controlarse con el interruptor es peligrosa
y debe repararse.
c) Desenchufe la cjavija de la fuente de alimentación y
o batería antes de efectuar cualquier ajuste, cambio de
accesorios, o de almacenar las herramientas eléctricas.
Talesmedidas preventivasde seguridadreducen elriesgo
de arrancar la herramienta accidentalmente.
d) Almacene las herramientas eléctricas inactivas fuera
del alcance de los niños y no permita el manejo de la
herramienta eléctrica a personas no familiarizadas con
las herramientas o con estas instrucciones. Las herra-
mientas eléctricas son peligrosas en manos de usuarios
no entrenados.
e) Mantega las herramientas eléctricas. Compruebe que
las partes móviles no estén desalineadas o trabadas, que
no haya piezas rotas u otras condiciones que puedan
afectarel funcionamientodelasherramientaseléctricas.
Las herramientas eléctricas se reparan antes de su suo,
cuando están dañadas. Muchos accidentes son causados
por herramientas eléctricas pobremente mantenidas.
f) Mantenga las herramientas de corte afiladas y limpias.
Las herramientas de corte mantenidas correctamente
con los bordes de corte afilados son menos probables
de trabarse y más fáciles de controlar.
g) Use la herramienta eléctrica, accesorios y puntas de
herramienta, etc. de acuerdo con estas instrucciones y
de la manera prevista para el tipo particular de herra-
mienta eléctrica, teniendo en cuenta las condiciones de
trabajo y el trabajo a desarrolar. El uso de la herramienta
eléctrica para aplicaciones diferentes de las previstas
podría causar unas situación de peligro.
5) Servicio
a) Haga revisar su herramienta eléctrica por un servicio
de reparación cualifcado usando solamente piezas de
recambio idénticas. Esto garantizará que la seguridad
de la herramienta eléctrica se mantiene.
1.2 INSTRUCCIONES DE SEGURIDAD PARA
EL MANEJO DE LA SIERRA
Nunca usar la máquina sin la protección.
Mantener las protecciones en su lugar.
• No perforar la carcasa de la máquina, pues se interrumpe
el aislamiento de protección (utilizar rótulos adhesivos
para su identificación)
• Controlar el área de trabajo con un aparato adecuado
ya que puede haber conductores eléctricos, tuberías de
gas y/o agua ocultas.
• Sostener siempre la máquina fuertemente con ambas
manos y manteniendo una posición estable.
• Comprobar la correcta sujeción de la pieza de trabajo
antes de empezar cualquier operación.
• Para serrar metales, lubrificar con aceite el punto
de corte.
• Utilice siempre el tipo de hoja de sierra adecuado para

4
1.3 INSTRUCCIONES DE SEGURIDAD PARA EL
USO Y CUIDADO DE LA BATERÍA Y EL CARGADOR
Nocalientela batería por encima de 45°C.
Protejala de una exposición prolongada
a los rayos de sol directos.
No deseche la batería en el fuego.
Proteja la batería de la lluvia.
• Recargue solamente con el cargador especificado por
el fabricante. Un cargador que es adecuado para un
tipo de bloque de baterías puede ocasionar un peligro
de incendio cuando se usa con otro bloque de baterías.
• Use las herramientas solamente con los bloques de
baterías diseñados específicamente. El uso de cualquier
otro bloque de baterías puede ocasionar un peligro de
daños e incendio.
• Cuando un bloque de baterías no esté en uso, man-
téngalo alejado de otros objetos metálicos como clips
para papeles, monedas, llaves, clavos, tornillos, u otros
pequeños objetos matálicos que puedan establecer
una conexión de un terminal al otro. Un cortocircuito
entre ambos terminales de la batería puede ocasionar
quemaduras o un incendio.
• En condiciones abusivas, puede derramarse líquido de
la batería; evite el contacto. Si accidentalmente tiene
lugar un contacto, lávelo con agua. Si el líquido toca
a los ojos, busque ayuda medica adicionalmente. El
liquido derramado de la batería puede causar irritación
o quemaduras.
• No utilice baterías o útiles dañados o modificados. Las
baterías dañadas o modificadas puede comportarse de
forma imprevisible y no correcta y producir un fuego o
explosión y ocasionar un daño.
• Evite encendidos involuntarios. Asegurese que el
interruptor de encendido/apagado esté en la posición
de apagado antes de colocar la batería.
Llevar las herramientas eléctricas con el dedo en el
interruptor o insertar la batería con el interruptor en
posición encendido da lugar a accidentes.
• No abrir las baterías. Existe peligro de dañar el circuito.
• En caso de daños y uso indebido de la batería, pueden
emitirse vapores. En este caso sitúese en un lugar venti-
lado y busque asistencia médica en caso necesario. Los
vapores pueden irritar el sistema respiratorio.
• Cuando la batería esté defectuosa, el líquido puede
escapar y entrar en contacto con componentes adya-
centes. Revise las piezas correspondientes, límpielas o
cada clase de material.
• Emplear únicamente hojas de sierra con buen filo y
en perfecto estado. Sustituir inmediatamente las hojas
de sierra fisuradas, dobladas o melladas.
• No fuerce el avance de la sierra, adaptado al tipo y
espesor del material a trabajar.
• Al serrar siga la dirección de los dientes de la sierra: si
se fuerza con desplazamientos laterales sólo conseguirá
la rotura de la hoja.
• Tener cuidado con las virutas que saltan. Sostener la
herramienta de modo que las chispas salten donde no
esté usted ni otras personas ni materiales inflamables.
• No ejerza presión excesiva sobre la base, ésta sirve de
apoyo, y lo único que conseguirá será frenar el avance.
• Si debe cortar chapas de poco grosor, es conveniente
sujetarlas sobre una base de madera para evitar la
vibración de la chapa y accidentes.
• Asegúrese que al trabajar, la placa base se apoya
totalmente en la superficie de trabajo.
• La trayectoria de corte debe encontrarse libre de
obstáculos en su parte superior e inferior.
• En ningún caso ponga en marcha la máquina con la
hoja de sierra en contacto con el material a trabajar, ya
que se le solicita un esfuerzo inadecuado. Introduzca la
sierra cuando la máquina haya alcanzado la velocidad
seleccionada.
• En aquellos trabajos que se produzca polvo nocivo
para la salud debe emplearse una mascarilla antipolvo.
No se puede trabajar material que contenga amianto.
• Para trabajar con la máquina, utilizar siempre gafas
de protección y protectores auditivos. Otros equipos
de protección personal como mascarilla protectora
de polvo, guantes, casco y mandil pueden usarse si es
necesario, así como es recomendable usar calzado de
seguridad antideslizante. En caso de duda, se aconseja
usar el equipo protector.
• Al trabajar, no mantener nunca la mano o los dedos
delante de la hoja de sierra.
• Asegurarse que las aberturas de ventilación siempre
estén libres cuando se trabaja con polvo. Si es necesario
limpiarel polvo,primero desconectarla máquina,no uti-
lizar objetos metálicos y evitar dañar las partes internas.
• Al terminar el trabajo, desconectar la máquina y
esperar al paro de la hoja de sierra antes de extraerla
de la ranura de corte y depositarla (peligro de rebote).
• Quite la batería antes de llevar a cabo cualquier trabajo
en la máquina.
• Al parar la máquina debe hacerse siempre por medio
del interruptor, no quitando la batería.
Cada vez que vaya a utilizar la máquina
controleelestadodelabatería.Debesus-
tituirlaenelcasodeque este deteriorada.
• Montar la batería 2 o 4 Ahsolamente en posición
desconectada.

5
reemplácelas si es necesario.
• Proteja la batería contra el calor, la irradiación solar
continua y el fuego. Existe peligro de explosión.
Leatodaslasinstrucciones y advertencias
de seguridad.
• Proteja el cargador de la batería de la lluvia y la
humedad. La entrada de agua en el mismo aumenta el
riesgo de descarga eléctrica.
• No cargue otras baterías. El cargador de la batería
sólo es adecuado para cargar baterías de iones de litio
dentro del rango de tensión indicado. De lo contrario,
existe peligro de incendio y explosión.
• Mantenga el cargador de la batería limpio. La suciedad
puede causar peligro de descarga eléctrica.
• Revise el cargador de la batería, el cable y el enchufe
siempre antes de usarlos. No utilice el cargador cuando
se detecten defectos. No abra el cargador por su cuenta,
hágalo reparar sólo por personal cualificado que utilice
repuestos originales. Los cargadores, los cables y los en-
chufesdañadosaumentan elriesgo dedescargaeléctrica.
• No utilice el cargador de la batería en superficies
fácilmente inflamables, por ejemplo, papel, textiles,
etc..., o en ambientes combustibles. Existe peligro de
incendio debido al calentamiento del cargador durante
el ciclo de carga.
2. CARACTERÍSTICAS TÉCNICAS
Tensión de la batería.........................................................20 V
Carreras por minuto.......................................700-3000/min
Tipo de batería.............................................................Li-Ion
Tiempo de carga de la batería..................................60 min
Capacidad de la batería..............................................2 o 4 Ah
Longitud de la carrera.............................................26 mm
Movimiento pendular........................................................Sí
Capacidaddeinclinacióndelabase(amboslados)....45º/45°
Velocidad regulable......................................................Sí
Sistema de fijación rápido.....................................................Sí
Capacidad de corte en madera............................85 mm
Capacidad de corte en aluminio..............................20 mm
Capacidadde corte en acero........................................10 mm
Peso sin batería...................................................................2,3 Kg
Nivel de Presión acústica Ponderado A.................87 dBA
Nivel de Potencia acústica Ponderada A..............98,5 dBA
¡Usar protectores auditivos!
Nivel total de emisión de vibraciones.........ah: 3,5 m/s2
3. COMPONENTES
1. Interruptor de encendido/apagado
2. Botón de bloqueo
3. Ranuras de ventitalción
4. Bloqueo de la batería*
5. Indicadores del estado de la carga de batería*
6. Botón de control del estado de carga de la batería*
7. Batería*
8. Cubierta protectora
9. Lámpara LED
10. Protector de contacto
11. Soporte de sierra
12. Rodillo guía
13. Mando ajuste pendulo
14. Placa base
15. Protector superficies delicadas
16. Rueda selección de velocidad de golpe
17. Llave Allen
18. Hoja de sierra*
19. Cargador* (Fig. 4)
20. Etiqueta del cargador* (Fig. 4)
21. Indicador (rojo)* (Fig. 4)
22. Indicador (verde)* (Fig. 4)
23. Tornillo de montaje de la placa base (Fig. 7)
24. Escala graduada (Fig. 8)
*No incluido
4. EQUIPO STANDARD
• Protector superficies delicadas
• Llave Allen
• Manual de instrucciones de servicio
• Garantía
5. CARACTERISTICAS DE LA MÁQUINA
Motor sin escobillas
La herramienta eléctrica está equipada con un motor sin
escobillas que proporciona las siguientes ventajas (en
comparación con la herramienta eléctrica que tiene un
motor con escobillas):
• Alta fiabilidad debido a la falta de piezas que se des-
gastan (escobillas de carbón, conmutador).
• Mayor tiempo de funcionamiento en una sola carga.
• Diseño compacto y ligero.
Protección de temperatura
El sistema de protección de temperatura permite des-
activar automáticamente la herramienta eléctrica en
caso de exceso de carga o cuando la temperatura de la
batería 7 (Fig. 0) excede los 70ºC. El sistema garantiza
la protección de la herramienta eléctrica contra daños
en caso de un uso inadecuado.
Protección contra sobrecargas
La batería 7 (Fig. 0) está protegida por el sistema de
seguridad contra descarga completa. En este caso, la
herramienta eléctrica se desconecta automáticamente.

6
ITALIANO
No intente encender la herramienta
eléctrica cuando el sistema de protec-
ción esté activado, la batería 7 (Fig. 0)
puede dañarse.
Indicadores del estado de carga de la batería (ver
Fig. 5)
Alpulsar el botón6 los indicadores5 mostrarán elestado
de carga de la batería 7.
Protección contra sobrecalentamiento
En caso de sobrecalentamiento, el sistema de protección
delmotor, apaga automáticamentela herramientaeléc-
trica. Si esto ocurre, deje que la herramienta eléctrica
se enfríe antes de volver a encenderla.
Protección contra sobrecargas
El sistema de protección contra sobrecargas del motor
apagaautomáticamentela herramientaeléctricacuando
se opera de una manera que provoca una corriente
anormalmente alta.
Arranque suave
El arranque suave permite que la herramienta eléctrica
accione la hoja de sierra 18 (Fig. 0) gradualmente sin
sacudidas ni contragolpes.
Desaceleración
La interrupción del trabajo por rotura de la herramienta
detiene la hoja de sierra 18 (Fig. 0) dentro de los 2
segundos posteriores a la desactivación.
Lámpara LED
Al pulsar el interruptor de encendido / apagado 1, la
lámpara LED 9 se enciende automáticamente y permite
realizar tareas en condiciones de poca iluminacion.
6. PROCEDIMIENTO DE CARGA DE LA BATERÍA
Tiempo de carga de la bateria
Funcionamiento inicial de la herramienta eléctrica
Antes del primer uso, la batería 7 (Fig. 0) se debe cargar
completamente.
Proceso de carga (ver Fig. 3)
• Presione el bloqueo de la batería 4 y retire la batería
7 (ver Fig. 3.1).
• Conecte el cargador 19 al suministro de energía.
• Inserte la batería 7 en el cargador 19 (ver Fig. 3.2).
• Después de la carga, desconecte el cargador 19 del
suministro de energía.
• Retire la batería 7 del cargador 19 y monte la batería
7 en la herramienta eléctrica (ver Fig. 3.3).
Indicadores del cargador (ver Fig. 4)
Los indicadores del cargador 21 y 22 informan sobre
el proceso de carga de la batería 7 (Fig. 0). Las señales
de los indicadores 21 y 22 se muestran en la etiqueta
20 (ver Fig. 4).
• Fig. 4.1 - (El indicador verde 22 está iluminado, la ba-
tería 7 no está colocada en el cargador 19) – el cargador
19 está conectado a la red eléctrica (listo para cargar).
• Fig. 4.2 - (El indicador verde 22 está parpadeando, la
batería 7 está colocada en el cargador 19) – la batería
7 se está cargando.
• Fig. 4.3 - (El indicador verde 22 está iluminado, la
batería 7 está colocada en el cargador 19) - la batería
7 está completamente cargada.
• Fig. 4.4 - (El indicador rojo 21 está iluminado, la
batería 7 está colocada en el cargador 19) - el proceso
de carga de la batería 7 se ha interrumpido debido a
una temperatura inadecuada. Cuando las condiciones
de temperatura sean normales, el proceso de cargar
se reanudará.
• Fig. 4.5 - (El indicador rojo 21 está parpadeando, la
batería 7 está colocada en el cargador 19) – el proceso
de carga de la batería 7 se ha interrumpido debido a
un fallo en la misma. Sustituya la batería defectuosa 7
está prohibido su posterior uso.
Durante el proceso de carga, la batería 7 y el cargador
19 se calientan, esto es un proceso normal.
7. PUESTA EN MARCHA
Antes de montar la batería 2 o 4 Ah, comprobar siem-
pre si el interruptor de conexión/desconexión 1 (Fig.
0) trabaja correctamente y regresa a la posición OFF
cuando lo suelta.
Para la puesta en marcha de la máquina pulsar el botón
2 (Fig. 0) y mantener accionando el pulsador 1 (Fig.
0). Si se desea realizar un trabajo continuo mantener
accionado el pulsador 1 (Fig. 0). Para parar la máquina
soltar el pulsador A.
8. MONTAJE Y CAMBIO DE LA HOJA DE SIERRA
Asegurarse siempre que la batería está
quitada de la máquina antes de cualquier
manipulación
Esta sierra caladora dispone de un sistema “Quick fix”
de retención de la hoja de sierra. Para montar la hoja
de sierra proceder de la siguiente manera:
• Girar la cubierta protectora 8 (Fig. 1.1-1.2) hasta el
tope y mantenerla en esta posición.
• Introducir la hoja de sierra 18 (Fig. 1.2) hasta el fondo,
apoyando la parte posterior en la guía de la rueda 12
(Fig. 0).

7
• Soltar la cubierta protectora 8 (Fig. 1.1) y presionar la
hoja de la sierra hasta que la cubierta protectora 8 (Fig.
1.1) vuelva a su posición inicial. Asegurarse que la hoja
de la sierra ha quedado fijada correctamente.
Es conveniente engrasar periódicamente con una gota
de aceite la zona de contacto entre la hoja de sierra y la
rueda de apoyo, así como el eje-soporte de dicha rueda.
9. AJUSTE DEL MOVIMIENTO PENDULAR
El mecanismo pendular proporciona un movimiento
oscilante en la hoja de sierra que permite mejorar las
condiciones de corte, incrementando la velocidad del
trabajo en función del material.
Para regular la amplitud de la oscilación, actuar sobre
el mando 13 (Fig. 9). En la posición 0 la oscilación
queda anulada.
El movimiento pendular se incrementa de la posición 1 a
la posición 3. El cambio de posición puede ser efectuado
con la máquina en marcha.
Ver condiciones de trabajo óptimas, en función del
material a trabajar.
MATERIAL POSICIÓN DEL REGULADOR
MADERA 1-2-3
ACERO 0
ALUMINIO 0-1
GOMA 0
CERAMICA 0
10. REGULACIÓN ELECTRÓNICA DE VELOCIDAD
La máquina va provista de un circuito electrónico que
permite un arranque suave y mantener la velocidad
prácticamente constante hasta la potencia nominal. El
regulador 16 (Fig. 0) va incorporado en la parte lateral
izquierda trasera de la máquina.
Para obtener la velocidad deseada debe actuarse sobre el
mando regulador 16 (Fig. 0). La posición 1 corresponde
a la mínima velocidad y la 6 a la máxima del circuito
electrónico.
La regulación electrónica puede efectuarse con la má-
quina en marcha. El mejor número de carreras, depende
del material y en cualquier caso de las condiciones de
trabajoque puedenobtenersemediante ensayopráctico.
11. TIPOS DE CORTES
Asegurarse siempre que la batería está
quitadadela máquina antes de cualquier
manipulación.
Cortes inclinados (Fig. 7)
Para trabajar con cortes inclinados aflojar el tornillo 23
(Fig. 7) con la llave de servicio 17 (Fig. 7), e inclinar la
base según el ángulo de corte deseado que viene indi-
cado en la escala graduada 24 (Fig. 8) incorporada en la
propia base. Apretar fuertemente el tornillo 23 (Fig. 7).
La base debe colocarse en la posición central, de manera
que permita sin limitación la inclinación de la hoja de
sierra.
Cortes verticales
La base se coloca en su posición máxima hacia atrás,
quedando la hoja de sierra centrada.
Para iniciar el trabajo en madera en cortes interiores (Fig.
6) puede apoyarse el conjunto por la parte delantera de
la placa base y presionar lentamente hasta que la hoja
de sierra haya atravesado el material a trabajar.
En caso de falta de práctica o en el trabajo en otros
materiales es necesario efectuar un agujero previo.
Para efectuar esta operación el mecanismo pendular,
regulado mediante el mando 13 (Fig. 9) debe estar en
la posición 0.
12. PROTECCIÓN PARA SUPERFICIES DELICADAS
Asegurarse siempre que la batería está
quitada de la máquina antes de cualquier
manipulación.
Para montar el protector de superficies delicadas,
engancharlo en el frontal de la base de apoyo 14 (Fig.
1 y 2) como se indica en la (Fig. 2). Presionar la parte
trasera hacia arriba hasta dejarlo enclavado como
indica la (Fig. 2).
La base de apoyo 14 (Fig. 2) que lleva un inserto de
acero ofrece una gran estabilidad y puede utilizarse el
protector de superficies delicadas 15 (Fig. 2) para trabajar
superficies metálicas u otros materiales poco delicados.
Al trabajar materiales que pueden rayarse fácilmente, es
conveniente usar el protector de superficies delicadas
15 (Fig. 2) a fin de no dañar las superficies delicadas.
13. ENTRADA DEL CORTE SIN TALADRO
Será posible hacer recortes en madera sin realizar un
taladro previo, dejando penetrar lentamente la hoja de
sierra en el material con la máquina en marcha. Esto
requiere sin embargo de cierta experiencia.
Apoyar el canto delantero de la placa base 14 (Fig. 6)
inclinandola máquina hacia arriba, yconectarla. Sujetar
la máquina firmemente y con fuerza contra la pieza de
trabajo y descenderla lentamente para que la hoja de
sierra vaya penetrando en la pieza de trabajo.
Una vez traspasado el material, colocar la máquina en
la posición de trabajo normal, de manera que la placa
base asienta con toda su superficie y continuar serrando
según trazo.
Al terminar de serrar, primero desconectar la máquina
y después sacar la hoja de sierra de la ranura de corte.
ITALIANO

8
14. HOJAS DE SIERRA OPCIONALES
(juego de 5 unidades)
• 3440095 Para el corte de madera blanda y dura hasta
60 mm. Corte fino. (HCS dentado tipo Triscada, Afilada,
paso 4 mm, long. 75)
• 3440167 Para el corte de madera blanda y dura hasta
80 mm. Corte fino. (HCS dentado tipo Triscada, Afilada,
paso 4 mm. long. 105)
• 3440094 Para el corte de madera dura y blanda hasta
60mm. Apropiada para cortescurvos. (HCS dentadotipo
Triscada, Afilada, paso 4 mm. long. 75)
• 3440093 Para el corte de madera dura y blanda contra-
placada o aglomerada hasta 30 mm. Corte muy fino (HCS
dentado tipo Afilada, Rectificada, paso 2,5 mm. long. 75)
• 3440163 Para el corte de madera dura y blanda
contraplacada o aglomerada hasta 30 mm. Corte muy
fino (HCS dentado tipo Afilada, Rectificada, paso 2,5
mm. long. 105)
• 3440097 Para el corte de madera dura y blanda con-
traplacada o aglomerada hasta 60 mm. Linoleum, fibras
aislantes y plásticos flexibles hasta 8 mm. Corte muy fino
(HCSdentadotipoAfilada,Rectificada, paso4mm,long. 75)
• 3440164 Para el corte de madera dura y blanda contrapla-
cadao aglomerada hasta 80 mm. Linoleum,fibras aislantes
y plásticos flexibles hasta 8 mm. Corte muy fino (HCS
dentado tipo Afilada, Rectificada, paso 4 mm, long. 105)
• 3440096 Para el corte de madera dura y blanda hasta
60 mm. Poliuretano expandido hasta 40 mm. Corte basto
(HCS dentado tipo Triscada, paso 3, long. 75)
• 3440098 Acero dulce hasta 3 mm. Aluminio y metales no
férreos hasta 4 mm. Melamina y fibras sintéticas hasta 8
mm.(HSS dentadotipo Ondulada,paso 1,2mm,long. 52)
• 3440165 Acero dulce hasta 3 mm. Aluminio y metales
no férreos hasta 4 mm. Melamina y fibras sintéticas
hasta 8 mm. (BIM dentado tipo Ondulada, paso 1,2
mm, long. 105)
• 3440099 Acero dulce hasta 6 mm. Aluminio y metales no
férreoshasta 8mm.Melaminayfibras sintéticashasta 10
mm. (HSS dentado tipo Ondulada, paso 2 mm, long. 52)
• 3440166 Acero dulce hasta 6 mm. Aluminio y metales
no férreos hasta 8 mm. Melamina y fibras sintéticas
hasta 10 mm. (BIM dentado tipo Ondulada, paso 2
mm, long. 105)
• 3440100 Para el corte de toda clase de paneles dobles
con cámara y grandes espesores, Fibrocemento y sinté-
ticos hasta 10 mm. Acero dulce hasta 6 mm. Aluminio y
metales no férreos hasta 8 mm. (HSS dentado Triscada,
paso 3 mm long. 75)
15. MANTENIMIENTO
Asegurarse siempre que la batería está
quitada de máquina antes de cualquier
manipulación.
• Inspección de la hoja de sierra: Emplear únicamen-
te hojas de sierra con buen filo y en perfecto estado.
Sustituir inmediatamente las hojas de sierra fisuradas,
dobladas o melladas.
• Inspeccionar los tornillos de montaje: Regularmente
inspeccionar todos los tornillos de montaje y asegurarse
deque estén apretados firmemente. Si cualquier tornillo
estuviera suelto, volver a apretarlo inmediatamente. El
no hacer esto provocaría un riesgo.
• Mantener siempre libres y limpias las aberturas de ventilación.
• Limpiar esmeradamente la máquina después de utili-
zarla. Soplar regularmente el motor con aire a presión.
• Limpiar con regularidad palanca de retención (sistema
“Quick Fix”) de la hoja de sierra especialmente cuando
se hayan serrado materiales que producen mucho polvo.
Así se garantizará el correcto funcionamiento de la
palanca de retención.
• Lubricar de vez en cuando la guía de la hoja de la
sierra con una gota de aceite y comprobar que no esté
gastada. Si está gastada, después de un uso prolongado,
tendrá que ser sustituida en un centro de asistencia
técnica VIRUTEX
• Engrase
(a realizar por el servicio técnico oficial)
No se deben aflojar los tornillos del cabezal de engranaje
duranteelperiodo degarantía, delo contrarioseperdería
el derecho de la misma.
La grasa del cabezal debe ser sustituida tras 1500 horas
de trabajo.
16. MANTENIMIENTO DE LA BATERIA
• Realice la carga oportunamente, antes de que la ba-
tería 7 (Fig. 0) esté completamente agotada. Detenga la
operación en baja energía y cárguela inmediatamente.
• No sobrecargue la batería 7 cuando la misma esté com-
pletamentecargada,de locontrarioseacortará suvidaútil.
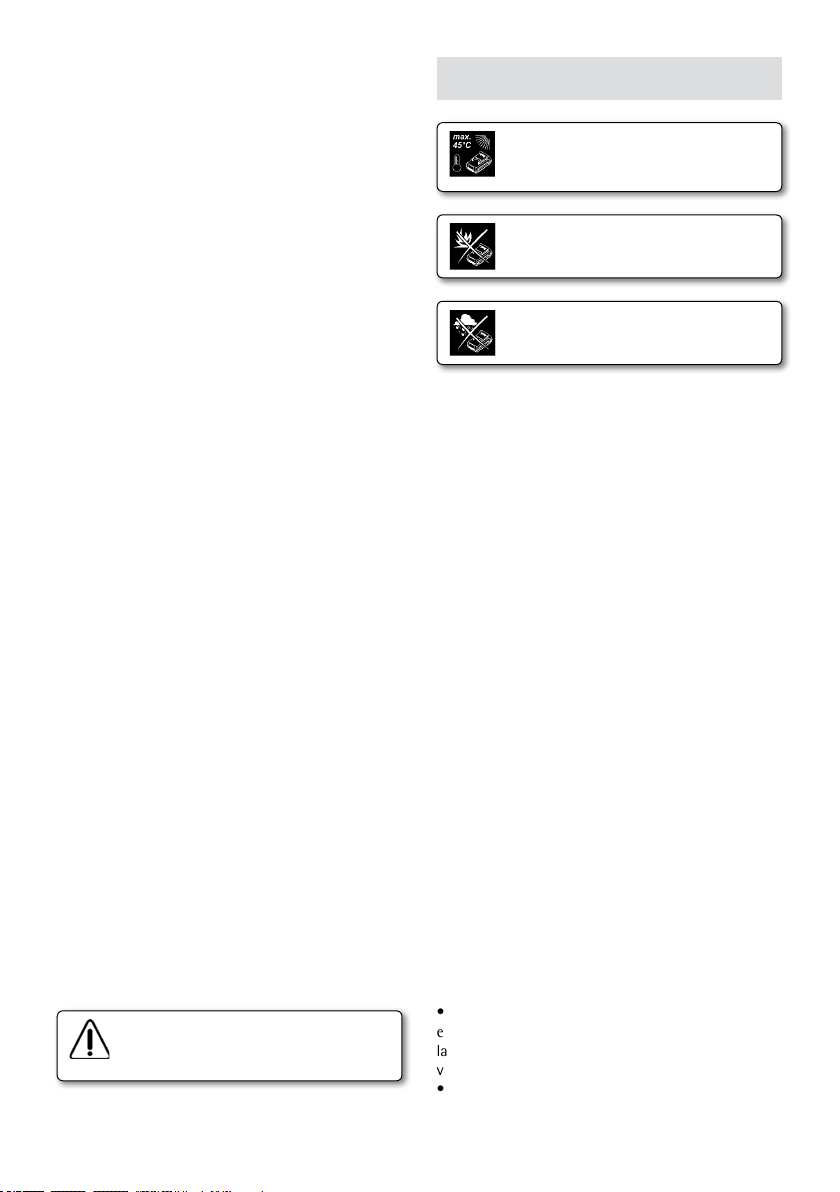
• Cargue la batería 7 a temperatura ambiente de 10ºC
a 40ºC (50ºF a 104ºF). Una carga inadecuada a tempera-
turas fuera del margen indicado puede dañar la bateria
y aumentar el riesgo de incendio.
• Cargue la batería 7 cada 6 meses si estuvo sin funcio-
namiento durante un tiempo prolongado.
• Sustituya las baterías usadas a tiempo. La disminución
de la producción o un tiempo de ejecución significativa-
mente más corto de la herramienta eléctrica después de
la carga, indica que la batería 7 se ha gastada y que se
necesita reemplazarla. Se debe tener en cuenta que la
batería 7 puede descargarse más rápido si los trabajos
tienen con temperaturas inferiores a 0°C.
• En caso de almacenamiento sin uso durante un tiempo
prolongado, se recomienda guardar la batería 7 a tem-
peratura ambiente y se debe cargar al 50%.
Servicio:
a) Haga revisar su herramienta eléctrica por un servicio
de reparación cualificado usando solamente piezas de

9
recambio idénticas. Esto garantizará que la seguridad
de la herramienta eléctrica se mantiene.
b)Norepare losAcumuladoresdañados. Elmantenimien-
to de las baterias y acumuladores sólo debe ser realizado
por el fabricante o un servicio técnico autorizado.
Transporte de baterías de Li-Ion
Las baterías de Li-Ion incorporadas están sujetas a los
requisitos de la Legislación de mercaderías peligrosas.
El usuario puede transportar las baterías por carretera
sin más requisitos.
Cuando se transporta por terceros (por ejemplo: trans-
porteaéreo oempresa detransportes), sedeben observar
los requisitos especiales sobre embalaje y etiquetado.
Para preparar el elemento que se envía, es necesario
consultar a un experto en materiales peligrosos.
Envíe las baterías sólo cuando la carcasa esté en buen
estado. Coloque cinta o tape los contactos abiertos y
embale la batería de manera tal que no pueda moverse
en el embalaje. Tenga también en cuenta las normativas
nacionales que pueden ser más detalladas.
17. NIVEL DE RUIDO Y VIBRACIONES
Los niveles de ruido y vibraciones de esta herramienta
eléctrica han sido medidos de acuerdo con la Norma
EuropeaEN60745-2-11 yEN 60745-1y sirvencomo base
de comparación con máquinas de semejante aplicación.
El nivel de vibraciones indicado ha sido determinado
para las aplicaciones principales de la herramienta,
y puede ser utilizado como valor de partida para la
evaluación de la exposición al riesgo de las vibraciones.
Sin embargo, el nivel de vibraciones puede llegar a ser
muy diferente al valor declarado en otras condiciones
de aplicación, con otros útiles de trabajo o con un
mantenimiento insuficiente de la herramienta eléctrica
y sus útiles, pudiendo llegar a resultar un valor mucho
más elevado debido a su ciclo de trabajo y modo de uso
de la herramienta eléctrica.
Por tanto, es necesario fijar medidas de seguridad de
protección al usuario contra el efecto de las vibraciones,
como pueden ser mantener la herramienta y útiles de
trabajo en perfecto estado y la organización de los
tiempos de los ciclos de trabajo (tales como tiempos
de marcha con la herramienta bajo carga, y tiempos de
marcha de la herramienta en vacío y sin ser utilizada
realmente ya que la reducción de estos últimos puede
disminuirdeformasustancial elvalortotal deexposición).
18. GARANTÍA
Todas las máquinas electroportátiles VIRUTEX tienen
una garantía válida de 12 meses, a partir del día de su
suministro, quedando excluidas todas las manipulacio-
nes o daños ocasionados por manejo inadecuado o por
desgaste natural de la máquina.
Para cualquier reparación, dirigirse al Servicio Oficial
de Asistencia Técnica VIRUTEX.
19.RECICLAJE DELAS HERRAMIENTASELÉCTRICAS
Nunca tire la herramienta eléctrica con el resto de resi-
duos domésticos. Recicle las herramientas, accesorios y
embalajes de forma respetuosa con el medio ambiente.
Respete la normativa vigente de su país.
Aplicable en la Unión Europea y en países europeos
con sistemas de recogida selectiva de residuos:
La presencia de esta marca en el producto o en el
material informativo que lo acompaña, indica que al
finalizar su vida útil no deberá eliminarse junto con
otros residuos domésticos.
No deseche la batería en un recipiente
de basura doméstico.
Conforme a la Directiva Europea 2002/96/CE los usuarios
puedencontactarcon elestablecimientodondeadquirie-
ronelproducto, ocon lasautoridadeslocales pertinentes,
para informarse sobre cómo y dónde pueden llevarlo
para que sea sometido a un reciclaje ecológico y seguro.
VIRUTEXse reservaelderecho demodificar susproductos
sin previo aviso.
ENGLISH
CORDLESS JIG SAW SCB324
(See pictures on pages 63 - 66)
Important
1. SAFETY INSTRUCTIONS
1.1 GENERAL SAFETY INSTRUCTIONS
Read these OPERATING INSTRUCTIONS.
Makesureyou have understood them befo-
re operating the machine for the first time.
Save all warnings and instructions for future reference.
Theterm“power tool”in thewarnings referstothe power
tool run off the electrical network (with a power cord)
or to a battery run power tool (cordless).
Read all instructions. Failure to follow
all instructions listed below may result
in electric shock, fire and/or serious
injury. The term “power tool” in all of
the warnings listed below refers to your
mains operated (corded) power tool or
battery operated (cordless) power tool.

10
1) Work area
a) Keep work area clean and well lit. Cluttered and dark
areas invite accidents.
b) Do not operate power tools in explosive atmospheres,
such as in the presence of flammable liquids, gases or
dust. Power tools create sparks which may ignite the
dust or fumes.
c) Keep children and bystanders away while operating a
power tool. Distractions can cause you to lose control.
2) Electrical safety
a) Power tool plugs must match the outlet. Never modify
the plug in any way. Do not use any adapter plugs with
earthed (grounded) power tools. Unmodified plugs and
matching outlets will reduce risk of electric shock.
b) Avoid body contact with earthed or grounded sur-
faces such as pipes, radiators, ranges and refrigerators.
There is an increased risk of electric shock if your body
is earthed or grounded.
c) Do not expose power tools to rain or wet conditions.
Water entering a power tool will increase the risk of
electric shock.
d)Do not abusethe cord. Neveruse the cordfor carrying,
pulling or unplugging the power tool. Keep cord away
from heat, oil, sharp edges or moving parts. Damaged
or entangled cords increase the risk of electric shock.
e) When operating a power tool outdoors, use an
extension cord suitable for outdoor use. Use of a cord
suitable for outdoor use reduces the risk of electric shock.
f) If operating a power tool in a damp location is una-
voidable, use a residual current device (RCD) protected
supply. Use of an RCD reduces the risk of electric shock.
3) Personal safety
a) Stay alert, watch what you are doing and use com-
mon sense when operating a power tool. Do not use a
power tool while you are tired or under the influence
of drugs, alcohol or medication. A moment of inatten-
tion while operating power tools may result in serious
personal injury.
b) Use safety equipment. Always wear eye protection.
Safety equipment such as dust mask, non-skid safety
shoes, hard hat, or hearing protection used for appro-
priate conditions will reduce personal injuries.
c) Avoid accidental starting. Ensure the switch is in the
off position before plugging in. Carrying power tools
with your finger on the switch or plugging in power
tools that have the switch on invites accidents.
d) Remove any adjusting key or wrench before turning
the power tool on. A wrench or a key left attached to a
rotating part of the power tool may result in personal
injury.
e) Do not overreach. Keep proper footing and balance
at all times. This enables better control of the power
tool in unexpected situations.
f)Dress properly.Do notwear looseclothing orjewellery.
Keep your hair, clothing and gloves away from moving
parts. Loose clothes, jewellery or long hair can be caught
in moving parts.
g) If devices are provided for the connection of dust
extraction and collection facilities, ensure these are
connected and properly used. Use of these devices can
reduce dust related hazards.
4) Power tool use and care
a) Do not force the power tool. Use the correct power
tool for your application. The correct power tool will
do the job better and safer at the rate for which it
was designed.
b) Do not use the power tool if the switch does not turn
it on and off. Any power tool that cannot be controlled
with the switch is dangerous and must be repaired.
c) Disconnect the plug from the power source before
making any adjustments, changing accessories, or storing
powertools. Suchpreventive safetymeasures reducethe
risk of starting the power tool accidentally.
d) Store idle power tools out of the reach of children
and do not allow persons unfamiliar with the power tool
or these instructions to operate the power tool. Power
tools are dangerous in the hands of untrained users.
e) Maintain power tools. Check for misalignment or
binding of moving parts, breakage of parts and any other
condition that may affect the power tools operation. If
damaged,have thepower toolrepaired beforeuse. Many
accidents are caused by poorly maintained power tools.
f) Keep cutting tools sharp and clean. Properly maintained
cutting tools with sharp cutting edges are less likely to
bind and are easier to control.
g) Use the power tool, accessories and tool bits etc., in
accordance with these instructions and in the manner
intended for the particular type of power tool, taking
into account the working conditions and the work to be
performed.Useof thepower toolforoperations different
fromthoseintendedcould resultinahazardous situation.
5) Service
a) Have your power tool serviced by a qualified repair
person using only identical replacement parts. This will
ensure that the safety of the power tool is maintained.
1.2 SAFETY INSTRUCTIONS FOR
HANDLING THE SAW
Neveruse the machine without protective
covers. Maintain protective covers in
place.
• Do not perforate the machine housing, as this would
destroy the protective insulation (use adhesive labels)
• Check the work area with an adequate devise for hidden
wires, gas and/or water pipes.

11
• Hold the machine firmly in both hands and in a stable
position.
• Ensure that the part to be worked on is firmly secured
before beginning any operation.
• When sawing metal, apply oil to the cutting point.
• Always use the correct saw blade for each type of
material.
• Only use sharp saw blades which are in perfect con-
dition. Cracked, bent or jagged saw blades should be
immediately replaced.
• Do not force the saw feed which is adapted to the type
and thickness of the material being worked.
• When sawing, follow the direction of the saw teeth:
force being applied by lateral shifts, will only lead to
breaking the blade.
• Beware of shavings that fly off. Hold the tool that
so that sparks fly away from you or other people and
inflammable materials.
• Do not exert excessive pressure on the base since
this serves as a support and doing so will merely brake
the saw feed.
• If thin sheets are to be cut, we recommend supporting
them on a wooden base to avoid vibration of the sheet
and accidents.
• Ensure that the base plate is totally supported by the
work surface before beginning work.
• The cutting path must be free from any obstacles,
both above and below.
• In no case turn the machine on with the saw blade in
contact with the material, since this places undue strain
on the blade. Insert the saw blade when the machine
has reached the selected speed.
• A protective face mask must be employed in any work
producing harmful dust. Material containing asbestos
must not be worked.
• When working with the machine, always wear safety
goggles and ear protection. Other personal protection
equipment such as dust masks, gloves, helmet and apron
should be worn when necessary, along with non-slip
safety footwear. If in doubt, use safety equipment.
• Never place hands or fingers in front of the saw when
working.
• Make sure the vents are free when working with dust.
If they require cleaning, first unplug the machine, do
notuse metalobjects andavoid damaginginternal parts.
• When the work is finished, the equipment should be
switched off and the saw blade must be allowed to come
to a complete stop before removing it from the cutting
slot and depositing it (danger of kick-back).
• Always be sure that the tool is switched off and the
battery cartridge is removed before adjusting or checking
function on the tool.
• Always stop the machine by switching it off, not by
removing the battery cartridge.
Before working check the battery level
and charge the battery cartridge when
you notice less tool power. If the battery
cartridge is damaged, exchange it for
another one.
• Always switch off the tool before installing or removing
of the battery cartridge (2 or 4 Ah).
1.3 SAFETY INSTRUCTIONS FOR USE AND MAIN-
TENANCE OF THE BATTERY AND CHARGER
Donot store the toolandbattery cartridge
in locations where the temperature may
reach or exceed 45° C.
Do not incinerate the battery cartridge.
Do not expose battery cartridge to water
or rain.
• Only recharge with the manufacturer's specified
charger. Only recharge with the manufacturer's specified
charger. A charger which is suitable for one type of
battery cartridge can cause a fire risk on another type
of battery cartridge.
• Only use this power tool with the battery cartridge
specifically designed for this model. The use of other
types of battery cartridges may cause injury to the
operator and a fire risk.
• When the battery cartridge is not in use, keep it away
from metal objects, such as paper clips, coins, keys, nails,
screws or other small metal objects that can establish
contact from one terminal to the other. Shorting the
battery terminals may cause burns or a fire.
• Battery fluid may be spilled under extreme conditions;
avoid contact with this liquid. In case of accidental
contact, rinse thoroughly with water. If the liquid comes
into contact with your eyes, seek medical attention.
Battery fluid may cause irritation or burns.
• Do not use damaged or modified batteries. Damaged
or modified batteries can behave in an unpredictable
way and may cause injury to the operator and a fire risk.
• Avoid switching the device on accidentally. Make sure
the on/off switch is in the off position before inserting
the battery. Carrying the power tool with your finger
on the on/off switch or inserting the battery with the
switch in the on position can cause accidents.
• Do not open the batteries. You could damage the
circuits.

12
• Fumes may be aired if there is battery damage and
improperuse.In thiscase,go toawell-ventilatedlocation
and seek medical assistance, if necessary. Fumes cause
respiratory irritation.
• When the battery is defective, the liquid may leak and
come into contact with adjacent components. Check the
correspondingparts. Clean or replace them, ifnecessary.
• Protect the battery from heat, continued solar radiation
and fire. There is an explosion hazard.
Readallinstructionsandsafetywarnings.
• Protect the battery charger from rain and moisture.
Water entering the charger increases the risk of electric
shock.
• Do not charge other batteries. The battery charger is
only suitable for charging lithium-ion batteries within
the indicated voltage range. Otherwise, there is a fire
and explosion hazard.
• Keep the battery charger clean. Dirt can cause a risk
of electric shock.
• Always check the battery charger, its cable and plug
before using them. Do not use the charger if you see it
is damaged. Do not open the charger on your own. Have
it repaired by a qualified person who uses original spare
parts. Damaged chargers, cables and plugs increase the
risk of electric shocks.
• Do not use the battery charger on highly flammable
surfaces. For example, paper, textiles, etc., or in com-
bustible environments. A fire hazard exists from the
charger heating during the charging cycle.
2. SPECIFICATIONS
Battery voltage.........................................................20 V
Strokes per minute.......................................700-3000/min
Battery type......................................................................Li-Ion
Time to charge battery..................................................60 min
Battery capacity..............................................................2 or 4 Ah
Stroke Length................................................................26 mm
Pendular movement..........................................................Yes
Anglecapacityof base(left andright).......................45º/45°
Variable speed..........................................................Yes
Quick fixing system.............................................................Yes
Wood cutting capacity..............................................85 mm
Aluminium cutting capacity......................................20 mm
Steelcutting capacity....................................................10mm
Weight without battery....................................................2.3 Kg
Weighted equivalent continuous acoustic
pressure level A...........................................................87 dBA
Acoustic power level A............................................98,5 dBA
Wear ear protection!
Vibrationtotal values..............................................ah: 3,5 m/s2
3. COMPONENTS
1. On / off switch
2. Lock-off button
3. Ventilation slots
4. Battery lock *
5. Indicators of the state of battery charge *
6. Control button of the state of battery charge *
7. Battery *
8. Protective cover
9. LED lamp
10. Contact protector
11. Saw holder
12. Guide roller
13. Lever for pendulum stroke adjustment
14. Base plate
15. Plastic overlay
16. Thumbwheel for stroke rate selection
17. Allen key
18. Saw blade *
19. Charger * (Fig. 4)
20. Label * (Fig. 4)
21. Indicator (red) * (Fig. 4)
22. Indicator (green) * (Fig. 4)
23. Base plate mounting bolt (Fig. 7)
24. Scale (Fig. 8)
* Not included
4. STANDARD ACCESSORIES
• Plastic overlay
• Allen key
• Operating instructions
• Warranty
5. SPECIFICATIONS OF THE TOOL
Brushless motor
Power tool equipped with a brushless motor that pro-
vides the following advantages (compared to the power
tool having a brush motor):
• High reliability due to the lack of wearing parts (car-
bon brushes, commutator).
• Increased operating time on a single charge.
• Compact design and light weight.
Temperature protection
The temperature protection system enables to auto-
matically deactivate the power tool in case of excess
load or when the temperature of the battery 7 (Fig. 0)
is exceeding 70°C. The system guarantees protection of
the power tool from damage in case of noncompliance
with the operation conditions.

13
Overdischarge protection
The battery 7 (Fig. 0) is protected by the safety system
against deep discharge. In case of complete discharge,
the power tool is automatically switched off.
Do not try to switch on the power tool
when the protection system is activated
the battery 7 (Fig. 0) can be damaged.
Indicators of the state of battery charge (see Fig. 5)
With the push of the button 6 the indicators 5 show
the state of charge of the battery 7.
Overheating protection
Overheating protection system of the engine automati-
cally switches off the power tool in case of overheating.
In this situation, let the tool cool before turning the
power tool on again.
Overload protection
Overload protection system of the engine automatically
switchesoff thepower toolwhen itisoperated ina man-
ner that causes it to draw an abnormally high current.
Soft start
Soft start enables smooth start of power tools - the
saw blade 18 (Fig. 0) is being run up gradually with no
jerks and kickbacks; no jump-like load is imposed on
the motor upon switching.
Break rundown
Break rundown stops the saw blade 18 (Fig. 0) within 2
seconds after the power tool is turned off.
LED light
By pressing the on/off switch 1, the LED light 9 turns
on automatically and allows you to perform tasks in
low light conditions.
6. HOW TO CHARGE THE BATTERY
Battery charging time
Initial operating of the power tool
Before the first use, the battery 7 (Fig. 0) must be fully
charged.
Charging process (see Fig. 3)
• Press the battery lock 4 and remove the battery 7
(see Fig. 3.1).
• Connect the charger 19 to the power supply.
• Insert battery 7 into charger 19 (see Fig. 3.2).
• Disconnect the charger 19 from power supply after
charging.
• Remove the battery 7 from the charger 19 and mount
battery 7 in the power tool (see Fig. 3.3).
Charger indicators (see Fig. 4)
Charger indicators 21 and 22 inform of the battery 7
(Fig. 0) charging process. Signals of the indicators 21
and 22 are shown on the label 20. (see Fig. 4).
• Fig. 4.1 - (The green indicator 22 is on, the battery
7 is not inserted in the charger 19) - the charger 19 is
connected to the power network (ready for charging).
• Fig. 4.2 - (The green indicator 22 is blinking, the
battery 7 is inserted in the charger 19) - the battery 7
is being charged.
• Fig. 4.3 - (The green indicator 22 is on, the battery 7 is
inserted in the charger 19) - the battery 7 is fully charged.
• Fig. 4.4 - (The red indicator 21 is on, the battery 7 is
inserted in the charger 19) - the charging process of
the battery 7 is terminated due to inappropriate tem-
perature. When the temperature conditions are normal,
the process of charging will resume.
• Fig. 4.5 - (The red indicator 21 is blinking, the battery
7 is inserted in the charger 19) - the charging process
of the battery 7 is terminated because of its failure.
Replacethe faulty battery 7, its further use isprohibited.
In the process of charging the battery 7 and the charger
19 become hot, it is a normal process.
7. TURNING ON THE MACHINE
Before inserting the battery cartridge (2 or 4 Ah) into the
tool, always check to see that the On/Off trigger (Fig.
0) actuates properly and returns to the "OFF" position
when released.
To start the tool pull the lock-off button 2 (Fig. 0) and
keep pulling the trigger 1 (Fig. 0). For continuous action
keep pulling the trigger 1 (Fig. 0). To turn the machine
off, release button A.
8. INSERTING AND CHANGING THE SAW BLADE
Always be sure that the tool is switched
off and the battery cartridge is removed
before adjusting or checking function
on the tool.
This jig saw is fitted with a “Quick fix” saw blade retainer.
Saw blade installation is described below:
• Fully rotate protective cover 8 (Fig. 1.1-1.2) and
maintain it in this position.
•Fully insert the saw blade 18 (Fig. 1.2) with the rear
section supported in wheel guide 12 (Fig. 0).
• with the rear section supported in wheel protective
cover 8 (Fig. 1.1) and press the saw blade until protective
cover 8 (Fig. 1.1) returns to its original position. Verify
that the saw blade is correctly fixed in place.
It is advisable to lubricate periodically the contact area

14
between the saw blade and support wheel (with a drop
of oil) and the support axle of the wheel itself.
9. ADJUSTING THE PENDULAR MOVEMENT
The pendulum mechanism provides blade swivel mo-
tion with improved cutting and higher work speed
per material.
To adjust with of swivel, use control 13 (Fig. 9). At 0
there is no swivel.
Pendular movement is increased from position 1 to
position 3. Change of setting can be carried out with
the machine in motion.
Read the optimum operating conditions according to
the specific material being worked.
MATERIAL WHEEL POSITION
WOOD 1-2-3
STEEL 0
ALUMINIUM 0-1
RUBBER 0
CERAMICS 0
10. ELECTRONIC SPEED ADJUSTMENT
The machine has an electronic circuit that permits a
smooth start and maintains a practically constant speed
up to its rated power. You will find the adjustment wheel
16 (Fig. 0) at the left side of the tool.
Adjustment control 16 (Fig. 0) is used to set the required
speed.Number 1corresponds tothe minimumspeed and
number 6 is the maximum obtainable speed by means
of the electronic circuit.
Electronicregulationcan becarriedout withthemachine
running. The optimum number of strokes, depends on
the material and particularly on the working conditions
which can be achieved with practice.
11. TYPES OF CUTS
Always be sure that the tool is switched
off and the battery cartridge is removed
before adjusting or checking function
on the tool.
Bevel cutting (Fig. 7)
To work with inclined cuts, loosen screw 23 (Fig. 7) with
service key 17 (Fig. 7), and incline the base according
to the desired cutting angle, which is indicated on
graduated scale 24 (Fig. 8) on the base itself. Firmly
tighten screw 23 (Fig. 7).
The base should be placed as far forward as possible to
allow for unlimited saw blade inclination.
Vertical cuts
The base is placed as far back as possible so that the
blade is centered at.
To start working on wood on inner cuts (Fig. 6) the
assembly car be beared through the front portion of
the base plate and slowly press until the saw blade has
gone through the material to be processed.
If there is no training or when working on other mate-
rials it is necessary to make a previous adjustment hole.
To carry out this the pendulum mechanism should 13
(Fig. 9) be at position 0.
12. PLASTIC OVERLAY FOR DELICATE SURFACES
Always be sure that the tool is switched
off and the battery cartridge is removed
before adjusting or checking function
on the tool.
To install the plastic overlay, clip it onto the front of
support base 14 (Fig. 1 and 2) as shown in (Fig. 2). Press
the rear section upwards until it is locked in place as
shown in (Fig. 2).
Support base 14 (Fig. 2) which is fitted with a steel insert
provides a high degree of stability and may be used
without plastic overlay 15 (Fig. 2) to work on metal or
other non-delicate surfaces.
It is recommended that plastic overlay 15 (Fig. 2) is
used with material that is easily scratched in order not
to damage delicate surfaces.
13. WORKING INSTRUCTIONS
Itis possibletocutwoodwithout havingmade aprevious
drillhole, allowing theblade to slowlypenetrate into the
material with the machine in operation. However, this
does require a certain amount of experience.
Support the front edge of base plate 14 (Fig. 6) incli-
ning the machine upwards and switch it on. Support
the machine
firmly against the work-piece and slowly lower it so that
the saw blade penetrates the work-piece.
Once the material has been cut through, place the
machine into its normal operating position so that the
base plate is seated on its entire surface area and con-
tinue the sawing operation according to requirements.
When sawing is completed, first switch the machine off
and then remove the blade from the saw slot.
14. OPTIONAL JIG SAW BLADES
(5 pcs blisters)
• 3440095 Fine cut, for soft and hard wood up to 60 mm.
(HCS, pitch 4 mm, length 75 mm)
• 3440167 Fine cut, for soft and hard wood up to 80
mm. (HCS, pitch 4 mm, length 105 mm)
• 3440094 Curved cut, for soft and hard wood up to 60
mm. (HCS, pitch 4 mm, lenght 75 mm)

15
• 3440093 Very fine cut, for soft, hard wood and chip-
board up to 30 mm (HCS, pitch 2.5 mm, length 75 mm)
• 3440163 Very fine cut, for soft, hard wood and chip-
board up to 30 mm (HCS, pitch 2.5 mm, length 105 mm)
• 3440097 Very fine cut, for soft, hard wood and chi-
pboard up to 80 mm. For linoleum and flexible plastics
up to 8 mm (HCS, pitch 4 mm, length 105 mm)
• 3440164 Very fine cut, for soft, hard wood and chi-
pboard up to 80 mm. For linoleum and flexible plastics
up to 8 mm (HCS, pitch 4 mm, lenght 105 mm)
• 3440096 Rough cut, for soft and hard wood up to
60 mm. For expanded polyurethane up to 40 mm (HCS,
pitch 3 mm, length 75 mm)
• 3440098 For soft steel up to 3 mm. Aluminium and
non ferrous metals up to 4 mm. Melamine and synthetic
fibres up to 8 mm (HCS, pitch 1.2 mm, length 52 mm)
• 3440165 For soft steel up to 3 mm. Aluminium and
non ferrous metals up to 4 mm. Melamine and synthetic
fibres up to 8 mm (BIM, pitch 1.2 mm, length 105 mm)
• 3440099 For soft steel up to 6 mm. Aluminium and
non ferrous metals up to 8 mm. Melamine and synthetic
fibres up to 10 mm (HSS, pitch 2 mm, length 52 mm)
• 3440166 For soft steel up to 6 mm. Aluminium and
non ferrous metals up to 8 mm. Melamine and synthetic
fibres up to 10 mm (BIM, pitch 2 mm, length 105 mm)
• 3440100 For soft steel up to 6 mm. Aluminium and non
ferrous metals up to 8 mm. Cement fibres and synthetic
materials up to 10 mm (HSS, pitch 3 mm, length 52 mm)
15. MAINTENANCE
Always be sure that the tool is switched
off and the battery cartridge is removed
before adjusting or checking function
on the tool.
• Saw blade inspection: Only sharp blades in perfect
condition should be used. Cracked, bent or jagged saw
blades should be immediately replaced.
• Inspect the mounting screws: Regularly inspect all
the mounting screws and ensure they are firmly tighte-
ned. Should any screw be loose, tighten it immediately.
Failure to do so could put you at serious risk.
• Always keep the vents clean and free of obstruction.
• Clean the machine thoroughly after each use. Blast
the motor regularly with compressed air.
• The saw blade retaining lever (“Quick Fix” systems) must
be regularly cleaned, especially when sawing material
which produces large amounts of dust. This will ensure
correct retaining lever operation.
• The saw blade guide should be lubricated now and
again with a drop of oil and, at the same time, checked
for wear. If it is worn, after prolonged use, it should be
replaced at the VIRUTEX Technical Assistance Centre.
• Greasing
(to be performed by an official technician)
The screws on the gear head must not be loosened
during the warranty period. Otherwise the warranty
will be invalid.
The grease should be renewed after 1,500 hours of use.
16. BATTERY MAINTENANCE
• Charge the battery cartridge 7 (Fig. 0) before com-
pletely discharged. Stop operation in low power and
charge it immediately.
• Do not overcharge when the battery 7 is full, other-
wise it will shorten the life time.
• Charge the battery cartridge 7 with room temperature
at 10° C - 40° C (50°F to 104°F). Charging the battery
in temperatures out of this range can damage it and
may cause fire.
• Charge battery 7 every 6 months without operation
for a long time.
• Replace worn out batteries in time. Decline of pro-
duction or a significantlyshorter runtime of the power
tool after charging indicates aging of the battery 7
and the need for replacement. It should be taken into
account that the battery 7 may discharge faster if the
works take place in the temperature below 0°.
• In case of long time storage without use, it is recom-
mended to store the battery 7 at room temperature, it
should be charged to 50%.
Technical service:
a) Tomaintain productsafety andreliability, repairs,any
other maintenance or adjustment should be performed
by authorized service senters, always using original
replacement parts.
b) Do not repair damaged batteries. Maintenance of the
batteries should be performed only by their producer or
authorized service center.
Transport of Li-Ion batteries
The contained Li-Ion batteries are subject to the
Dangerous Goods Legislation requirements. The user
can transport the batteries by road without further
requirements.
When being transported by third parties (e.g.: air trans-
port or forwarding agency), special requirements on
packaging and labelling must be observed. For prepa-
ration of the item being shipped, consulting an expert
for hazardous material is required.
Dispatchbatteries onlywhen thehousing isundamaged.
Tape or mask off open contacts and pack up the battery
in such a manner that it cannot move around in the
packaging. Please also observe possibly more detailed
national regulations
17. NOISE AND VIBRATION LEVELS
The noise and vibration levels of this device have

16
been measured in accordance with European stan-
dard EN60745-2-11 and EN 60745-1 and serve as a
basis for comparison with other machines with similar
applications.
The indicated vibration level has been determined for
the device’s main applications and may be used as an
initial value for evaluating the risk presented by expo-
sure to vibrations. However, vibrations may reach levels
that are quite different from the declared value under
other application conditions, with other tools or with
insufficient maintenance of the electrical device or its
accessories, reaching a much higher value as a result
of the work cycle or the manner in which the electrical
device is used.
Therefore, it is necessary to establish safety measures
to protect the user from the effects of vibrations, such
as maintaining both the device and its tools in perfect
condition and organising the duration of work cycles
(such as operating times when the machine is subjected
to loads, and operating times when working with no-load,
in effect, not in use, as reducing the latter may have a
considerable effect upon the overall exposure value).
18. WARRANTY
All VIRUTEX power tools are guaranteed for 12 months
from the date of purchase, excluding any damage which
is a result of incorrect use or of natural wear and tear
on the machine. All repairs should be carried out by the
official VIRUTEX technical assistance service.
19. RECYCLING ELECTRICAL EQUIPMENT
Neverdisposeof electricalequipmentwithdomestic was-
te. Recycle equipment, accessories and packaging in ways
that minimise any adverse effect on the environment.
Comply with the current regulations in your country.
Applicable in the European Union and in European
countries with selective waste collection systems:
If this symbol appears on the product or in the accom-
panying information, at the end of the product's useful
lifeit mustnot bedisposed ofwith otherdomestic waste.
Donot dispose of thebatteryin a domestic
waste container
In accordance with European Directive 2002/96/EC, users
maycontactthe establishmentwheretheypurchased the
productor the relevant local authority to find outwhere
and how they can take the product for environmentally
friendly and safe recycling.
VIRUTEX reserves the right to modify its products
without prior notice.
FRANÇAIS
SCIE SAUTEUSE À BATTERIE SCB324
(Voir images pages 63 - 66)
Important
1. CONSIGNES DE SÉCURITÉ
1.1 CONSIGNES GÉNÉRALES DE SÉCURITÉ
Avant d'utiliser la machine, lisez atten-
tivement ce MANUEL D'INSTRUCTIONS.
Assurez-vous de bien avoir tout compris
avant de commencer à travailler sur la
machine.
Conservez toutes les mises en garde et les instructions
pour vous y reporter ultérieurement. Le terme "outil
électrique" utilisé dans les consignes désigne un outil
électrique fonctionnant sur le secteur (câblé) ou sur
batterie (sans fil).
Liretouteslesindications. Le non-respect
des instructions indiquées ci-après peut
entraîner un choc électrique, un incendie
et/ou de graves blessures sur les person-
nes. La notion d’«outil électroportatif»
mentionnée par la suite se rapporte à des
outils électriques raccordés au secteur
(avec câble de raccordement) et à des
outils électriques à batterie (sans câble
de raccordement).
1) Place de travail
a) Maintenez l’endroit de travail propre et bien éclairé.
Un lieu de travail en désordre ou mal éclairé augmente
le risque d’accidents.
b) N’utilisez pas l’appareil dans un environnement
présentant des risques d’explosion et où se trouvent
des liquides, des gaz ou poussières inflammables. Les
outils électroportatifs génèrent des étincelles risquant
d’enflammer les poussières ou les vapeurs.
c) Tenez les enfants et autres personnes éloignés durant
l’utilisationdel’outil électroportatif.En casd’inattention
vous risquez de perdre le contrôle sur l’appareil.
2) Sécurité relative au système électrique
a) La fiche de secteur de l’outil électroportatif doit être
appropriée à la prise de courant. Ne modifiez en aucun
casla fiche.N’utilisez pasde fichesd’adaptateur avecdes
appareils avec mise à la terre. Les fiches non modifiées
et les prises de courant appropriées réduisent le risque
de choc électrique.

17
b) Evitez le contact physique avec des surfaces mises à la
terre tels que tuyaux, radiateurs, fours et réfrigérateurs.
Il y a un risque élevé de choc électrique au cas où votre
corps serait relié à la terre.
c) N’exposez pas l’outil électroportatif à la pluie ou à
l’humidité. La pénétration d’eau dans un outil électro-
portatif augmente le risque d’un choc électrique.
d)N’utilisezpas lecâble àd’autres finsque cellesprévues,
n’utilisez pas le câble pour porter l’appareil ou pour
l’accrocher ou encore pour le débrancher de la prise
de courant. Maintenez le câble éloigné des sources de
chaleur, des parties grasses, des bords tranchants ou des
parties de l’appareil en rotation. Un câble endommagé
ou torsadé augmente le risque d’un choc électrique.
e) Au cas où vous utiliseriez l’outil électroportatif à
l’extérieur, utilisez une rallonge autorisée homologuée
pour les applications extérieures. L’utilisation d’une
rallonge électrique homologuée pour les applications
extérieures réduit le risque d’un choc électrique.
f) Si l’usage d’un outil dans un emplacement humide
est inévitable, utiliser une alimentation protégée par un
dispositif à courant différentiel résiduel (RCD). L’usage
d’un RCD réduit le risque de choc électrique.
3) Sécurité des personnes
a) Restez vigilant, surveillez ce que vous faites. Faites
preuve de bon en utilisant l’outil électroportatif.
N’utilisez pas l’appareil lorsque vous êtes fatigué ou
après avoir consommé de l’alcool, des drogues ou avoir
pris des médicaments. Un moment d’inattention lors
de l’utilisation de l’appareil peut entraîner de graves
blessures sur les personnes.
b) Portez des équipements de protection. Portez tou-
jours des lunettes de protection. Le fait de porter des
équipements de protection personnels tels que masque
anti-poussières, chaussures de sécurité antidérapantes,
casque de protection ou protection acoustique suivant
le travail à effectuer, réduit le risque de blessures.
c) Evitez une mise en service par mégarde. Assurez-vous
que l’interrupteur est effectivement en position d’arrêt
avant de retirer la fiche de la prise de courant. Le fait
de porter l’appareil avec le doigt sur l’interrupteur ou
de brancher l’appareil sur la source de courant lorsque
l’interrupteur est en position de fonctionnement, peut
entraîner des accidents.
d) Enlevez tout outil de réglage ou toute clé avant de
mettre l’appareil en fonctionnement. Une clé ou un
outil se trouvant sur une partie en rotation peut causer
des blessures.
e) Ne surestimez pas vos capacités. Veillez à garder
toujours une position stable et équilibrée. Ceci vous
permet de mieux contrôler l’appareil dans des situations
inattendues.
f) Portez des vêtements appropriés. Ne portez pas de
vêtements amples ni de bijoux. Maintenez cheveux,
vêtements et gants éloignés des parties de l’appareil
en rotation. Des vêtements amples, des bijoux ou des
cheveux longs peuvent être happés par des pièces en
mouvement.
g) Si des dispositifs servant à aspirer ou à recueillir les
poussières doivent être utilisés, vérifiez que ceux-ci
soient effectivement raccordés et qu’ils sont correcte-
ment utilisés. L’utilisation de tels dispositifs réduit les
dangers dus aux poussières.
4)Utilisation etemploisoigneux del’outil électroportatif
a) Ne surchargez pas l’appareil. Utilisez l’outil électro-
portatif approprié au travail à effectuer. Avec l’outil
électroportatifapproprié, voustravaillerezmieux etavec
plus de sécurité à la vitesse pour laquelle il est prévu.
b) N’utilisez pas un outil électroportatif dont
l’interrupteur est défectueux. Un outil électroportatif
qui ne peut plus être mis en ou hors fonctionnement
est dangereux et doit être réparé.
c)Retirer la fichede la prisede courant avant d’effectuer
des réglages sur l’appareil, de changer les accessoires,
ou de ranger l’appareil. Cette mesure de précaution
empêche une mise en fonctionnement par mégarde.
d) Gardez les outils électroportatifs non utilisés hors
de portée des enfants. Ne permettez pas l’utilisation de
l’appareilà des personnes quine se sont pasfamiliarisées
avec celui-ci ou qui n’ont pas lu ces instructions. Les
outils électroportatifs sont dangereux lorsqu’ils sont
utilisés par des personnes non initiées.
e) Prenez soin des outils électroportatifs. Vérifiez que
les parties en mouvement fonctionnent correctement
et qu’elles ne soient pas coincées, et contrôlez si des
parties sont cassées ou endommagées de telle sorte que
le bon fonctionnement de l’appareil s’en trouve entravé.
Faites réparer les parties endommagées avant d’utiliser
l’appareil. De nombreux accidents sont dus à des outils
électroportatifs mal entretenus.
f) Maintenez les outils de coupe aiguisés et propres.
Des outils soigneusement entretenus avec des bords
tranchants bien aiguisés se coincent moins souvent et
peuvent être guidés plus facilement.
g) Utilisez les outils électroportatifs, les accessoires, les
outils à monter etc conformément à ces instructions et
aux prescriptions en vigueur pour ce type d’appareil.
Tenez compte également des conditions de travail et du
travailàeffectuer. L’utilisationdes outilsélectroportatifs
à d’autres fins que celles prévues peut entraîner des
situations dangereuses.
5) Service
a) Ne faites réparer votre outil électroportatif que par
un personnel qualifié et seulement avec des pièces de
rechange d’origine. Ceci permet d’assurer la sécurité
de l’appareil.

18
1.2 INSTRUCTIONS DE SÉCURITÉ
POUR LE MANIEMENT DE LA SCIE
Ne jamais utiliser la machine sans le
carter de protection. Maintenir ce carter
en place.
• Ne pas percer la carcasse de la machine, cela suppri-
merait l’isolation (utiliser des plaques adhésives)
• Contrôler la zone d’intervention avec un appareil
adapté; il est possible en effet que des conducteurs
électriques, des tuyaux de gaz et/ou d’eau soient cachés.
• Tenir toujours la machine fermement des deux mains
et en maintenant une position stable.
• Avant toute opération, vérifier que la pièce à travailler
est bien fixée.
• Pour scier les métaux, lubrifier le point de coupe avec
de l’huile.
• Employez toujours le type de lame de scie approprié
à chaque matériau.
• Employez uniquement des lames de scie avec un bon fil
et en parfait état. Remplacez immédiatement les lames
de scie fissurées, pliées ou ébréchées.
• Ne forcez pas l’avancement de la scie. Adaptez-le au
type de matériau à travailler et à son épaisseur.
• En sciant suivez la direction des dents de la scie; si
vous la forcez à se déplacer latéralement, vous risquez
de casser la lame.
• Faire attention aux projections. Tenir l’outil de manière
que les étincelles ne soient pas projetées dans votre
direction ou en direction d’autres personnes.
• Ne faites pas trop de pression sur la base servant
d’appui, car tout ce que vous obtiendrez c’est de freiner
l’avancement.
• Si vous avez à couper des tôles de faible épaisseur, il
convient de les fixer sur une base en bois afin d’éviter
des accidents et que la tôle vibre.
• Au moment de travailler assurez-vous que la plaque
de base adhère complètement à la surface de travail.
• Toute la trajectoire de la coupe doit être dégagée de
tout obstacle.
• Ne mettez en aucun cas la machine en marche lorsque
la scie est en contact avec le matériau à travailler, car
cela lui exige un effort inadéquat. Introduisez la scie
lorsque la machine aura atteint la vitesse choisie.
• En cas de travaux susceptibles de produire des poussières
nocives pour la santé, vous devez utiliser un masque
anti-poussière. Il ne faut pas travailler des matériaux
qui contiennent de l’amiante.
• Lors de l’utilisation de la machine, porter toujours des
lunettes de protection et un casque antibruit. D’autres
équipements de protection personnelle, tels que: masque
anti-poussière, gants, casque et tablier, peuvent être
utilisés si nécessaire; il est également recommandé de
porter des chaussures de sécurité antidérapantes. En
cas de doute, nous conseillons d’utiliser l’équipement
de protection.
• Pendant le travail, ne jamais avoir la main ou les doigts
devant la lame de la scie.
• Lorsque vous travaillez dans une atmosphère pous-
siéreuse assurez-vous que les ouïes de ventilation de la
machine sont toujours dégagées. Si nécessaire, nettoyer
la poussière après avoir mis la machine hors tension. Ne
pas utiliser d’objets métalliques et éviter d’endommager
les parties internes.
• À la fin du travail, débranchez l’appareil et attendez
l’arrêt de la lame de la scie avant de l’extraire de la
rainure de la coupe et posez-la (danger de rebond).
• Retirez la batterie avant d’effectuer toutes inter-
ventions.
• La machine doit toujours être arrêtée en relâchant
l’interrupteur, sans retirer la batterie.
Àchaque fois que vous utilisez lamachine,
vérifiez l’état de la batterie. Vous devez
la remplacer si elle est endommagée.
• Monter la batterie seulement avec l’interrupteur en
position d’arrêt.
1.3CONSIGNESDESÉCURITÉPOURL'UTILISATION
ETL'ENTRETIEN DE LA BATTERIEET DU CHARGEUR
Ne chauffez pas la batterie audessus de
45° C. Protégez la batterie d'une expo-
sition directe et prolongée aux rayons
de soleil.
Ne jetez pas la batterie au feu.
Protegez la batterie de la pluie.
• Ne rechargez qu’avec le chargeur préconisé par le
fabricant. Un chargeur adapté à un type de bloc de
batteries peut provoquer un danger d'incendie lorsqu'il
est utilisé avec un autre bloc de batteries.
• Utilisez les outils uniquement avec les blocs de bat-
teries spécialement conçus. L' usage de tout autre bloc
de batteries peut provoquer des dégâts et incendies.
• Quand un bloc de batteries n’est pas utilisé, conservez-le
éloigné d'autres objets métalliques comme des clips pour
papiers,piècesde monnaie,clés, clous,vis ouautrespetits
objets en métal qui peuvent définir une connexion d'un

19
terminal à l'autre. Un courtcircuit entre les deux bornes
de la batterie peut causer des brûlures ou un incendie.
• Dans des conditions abusives, le liquide de la batterie
peut couler; évitez le contact. Si un contact a lieu de
manière accidentelle, lavez avec de l'eau. Si le liquide
rentre en contact avec les yeux, demandez une aide
médicalesupplémentaire. Le liquidede batterie renversé
peut provoquer une irritation ou des brûlures.
• N'utilisez pas des batteries ou autres outils endom-
magés ou modifiés. Les batteries endommagées ou
modifiées peuvent avoir un comportement imprévisible
ouincorrecte etprovoquer un incendieou uneexplosion
pouvant causer des dommages.
• Évitez les démarrages involontaires. Assurez-vous que
l’interrupteur est en position d’arrêt avant d’installer la
batterie. Utiliser des outils électriques avec votre doigt
sur le commutateur ou insérez la batterie avec le com-
mutateur en position d'allumage provoque des accidents.
• N’ouvrez pas les batteries. Il existe un risque
d’endommager le circuit.
• En cas de dommages ou d’utilisation incorrecte de
la batterie, des vapeurs peuvent être émises. Dans un
tel cas, placez-vous dans un endroit aéré et consultez
un médecin si nécessaire. Les vapeurs peuvent irriter le
système respiratoire.
• Lorsque la batterie est défectueuse, du liquide peut
s’échapper et entrer en contact avec les composants
voisins.Vérifiez lespièces correspondantes, nettoyez-les
et remplacez-les si nécessaire.
• Protégez la batterie de la chaleur, du rayonnement
solaire continu et du feu. Il existe un risque d’explosion.
Lisez toutes les instructions et consignes
de sécurité.
• Protégez le chargeur de la batterie de la pluie et de
l’humidité. L’infiltration d’eau augmente le risque de
choc électrique.
• Ne chargez pas d’autres batteries. Le chargeur est
réservé à la charge de batteries au lithium-ion dans la
tranche de tension indiquée. Autrement, il existe des
risques d’incendie et d’explosion.
• Maintenez le chargeur en parfait état de propreté. Les
impuretés peuvent constituer un risque d’électrocution.
• Vérifiez le chargeur, le câble et la prise avant chaque
utilisation. N’utilisez pas le chargeur lorsque des dé-
faillances sont détectées. Ne l'ouvrez pas vous-même,
faites-le réparer uniquement par du personnel qualifié
qui utilise des pièces détachées d’origine. Les chargeurs,
lescâbles etlesprisesendommagésaugmentent lerisque
de secousse électrique.
• N’utilisez pas le chargeur sur des surfaces inflam-
mables, par exemple: du papier, du textile, etc. ou dans
des environnements combustibles. Il existe un risque
d’incendie dû au réchauffement du chargeur pendant
le cycle de de chargement ou de recharge.
2. CARACTÉRISTIQUES TECHNIQUES
Tensiondela batterie............................................................20V
Courses par minute...............................700-3000/min
Type de batterie..........................................................Li-Ion
Temps de charge de la batterie.............................60 min
Capacitéde labatterie.....................................................2/4 Ah
Longueur de parcours.............................................26 mm
Mouvement pendulaire.............................................Oui
Capacité d'inclination de la base (2 côtés)........45º/45º
Vitesse réglable...............................................................Oui
Systèmede fixationrapide..................................................Oui
Capacité de coupe en bois mm..................85 mm
Capacité de coupe en aluminium mm.....................20 mm
Capacité de coupe en acier mm...........................10 mm
Poids sans batterie...............................................................2,3 Kg
Niveau de pression acoustique
continu équivalent pondéré A...........................87 dBA
Niveau de puissance acoustique A..........................98,5 dBA
Porter une protection acoustique!
Valeurs totales des vibrations.................................ah: 4 m/s2
Incertitude...................................................................K: 1,5 m/s2
3. COMPOSANTS
1. Interrupteur marche / arrêt
2. Bouton de déverrouillage
3. Fentes d'aération
4. Système de blocage de la batterie*
5. Voyant de charge de la batterie*
6. Bouton de contrôle de charge de la batterie*
7. Batterie*
8. Carter de protection
9. Voyant LED
10. Protection contre le contact
11. Support de scie
12. Roulette de guidage
13. Levier de réglage de la course du pendule
14. Plaque de base
15. Semelle de protection en plastique
16. Roulette de choix de la vitesse de course
17. Clé Allen
18. Lame de scie*
19. Chargeur* (Fig. 4)
20. Étiquette du chargeur* (Fig. 4)
21. Voyant (rouge)* (Fig. 4)
22. Voyant (vert)* (Fig. 4)
23. Boulon de fixation de la plaque bas (Fig. 7)
24. Graduation (Fig. 8)
* Non inclu
4. ÉQUIPEMENT STANDARD
• Semelle de protection en plastique

20
• Clé Allen
• Notice d’utilisation
• Garantie
5. CARACHTÉRISTIQUES DE LA MACHINE
Le moteur sans balai
L'outil électrique équipé d'un moteur sans balai qui
présente les avantages suivants (par rapport à l'outil
motorisé ayant un moteur à balais):
• Une haute fiabilit en raison du manque de pièces
d'usure (brosses de carbone, commutateur).
• L'augmentation du temps d'exploitation sur une
seule charge.
• Un modèle compact et de poids léger.
Protection contre la température
Le système de protection contre la température permet
de couper automatiquement l'outil électrique en cas de
surcharge ou lorsque la température de la batterie 7
(Fig. 0) dépasse 70°C. Le système garantit que le système
de protection de l'outil ne soit pas endommagé en cas
de manque de conformité aux conditions d'utilisation.
Protection contre les décharges excessives
La batterie 7 (Fig. 0) est protégée par le système de sécu-
rité contre les décharges profondes. En cas de décharge
complète, l'outil électrique s'éteint automatiquement.
Ne pas essayer d'allumer l'outil élec-
trique lorsque le système de protection
est activé, la batterie 7 (Fig. 0) peut être
endommagée.
Témoins de l'état de charge de la batterie (voir Fig. 5)
Si vous appuyez sur le bouton 6, le voyant 5 se met à
indiquer le niveau de charge de la batterie 7.
Protection contre la surchauffe
Le système de protection contre la surchauffe du mo-
teur arrête automatiquement l'outil électrique en cas de
surchauffe. Dans ce cas, laisser refroidir l'outil électrique
avant de le remettre en marche.
Protection contre la surcharge
Lesystèmede protectioncontre lessurchargesdu moteur
arrête automatiquement l'outil électrique lorsqu'il est
utilisé d'une manière telle qu'il consomme un courant
anormalement élevé.
Démarrage progressif
Le démarrage souple permet un démarrage en dou-ceur
des outils électriques - la lame de scie 18 (Fig. 0) se met
enmarcheprogressivement sansà-coupsni reculs;aucun
sursaut de charge n'est imposé au moteur à son allumage.
Butée d'arrêt
La décélération arrête la lame de scie 18 en 2 secondes
maximum après l'arrêt de l'outil électrique.
Voyant LED
Lorsque l'on appuie sur l'interrupteur marche / arrêt 1, la
voyant LED 9 s'allume automatiquement ce qui permet
de travailler sous peu de lumière.
6. MÉTHODE DE RECHARGE DE LA BATTERIE
Temps de chargement de la batterie
Première utilisation de l'outil électrique
Avant de commencer à l'utiliser, la batterie 7 (Fig. 0) il
faut la charger complètement.
Recharge (voir Fig. 3)
• Appuyez sur le verrou de batterie 4 et retirez la bat-
terie 7 (voir Fig. 3.1).
• Branchez le chargeur 19 au secteur.
• Insérez la batterie 7 dans le chargeur 19 (voir Fig. 3.2).
• Débranchez le chargeur 19 de l'alimentation après
l'achievement de l'alimentation.
• Retirez la batterie 7 du chargeur 19 et montez la
batterie 7 dans l'outil électrique (voir Fig. 3.3).
Indicateurs du chargeur (voir Fig. 4)
Les voyants 21 et 22 du chargeur indiquent l'avance-
ment du chargement de la batterie 7 (Fig. 0). Les signaux
des voyants 21 et 22 sont indiqués sur l'étiquette 20
(voir Fig. 4).
• Fig. 4.1 - (Le témoin vert 22 est allumé, la batterie 7
n'est pas connectée au chargeur 19) - celui-ci est branché
sur le réseau électrique (prêt à charger).
• Fig. 4.2 - (Le témoin vert 22 clignote, la batterie 7 est
connectée au chargeur 19) - elle est en charge.
• Fig. 4.3 - (Le témoin vert 22 est allumé, la batterie 7
est connectée au chargeur 19) - elle est complètement
chargée.
• Fig. 4.4 - (Le témoin rouge 21 est allumé, la batterie 7
est connectée au chargeur 19) - la charge de la batterie 7
a été interrompue à cause d'une température inadaptée.
Lorsque les conditions de température seront normales,
la charge reprendra.
• Fig. 4.5 - (Le témoin rouge 21 clignote, la batterie 7
est connectée au chargeur 19) - la charge de la batterie
7 a été interrompue à cause d'un dysfonctionnement.
Changez la batterie 7 défaillante, il est interdit de
continuer à l'utiliser.
Lors du chargement, la batterie 7 et le chargeur 19 se
mettent à chauffer; c'est tout à fait normal.
This manual suits for next models
1
Table of contents
Languages:
Other Virutex Cordless Saw manuals
Popular Cordless Saw manuals by other brands

Ryobi
Ryobi RRS1201 instructions

Craftsman
Craftsman CMCS600 OriginaI Instruction Manual

Parkside
Parkside PHKSAP 20-Li A1 Operation and safety notes

Batavia
Batavia MAXXPACK BT-CJS002 operating instructions

Makita
Makita DHS630RFJ instruction manual

Metabo HPT
Metabo HPT C18DBAL Safety instructions and instruction manual