Parts List
Congratulations on your purchase of this Vision Vinyl
Storage Building! As with any construction or assembly
project, please exercise caution when using tools and
equipment to install this structure. Be sure to read and
follow the instructions contained within this manual
prior to assembly. If you have any questions before,
during or after assembly, please contact the Vision
Help Line at 1-866-633-9970. We welcome your call
and will be glad to assist you in any way we can.
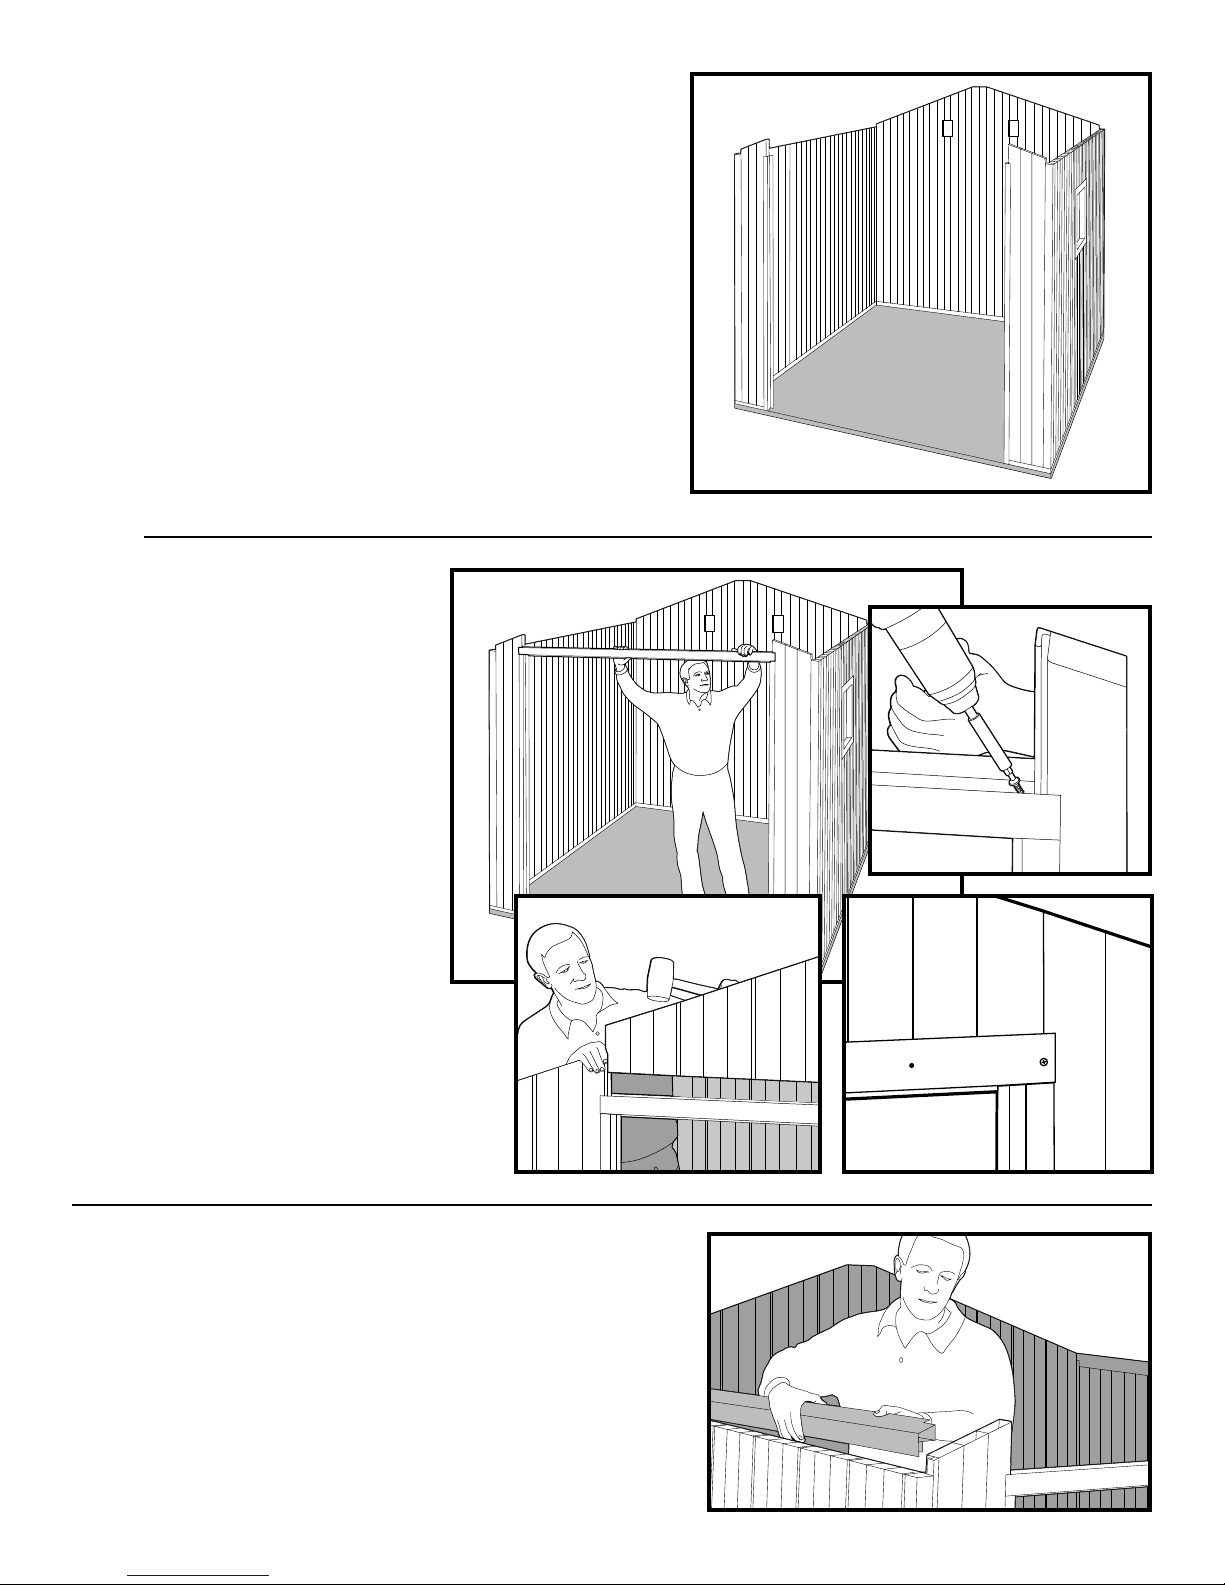
Assembly Safety Tips
• Use proper lifting procedures when handling
the packages.
• Take care when handling the individual components
and wear gloves to avoid cuts or scrapes.
• Follow proper operating procedures for any tools,
ladders, etc. used when assembling the building.
• Protect your eyes. Always wear safety glasses when
assembling building and when using power tools
and hammers.
• Do not assemble building during high winds.
• Do not assemble building if parts are missing.
A partially assembled building may be seriously
damaged by high winds.
• This building must be anchored to the foundation to
prevent wind damage. Follow anchoring instructions
accordingly.
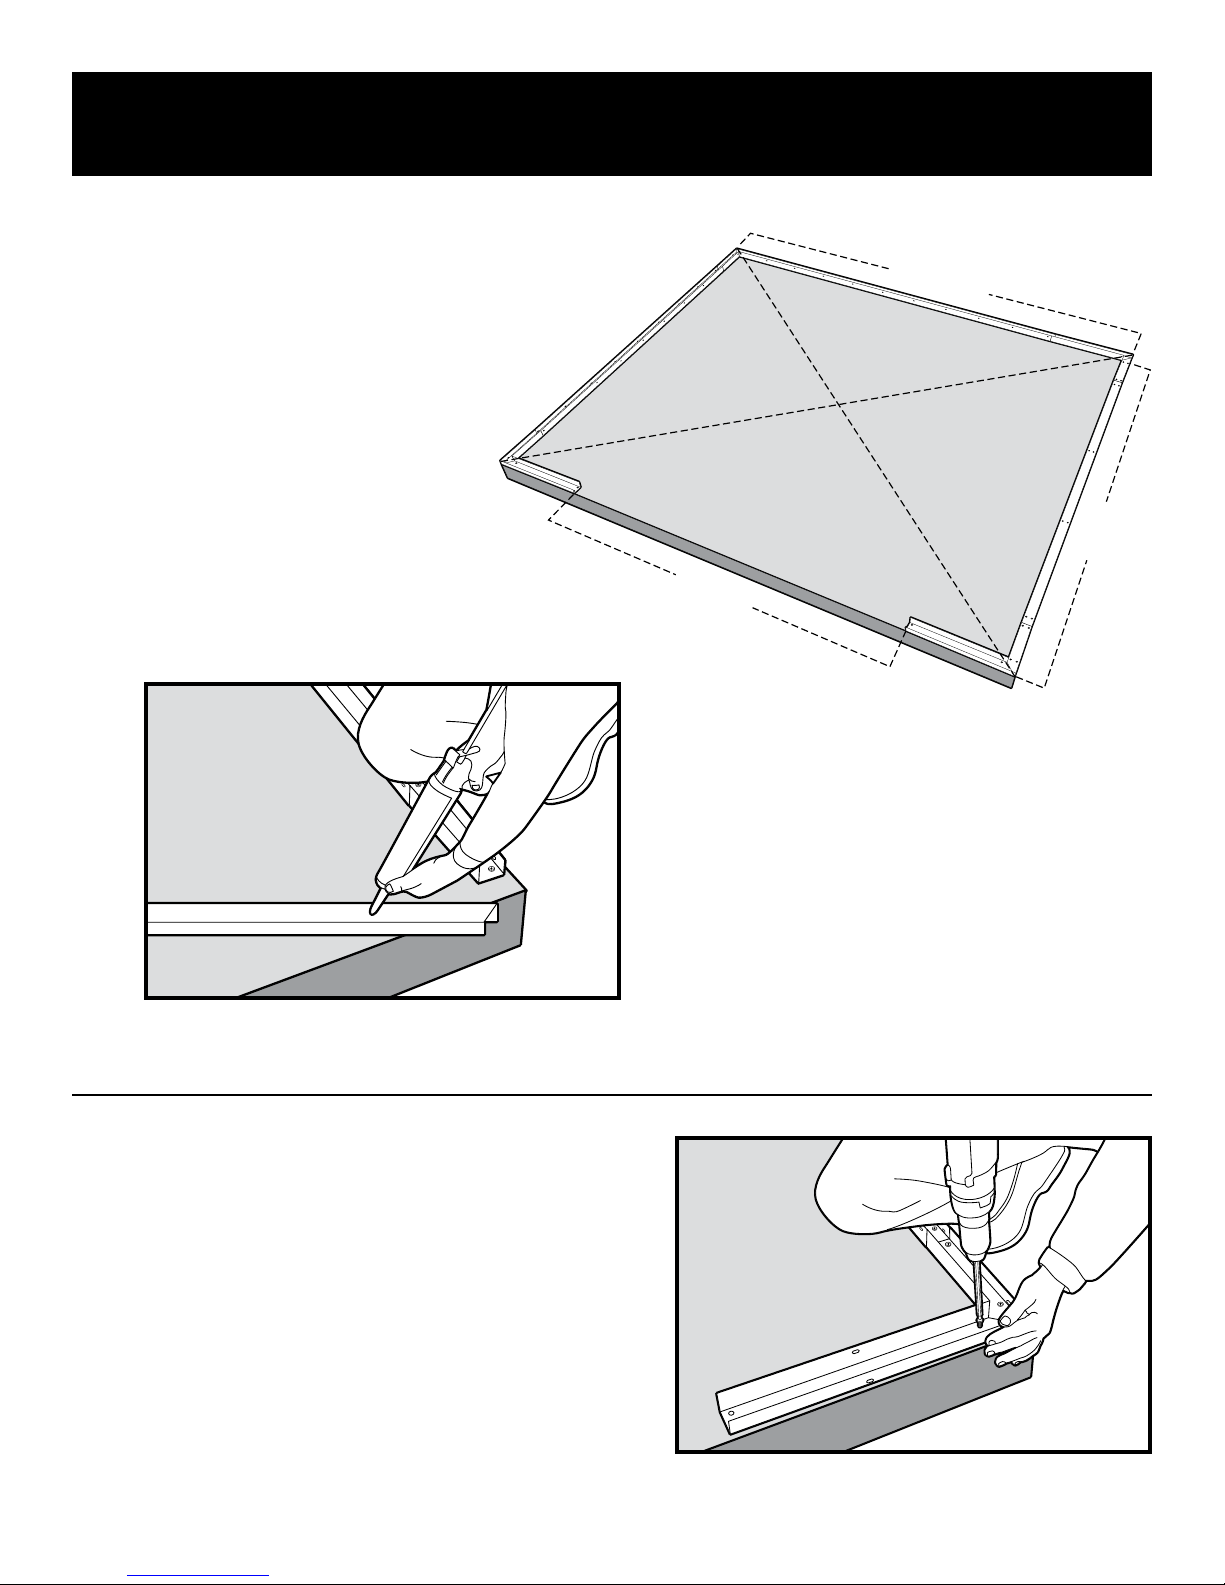
NOTE: Before assembly of this structure –
Please take a complete inventory of the parts and
components contained in the shed pallet/package
and compare with the parts list and parts identication
diagrams shown on the next few pages. If any parts
are missing, please contact the Vision Help Line.
DO NOT ATTEMPT TO ASSEMBLE THIS PRODUCT
IF ANY PARTS ARE MISSING OR DAMAGED.
Please do not attempt to return this product to
the store where you purchased it. For assistance
or parts replacement, call the Vision Help Line
at 1-866-633-9970.
PRODUCT LENGTH
PRODUCT DESCRIPTION NO. (INCHES) QTY
Wall Panel WP1 71.5 18
Roof Panel RP2 50.125 18
Corner Post CNR 71.5 4
Sloped Wall Panel WP2 76 2
Sloped Wall Panel WP3 79 1
Sloped Wall Panel WP4 81.937 1
Sloped Wall Panel WP22 84.937 1
Sloped Wall Panel WP23 86.937 1
Sloped Wall Panel WP8 76 2
Sloped Wall Panel WP9 79 1
Sloped Wall Panel WP10 81.937 1
Sloped Wall Panel WP24 84.937 1
Sloped Wall Panel WP25 86.937 1
Door Header Door Header 1
Roof Gable End [A] RG-A2-50 2
Roof Gable End [B] RG-B2-50 2
Ridge Cap RBC2-84 1
Fascia FC2-88 2
Doors – left and right. Includes pre-installed Door Panel 2
aluminum astrigal and hinges
Gable End Cap Gable End Caps 2
Vent Cap (set of 2 ea. inside/outside pcs) Vent Caps 2
FASTENERS
Hinge Screws For door hinges 12
#8 x 1" Pan Head Screws For wall & roof panels 150
#8 x 3/4" Pan Head Screws For base track 65
Vent Cap Screws For vent cap sets 4
2
ALUMINUM COMPONENTS
Aluminum Ridge Beam F512H02 1
Aluminum Sloped Side Wall Cap F512G02 2
Aluminum Door Lintel F512I01 1
Aluminum Door Frame Left Aluminum & Vinyl 1
Aluminum Door Frame Right Aluminum & Vinyl 1
Aluminum Base Track F512K05 1
Aluminum Base Track F512K04 2
Aluminum Base Track F512K03 2
Aluminum Base Track F512K02 2
Aluminum Base Track F512K01 2
Aluminum Base Track F512K06 2
Door Handle 2
Door Latch 2