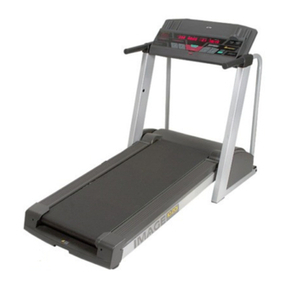
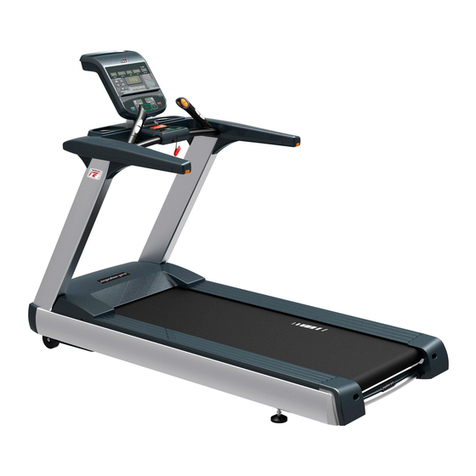
VITAL GYM T 5.1 User manual

!
P#!1!/14!
CINTA DE CORRER. Manual de Usuario
MOTORIZED TREADMILL. User’s Manual
VITAL GYM T 5.1.
Teléfono Servicio Técnico : 91 65 69 724

!
P#!2!/14!
INDICE / CONTENTS
Precauciones - Precautions
…… 3
Vista explosion - Exploded drawing
…… 5
Lista de piezas - Parts list
…… 6
Herramientas - Tools
…… 7
Instrucciones de montaje - Assembly instruction
…… 8
Ordenador - Computer
…… 9
Plegar y Desplegar la maquina - Folding and unfolding instruction
…… 9
Mantenimiento y Consejos - Maintenance and malfunction treatment
…… 10
Calentamiento y enfriamiento – Warm-up and cooling down
…… 13
Programas y Funciones / Programs and Funcions
…… 13
Advertencias y Garantía / Warnings and Guaranty
…… 14

!
P#!3!/14!
PRECAUCIONES
IMPORTANTE
Lea atentamente todas las instrucciones antes de utilizar el producto. Conserve este manual con el
fin de poder realizar futuras consultas.
MANTENIMIENTO
Examine periódicamente el aparato con el fin de detectar cualquier daño o desgaste que se pudiera
producir.
Preste especial atención a las piezas que sufren mayor desgaste.
Reemplace inmediatamente toda pieza defectuosa y evite utilizar el aparato hasta que no esté de
nuevo en perfecto estado.
Le recomendamos que de vez en cuando lubrifique ligeramente las piezas en movimiento para evitar
un desgaste prematuro.
Compruebe regularmente que las tuercas y tornillos estén bien apretados.
Tenga en cuenta que el sudor es corrosivo, no deje que éste entre en contacto con el aparato.
Para la limpieza del aparato utilice una esponja humedecida con agua.
No deje que los niños introduzcan las manos en las partes móviles del aparato. Lea el manual de
instrucciones para evitar cualquier accidente.
SALUD Y SEGURIDAD
El usuario será responsable de cualquier riesgo de lesiones que se produzcan por la utilización de
este aparato. Los riesgos se pueden minimizar siguiendo estas reglas:
•Instale el aparato sobre una superficie nivelada y limpia, dejando al menos 1metro de espacio
alrededor de éste. No utilice el aparato cerca del agua ni en el exterior.
•Mantenga a los niños y a los animales domésticos alejados del aparato. No deje nunca a los niños
cerca del aparato sin la supervisión de un adulto.
•Vista siempre con ropa y calzado deportivo adecuado.
•Este aparato está concebido para una utilización doméstica, por lo que el fabricante no se hace
responsable en caso de otro tipo de utilizaciones ( gimnasios, clubes deportivos, etc. )
•Este aparato no es adecuado para utilizaciones con fines terapéuticos.
•En caso de mareos, náuseas, dolores torácicos o cualquier otro síntoma fuera de lo normal, deje
de realizar ejercicios inmediatamente y consulte a su médico.
•Nunca retenga la respiración durante la realización del ejercicio.
•No comience nunca un programa de ejercicios sin consultar con su médico, si usted sufre o ha
sufrido algún problema físico.
•No realice ejercicios 30-60 minutos antes o después de una comida.
•Antes de comenzar un entrenamiento, es indispensable que tenga presente su edad y su
condición física. Si usted tiene una forma de vida sedentaria y sin actividad física regular, es
primordial que consulte a su médico para determinar el grado de intensidad de su
entrenamiento. No espere conseguir alcanzar el nivel máximo durante los primeros
entrenamientos. Cada sesión de entrenamientos debe comenzarse con una fase de calentamiento
de entre 3 y 5 minutos, especialmente personas con más de 50 años. Comience con un
calentamiento progresivo y termine bajando el ritmo. Si comienza el entrenamiento con un ritmo
muy fuerte, corre el riesgo de quedarse rápidamente sin fuerza y el riesgo de lesiones aumenta.
•Las personas minusválidas o discapacitadas no deben utilizar este aparato sin la supervisión de un
especialista en salud o de un médico cualificado.
Debido a un intento de mejora constante, el fabricante se reserva el derecho de
realizar cualquier alteración que crea oportuna tanto en el aparato como en el manual
de instrucciones.

!
P#!4!/14!
PRECAUTIONS
IMPORTANT
Carefully read all instructions before using the product. Keep this manual in order to make future
inquiries.
MAINTENANCE
Periodically examine the device in order to detect any damage that might occur.
Pay particular attention to the parts suffering from usury.
Immediately replace any defective part and avoid using the device until it is back in perfect condition.
We recommend you to occasionally slightly lubricate moving parts to prevent premature usury.
Regularly check that nuts and screws are tight.
Note that sweat is corrosive, do not let it come in contact with the device.
To clean the appliance, use a damp sponge.
Do not let children insert their hands into moving parts. Read the instruction manual to avoid any
accidents.
HEALTH AND SAFETY
The user is responsible for all risk of injuries that occur from the use of this device. Risks can be
minimized by following these rules:
•Install the unit on a clean level surface, leaving at least one meter of space around it. Do not use
it near water or outdoors.
•Keep children and pets away from the appliance. Do not leave children near the appliance
without adult supervision.
•Always wear appropriate clothes and shoes to use the device.
•This appliance is designed for domestic use, so the manufacturer is not responsible for any other
uses (gyms, sports clubs, etc..)
•This appliance is not suitable for therapeutic uses.
•In case of dizziness, nausea, chest pains or any other unusual symptoms, stop exercising
immediately and consult your doctor.
•Never hold your breath during the exercise.
•Do not start an exercise program without consulting your doctor if you have or have had any
physical problems.
•Do not exercise 30-60 minutes before or after a meal.
•Before beginning training, it is essential to bear in mind your age and physical condition. If you
have a sedentary lifestyle without regular physical activity it is essential to consult your doctor to
determine the degree of intensity of your workout. Do not expect to reach the maximum level
during the first practice. Each training session should begin with a warm-up of 3 to 5 minutes,
especially for people over 50 years.
•Start with a gradual warming-up and finish winding down. If you start training too fast, you could
get injured.
•Handicapped or disabled persons should not use this appliance without supervision of a health
specialist or a qualified physician.
Due to constant improvement attempts, the manufacturer keeps the right to make any
changes he believes would be appropriated on both the unit and the instruction manual.

!
P#!5!/14!
VISTA EXPLOSIÓN / EXPLODED DRAWING

!
P#!6!/14!
LISTA DE PIEZAS / PARTS LIST
No.
Description
Qty
No.
Description
Qty
1
Base frame
1
A1
Hex screw M8*12
2
2
Support frame
1
A2
Hex screw M8*30
1
3
Left support tube
1
A3
Hex screw M6*16
4
4
Right support tube
1
A4
Hex screw M8*16
4
5
Left end cap frame
1
A5
Hex screw M8*40
2
6
Right end cap frame
1
A6
Hex screw M10*55
2
7
Handlebar support frame
1
A7
Hex screw M8*60
2
8
Rear roller
1
A8
Hex screw M8*45
1
9
Front roller
1
A9
Hex screw M8*35
16
10
Motor
1
A10
Hex screw M8*75
2
11
Running deck support base
2
A11
Cross head self-lock bolt ST4.2*12
4
12
Eyebolt(Adjustable pole)
2
A12
Cross head self-lock bolt ST4.2*16
14
13
Computer
1
A13
Cross head half round bolt ST4*16
4
14
Running deck
1
A14
Cross head half round self-lock bolt ST4.2*10
10
15
Running belt
1
A15
Cross head self-lock bolt ST5*20
8
16
6v belt
1
A16
Cross blot M4*12
2
17
Wheel
2
A17
Cross head self-lock bolt ST4*16
2
18
Cushion
4
A18
Cross head self-lock bolt ST2.9*12
2
19
Speed sensor
1
A19
Cross head self-lock bolt ST4.2*40
2
20
Motor base
1
B1
Nut M6
2
21
Skid-resistant fabric cushion
2
B2
Nylon nut M8
15
22
Upper motor cover
1
B3
Nut M8
4
23
Base motor cover
1
B4
Nut M4
2
24
Left rear end cap
1
C1
Flat washer Ф4
13
25
Right rear end cap
1
C2
Flat washer Ф6
6
26
Handlebar (cover)
2
C3
Flat washer Ф8
8
27
Ф50 tube plug
2
C4
Flat washer Ф10
2
28
Locker
1
C5
Big flat washer Ф8
4
29
Adjustable foot pad
2
C6
Big flat washer Ф4
4
30
Wire (power / control wire)
1
C7
Spring washer Ф4
6
31
Transformer
1
C8
Spring washer Ф8
12
32
Driver(PCB)
1
C9
Arc washer Ф8
4
33
Safety key
1
34
Power plug
1
D1
Wrench
1
35
J50*25 square plug
2
D2
Screwdriver
1
36
Lock nut
2
D3
Lubricant bottle
1
37
Stator
4
D4
Wrench (s=6/ s=5)
1
38
Pulse wire
2
39
Filter
1

!
P#!7!/14!
HERRAMIENTAS / TOOLS

!
P#!8!/14!
INSTRUCCIONES DE MONTAGE / ASSEMBLY
Advertencias: No enchufe a la red la cinta de correr hasta que esté completamente
montada.
Por favor, asegúrese de que el espacio es suficientemente adecuado para instalar la cinta de correr
y se recomienda montar la cinta con la ayuda de otra persona.
Warnings: Don’t connect the power until the treadmill is fully assembled.
Please make sure the space is big enough to install the treadmill and recommend another person to
help install it.

!
P#!9!/14!
ORDENADOR / COMPUTER INSTRUCTION
Calorías / Calorie: 0-999 kcal
Distancia/ Distance: 0-99.99 km/h
Tiempo/ Time: 0-99 minutos: 59 seconds
Velocidad/ Speed: 1.0-12 km/h
Pulso/ Pulse: 50-200 times/minute
Llave de seguridad: Cuando la llave de seguridad se cae durante el ejercicio, la cinta se
para y el display vuelve a cero.
Safety key: When Emergency stop key falls off during operation the treadmill will stop and
index of the computer will be zero.
On/Off: Pulse, el tiempo hará una cuenta regresiva de 3 segundos, se inicia la cinta, la
velocidad está a 1 km/h. Pulse de nuevo, la cinta se detendrá y volverá en estado en paro.
On/Off: Press it, time will count down 3 seconds, the treadmill starts, the speed is 1km/h.
Press it again, the treadmill will stop and turn into ready status.
Acelerar: Pulse este botón para aumentar la velocidad de 0,2 km/h por hora.
Speed up: Press this button to increase speed 0.2 km/hr per time.
Disminuir velocidad: Pulse este botón para disminuir la velocidad de 0,2 km/h por hora.
Speed down: Press this button to decrease speed 0.2 km/hr per time.
INSTRUCCIONES PARA PLEGAR Y DESPLEGAR LA MAQUINA
1. Plegada: levantar la cinta por la parte trasera, poner el cierre de seguridad que se encuentra a
la izquierda de la cinta (se parece a una cerradura de puerta), (ver figure a)
2. Para desplegarla quite el cierre de seguridad, bajarla despacio manualmente (ver esquema b)
FOLDING AND UNFOLDING INSTRUCTION
1. Folding: The treadmill is foldaway. Lift the end of the main frame and fold upwards to lock
the deck with the support frame. (See figure a)
2. When you want to put the treadmill to the work position, please unlock the deck and handle
carefully to put it on the floor (see figure b)

!
P#!10!/14!
MANTENIMIENTO / MAINTENANCE AND MALFUNCTION TREATMENT
1) El tapiz de la cinta de correr debe mantenerse limpio, antes de proceder al
mantenimiento, desenchufe la cinta de la red. Puede limpiar el tapiz con un paño suave y
húmedo.
2) La cinta de correr se ajusta en la fábrica, se puede
desajustar durante el transporte y por su uso. Antes de
ajustar el tapiz, verifique que este apagada y
desenchufada. Para ajustarlo, se debe de apretar los
tornillos izquierdo y derecho en el rodillo trasero con la
llave hexagonal (ver esquema), se debe de dar las
mismas vueltas de ambos lados. A continuación, active
el interruptor, verifique que el tapiz funcione
correctamente, cuando la velocidad de ejecución es 4 ~
5 km / h.
3) Después de un uso de 100 horas, se debe lubricar la cinta con un lubricante de silicona.
Se recomienda este mantenimiento cada 3 – 4 semanas.
4) Después de un uso diario, la cinta puede destensarse, bloquearse. Volver a ajustarla
girando los tornillos izquierdos y derechos con las mismas vueltas de ambos lados.
1) The surface of the treadmill should be kept clean, pull out the power line before
cleaning. You can clean the running belt and the surface of the treadmill with a soft and
wet cloth.
2) The running belt is adjusted at factory; it may runs
defectively after transportation and use. Turn off the
treadmill before adjusting, pull the belt in the center,
and then adjust the left and right bolts in rear roller
with hex spanner (See figure 8 ) it is better to adjust
1/2 circle once. Then turn on the switch, check if the
belt runs efficiently when the running speed is 4~5
km/h.
3) After using over 100hours, the running belt is used up, please lubricate the running
board and adjust the running belt well.
4) After a long time of running, the belt may be longer and stuck. You should turn the left
and right adjustor bolt in rear roller clockwise at same position till the belt runs
smoothly and freely.

!
P#!11!/14!
ADVERTENCIA:
1. El nivel de seguridad del equipamiento se puede mantener sólo si se examina
regularmente para detectar daños y desgaste, por ejemplo, puntos de conexión.
2. Por favor, reemplazar los componentes defectuosos de inmediato y / o mantener el
equipo fuera de servicio hasta su reparación.
Avería
Causa
Solución
1. Cinta encendida pero el
display no funciona
1. Mal enchufado
2. El interruptor está en “off”
3. Transformador está mal
enchufado
4. El fusible de la tarjeta está
quemado
1. Enchufarlo de nuevo
2. Encender de nuevo
3. Verificar y/o cambiarlo
4. Cambiar fusible
2. Er01, fallo de velocidad
1. Sensor de velocidad está roto o
mal instalado
2. Optoacoplador en la tarjeta
está dañado
3. Otras partes están dañadas
1. Verificar o cambiar el sensor
2. Cambiar tarjeta o
optoacoplador
3. Cambiar tarjeta
3. Er02, problemas de
sobrecarga
1. Sobrecarga de corriente a
través del motor
2. Tarjeta dañada
1. Cambiar el motor
2. Cambiar la tarjeta
4. Er03, Correspond failure
1. Interruptor luminoso
defectuoso
2. Optoacoplador en la tarjeta
está dañado
3. Ordenador está dañado
1. Verificar el cableado
2. Cambiar tarjeta o
optoacoplador
3. Cambiar ordenador
5. Er04, fallo de conexión
entre la tarjeta y el display
1. Motor mal insertado o motor
dañado
(circuito roto)
2. La tarjeta esta defectuosa
3. Cable defectuoso
4. Otras partes están dañadas
1.Verificar o cambiar el
motor
2. Cambiar tarjeta
3. Cambiar el cable
4. Cambiar tarjeta
6. Con un peso encima no
funciona, sin peso, funciona
1. Tarjeta defectuosa
2. El tapiz se destensa
3. Motor dañado
1. Cambiar tarjeta
2. Ajustar el tapiz
3. Cambiar motor

!
P#!12!/14!
WARNING:
1. The safety level of the equipment can be maintained only if it is examined regularly
for damage and wear, e.g. pins, connection points.
2. Please replace defective components immediately and/or keep the equipment out of
use until repair.
Malfunction
Reason
Solution
1. Power on but no
display on the
computer
1. Plug incorrectly.
2. Overload protection switch is off
3. Transformer is inserted incorrectly.
4. The fuse in the driver is burned.
1. Plug it again.
2. Reset it.
3. Check it up or replace it.
4. Replace it
2. Show Er01, Speed
sensor malfunction
1. Speed sensor is broken or installed
incorrectly.
2. Optocoupler in the driver is
damaged
3. Other parts outside IC is broken
6. Check up the install position or
replace the speed sensor
7. Replace Driver or the
Optocoupler
8. Replace driver
3. Show Er02, motor
electricity overload
malfunction
1.Overload current through the
motor
2. Obstruction of the roller is too
much
3. Driver is damaged
1. Replace the motor
2. Enhance lubricating or
replace it
3. Replace the driver
4. Show Er03,
Correspond failure
1. Undesirable signal wire
2. Optocoupler in the driver is
damaged
3. Computer is damaged
1. Check up the signal wire’s
connector to the computer and
the driver
2. Replace driver or the
Optocoupler
3. Replace computer board
5. Show Er04, driver
power malfunction
1. Motor wasn’t inserted well or
motor’s damaged
(broken circuit)
2. The relay of the driver is damaged
3. The bridge of the driver is damaged
4. Other parts outside IC is damaged
1. Check up or replace a motor
2. Replace driver or relay
3. Replace driver or bridge
4. Replace driver
6. Without loading,
operate normally. With
loading, hard to start
and with stops.
1. Driver’s torque regulation is small
2. Running belt gets loose
3. Undesirable motor
1. Adjust the torque
2. Adjust running belt
3. Replace motor

!
P#!13!/14!
CALENTAMIENTO Y ENFRIAMIENTO / WARM-UP AND COOLING DOWN
PROGRAM FUNCTIONS / PROGRAMAS

!
P#!14!/14!
!
ADVERTENCIAS Y GARANTIA / !
•Antes de encender la cinta, asegurese que la llave de seguridad este puesta.
•Instale la cinta de correr sobre una superficie lisa que tenga acceso a 220-
240voltios (50/60 Hz), toma de tierra. De no ser así, corre el peligro de que la
máquina se estropee.
•LUBRICAR LA CINTA CADA 15-25 DÍAS (lubricante silicona). Corre el peligro
de que su aparato se le rompa el tapiz, los rodamientos o se queme el motor y la
tarjeta electronica.
•APARATO PARA USO DOMÉSTICO, NO PROFESIONAL.
•UTILIZAR EN LUGAR SECO Y EVITANDO HUMEDADES.
•GUARDE EL EMBALAJE ORIGINAL PARA CONSERVAR TODAS SUS
GARANTÍAS
•SOLTEC garantiza este producto: piezas y mano de obra, en condiciones
normales de utilización, durante 2 años. Su garantía quedará acreditada con el
justificante del ticket de compra.
Cualquier incumplimiento de estas advertencias elimina la garantía.
WARNINGS AND GUARANTY
•Before igniting the tape, make sure that the safety key this plugged.
•Install the threamill on a smooth surface that has access to 220-240 volts (50/60
Hz), and a land. If not, there’s a probability that the machine gets damaged.
•LUBRICATE THE THREAMILL EVERY 15-25 DAYS (silicone lubrificant).
•DEVICE FOR DOMESTIC USE, NOT PROFESSIONAL USE.
•TO USE IN DRY PLACE AND AVOIDING DAMPNESS.
•KEEP THE ORIGINAL PACKING TO PRESERVE THE GUARANTE
•SOLTEC guarantees this product: pieces and workforce(manpower), in normal
conditions, for 2 years. The guarantee will remain accredited with the ticket of
purchase.

!
P#!15!/14!
Failure to follow these!warnings!eliminates!the guarantee.!
Table of contents

