VitrineMedia VM Light&PLAY User manual

Notice Utilisateur
User Guide
LIGHT&PLAY

50 route de la Reine - 92 100 Boulogne-Billancourt - FRANCE | Tel: +33 (0)1 49 21 00 61 | [email protected]
2
III 6
Sommaire / Table of contents
3
Contenu / Contents
Installation sur câbles / Clip-on cable installation
II 5
I 4
Installation sur barres / Clip-on bars installation
Utilisation / Use
IV 8
Configuration / Setting
V 15
Problèmes fréquents / Commonly identified problems
VI 16
Utilisation et maintenance / Use and maintenance
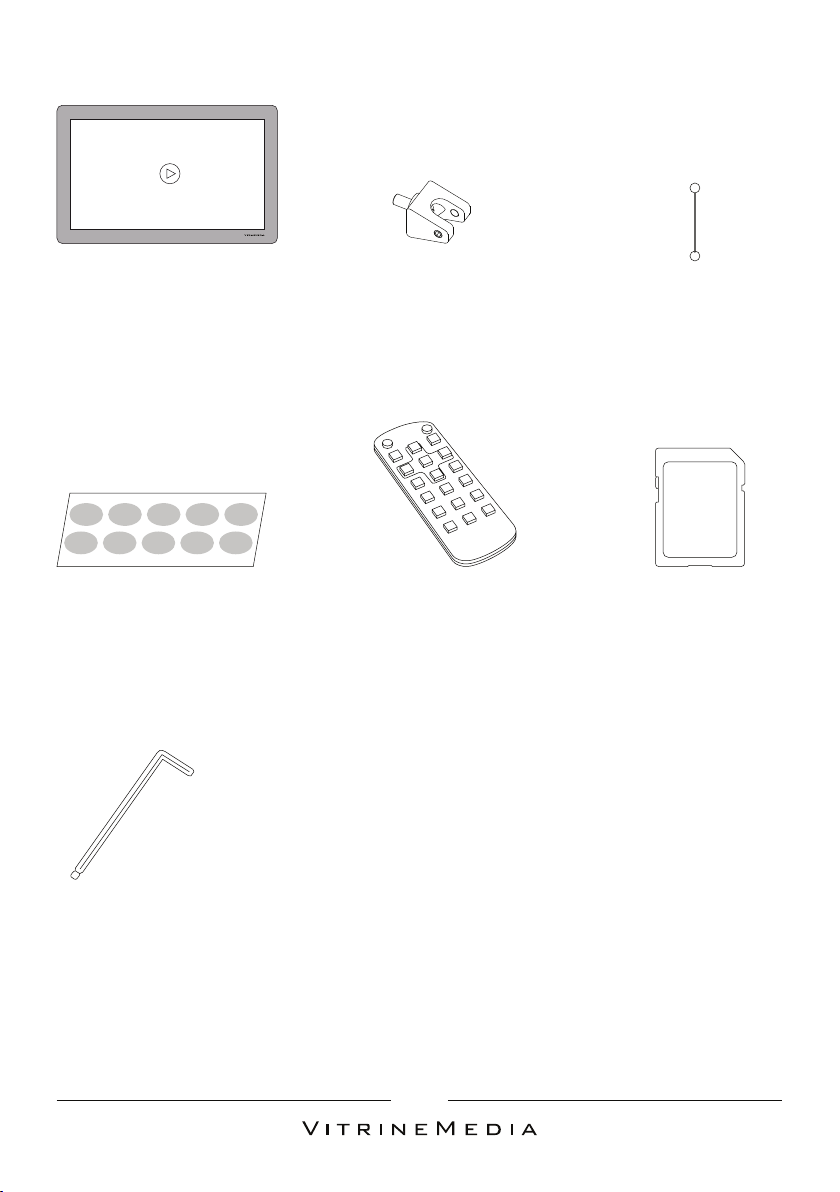
Contenu / Contents
50 route de la Reine - 92 100 Boulogne-Billancourt - FRANCE | Tel: +33 (0)1 49 21 00 61 | [email protected]
3
VM TWO CLIP SECURE FIX (x4)
VM TWO CLIP SECURE FIX (x4)
Pastilles autocollantes (x10)
Dot stickers (x10)
Clés allen (x2)
Allen Keys (x2)
Télécommande VM LIGHT&PLAY (x1)
VM LIGHT&PLAY remote control (x1)
Carte SD 8GB (x1)
8GB SD Card (x1)
Câble 48mm (x2)
Cable 48mm (x2)
VM LIGHT&PLAY (x1)
VM LIGHT&PLAY (x1)

50 route de la Reine - 92 100 Boulogne-Billancourt - FRANCE | Tel: +33 (0)1 49 21 00 61 | [email protected]
4
IINSTALLATION SUR BARRE
CLIP-ON BARS INSTALLATION
1
2
3
Si vous souhaitez changer l’orientation de l’écran, faites pivoter l’écran et répétez
l’opération.
If you wish to change the orientation of your display panel, rotate it and repeat the steps.
Lorsque les barres et l’écran sont en position verticale, l’utilisation de la carte SD est
délicate et celle de la clé USB impossible. Idem en position horizontale.
When the clip-on bars and the L&P panel are vertically or horizontally aligned, you cannot
use a USB flash drive. The use of an SD card requires an intricate set-up.
Pour assurer la sécurité, les 4 fixations doivent être utilisées.
To ensure safety, the 4 secure fix need to be used.
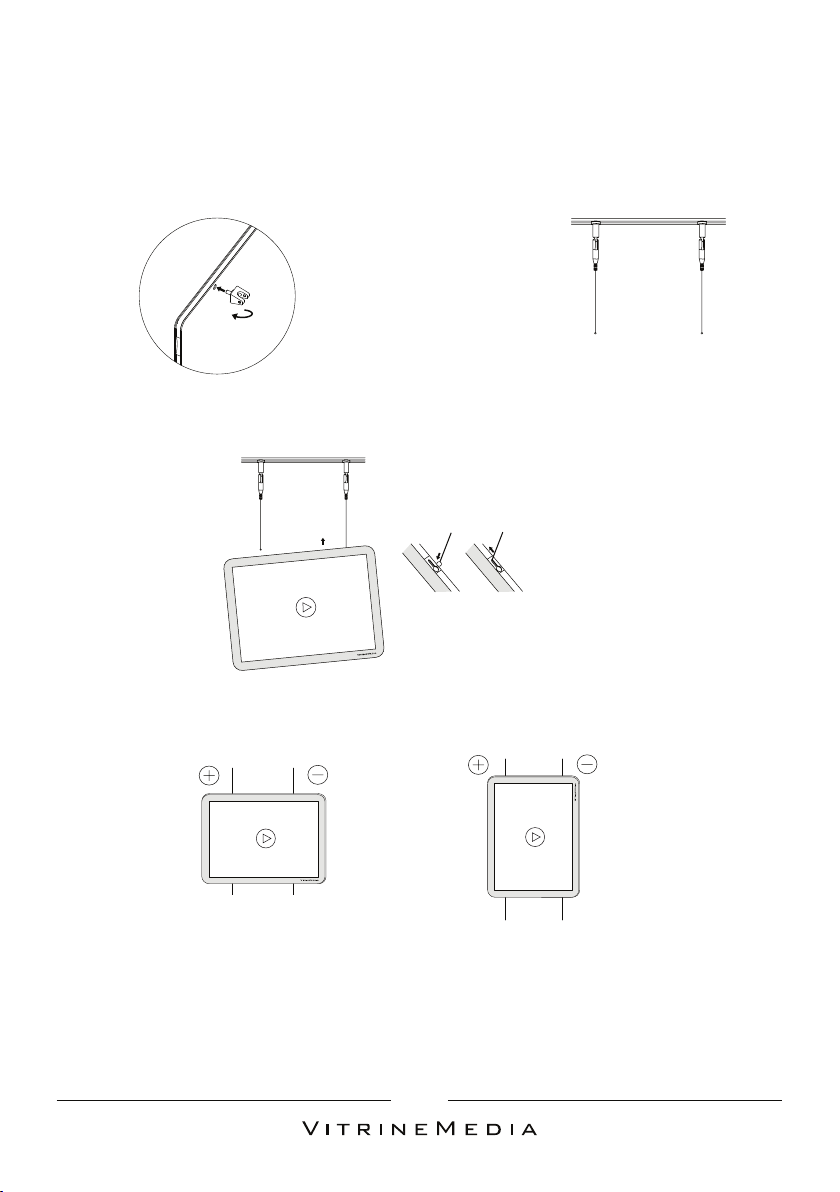
1
3
2
INSTALLATION SUR CÂBLE
CLIP-ON CABLE INSTALLATION
50 route de la Reine - 92 100 Boulogne-Billancourt - FRANCE | Tel: +33 (0)1 49 21 00 61 | [email protected]
5
II
Avant l’installation du VM LIGHT&PLAY sur les câbles, enlevez les VM TWO CLIP SECURE
FIX et effectuez une mise hors tension.
Before setting up the VM LIGHT&PLAY on cable please remove the VM TWO CLIP SECURE FIX
and switch off the power.
Logo : Bas / droite
Logo: Bottom / right
Logo : Haut / droite
Logo: Top / right

6
UTILISATION VM LIGHT&PLAY
USING THE VM LIGHT&PLAY
III
A
B
1
Dossier Racine Dossier Racine
Sous-dossier 1
Sous-dossier 2
Image1.jpg
Image1.jpg
Video1.mp4
Video1.mp4
Image2.jpg
Image2.jpg
Video2.mp4
Video2.mp4
Formats
Formats
Résolution optimale conseillée
Optimal recommended resolution
Vidéos
Videos MP4 – Mpeg4(divx)
17 pouces/inches 1280x1024
21.5 pouces/inches 1920x1080
Images
Images jpg / jpeg / bmp / png
17 pouces/inches 1280x1024
21.5 pouces/inches 1920x1080
(max: 9600x6400)
50 route de la Reine - 92 100 Boulogne-Billancourt - FRANCE | Tel: +33 (0)1 49 21 00 61 | [email protected]
Root folder Root folder
Sub-folder 1
Sub-folder 2
Formats de fichiers compatibles.
Supported file formats.
Préparation de votre carte SD de votre clé USB.
Setting-up your SD card or USB flash drive.
Note : La carte SD est toujours le support de mémoire par défaut! Si vous souhaitez
utiliser une clé USB, veuillez vous référer à la section "Sélection du support par défaut"
(Section IV - A).
The SD card is the preset data storage medium! If you wish to use a USB flash drive, refer to
section “Selecting the preset data storage” (Section IV – A).
Au préalable, formatez votre carte SD ou votre clé USB. Ajoutez vos fichiers
vidéo et/ou images directement à la racine de votre carte SD ou clé USB
(espace inutile). Attention à ne pas créer de sous-dossier, le lecteur ne
pourra pas y accéder.
Beforehand, format your SD card or USB flash drive. Add the video files or
images directly to the root folder of your SD card or USB flash drive. Be careful
not to create any sub-folder as they will not be accessible to the device.

50 route de la Reine - 92 100 Boulogne-Billancourt - FRANCE | Tel: +33 (0)1 49 21 00 61 | [email protected]
7
2
3
C
_VitrineMedia.jpg
1VitrineMedia.jpg
VitrineMedia.jpg
Lecture de vos contenus.
Playing your content.
L’ordre de lecture s’effectue en fonction du classement par ordre alphabétique
du nom de vos fichiers.
Priorité de classement: Caractères spéciaux > Chiffres > Lettres.
The playing order goes according to alphabetical order of the file names. File order:
Special characters > Numbers > Letters.
Par défaut, VM LIGHT&PLAY lira les fichiers vidéo ou images présents sur votre carte
SD. Si vous souhaitez changer cette configuration (lecture par défaut sur clé USB)
veuillez vous référer à la section IV-A.
As preset, the VM LIGHT&PLAY will play the video or image files on your SD card. If you wish
to change this setup (USB flash drive preset reading) refer to section IV - A.
Insérer votre carte SD ou votre clé USB.
Insert the SD card or the USB flash drive.
Carte SD
SD Card
Clé USB
USB Flash Drive
50 route de la Reine - 92 100 Boulogne-Billancourt - FRANCE | Tel: +33 (0)1 49 21 00 61 | [email protected]
8
CONFIGURATION DU VM LIGHT&PLAY
SETTING-UP THE VM LIGHT&PLAY
IV
A
1
2
Language English
Repeat Mode Repeat
Play Recording
Play Path SD
Copy Mode Format
Subtitle Switch On
Subtitle Font Size Normal
Subtitle Foreground Black
Subtitle Background White
Subtitle Scroll Speed Normal
Basic Setup Custom Fonctions Others Setup
Basic Setup
Sélection du support mémoire à lire.
Selecting a data storage medium to read.
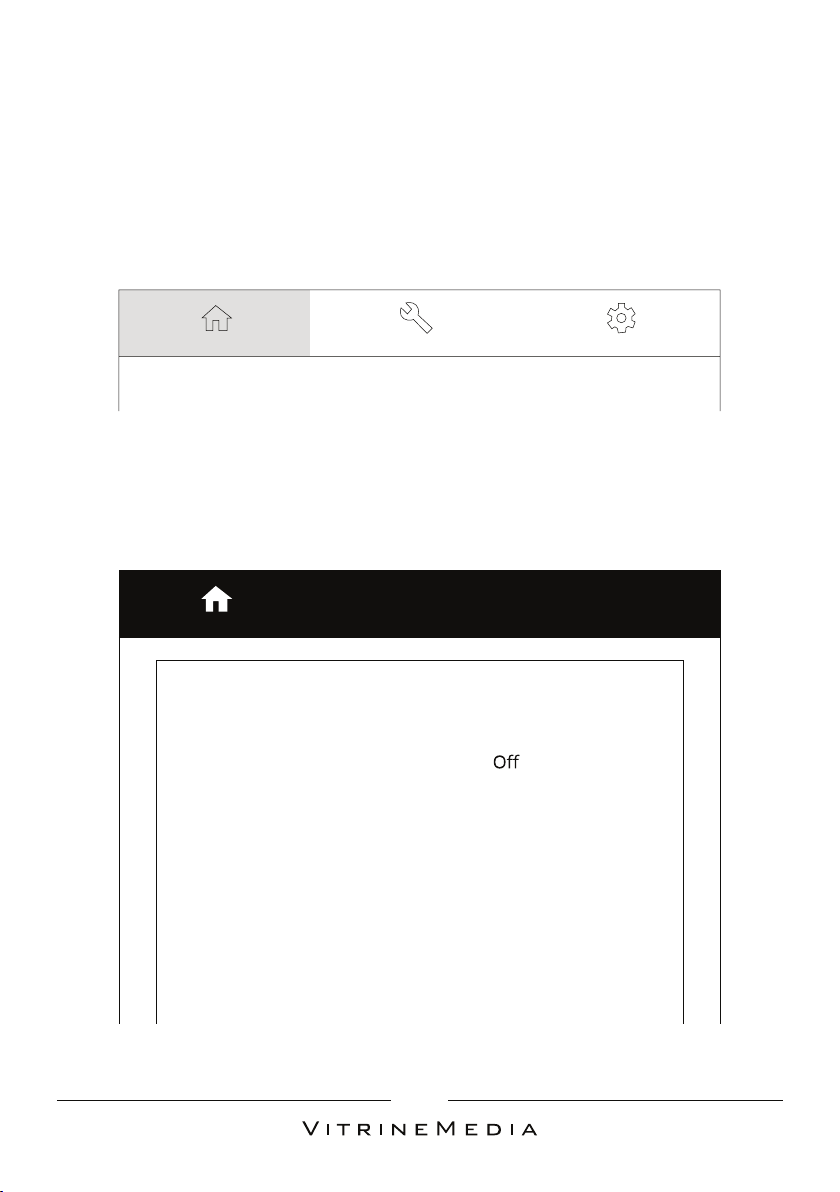
Appuyez sur le bouton SETUP pour afficher le menu principal de l’écran VM
LIGHT&PLAY.
Press SETUP to display the main menu of the VM LIGHT&PLAY.
Entrez dans le menu “Basic Setup” en appuyant sur le bouton ENTER.
Go to the “Basic Setup” menu by pressing the ENTER key.

50 route de la Reine - 92 100 Boulogne-Billancourt - FRANCE | Tel: +33 (0)1 49 21 00 61 | [email protected]
9
3
4
Language English
Repeat Mode Repeat
Play Recording
Play Path SD
Copy Mode Format
Subtitle Switch On
Subtitle Font Size Normal
Subtitle Foreground Black
Subtitle Background White
Subtitle Scroll Speed Normal
Basic Setup
Nand
SD
USB
Appuyer une première fois, puis une seconde fois sur le bouton EXIT pour sortir
du menu.
Press the EXIT button a first time and then a second time to exit the menu.
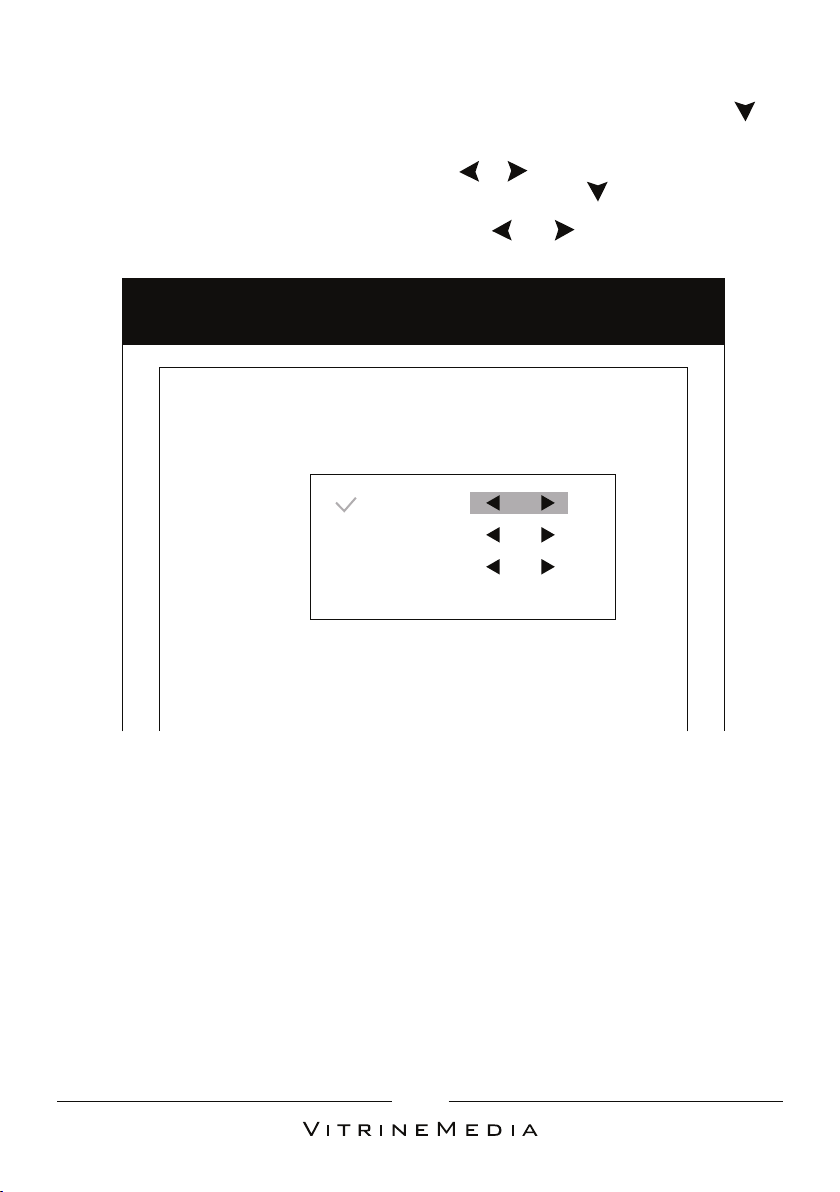
Accédez à la fonction “Play Path” à l’aide des boutons de navigation . Puis
validez en appuyant sur le bouton ENTER. Enfin, sélectionnez le support de
lecture par défaut (SD ou USB) à l’aide des boutons de navigation et du bouton
ENTER.
Reach the “Play Path” option using the navigation keys . Then confirm by pressing
the ENTER key. Select the preset data storage (SD or USB) using the navigation keys
and the ENTER key.

50 route de la Reine - 92 100 Boulogne-Billancourt - FRANCE | Tel: +33 (0)1 49 21 00 61 | [email protected]
10
B
1
2
Language English
Repeat Mode Repeat
Play Recording
Play Path SD
Copy Mode Format
Subtitle Switch On
Subtitle Font Size Normal
Subtitle Foreground Black
Subtitle Background White
Subtitle Scroll Speed Normal
Basic Setup Custom Fonctions Others Setup
Basic Setup
Mode de lecture.
Repeat Mode.
Appuyer sur le bouton SETUP pour afficher le menu principal de l’écran VM
LIGHT&PLAY.
Press the SETUP key to display the main menu of the VM LIGHT&PLAY screen.
Entrer dans le menu de “Basic Setup” en appuyant sur le bouton ENTER.
Go to the “Basic Setup” menu by pressing the ENTER key.

50 route de la Reine - 92 100 Boulogne-Billancourt - FRANCE | Tel: +33 (0)1 49 21 00 61 | [email protected]
11
3
4
Language English
Repeat Mode Repeat
Play Recording
Play Path SD
Copy Mode Format
Subtitle Switch On
Subtitle Font Size Normal
Subtitle Foreground Black
Subtitle Background White
Subtitle Scroll Speed Normal
Basic Setup
List Cycle
REPEAT
Accéder à la fonction “Repeat Mode” à l’aide des boutons de navigation .
Puis valider en appuyant sur le bouton ENTER. Enfin, sélectionner le mode de
lecture par défaut (List Cycle ou REPEAT) à l’aide des boutons de navigation
et du bouton ENTER.
Reach the “Repeat Mode” function using the navigation button . Then confirm
your choice by pressing the ENTER key. Select then the preset reading mode (Cycle
or REPEAT list) using the navigation keys and the ENTER key.
NOTE : “ List Cycle “ est le mode de lecture par défaut.
List Cycle : Lecture en boucle de votre liste de lecture.
REPEAT : Lecture en boucle d’une seule vidéo ou d’une seule image. Pour changer de
contenu, naviguez avec les touches ou .
NOTE: “List Cycle” is the default mode.
List Cycle: Will read the entire content and will then repeat it.
REPEAT: Will read a single video or image repeatedly. To read a different content, use the
or .
Appuyez deux fois sur le bouton EXIT pour sortir du menu.
Press the EXIT key twice to exit the menu.
50 route de la Reine - 92 100 Boulogne-Billancourt - FRANCE | Tel: +33 (0)1 49 21 00 61 | [email protected]
12
C
1
2
Time Size Normal
Time Color Blue
Rotate Screen 90 degrees
File Manager Open
Boot On
Serial Port Mian
Auto Boot/Sleep Set Open
Display Setting Light
Id Setting 000000
Remote Control Lock Set
Basic Setup Custom Fonctions Others Setup
Others Setup
Luminosité, contraste et saturation.
Brightness, contrast and saturation.
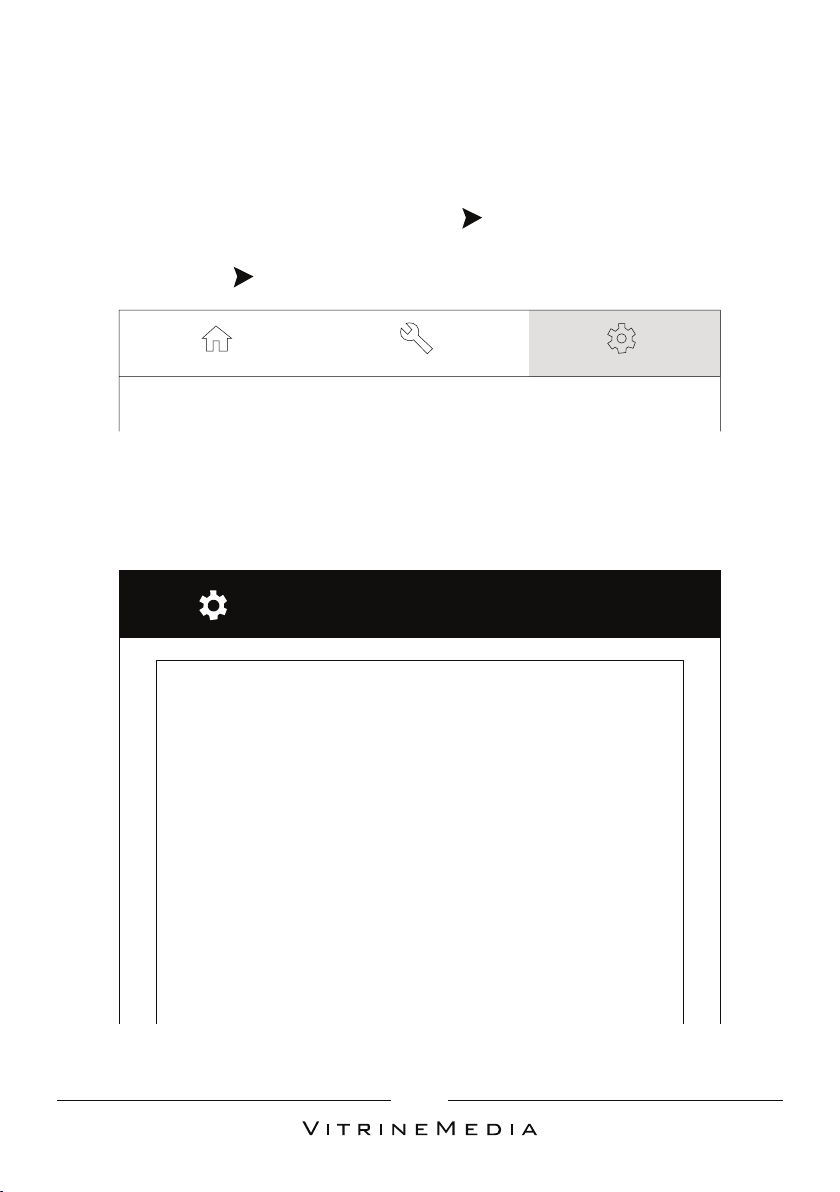
Appuyez sur le bouton SETUP pour afficher le menu principal de l’écran VM
LIGHT&PLAY. Puis appuyez sur le bouton pour naviguer vers le menu
“Other Setups”.
Press the SETUP key to display the main menu of the VM LIGHT&PLAY screen.
Then press the key to navigate to the “ Other Setups” menu.
Entrez dans le menu “Other Setups” en appuyant sur le bouton ENTER.
Reach the “Other Setups” menu by pressing the ENTER key.
50 route de la Reine - 92 100 Boulogne-Billancourt - FRANCE | Tel: +33 (0)1 49 21 00 61 | [email protected]
13
3
4
Time Size Normal
Time Color Blue
Rotate Screen 90 degrees
File Manager Open
Boot On
Serial Port Mian
Auto Boot/Sleep Set Open
Display Setting Light
Id Setting 000000
Remote Control Lock Set
Others Setup
Light 1
Contrast 50
Saturation 50
NOTE : La valeur de la luminosité est comprise entre 1 et 255 (1 étant le plus
lumineux).
Note: The brightness value is set between 1 and 255 (1 being the brightest).
Appuyer deux fois sur le bouton EXIT pour sortir du menu.
Press the EXIT key twice to exit the menu.
Accédez à la fonction “Display Setting” à l’aide des boutons de navigation .
Puis validez en appuyant sur le bouton ENTER. Sélectionnez l’option souhaitée,
Luminosité, Contraste ou Saturation à l’aide des boutons de navigation
et du bouton ENTER. Utilisez les boutons et pour modifier les valeurs.
Reach the “Display Setting” option using the navigation keys . confirm by pressing
the ENTER key. Select the desired option, Brightness, Contrast or Saturation using
the navigation keys and the ENTER key. Use the and keys to change the
values.
50 route de la Reine - 92 100 Boulogne-Billancourt - FRANCE | Tel: +33 (0)1 49 21 00 61 | [email protected]
14
ENTER
COPYDEL
EXITSETUP
INPUT
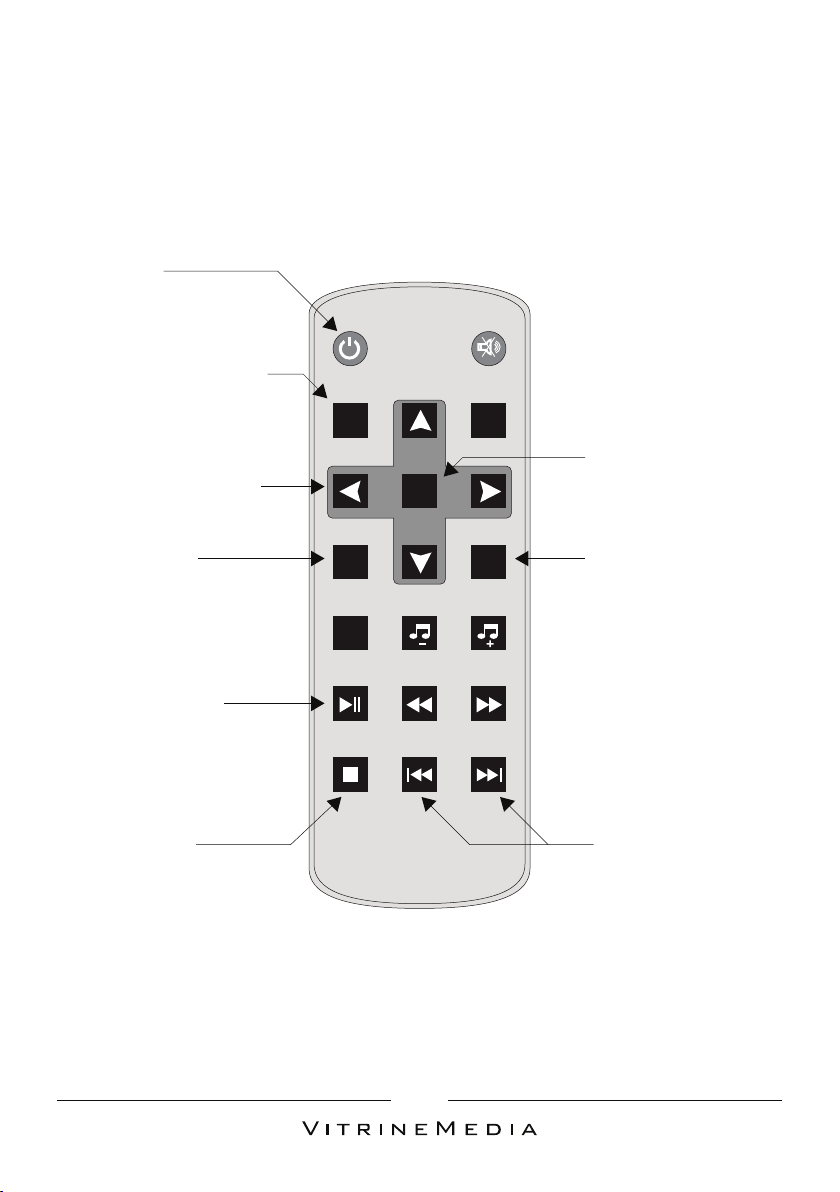
Annexe : Télécommande.
Appendix : Remote control.
Power
Power
Rotation de l’image à
90° (sens horaire)
Content rotation by
90° (clockwise)
Boutons de navigation
Navigation buttons
Menu
Go to Menu
Menu
Go to Menu
Valider
Choose / Enter
Sortie
Exit
Précédent et suivant
Previous and next
Lecture / Pause
Play / Pause

50 route de la Reine - 92 100 Boulogne-Billancourt - FRANCE | Tel: +33 (0)1 49 21 00 61 | [email protected]
15
PROBLÈMES FRÉQUENTS
RECURRING PROBLEMS /
COMMONLY IDENTIFIED PROBLEMS
V
Après insertion de ma clé USB
ou carte SD, rien ne se passe.
After inserting my USB flash drive
or SD card, nothing happens.
VM LIGHT&PLAY lit une seule
vidéo en boucle.
The VM LIGHT&PLAY only reads
one video repeatedly.
VM LIGHT&PLAY affiche un
écran noir.
The VM LIGHT&PLAY displays a
black screen.
La télécommande ne répond
pas.
The remote control is not
responding.
Ma vidéo s’arrête à la
première image.
My video freezes on its first
frame.
Vérifiez que vous utilisez le bon format vidéo.
Verify that you are using the right video format.
Vérifiez que tous vos fichiers vidéo et images
sont situés à la racine du support mémoire. (voir
section III-B).
Check that all your video and image files are
located at the root of the data storage (medium)
(see section III-B).
Vérifiez que vos formats de fichiers sont
compatibles avec notre lecteur. (voir tableau
section III-A).
Check that your files are compatible with our
drive (see section III-A).
Vérifier que le support à jouer est celui
sélectionné par défaut. (voir section IV-A).
Check that the medium to be read is the preset one
(see section IV-A).
Vérifiez le “Mode de lecture” sélectionné (voir
section IV-B).
Check the selected “Repeat mode” (see Section IV-B).
Vérifiez que votre installation est sous tension.
Check that your installation is powered.
Vérifiez le sens d’installation de l’écran (polarité).
Check the display’s installation direction (polarity).
Assurez-vous que la distance entre la
télécommande et votre écran soit inférieure à
10cm.
Ensure a distance of less than 10 cm between your
remote control and the screen.
Vérifiez vos piles.
Check your batteries.

50 route de la Reine - 92 100 Boulogne-Billancourt - FRANCE | Tel: +33 (0)1 49 21 00 61 | [email protected]
16
UTILISATION ET MAINTENANCE
Use and maintenance
VI
1
2
3
Rev. B
Si vous souhaitez obtenir de l’aide, vous pouvez contacter le Service Après Vente. Avant de contacter VitrineMedia,
notez le modèle et le numéro de série du produit. Vous trouverez ces informations directement sur le produit ou
sur l’emballage.
If you need help, you can contact our After Sale Service. Before contacting VitrineMedia, please write down the product
You can find these informations directly on the product or on the packaging.
model and serial number.
Normes Européennes et Internationales
European and International Standard
Ne pas utiliser de pulvérisateur à eau.
Do not spray water on VM LIGHT&PLAY.
Ne pas utiliser de détergents, ni de produits abrasifs.
Do not use corrosive materials to clean VM LIGHT&PLAY.
À utiliser et à stocker dans un environnement dont la température se situe entre
0°C et 55°C.
Ensure that the storage temperature conditions and environment of use is between
0-55°C, please do not store or use VM LIGHT&PLAY in high-temperature or low-
temperature environment.

Jérémy Lamour
A
A 30/05/2016
B 05/04/2017
30902CN012
A5 booklet 70g 小册子A5 70G
VM LIGHT&PLAY
Table of contents
Popular Projection Screen manuals by other brands

Elite Screens
Elite Screens YARD MASTER MANUAL SERIES user guide

Elite Screens
Elite Screens B SERIES Quick user guide

Draper
Draper Premier Installation & operating instructions

Draper
Draper Access XL Installation & operating instructions

Cello
Cello Owens 50 instruction manual

Elite Screens
Elite Screens CineTension B Series user guide


Draper
Draper FocalPoint instructions

Classic Exhibits
Classic Exhibits Perfect 10 VK-1401 manual

Certikin
Certikin COVERSTAR installation guide

AVstumpfl
AVstumpfl MONOBLOX 32 instructions

Stewart Filmscreen
Stewart Filmscreen AT 1.5 owner's manual

Stewart Filmscreen
Stewart Filmscreen Cima Owner's Manual & Installation Instructions