Vivago 8000 Series User manual
1
Vivago WristCare System
User’s guide for
sheltered homes
2 3
Contents:
What is the Vivago WristCare System? ........................................................................................................3
The Vivago watch .....................................................................................................................................................3
The Vivago WristCare transmits the alarms...............................................................................................3
Using the Vivago watch.........................................................................................................................................4
Fastening the watch........................................................................................................................................4
Shower, bath and sauna................................................................................................................................4
Removing the watch.......................................................................................................................................4
Cleaning the watch..................................................................................................................................................4
Recharging the battery..........................................................................................................................................5
Button Functions .......................................................................................................................................................6
The watch has three buttons.....................................................................................................................6
Watch settings.............................................................................................................................................................7
Setting mode...............................................................................................................................................................7
Setting scheme...........................................................................................................................................................7
1. Time and date settings......................................................................................................................................7
1.1 Time ...................................................................................................................................................................7
1.2 24/12 h display ..........................................................................................................................................7
1.3 Year.....................................................................................................................................................................8
1.4 Month...............................................................................................................................................................8
1.5 Day......................................................................................................................................................................8
1.6 Type of date field .......................................................................................................................................8
1.7 Summer time...............................................................................................................................................8
2. Wake-up alarm settings....................................................................................................................................9
2.1 Wake up off/automatic delay function/on................................................................................9
2.2 Wake up time .............................................................................................................................................9
3. Other settings ........................................................................................................................................................9
3.1 Activity limit value for sleep ...............................................................................................................9
3.2 Resetting the memory........................................................................................................................ 10
Menu Structure of the Watch .........................................................................................................................10
Different menus and their functions:.........................................................................................................11
1. Watch .......................................................................................................................................................................11
2. Alarm (WAKE) ......................................................................................................................................................11
3. Last night’s hours of sleep ........................................................................................................................... 11
4. Average sleep time (ST 4w, Sleep Time 4 weeks).......................................................................... 12
5. Daytime activity.................................................................................................................................................. 12
6. Average activity (AC 4w, Activity 4 weeks) ........................................................................................ 13
7. Circadian Rhythm (CR 1d, Circadian Rhythm 1 day).................................................................... 13
Maintenance, Liability and Warranty ......................................................................................................... 14
Maintenance ...................................................................................................................................................14
Liability ............................................................................................................................................................... 14
Warranty ............................................................................................................................................................14
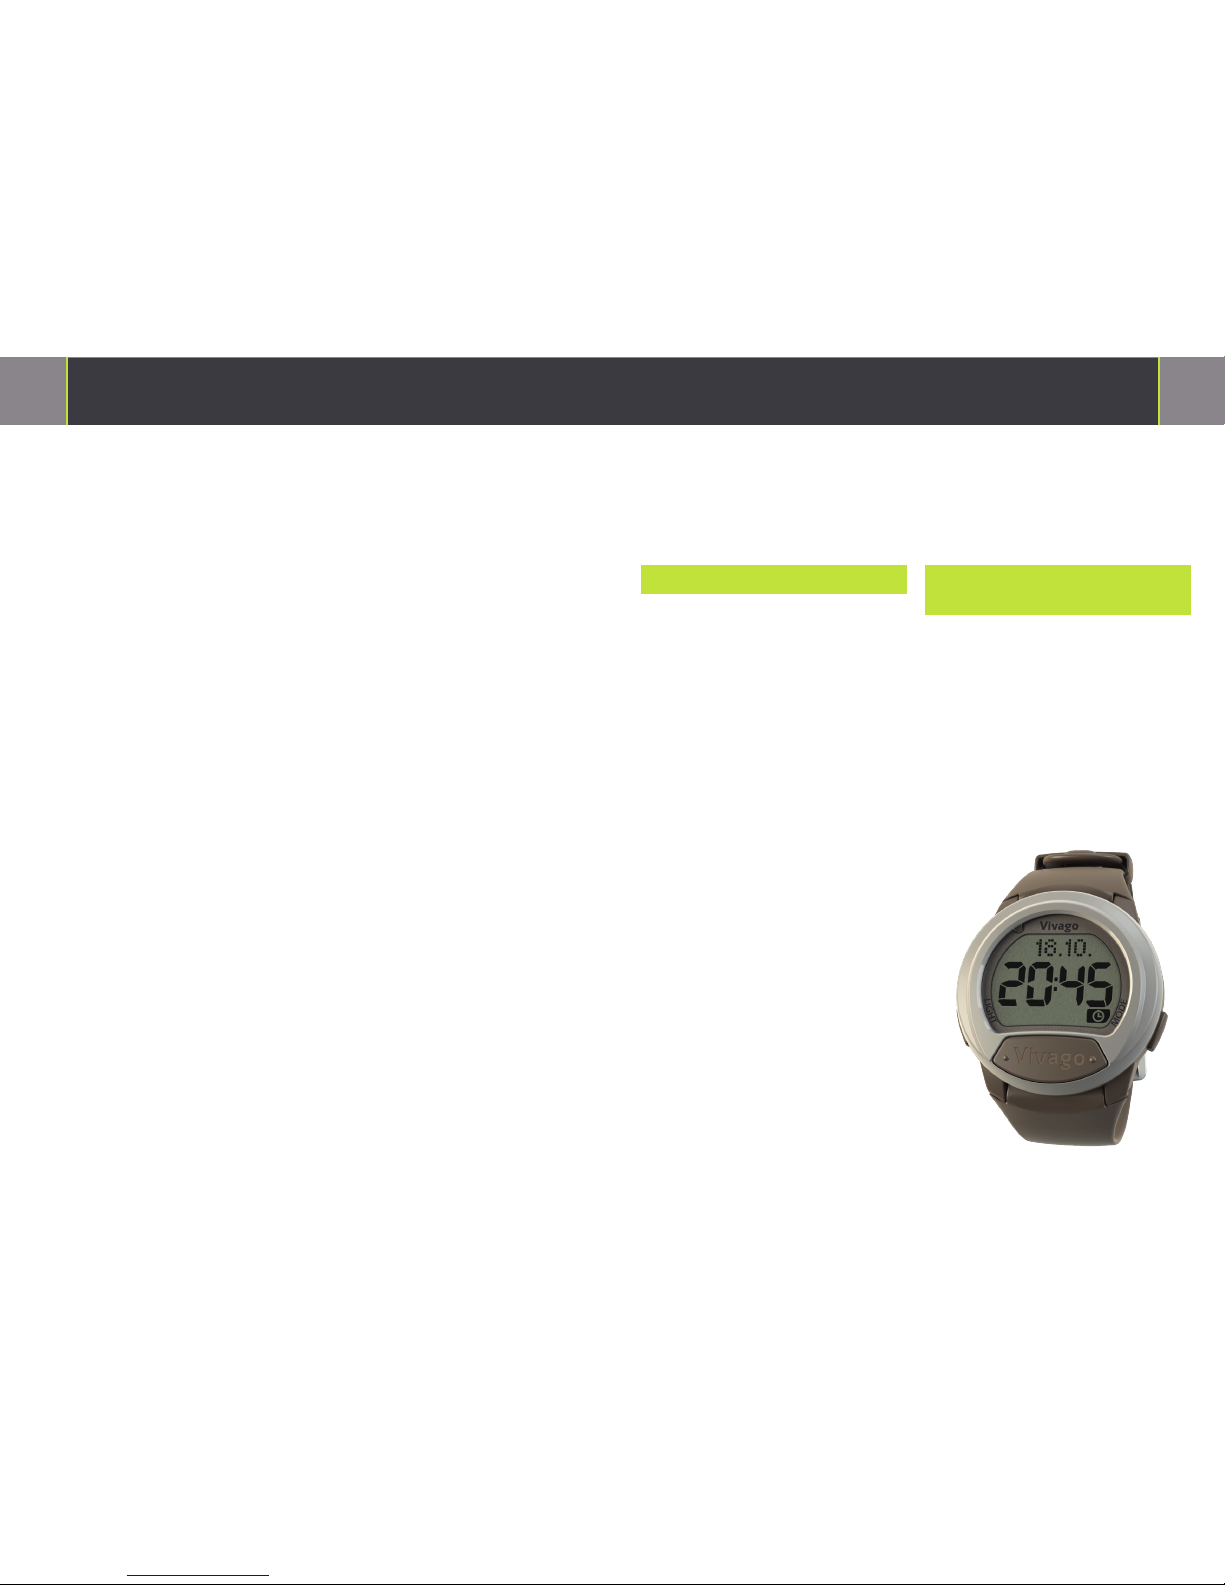
Vivago watch
You should keep the Vivago watch on your
wrist at all time seven when you go to bed or
out, because the watch continuously moni-
tors your activity level. By pressing the alarm
button you can trigger an alarm yourself. The
WristCare system sends an automatic alarm
e.g. in case of immobility within 30 minutes
to 4 hours. The sensibility of the automatic
alarm can be adjusted user-specicly.
You can use the wrist unit as a normal watch.
It shows you the time and date and can be
used as an alarm clock. Besides this it is pos-
sible to review the last night’s hours of sleep
and the activity level for the previous day .
You can take o the watch anytime but be
aware that the watch measures your activ-
ity only when worn on the wrist. At that
time you are not fully secured, please re-
member to fasten the watch again on your
wrist. The manual alarm button works even
though you are not wearing the watch,
e.g. if the watch is situated on the table.
The WristCare system transmits
the button alarms
If you feel that you need help, press imme-
diately the VIVAGO-button on the watch un-
til the red light appears on the watch. The
red light will be switched on a while after
the alarm has been sent.
Do not wait for the system to send an auto-
matic alarm for you!
What is the Vivago WristCare system?
The Vivago system is the first personal safety device in the world that
continuously monitors your well-being. The system automatically calls for help if
you are unable to push the VIVAGO-button yourself.

4 5
Fastening the watch
Wear the watch on your weaker hand. If you
are right-handed, please fasten the watch
on your left hand and vice versa. Fasten the
watch on your wrist so that it feels comfort-
able and does not restrict your wrist move-
ments. However, please note that it should
be tight enough to ensure that the bottom
face of the watch is in close contact with
your skin, even when you move your arm
around. This is important, because your
watch can only monitor the activity level
and physiological signals when it is in di-
rect contact with your skin. The watch is too
loose if it can be rotated.
Shower, bath and sauna
The WristCare can be worn in the shower
and bath. It is waterproof. This enables you
to send an alarm while taking a shower or
Recharging the battery
The watch has a rechargeable battery,
which needs to be charged. A charged bat-
tery lasts for 2-4 months(depending on the
watch model).
A symbol of a battery appears
on the upper left side of the
display when the battery is
getting empty. The text BATT will also blink
in the display. The watch will also send a
“Battery empty” notication to the alarm
recipient. The battery should be charged
as soon as possible, but at the latest with-
in three days to make sure that the watch
works properly.
Place the charger on the watch as shown on
the picture and plug the charger into a pow-
er socket. Make sure that the charger is cor-
rectly placed on the watch. Place the char-
ger on the same side as the MODEbutton.
When the charger is correctly attached and
it starts to charge the watch, a symbol of the
charging process appears on the display.
When the battery is full the charge ani-
mation stops and the battery symbol is
switched o. A “Battery full” notication will
now be sent to the alarm recipient. You can
detach the charger from the watch and the
socket. If the battery symbol doesn’t fade
the battery isn’t fully charged
Using the Vivago watch
bathing. Please do not wear the watch in
hot environments for example in the sauna.
Removing the wrist unit
The WristCare shouldn’t be left under direct
sunlight or within reach of children or pets.
Cleaning the watch
Regular cleaning of the watch is important
to ensure that the measurement function
works properly. If the watch is in constant
use, it is good to clean it once a week. Clean
the bottom face of the watch and the inside
of the straps with a damp, soft, non-uy
cloth. Dry thoroughly with a dry cloth.
Do not use washing liquids that contain sol-
vents like alcohol. These might damage the
plastic parts of the watch. Do not scrape or
scratch your watch.
Place the charger on the watch as shown on
the picture and plug the charger into a power
socket.
6 7
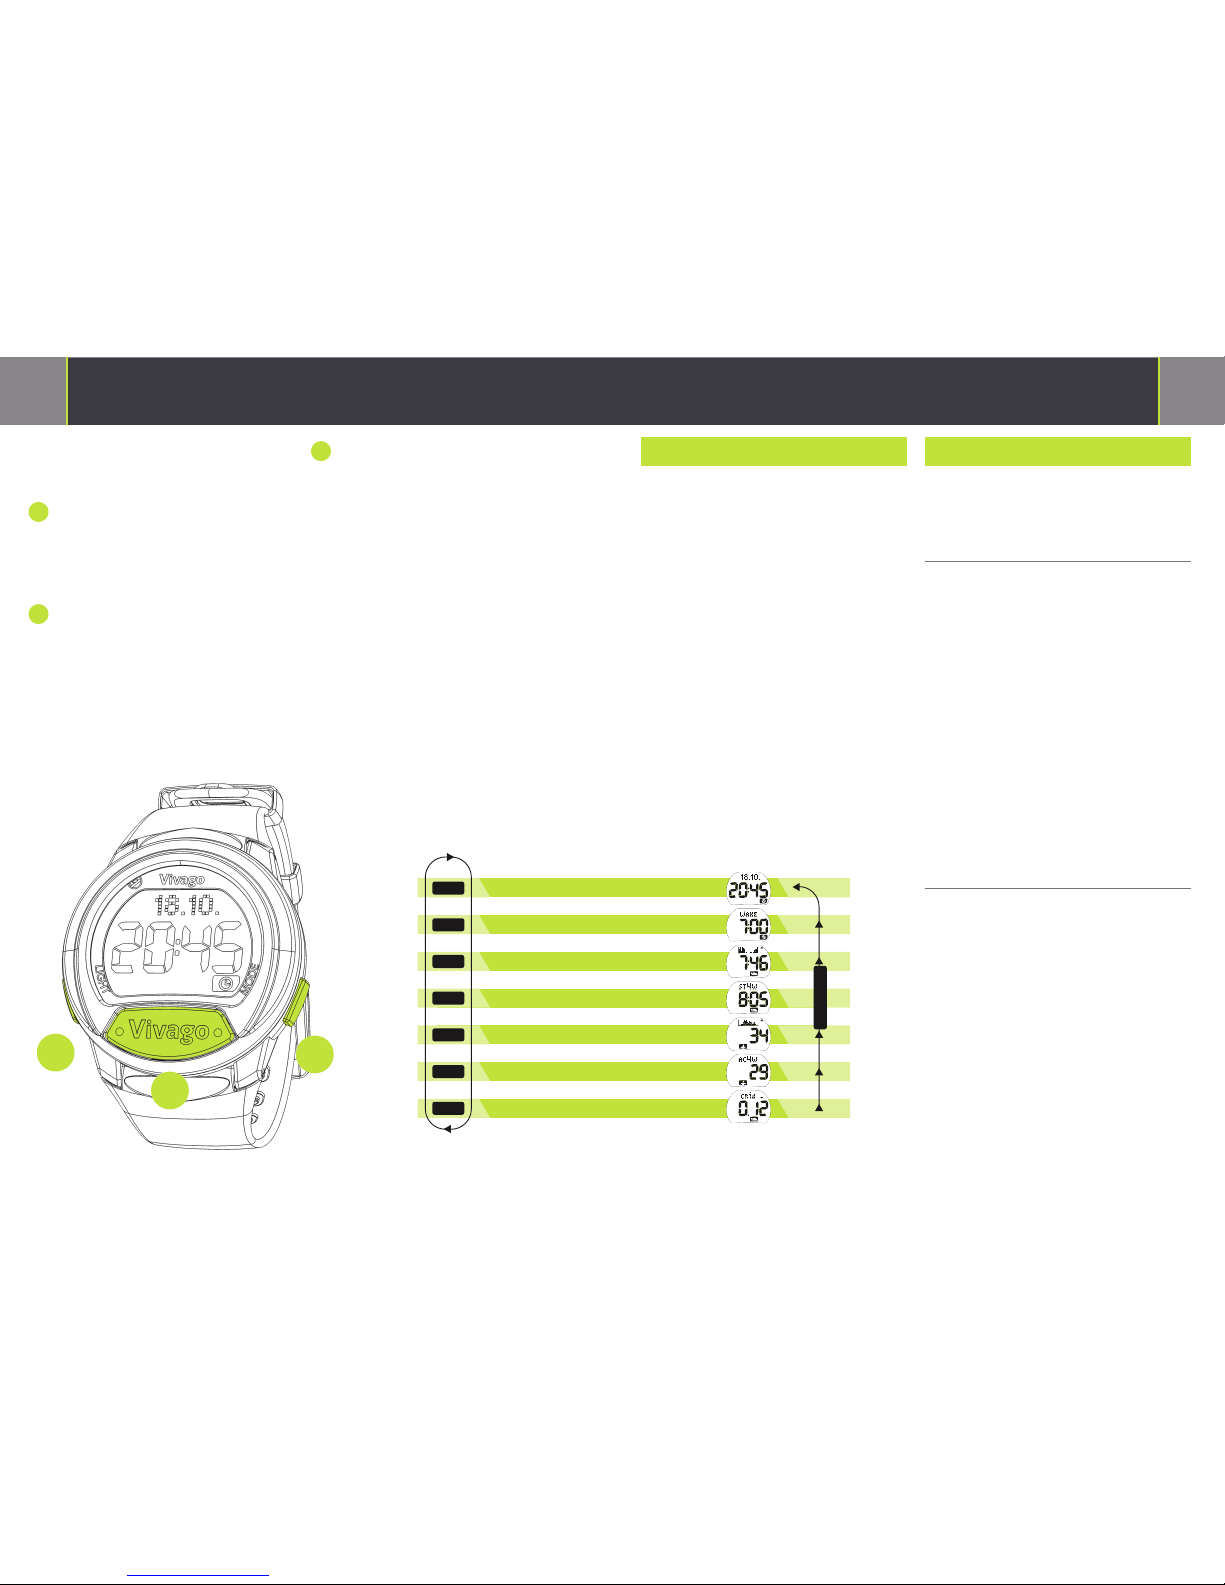
The functions of the buttons
The watch has three buttons:
1) VIVAGO button on the watch is meant
for triggering the alarms, except when
doing conrming changes in the setting
mode of the watch.
2) LIGHT button will switch on the back-
ground light (a long press). It will help
you to use the watch in the dark. The
light will automatically switch o after 12
seconds.
3) MODE button is to be used when
browsing through the dierent menus.
By pressing LIGHT(2) and MODE(3) buttons
at the same time in the clock display you en-
ter the set-up mode, where you can set the
time, date and the alarm. See watch settings.
A long press on the MODE-button or no
press at all for 60 seconds redirects the sys-
tem automatically to the watch mode.
Button functions
Settings mode
By pressing LIGHT and MODE buttons si-
moultaneusly you will enter the mode for set-
tings. The setting mode depends on in which
display mode you enter the settings.
If you don’t press any button for 60 seconds
you will automatically, from all modes, return
to the watch to the basic watch mode.
In the set up mode the buttons work as fol-
lows:
• LIGHT:changessettings.
• MODE:changesthenumbers,forinstance
from hours to minutes when setting the time
or changes the settings
• VIVAGO:conrmsthesettingandshiftsto
next set-up mode.
Watch settings
1. Time and date settings
Make sure the watch shows the time, in other
words is in the watch mode.
1.1 Time
• PressandholdtheLIGHTandMODEbut-
tons simultaneously until the text: TIME ap-
pears on the display. In this mode you can set
the time.
• Thehourstartsblinking.
• SettherighthourbypressingtheLIGHT
button.
• Advance to the minutes by pressing the
MODE button. The minutes start to blink.
• Set the minutes by pressing the LIGHT
button.
• SavethesettingsbypressingtheVIVAGO
button. The watch will move to the next set-
up mode.
1.2 24/12 h display
The text CLOCK appears on the display. In this
mode you can choose to show the time ei-
ther in 12h mode, or 24h mode.
• Onthedisplaythetext24Hor12Hstarts
blinking, depending on which time
mode has earlier been set.
• By pressing the LIGHT button you can
change the setting.
• When you have chosen the time mode
you prefer conform it by pressing the VIVAGO
button. The watch moves to the next setup
mode.
2
1
3
MODE
MODE
MODE
MODE
MODE
MODE
MODE
LONG MODE
1. Watch
2. Wake-up alarm
3. The sleep time of last night
4. The average sleep time
5. The activity of yesterday
6. The average activity
7. The circadian rhythm

8 9
1.3 Year
• ThetextYEARappearson thedisplay.In
this mode you set the right year.
• Thelastdigitoftheyearstartsblinking.
• BypressingLIGHTbuttonyoucanchange
the year.
• Whenyouhavechosentheyear,saveby
pressing the VIVAGO button. The watch goes
to the next setup mode.
1.4 Month
• The text MO appears on the display. In
this mode you set the right
month.
• Themonththathasbeensetearlierstarts
blinking.
• BypressingtheLIGHTbuttonyoucanset
the right month.
• When you have chosen the month con-
rm it by pressing the VIVAGO button. The
watch moves to next setup mode.
1.5 Day
• The text DAY appears on the display. In
this mode you set the right day of
the month.
• The day that has been set earlier starts
blinking.
• BypressingtheLIGHTbuttonyoucanset
the right day.
• When you have chosen the day conrm
it by pressing the VIVAGO button and the
watch moves to next setup mode.
1.6 Type of date eld
• ThetextVIEWappearsonthedisplay.In
this mode you dene what is shown in the
eld above the date when the watch is in the
normal time mode.
• Depending on the mode that has been
chosen earlier one of the texts below starts
blinking in the display. One of the options
below starts blinking, depending on which
mode has been set earlier.
• BypressingtheLIGHTbuttonyoucande-
termine which of following options
is shown:
- Date, e.g 14.6. (day. month)
- Time of the day, DAY or NIGHT
- Weekday, MON or TUE, WED, THU,
FRI, SAT, SUN
- Empty eld
When you have chosen the type of date eld
you prefer, conrm by pressing the VIVAGO-
button. This will exit the watch’s setup mode.
1.7 Summer time
After the time has been set the system will
automatically change to summer/winter
time(see hereinafter mentioneddescription)
Summertime starts mainly in the European
Union counties on the last sunday in March at
3:00 a.m. The clock moves ahead (thus, losing
one hour) when summer time starts and falls
back one hour (thus, gaining one hour) when
summer time ends the last sunday in October
at 4 AM.
2.Setting the wake-up alarm
Move to the wake-up alarm menu by press-
ing MODE. (Menu 2, see menu structure).
The text WAKE is shown on the display. If
the wake-up alarm is activated, the display
shows the wake-up time, if not two lines (-:-)
are shown on the display.
2.1 Wake up on / delay function/ o
• PresstheLIGHTandMODEbuttonssimul-
taneously until the time or the (-: -) is removed
from the display. The display still shows the
text: WAKE. Now it’s possible to set or to cancel
the wake-up or to mobilize the delay function.
• Inawhileoneofthefollowingtextsstart
to blink depending on which wake-up mode
has lately been used.
- OFF, alarm o
- AUTO, delay function activated
- ON, normal alarm on
When you have activated or deactivated pre-
ferred wake-up alarm, conrm by pressing
the VIVAGO button. If you have chosen OFF,
the watch automatically returns to the watch
display. If you chose ON or AUTO, the watch
moves to wake up alarm settings.
2.2 Setting the wake-up time
• Thetext:WAKEappearsonthedisplay.No
you can set the desired wake-up time.
• The hours start blinking. Set the correct
hour by pressing the LIGHT button.
• Move to the minutes bu pressing the
MODE button
• The minutes start to blink. Set the min-
utes by pressing the LIGHT button
• Whenthe wake-uptime isset conrmit
by pressing the VIVAGO button. The watch
moves back to the wake-up menu where the
text: WAKE and the set wake-up time appears
3. Other settings
Move to sleep or activity menus by pressing
theMODE button. (menu 3 to 6, see menu
structure ).
3.1 Activity limit value for sleep
By setting the limit value for sleep the watch
notice when you are asleep and when you
are awake
• PressandholdtheLIGHTandMODEbut-
tons simultaneously, until the text SLEEP ap-
pears on the display. In this mode you can
set the limit value for sleep, in other words in
which activity level the watch assumes you
sleeping. The sleep limit value may aect
the passivity notication.
• Inawhileoneofthenumericalvaluesbe-
low starts blinking depending on which limit
value for sleep has been selected earlier.
• By pressingthe LIGHTorMODE button
you can determine which limit value be-
tween 1–10 suits you. The default value is
4. Choose a low limit value if your activity
is low or the watch counts too many hours
of sleep for you. Choose a high limit value if
you know you sleep restlessly or the watch
counts too few hours of sleep for you.

10 11
The menu structure of the watch
By pressing the MODE button you enter the
dierent menus as following:
1. Watch
2. Wake-up alarm
3. Last night’s hours of sleep
4. Average sleeping time
5. Activity of yesterday
6. Average activity
7. Circadian rhythm
A long press of the MODE button or no press
for 60 seconds redirects the system to the
watch mode.
• When you have chosen the limit value
for sleep, press the VIVAGO button. The
watch moves on to the next set up mode
3.2 Resetting the memory
• Thetext:CLEARappearsonthedisplay.
In this mode you can clear the watch’s mea-
surement data and memory.
• Thetext:NOstartsblinking.
• Ifyoudonotwanttoresetthememory
press VIVAGO button.
• If you want to reset the memory chose
YES by pressing the LIGHT button and
conrm by pressing the VIVAGO button.
The watch carries out the desired function
and moves on to the next set up.
The menu structure of the watch
1. Watch
2. Wake-up alarm
3. The sleep time of last night
4. The average sleep time
5. The activity of yesterday
6. The average activity
7. The circadian rhythm
1. Watch
2. Wake-up alarm
3. The sleep time of last night
4. The average sleep time
5. The activity of yesterday
6. The average activity
7. The circadian rhythm
1. Watch
2. Wake-up alarm
3. The sleep time of last night
4. The average sleep time
5. The activity of yesterday
6. The average activity
7. The circadian rhythm
MODE
MODE
MODE
MODE
MODE
MODE
MODE
LONG MODE
1. Watch
2. Wake-up alarm
3. The sleep time of last night
4. The average sleep time
5. The activity of yesterday
6. The average activity
7. The circadian rhythm
Different menus and their functions
1. Watch
In the basic display mode the
watch showstime and in the up-
per half of the display date or al-
ternatively the day of the week or time of
the day . A watch symbol is shown at the
bottom of the display. The time can either
ber in 12 or 24 hour mode. When using the
12 hour mode AM/PM will be shown on the
left of the time. The date is shown either
day.month or just weekday (mon, tue, wed,
thu, fri, sat, sun). You can also choose DAY
or NIGHT texts in accordance with the time
of the day . The eld can also be empty. See
watch settings, if you like to set the time and
date or change the time ordate layout.
The watch will always, from all menus, re-
turn to the basic watch mode in 60 seconds
if no buttons have been pressed. A long
press of the MODE button will immediate-
lyredirect the system to watch mode.
2. Alarm (WAKE)
By pressing once the MODE
button you will see the set
time for the wake up alarm.
The watch symbol is still shown at the bot-
tom of the display. If the display shows two
lines(-:-) in the place of the alarm time the
alarm is not activated. To set the alarm time,
see watch settings.The wake-up beep starts
on the chosen time and stops by pressing
the LIGHT or MODE button. Do not press
the VIVAGO button, it will launch an alarm.
The beep will also automatically end after
one minute. It is possible to set a delay func-
tion (see the watch setting). When the de-
lay function is activated the watch will wake
you up only when it notices movements af-
ter the set wake-up time. The wake-up will
at the latest start half an hour after set wake-
up time. If you sleep peacefully and do not
move, the snooze automatically gives you
30 min extra sleeping time and you will not
be awakened from deep sleep. If you acti-
vate the delay function and for example set
your alarm on 7:00 the watch wakes you up
between 7:00 and 7:30 depending on when
it detects movements, but at the latest at
7:30.
3. Last night’s sleep time
This mode graphically shows the
movement activity (activity histo-
gram) measured by the WristCare
system and last night’s calculated hours of
sleep (on the picture it is 7 hours 46 min-
utes). A sleep symbol is shown at the bottom
of the display. One column of the histogram
describes the average movement activity
during one hour. The picture is being drawn
to the display one column at a time and
shows last night’s movement activity be-
tween 18:00-12:00. During the drawing the
display shows the hour digits respectively.
When the entire picture has been drawn the
display shows the total amount of sleep. The
picture is updated at 8 a.m, after it you can
see the histogram and your hours of sleep

12 13
1. Watch
2. Wake-up alarm
3. The sleep time of last night
4. The average sleep time
5. The activity of yesterday
6. The average activity
7. The circadian rhythm
1. Watch
2. Wake-up alarm
3. The sleep time of last night
4. The average sleep time
5. The activity of yesterday
6. The average activity
7. The circadian rhythm
1. Watch
2. Wake-up alarm
3. The sleep time of last night
4. The average sleep time
5. The activity of yesterday
6. The average activity
7. The circadian rhythm
1. Watch
2. Wake-up alarm
3. The sleep time of last night
4. The average sleep time
5. The activity of yesterday
6. The average activity
7. The circadian rhythm
for last night. Before 8:00 a.m, your sleep
time and the histogram are therefore from
the night before.
The watch measures your wrist movements.
When there are only very few small move-
ments during a longer period it will detect
it as sleepBecause of this it is possible to
count an estimate of your sleeping time.
The height of the columns on the display
describes your sleep. If you have slept for
an entire hour there will not be a visible col-
umn. Therefore a continuous good sleep of
8 hours will be shown as a blank period in
the histogram. Short awakenings might not
be shown in the display, because the column
height describes the average movement
during one hour. The arrow on the right side
of the histogram indicates if your sleep time
is longer (arrow up), shorter (arrow down) or
about the same (arrow linear) than your av-
erage sleep time during the last four weeks.
Because the sleep time calculation is based
on the movement measurement, the dis-
played sleep time might not totally reect
your own observation of sleep. For instance
if you are watching TV very peacefully in
the evening the system might observe it as
sleep even though you are awake.
If there is not enough collectable data from
last night to measure the average, for exam-
ple if you have not worn the watch continu-
ously, two lines (- -) appears on the display.
4. Average sleep time
(ST 4w, Sleep Time 4 weeks)
In this mode the display shows
the average sleeping time for the
last 4 weeks (on the picture it is 8
hours 5 minutes). A symbol of sleep is shown
at the bottom of the display. The data will
be updated once a day, 8:00 a.m. If there is
not enough collectable data from the last 4
weeks to measure the average,for example.
if you have not worn the watch continuous-
ly, two lines (- -) appears on the display.
5. Daytime activity
This mode shows graphical-
ly the daytime activity for the
previous day measured by the
watch(activity histogram). The display shows
the average activity level (on the picture it is
34) for the previous day (8:00-20:00). A sym-
bol of activity is shown on the bottom of the
display.One column of the histogram de-
scribes the average activity level during one
hour. The picture is drawn one column at a
time showing the activity for yesterday be-
tween 6:00 a.m-00:00 p.m no matter what
time of the day it is. During the drawing the
display shows the hour digits respectively.
When the entire picture has been drawn,
the display shows the average activity for
the whole day. The picture is updated at
8:00 p.m every day. After it you can see the
histogram for the current day. If there is not
enough collectable data for example if you
have not worn the watch continuously, two
lines (- -) appears on the display. One col-
umn of the histogram describes the aver-
age activity during one hour. The columns
are scaled between 0 and 100. When the
column is at its highest, your activity has
been between 50 and 100 for that hour. This
means very high activity. The arrow on the
right side of the histogram indicates if your
activity level is higher (arrow up) or lower
(arrow down) during the last 4 weeks.
6. Average activity
(aC 4w, activity 4 weeks)
In this mode the display shows the
average activity level for the last 4
weeks (on the picture it is 29). On
the bottom of the display a activity symbol is
shown. The data will be updated once a day,
at 08:00 p.m. If there is not enough collect-
able data from the last 4 weeks for example
if you have not worn the watch continuous-
ly, two lines (- -) appears on the display.
7. Circadian Rhythm
(CR 1d, Circadian Rhythm 1 day)
In this mode the display shows
you the calculated circadian
rhythm for the last day and night
(in the picture it is 0.12). The symbol for sleep
appears on the bottom of the display. The
numerical value is updated every day at 8:00
a.m. The arrow on the display indicates if
your circadian rhythm is higher (arrow up)
or lower (arrow down) that your average
circadian rhythm during last month.The cir-
cadian rhythm is calculated by dividing the
activity during night with the activity during
day. If the reading is close to zero, the circa-
dian rhythm is good. If the reading is close
to or over one, the circadian rhythm is poor.
The circadian rhythm should in normal con-
ditions stay clearly under 0,5. This tindicates
that you have rested in the night and been
active during the day. The numerical value
for the circadian rhythm can be high (over
0.5), if you have slept very restlessly, or not
at all and you have been very inactive dur-
ing the day. The circadian rhythm describes
your over all well-being and capacity. Your
circadian rhythm is good when you feel
good, sleep well and peacefully and are ac-
tive during daytime. If there is not enough
collectable data from the last day, for exam-
ple if you have not worn the watch continu-
ously, two lines (- -) appears on the display.
Good rhythm CR = 0.1
Poor rhythm CR = 1.0

14 15
Maintenance
Regular cleaning of the Vivago wrist unit is
essential to assure the correct operation of
the product. The rechargeable battery of the
watch has to be changed every 2-4 months.
The system automatically sends “Battery
empty” notication to the alarm recipient
when the battery should be charged, also
the text BATT appears on the display of the
watch. Vivago Oy is responsible for the ser-
vice of all Vivago-devices.
Liability
The Vivago WristCare System constantly
monitors its own technical performance. If
there is a malfunction, it will automatically
send a notication to the alarm recipient.
The alarm recipient can then take the neces-
sary measures to x the situation. The func-
tions of the wrist unit do not correspond
with those of a health monitoring device.
There are situations in which the system will
not trigger an alarm. However, even a slight
change in the person’s activity pattern
or condition may cause an alarm. Functional
trouble in telephone lines or telecommu-
nication links may hinder the arrival of the
alarm.
Maintenance, Liability and Warranty
Under no circumstances, is the manufactur-
er liable for any indirect damages caused by
the system not making or transmitting an
alarm.
The manufacturer assumes no liability
for malfunctions of the system, which are
caused or occasioned by the system not be-
ing used and maintained in the manner de-
scribed in the operating instructions.
Warranty
The Vivago system manufactured by Vivago
Oy carries a warranty for 24 months from
the date of purchase. The warranty cov-
ers the materials and workmanship of each
product. The warranty does not cover any
damage that is caused or occasioned by im-
proper use or user’s negligence. It does not
cover any damage caused by the system not
being used and maintained in the manner
described in the operating instructions, nor
by an external factor outside the manufac-
turer’s reasonable control or normal wear
and tear. Under no circumstances, is the
manufacturer liable for any indirect dam-
ages caused by the system not making or
transmitting an alarm.
Join our facebook-group
Vivago’s new www-pages can be found at
www.vivago.com

16
EN•0146•06/2011
Vivago Oy•Melkonkatu16A•FIN-00210Helsinki•Finland•www.vivago.com
Table of contents
 instruction manual")


