Vivo ASL-54121T User manual

ASL-54121T/ASL-54121T-NV
Wireless 802.11n VDSL2 Router
Quick Installation Guide

ASL-54121T/ASL-54121T-NV Wireless VDSL2 Router Quick Installation Guide
2
Introduction
This guide is to assist the reader with the most basic
form of installation and connection to this router.
Package Contents
After purchasing the router, the following items will
be included in the package:
•One ASL-54121T/ASL-54121T-NV Router
•One Quick Installation Guide
•One power supply adapter
•One RJ45 Ethernet cable
•One RJ11 DSL cable
Note: If any of the above mention items was not
found inside the package contents of this product
or are damaged in any way, contact your reseller
immediately.
Hardware Installation
Installation Guidelines
This section will discuss the hardware installation
guidelines that administrators must follow in order
to properly and safely install this product into the
appropriate environment.
Connect the Ethernet Cable
The following steps explain how to successfully
connect the RJ45 Ethernet cable to one of the four
LAN ports of the router.
1. Connect the one end of the Ethernet cable, included in
the package, into the Ethernet port of the Management
PC or Ethernet switch/router.
2. Insert the other end of the Ethernet cable into one of
the four LAN ports on the back panel of the router.
Connect the DSL Cable
The following steps explain how to successfully
connect the RJ11 DSL cable to the DSL port of the
router.
1. Connect the one end of the DSL cable, included in the
package, into the VDSL port, installed by the ISP.
2. Insert the other end of the DSL cable into the DSL port
on the back panel of the router.
Connect the Power Supply
The following steps explain how to successfully
connect the power supply to the router.
3. Connect the one end of the power supply cable,
included in the package, into the grounded electrical
outlet at the site.
4. Insert the other end of the power supply cable into the
power receptacle on the back panel of the router.
5. Push the power button in to the ON position.
The LED indicators on the front panel of the router
should come on.
Software Connection
The default IP address of the router is 192.168.15.1
with a subnet mask of 255.255.255.0.
Connect to the Web User Interface
To access the Web User Interface (Web UI), open
any standard web browser software, like Internet
Explorer and in the address bar enter the following
URL: http://192.168.15.1/padrao.
Press the Enter key on the keyboard.

Quick Installation Guide ASL-54121T/ASL-54121T-NV Wireless VDSL2 Router
3
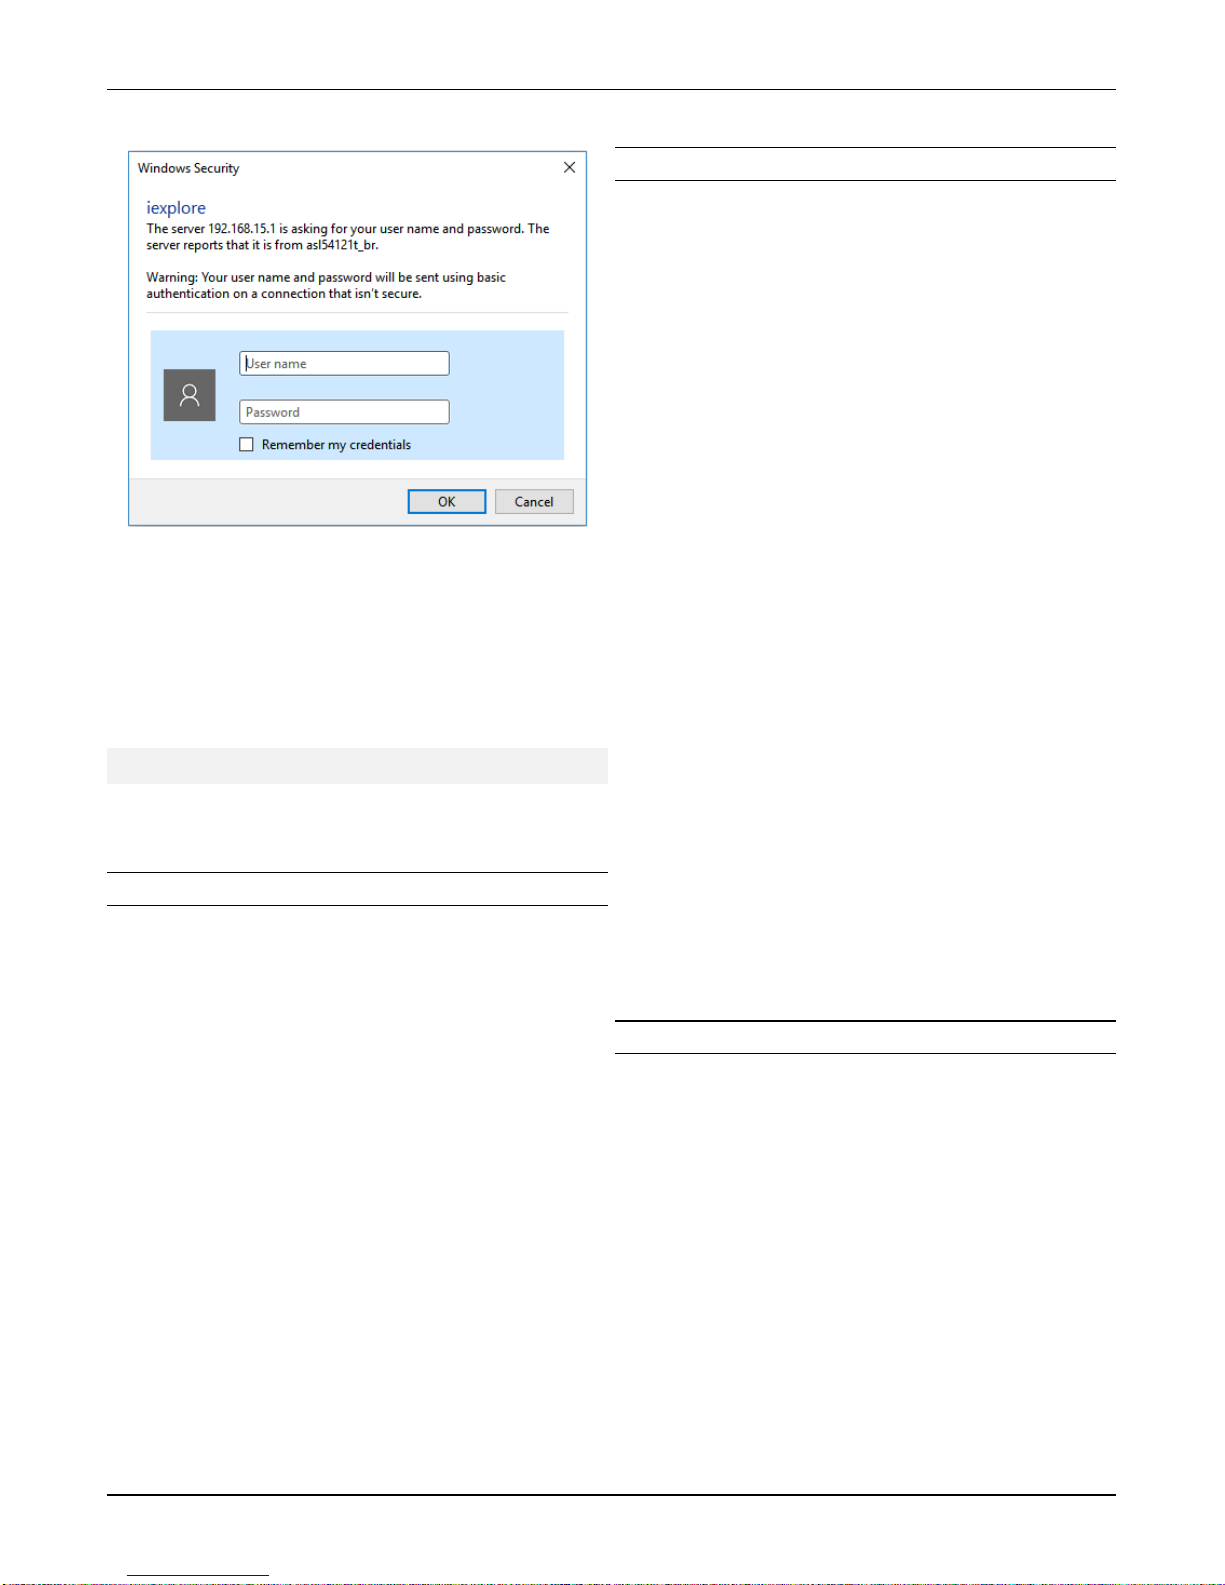
The login window will appear as shown below:
Enter the username and password, in the spaces
provided, and click the OK button to access the
Web UI. By default, the username and password is
support.
For more information about the Web UI, refer to the
ASL-54121T/ASL-54121T-NV User Guide.
Safety Instructions
The following sections provide safety precautions to
follow when installing the router.
Safety Precautions
For your protection, observe the following safety
precautions when setting up your equipment:
•Follow all cautions and instructions marked on the
equipment.
•Only trained and qualified personnel are allowed to
install or to replace this equipment.
•Never push objects of any kind through openings in
the equipment. Dangerous voltages may be present.
Conductive foreign objects could produce a short
circuit that could cause fire, electric shock, or damage
to your equipment.
•This product is intended for restricted access whereby
access is controlled through the use of a means of
security (for example, key, lock, tool, badge access) and
personnel authorized for access have been instructed
on the reasons for the restrictions and any precautions
that need to be taken.
•Remove all metal jewelry, such as rings and watches,
before installing or removing the device.
•Do not install in direct sunlight, or a damp or dusty
place.
•Do not expose the device to moisture or water.
•Disconnect all power supply cords before servicing.
Electrical Safety Precautions
For your protection, observe the following electrical
safety precautions when setting up your equipment:
•Ensure that the voltage and frequency of your power
source match the voltage and frequency inscribed on
the equipment’s electrical rating label.
•Not all power cords have the same current ratings. Do
not use the power cord provided with your equipment
for any other products or use. Household extension
cords do not have overload protection and are not
meant for use with this product. Do not use household
extension cords with this product.
•To prevent electric shock, do not remove the cover of
this product. There are no user-serviceable parts inside.
This unit contains hazardous voltages and should only
be opened by a trained and qualified technician.
•Do not work on equipment or cables during periods of
lightning activity.
•Check to see if there are any exposed copper strands
coming from the installed wire. When this installation is
done correctly there should be no exposed copper wire
strands extending from the terminal block. Any
exposed wiring can conduct harmful levels of electricity
to persons touching the wires.
•When using the power supply, the power source for the
device should be located near the unit and should be
easily accessible.
•Circuit Overloading: Consideration should be given to
the connection of the equipment to the supply circuit
and the effect that overloading of circuits might have
on overcurrent protection and supply wiring.
Appropriate consideration of equipment nameplate
ratings should be used when addressing this concern.
Installation Safety Precautions
For your protection, observe the following
installation safety precautions when setting up your
equipment:
•Elevated Operating Ambient - If installed in a closed
ceiling, the operating ambient temperature of the
ceiling environment may be greater than room ambient.
Therefore, consideration should be given to installing
the equipment in an environment compatible with the
maximum ambient temperature (Tma) specified by the
manufacturer.
•Reduced Air Flow - Installation of the equipment in a
ceiling should be such that the amount of air flow
required for safe operation of the equipment is not
compromised.
•Circuit Overloading - Consideration should be given
to the connection of the equipment to the supply

ASL-54121T/ASL-54121T-NV Wireless VDSL2 Router Quick Installation Guide
4
circuit and the effect that overloading of the circuits
might have on overcurrent protection and supply
wiring. Appropriate consideration of equipment
nameplate ratings should be used when addressing
this concern.
Regulations & Warnings
FCC Warning
This equipment has been tested and found to comply with
the limits for a Class B digital device, pursuant to Part 15 of
the FCC Rules. These limits are designed to provide
reasonable protection against harmful interference in a
residential installation. This equipment generates, uses and
can radiate radio frequency energy and, if not installed and
used in accordance with the instructions, may cause harmful
interference to radio communications. However, there is no
guarantee that interference will not occur in a particular
installation.
If this equipment does cause harmful interference to radio
or television reception, which can be determined by turning
the equipment off and on, the user is encouraged to try to
correct the interference by one of the following measures:
•Reorient or relocate the receiving antenna.
•Increase the separation between the equipment and
receiver.
•Connect the equipment into an outlet on a circuit
different from that to which the receiver is connected.
•Consult the dealer or an experienced radio/TV
technician for help.
This device complies with Part 15 of the FCC Rules.
Operation is subject to the following two conditions: (1)
This device may not cause harmful interference, and (2) this
device must accept any interference received, including
interference that may cause undesired operation.
Any changes or modifications not expressly approved by
the party responsible for compliance could void the user’s
authority to operate this equipment.
For product available in the USA/Canada market, only
channel 1~11 can be operated. Selection of other channels
is not possible.
This device and it's antenna(s) must not be co-located or
operating in conjunction with any other antenna or
transmitter except in accordance with FCC multi-transmitter
product procedures.
This device is going to be operated in the 2400~2483.5
MHz frequency range. It is restricted in indoor environment
only.
IMPORTANT NOTE:
FCC Radiation Exposure Statement:
This equipment complies with FCC radiation exposure limits
set forth for an uncontrolled environment. This equipment
should be installed and operated with a minimum distance
of 20cm between the radiator and your body.
Warranty
This product supports a 2 year warranty.
GNU General Public License (GPL)
Firmware incorporated into this product may
include third party copyrighted software licensed
under the General Public License (GPL) or Lesser
General Public License (LGPL), collectively known as
GPL software and not Canary Networks’ End User
License Agreement.
In accordance with the GPL, if applicable:
1. The source code for the GPL software may be
downloaded at no charge from the following website:
<website needed>.
2. The GPL software used may be modified, reused, and
redistributed.
3. With respect solely to the GPL software, no warranty is
provided, to the extent permitted by applicable law.
4. A copy of the GPL is included herewith, may be
obtained at http://www.gnu.org, and may also be
found at <website needed>.
Modification of or tampering with the software of
this device, including but not limited to any Open
Source Software, is solely at your own risk. Alpha
Networks Inc. is not responsible for any such
modification or tampering and will not support any
product in which you have or have attempted to
modify the supplied software.
Service and Support
For service and support information phone us at
+1-847-468-1840 or email us at
support@alphanetworks.com.

Quick Installation Guide ASL-54121T/ASL-54121T-NV Wireless VDSL2 Router
5
For More Information
For more information, please visit <website
needed>.
This manual suits for next models
1
Table of contents