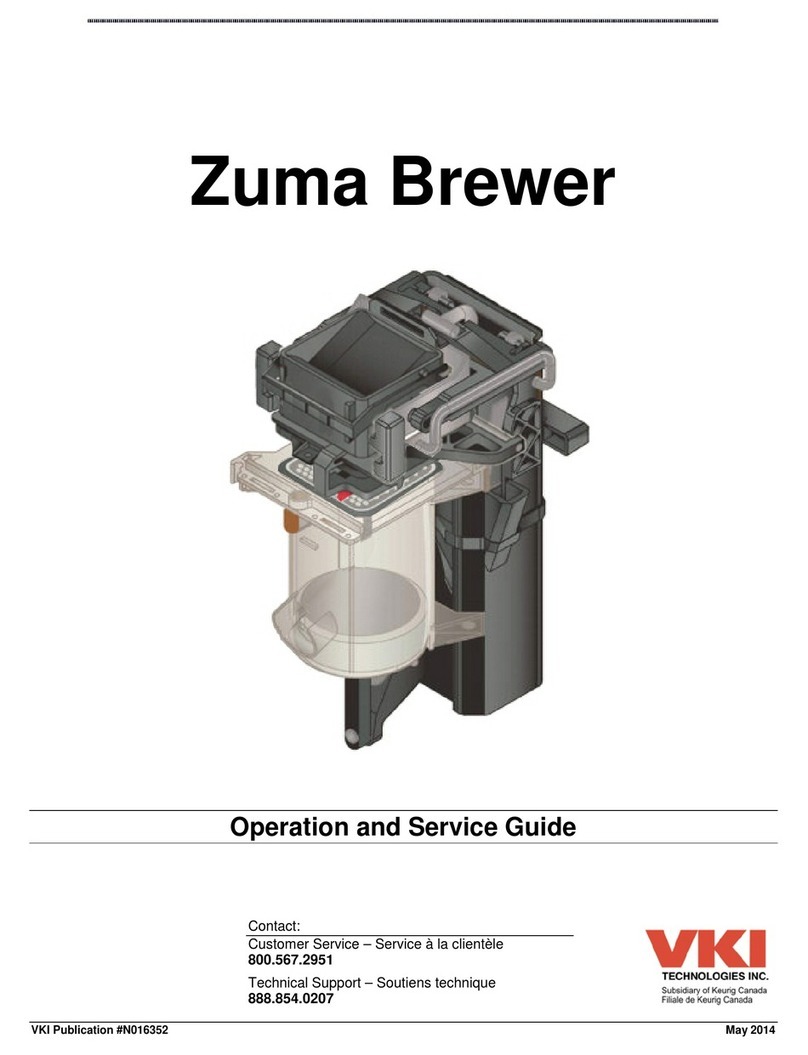
VKI Technologies Zuma Brewer Operation manual

Page 1 of 8 November 24, 2000 p/n – N016352
Zuma
Brewer
Operation and Service Manual

ZUMA BREWER - OPERATION & SERVICE MANUAL
Page 2 of 8 0011 Zuma Brewer (N016352)
OPERATING GUIDELINES
NOTE: The maximum capacity of this brewer is approximately 325 ml (11 oz.). Do not attempt to
exceed this value. Doing so may create flooding/overflow problems with the brewer.
There are certain operating guidelines and preventative maintenance procedures that must be
followed to ensure the Zuma brewer functions properly and efficiently. These guidelines and
procedures are listed below, and are also detailed in this guide. It is important that you read this
guide to familiarize yourself with this brewer and these procedures.
•Over time, coffee oils and fine grounds (the size of dust particles) as well as minerals in the
water will accumulate on the brewer screen assembly. This accumulation will decrease the
porosity of the screen, resulting in brewer flooding. The Zuma brewer screen must be kept
clean to prevent this from occurring.
•The correct removal and installation procedure for the brew chamber is crucial. Although the
assembly can be easily removed for cleaning (by lifting up the latch bar in front of the
chamber), the re-installation requires some precision. The wiper assembly on the chamber
must be inserted between the two stainless steel arms located at the rear of the brewer. These
two arms can be easily located once the brew chamber assembly is removed. Failure to
properly align the brew chamber during installation may result in excessive brewer
damage.
•If a leak develops between the top of the brewer cylinder and the bottom of the brew chamber,
it may be necessary to add small metal shims onto the H-frame to correctly seal the brewer.
•To properly clean and de-stain the brewer without damaging the components, rinse the brewer
using only a VKI approved brewer cleaner. The use of any other types of cleaning agents may
cause damage to plastic and rubber components on the brewer.
•Never, under any circumstances, turn the Zuma brewer in a backwards direction. Doing
so will damage the bearings on the cam.
Lift Latch and Pull
Brew Chamber
Towards You

ZUMA BREWER - OPERATION & SERVICE MANUAL
Zuma Brewer (N016352) 0009 Page 3
The following describes some of the general maintenance procedures that must be followed to
keep the Zuma brewer functioning properly at all times. All of these procedures are simple and can
be done in just minutes.
BREW CHAMBER TENSION ADJUSTMENT
During a brew cycle, if a leak develops between the brew chamber and the screen assembly, some
minor adjustments may be required. This leaking is an indication that the brew chamber is not
closing tightly enough.
If this is the case, the following procedure should
be performed,
1. Press the red “LOAD FILTER TAPE” button
to open the brewer, and remove the
brew chamber by lifting the latch bar
and pulling it towards you.
2. Push down on the H-frame, and lift the
vertical rod (T-bar) out of its recession.
3. Add a stainless steel Zuma brewer shim
(full shim - K011950 or half-shim - K011191)
into the recession, and re-insert the T-
bar.
4. Re-install the brew chamber and test
the brewer by making several cups of
coffee.
NOTE: In most cases, this simple procedure is enough to stop the leaking. However, if the brewer
still leaks at this point, repeat the above procedure and add one more shim. If the problem
is still not corrected, remove all the stainless steel shims, turn the T-bar one complete
rotation clockwise, then re-insert it into the recession on the h-frame.
CAUTION: Do not over-tighten the T-bar as too much pressure will cause damage to
the brewer. If wiper blade throws the coffee patty against the side of the
machine, the T-bar is too tight.

ZUMA BREWER - OPERATION & SERVICE MANUAL
Page 4 of 8 0011 Zuma Brewer (N016352)
ZUMA BREWER SCREEN ASSEMBLY MAINTENANCE
Screen Assembly Extractor Tool
The screen assembly on the Zuma brewer can be very easily removed for cleaning or replacement
with a special screen extraction tool to properly do this. The part number of the Zuma Screen
Extractor Tool is K023029.
Zuma Screen Extractor Tool
Removing the Brewer Screen Assembly
The following describes the correct procedure for removing the Zuma brewer screen assembly. It is
recommended you remove the brewer from the machine to remove the screen assembly. Once the
screen is removed, it should be thoroughly cleaned before it is re-installed.
1. Press the red <LOAD FILTER TAPE> button on the control panel to open the brewer.
2. Remove the brewer from the machine.
3. Remove the brew chamber assembly by lifting the latch bar and pulling the brew
chamber towards you.
4. Insert the Zuma screen extractor tool through the pour spout with the tip pointing
upwards (as illustrated in the diagram on the following page).
5. Gently push the extractor tool against the rear of the cylinder and slide it up until contact
is made with the screen assembly frame.
6. With the tool, push up on the bottom, rear center of the screen assembly to remove the
screen. Please note that some pressure will be required to pop the screen assembly
loose.

ZUMA BREWER - OPERATION & SERVICE MANUAL
Zuma Brewer (N016352) 0009 Page 5
Cleaning the Brewer Screen Assembly
The Zuma brewer filter screen needs to be cleaned periodically to allow liquid to easily flow
through it. Over time, coffee dust, oils and minerals from the water will accumulate on the screen
making it less porous, eventually resulting in brewer flooding. It is recommended that the screen be
cleaned every 1000-2000 cups, even if it appears to be working properly.
Using the Zuma screen extractor tool, remove the screen from the brewer to clean it. We
recommend soaking the screen in a solution of one part bleach to ten parts water for a
maximum of 30 minutes, as prolonged contact with bleach may damage the screen assembly.
Once this is done, the screen should then be thoroughly rinsed with dish soap and warm water to
remove any leftover residue.
NOTE: Periodically performing an automated brewer rinse cycle is still required to clean the brewer
screen as well as other brewer components.

ZUMA BREWER - OPERATION & SERVICE MANUAL
Page 6 of 8 0011 Zuma Brewer (N016352)
Installing the Screen Assembly
1. Line up the screen assembly in the recession on top of the brewer cylinder. Make certain that
the bump on one of the sides of the screen assembly is pointing to the rear of the brewer
cylinder.
NOTE: The screen has to be inserted in a particular way. There are clips on each end of the
screen assembly. These clips must be pointing downwards, and to the right and left sides
of the cylinder. If they do not, the screen assembly cannot be locked in place.
Zuma Brewer Screen Assembly
2. With the clips properly lined up, push down on the screen assembly until it locks in place.
3. Re-install the brew chamber in the brewer. Make certain that the wiper assembly is inserted
between the two stainless steel arms at the rear of the brewer.
4. Re-install the brewer into the machine.
Bump Goes Towards the
Rear of the Cylinder
Clips on Sides of
Screen Assembly

ZUMA BREWER - OPERATION & SERVICE MANUAL
Zuma Brewer (N016352) 0009 Page 7
Using the Brewer Rinse Cycle
The Vista 2/3 is equipped with a rinse cycle for both the brewer and the chocolate components.
This automated feature allows for simple periodic cleaning of these components. To access the
rinse cycles, press the "RINSE CYCLE" button on the control panel inside the door and the following
message will appear on the display,
At this point, the words "CHOCO.” and "COFFEE" will flash, alternating from one to the other. This is
to advise you that it will be necessary to select the type of rinse that is required. To rinse the
brewer, press the "COFFEE" button on the front selection panel.
WARNING: Before proceeding with the rinse cycle, a waterproof container
must be placed below the pour spouts as rinse water will be dispensed from
these spouts.
To rinse the brewer:
1. Add VKI approved brewer cleaner to the brew chamber and activate the brewer rinse cycle by
pressing the "RINSE CYCLE" button on the control panel inside the front door.
NOTE: To cancel the rinse cycle if it was pressed accidentally, press any button (except the
“START” button) on the front selection panel. This will exit the rinse cycle and return the unit
to the “standby” mode.
a) It will now be necessary to select the type of rinse cycle required. For a brewer rinse,
press the "COFFEE" button on the front selection panel to begin the cycle.
b) The piston will now move to the top of the cylinder, water will pour in, and the brewer
will pause for about 5 minutes. During this time, the cleaner will break down all the oils
and stains that have accumulated on the brewer.
NOTE: To cancel the five-minute pause and proceed to the seven rinse cycles, press the “START”
button. For proper brewer cleaning, it is recommended that the full cycle be performed.
c) After the 5 minutes have elapsed, the brewer will cycle, dumping the cleaner into the
waste container in the process. The brewer will then automatically cycle water seven
consecutive times to rinse the cleaner from the brewer. After the rinse cycle is
completed, the brewer will stop and the machine will automatically exit the rinse mode.
NOTE: To cancel the seven rinse cycles, press the “START” button. For proper brewer cleaning, it
is recommended that the full cycle be performed.
d) After the rinse cycle is complete, brew a few cups of coffee to re-lubricate the brewer.
RINSE CYCLE
CHOCO. OR COFFEE
ZUMA BREWER - OPERATION & SERVICE MANUAL
Page 8 of 8 0011 Zuma Brewer (N016352)
Important Information about Using a Zuma Brewer in Vista 2 Machines with D-Series
& G-Series Rear Boards
On newer Zuma brewers with a sealed breather vent on the front of the cylinder, you may
experience some cycle problems if installed in an older Vista 2 with a D-series or G-series rear
board. If a large cup of coffee is brewed on a newer Zuma brewer with a sealed breather vent,
liquid may remain in the cylinder as the brewer cycles back to the home position. After a few cups,
liquid may accumulate in the cylinder and cause inconsistent coffee levels and possibly cup
overflows. The sealed Zuma breather vent causes the brewed coffee to drain out of the cylinder
slower than the older non-modified Zuma brewer (prior to October 1997, without the plugged
breather vent), creating this situation. This may also apply to Vista 3 machines with very early NT1
software (prior to software version 2.6).
To use a Zuma brewer in Vista 2
with a D-series or G-series rear
board, you need to make the
following modifications.
1. Install a vent plug onto
the front of the brew
chamber. The part
number of the vent plug
is M014219.
2. Remove the existing
silicone plug from the
vent hole on top of the
brewer cylinder.
3. Remove the existing
silicone plug from the
front of the brewer
cylinder, cut the depth of
the plug in half, and re-
install it.
This is not a problem on Vista NT2 equipment (with software version 4.3 or higher), as the piston
stops when it goes below the cylinder pour spout. This gives the liquid time to completely drain,
preventing any accumulation.
We recommend that you use the latest software versions for all NT or NT2 equipment. This
ensures that the equipment always uses the correct Zuma brewer cycle, as well as eliminates any
potential problems that may exist with earlier software versions.
Unfortunately, this extra ‘pouring pause’ feature designed specifically for the Zuma brewer cannot
be incorporated into D-series or G-series boards. However, if a non-modified Zuma brewer (without
a plugged breather vent) is used, the brewed coffee will drain from the cylinder more quickly,
reducing the chances of liquid accumulation. For this reason, we recommend that only Zuma
brewers that have not been modified be used in equipment with D-series and G-series rear boards.
!Install vent plug to
front of brew chamber
"Remove existing plug
from vent hole
#Remove, cut and re-install
plug in front of cylinder

Zuma – Adjusting & Handling (N016568) December 4, 2001 Page 1
Zuma Brewer Adjusting and Handling Procedures
For the past few weeks, we have been analyzing the Zuma brewers that have been returned to us for
repair. The majority of these brewer were received with damaged bearings and vertical rod housings. Our
analysis indicates that in most cases, too much tension was placed on the brew chambers. When the
chambers are overtightened, there is too much pressure placed on both the bearings and the vertical rod
housings, resulting in damage to these components.
This document was created to guide you through the adjusting and handling procedures that are essential
for keeping the Zuma brewers operating efficiently. Following these procedures will reduce the risk of
damage to the brewers.
It is imperative that this information be shared with all your service staff.
Please post this document in an area that is accessible to everyone.
Brew Chamber Tension Adjustment
•When adjusting the tension on the brewer, add full shims (K011950) or half shims (K011191
between the T-bar and the H-frame, as illustrated below. These shims must be added one at a
time. Do not add several shims at once as the tension may be increased too much.
In most cases, this simple procedure is enough to stop the leaking. However, if the brewer still
leaks at this point, repeat the procedure and add one more shim (start with one half shim – if
that’s not enough, remove the half shim and add one full shim).
•Turning the T-bar should be avoided and should only be done as a last resort. If the brewer
tension is still too loose after installing two full shims, remove the two shims and only once they
are removed should you turn the T-bar one rotation clockwise.
•If the wiper is hitting the coffee paddy as it moves towards the left, this indicates that the brew
chamber is not rising high enough. Either something is interfering with the upward motion of the
chamber, or the chamber tension is too tight.
•If the tension is adjusted properly and the brewer is flooding, do not tighten the brew chamber
even more. Increase the bottom pause, lower the water temperature or replace the filter screen. If
the problem persists, check the brewer to make certain there is no loss of vacuum, usually caused
by a cracked brew chamber or cylinder, a worn or scored cylinder, or a worn Teflon seal.

Zuma – Adjusting & Handling (N016568) December 4, 2001 Page 2
Brew Chamber Installation
•The correct removal and installation procedure for the brew chamber is crucial. Although the assembly
can be easily removed for cleaning (by lifting up the latch bar in front of the chamber), the re-
installation requires some precision. The wiper assembly on the chamber must be inserted between
the two stainless steel arms located at the rear of the brewer. These two arms can be easily located
once the brew chamber assembly is removed. Failure to properly align the brew chamber during
installation may result in excessive brewer damage.
•When re-installing the brew chamber, make certain it is properly locked in position. Gently grip the
top of the brew chamber (not the release latch) and pull it slightly. If it is not properly locked in
place, you will be able to pull it out. Failure to lock the brew chamber in place will result in the
chamber moving forwards, and then coming down on top of the plastic cylinder lip in front
of the filter screen. This can damage the brew chamber, cylinder, the arms and bearings and/or
the vertical rod housing.
General Maintenance and Adjustments
•Never turn the brewer backwards. This will damage the arms and bearings and possibly the
cam.
•Use only the VKI designed screen extraction tool (illustrated below) to remove the re-useable filter
screen. The use of any other tools will damage the brewer.
•When performing a brewer rinse, use only VKI approved powder cleaner. Any other chemicals
or detergents may damage the brewer. Do not, under any circumstances, soak the brewer’s
plastic parts in brewer cleaner for prolonged periods of time (maximum is 30 minutes).
Lift Latch and Pull
Brew Chamber
Towards You

Zuma – Adjusting & Handling (N016568) December 4, 2001 Page 3
Zuma Brewer – Brew Chamber Tension Adjustment
Too Loose – Side View
The wiper is not touching the surface of the cylinder and
filter screen.
Too Loose – Front View
No bend on the wiper because it is not touching the
surface of the cylinder and filter screen.
Perfect Tension – Side View
The wiper is gently touching the surface of the cylinder &
filter screen. A slight deformation is seen on the wiper.
Perfect Tension – Front View
Slight bend on the wiper. All coffee grounds will be
removed from the surface of the filter screen.
Too Tight – Side View
The wiper is stretched and extremely deformed. The
brewer is under extreme pressure.
Too Tight – Front View
Very pronounced bend on the wiper. The wiper arm and
vertical rod housing are under extreme pressure.
Fi
g
ure 3 Fi
g
ure 4
Fi
g
ure 1 Fi
g
ure 2
Fi
g
ure 5* Fi
g
ure 6*

Zuma – Adjusting & Handling (N016568) December 4, 2001 Page 4
BREWER TENSION IS TOO LOOSE
Figure 1 As the wiper moves across the top of the cylinder, it does not make contact with the filter screen. This
will leave a layer of coffee grounds on the screen. A brewer adjusted this way may also leak when the
brew chamber is closed. If the leak is severe enough, it can result in a loss of vacuum and possible
brewer flooding on larger cup sizes.
Figure 2 Because the wiper is not making proper contact with the top of the cylinder and filter screen, there is
very little or no bend on it. In some cases, this may result in a layer of coffee grounds remaining on the
surface of the screen.
BREWER TENSION IS PROPERLY ADJUSTED
Figure 3 When a Zuma brewer is properly adjusted, the wiper will gently slide across the top of the cylinder,
cleaning the surface of the filter screen. A slight deformation of the wiper can be seen as it moves
across the top of the cylinder and filter screen.
Figure 4
As the wiper moves to the right side, the used coffee grounds will be transported to the waste
container. The coffee grounds will gently drop off the right-most edge of the brewer, directly into the
waste container. The filter screen will be clean of coffee grounds.
BREWER TENSION IS TOO TIGHT *
Figure 5* When the brew chamber is too tight, the wiper begins to stretch and becomes noticeably deformed. If
you look carefully at the photo, you will notice the rippling effect this has at the bottom of the wiper.
The brewer is under extreme pressure at this point and the sound of the brewer motor may change to
indicate that there is a larger load on it. Permanent damage to the wiper may also result.
Figure 6* As the wiper moves across the top of the cylinder and filter screen, there will be a very pronounced
bend on it. When it passes over the right-most edge of the brewer cylinder, and the pressure gets
released from the wiper, coffee grounds will be flung towards the right wall of the machine. After only a
few cycles, heavy grounds accumulation can be seen around the waste container and on the right wall
of the unit.
Throughout the complete cycle, the bearing on the wiper arm in under extreme pressure, causing the
complete arm assembly to twist. The vertical rod is also under extreme pressure when the brew
chamber closes. At this point, there is a very high risk of damage to both of these components. The
bearing on the wipe arm will eventually break or snap off, and the pressure being exerted on the
vertical rod will stress the plastic vertical rod housing causing it to initially crack, then break.
*Please note the Zuma brewer used in Figure 5 and Figure 6 was only slightly overtightened. If the tension is higher
than that used in the example, damage to the brewer components will occur much quicker and will be more severe.
The following signs are an indication that the tension on the Zuma Brewer may be too tight:
•The wiper has a pronounced bend as it passes over the top of the brewer cylinder and filter
screen.
•The wiper carriage looks like it is getting crushed between the brew chamber and the top of the
brewer cylinder.
•The motor sounds like it is straining due to a heavy load.
•The wiper is hitting the top of the coffee paddy as it passes over it (while moving towards the left
side).
•Heavy coffee grounds accumulation around the waste container and on the right wall of the
machine.

ZUMA BREWER CAST ALUMINUM ARM UPGRADE INSTRUCTIONS
Instructions P/N – N016464 May 7, 2001 Zuma – Cast Aluminum Arm Upgrade
1. Remove the old Zuma brewer arms.
a) Open the brewer and remove the brew chamber.
b) Rotate the T-bar 180° to allow the H-frame to open completely.
c) Make sure the crank arm is at about the 5 o’clock position.
d) Remove the two ‘C’-clips that secure the wipe arm and unwipe
arm shafts in place. These clips are located on the front of the
brewer mainframe, just below the brew cylinder (Figure 1).
e) From the front of the brewer, push the two arm shafts out the back
of the brewer. These will free the two older arms (Figure 1).
f) From the top of the brewer, push the arms out the bottom of the
brewer.
g) Once done, the wipe arm spring and two plastic bushings will fall
out of the brewer. The two bushings can be discarded, but the
spring is still required.
2. Install the new Zuma brewer arms.
a) Position the spring onto the wipe arm boss (round protrusion) as
illustrated (Figure 2).
b) Slide the wipe arm into the brewer from the bottom.
c) Secure the wipe arm (and spring) in place by installing the wipe
arm shaft.
d) Secure the wipe arm shaft in place by installing the ‘C’-clip.
e) Slide the spring hook tool (p/n – M027019) through the top right of
the brewer towards the wipe arm spring (Figure 3).
f) Hook the smaller end of the wipe arm spring and pull upwards on
the tool. This will rotate the spring into position and allow you to
secure the end of the spring (small hook) onto the inner part of the
wipe arm (Figure 3).
g) Turn the brewer shaft until the crank arm is in the 9 o’clock
position.
h) Slide the unwipe arm into the brewer from the bottom.
i) Place the loop of the spring onto the boss (round protrusion) of
the arm. You may need to use a small screwdriver to lift the spring
onto the boss.
j) Secure the unwipe arm (and spring) in place by installing the
unwipe arm shaft.
k) Secure the unwipe arm in place by installing the ‘C’-clip.
l) Turn the brewer shaft until the crank arm is in the 5 o’clock
position.
m) Slide the spring hook tool through the top left of the brewer
towards the unwipe arm spring (Figure 4).
n) Hook the end of the unwipe arm spring and pull upwards on the
tool. This will allow you to secure the end of the spring (small
hook) onto the inner part of the unwipe arm (Figure 4).
o) Re-install the H-frame and the brew chamber.
p) Test the brewer to verify the operation of the arms and the tension
on the brew chamber. Make any necessary adjustments.
Figure 1 – Remove c-clips and arm shafts
Figure 2 – Position spring on wipe arm
Figure 3 – Hook spring onto wipe arm
Figure 4 – Hook spring onto unwipe arm
Note: This is
an internal
view of the
Zuma brewer.
Note: This is
an internal
view of the
Zuma brewer.
Other manuals for Zuma Brewer
1
This manual suits for next models
1
Table of contents
Other VKI Technologies Brewing System manuals
Popular Brewing System manuals by other brands

Fetco
Fetco CBS-1241 Users guide and operator instructions

BrewBuilt
BrewBuilt BrewSculpture manual

Grindmaster
Grindmaster AMERICAN METAL WARE 87710 Installation and operation manual

Keg King
Keg King Guten Nanobrewery instruction manual

Newco
Newco LCD-TCH Operating instructions manual

Speidel
Speidel Braumeister Operating & Brewing Instructions