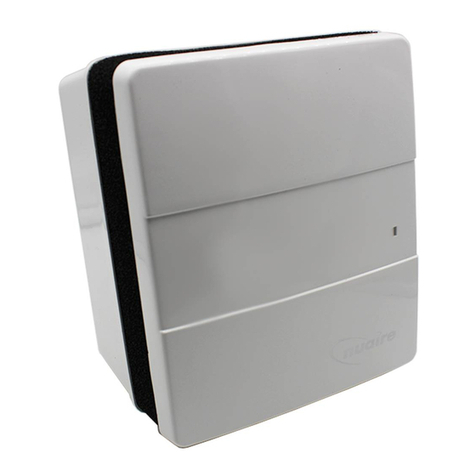
Vlano ifan ARIAWiFi User manual

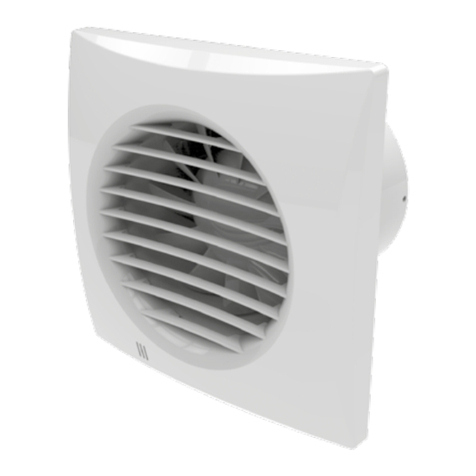
Intelligent axial fan
OPERATING MANUAL
ARIAWiFi

ARIAWiFi
CONTENT
Scope of delivery ................................................. .................................................. .................................................. .............................. 6
Technical specifications................................................ .................................................. .................................................. ...................... 6
Assembly and preparation for operation ............................................... .................................................. ................................ 9
Mains connection ................................................. .................................................. .................................................. ............................ 11
Operating rules ................................................. .................................................. .................................................. ................ 11
Fan control ................................................. .................................................. .................................................. ................ 12
Transport regulations ................................................. .................................................. .................................................. ............ 24
Maintenance instructions ................................................. .................................................. .................................................. ................... 25
Manufacturer's guarantee ................................................. .................................................. .................................................. ..................... 26
2

ARIAWiFi
These operating instructions are the most important document for operation and are aimed at specialist and maintenance staff as
well as operating personnel. The operating instructions contain information on the intended use, technical data, functionality and
installation of the ARIAWiFi device and all its modifications.
Skilled and maintenance personnel should have completed training in ventilation and must carry out the work in accordance
with the applicable local occupational safety regulations, building norms and standards.
The information given in these operating instructions is believed to be correct at the time this document was written.
In order to implement current technical developments, the company reserves the right to make changes to the design,
technical properties and scope of delivery of the device at any time. No part of this publication may be reproduced,
transmitted, stored in an information search system, or translated into any other language in any way without the prior
written consent of the company.
READ THIS OPERATING MANUAL CAREFULLY BEFORE INSTALLING THE DEVICE.
COMPLIANCE WITH THE OPERATING INSTRUCTIONS ENSURES SAFE OPERATION OF THE DEVICE DURING THE
TOTAL USAGE LIFE.
KEEP THESE OPERATING INSTRUCTIONS AS LONG AS YOU ARE OPERATING THE DEVICE, AS ALL OF THESE
MAINTENANCE INSTRUCTIONS INCLUDED.
3

ARIAWiFi
MEET THE PRESENT OPERATING REQUIREMENTS,
TO ENSURE PROPER FUNCTION AND LONG SERVICE LIFE OF THE FAN.
The device must be disconnected from the power supply before all connection, adjustment, maintenance and repair work.
Service and maintenance work must only be carried out by qualified personnel who have a valid license for
electrical work on electrical systems up to 1000V. Read the operating instructions before starting any work on
the device.
The single-phase power supply to which the device is connected must comply with the applicable electrical
standards. The cabling system must have a circuit breaker.
The electrical connection is made via a line circuit breaker QF, which is integrated in the stationary line. The contact
distance must be at least 3 mm at all poles.
Before installing the device, check it for visible defects on the impeller, housing and grille. Furthermore, it must be
ensured that there are no foreign bodies in the housing that could damage the impeller blades.
During assembly, make sure that the housing is not deformed! Deformation of the housing can cause the motor to stall
and loud noises.
Improper use, unauthorized changes and reworking as well as modifications to the device are prohibited.
Take precautions to ensure that smoke, carbon oxide gases and other flammable substances cannot enter the room through open
smoke vents or other fire protection devices. In order to avoid a back pressure of air and at the same time to ensure proper
combustion of exhaust gases and gases through the chimney, ensure that there is an adequate supply of air. The conveying air must
not contain any dust, vapors, solid foreign matter, sticky substances or fibers.
The device is not designed for use in a flammable or explosive environment that contains, for example, alcohol fumes,
gasoline or insecticides.
Do not close or cover the air inlet and outlet openings in order to ensure an optimal air flow.
4th

ARIAWiFi
Please do not sit on the device or leave any objects on it.
This device may only be used by children from the age of 8 and persons with limited physical, mental or sensory
abilities or without sufficient experience and knowledge if they have been supervised or have been instructed in the
safe use of the device and have understood the resulting dangers.
Do not let children play with the device.
AFTER ITS SERVICE LIFE, THE DEVICE MUST BE DISPOSED OF SEPARATELY.
THE DEVICE MUST NOT BE DISPOSED OF AS UNSORTED URBAN WASTE.
5

ARIAWiFi
SCOPE OF DELIVERY
Fan:
Nozzle with a diameter of 100 mm:
Nozzle with a diameter of 125 mm:
Screws and dowels:
Operating manual:
Packaging box:
1 pc
1 pc
1 pc
4 pc.
1 pc
1 pc
TECHNICAL SPECIFICATIONS
The product described in the operating instructions is an axial fan made of high quality plastic
Ventilation of small to medium-sized living spaces that are heated in winter.
The design of the device is constantly being developed and optimized, which is why some models differ from the description in this
Operating instructions may differ.
Supply voltage, V
Frequency, Hz
Max. Power consumption, W
Current consumption, A
Speed, min-1
Max. Air flow rate, m³ / h
Electrical protection class
100-240
50-60
6.0
0.07
2200
133
IP44
6th

ARIAWiFi
TECHNICAL SPECIFICATIONS
Max. Power current
model Support- Speed, för performance,
m3 / h
Sound pressure
level
3m, dBA
diameter Ventilation level ouchacceptance recording, A min-1
24 hours
Silent
Max
24 hours
Silent
Max
1.6
2.9
5.6
1.7
3
6th
0.02
0.04
0.06
0.03
0.04
0.07
950
1650
2150
850
1350
2200
33
72
106
40
83
133
17th
21
31
17th
22nd
32
100
ARIAWiFi
125
VARIANT FANS
Functions
model Humidity 24 Trailing-
counterkcontrol hours switch-on
hesitation
Speed
succeeded Ininterval ventilation External
counter
Motion
sensor
ARIAWiFi +
+
+
+
+
+
+
+
+
+
+
+
+
+
ARIAWiFi
Move +
7th

ARIAWiFi
EXTERNAL DIMENSIONS
152 32
206
OPERATING MODES OF THE FAN
Standby mode: the fan does not run. It is activated when the24 hours mode is activated with an app or by a signal
from the temperature / humidity / motion / light sensor or an external switch.
24 hours: the fan runs on a low ventilation level to ensure minimal ventilation around the clock. When the
temperature / humidity / motion / light sensor or an external switch is activated, the fan switches to mode
Silent or Max.
Silent: Quiet operating mode that is activated by the motion sensor, light sensor or an external switch.
MAX: Operating mode of the fan with a high ventilation level, which is determined by the humidity sensor, temperature sensor or the Boost mode
activated via app.
8th

ARIAWiFi
ASSEMBLY AND PREPARATION FOR OPERATION
1. Protect the fan against the ingress of precipitation and
condensation if it is installed vertically.
The installation of the fan with a direct air outlet upwards
is not permitted.
2. Before installation, make sure that the device is disconnected
from the power supply.
LN
QF
3. Remove the cover from the fan. 4. Mark the holes for mounting the fan and power cord.
9

ARIAWiFi
5. Pull the power cable to the ventilation opening, drill the
mounting holes and install the wall plugs.
6. Mount the fan with the help of the screws.
7. Remove the cover to gain access to the terminal box
and connect the fan to the power supply according to the
connection diagram. Reassemble the fan in reverse order.
8. Connect the fan to the power supply.
ON
10

ARIAWiFi
MAINS CONNECTION
The fan is designed for connection to a 100-240 V / 50 (60) Hz single-phase AC network.
Designations of the terminals on the connection diagram:
L. : phase
N : zero
LT : Control chain of the ventilation level
LI : Output for connecting the external impedance
SK : Switch for switching the ventilation level
NL
N
L.
LT
LI
SK
OPERATING INSTRUCTIONS
Degree of protection against ingress of foreign bodies and water ingress IP44.
The fan is designed for use in ambient temperatures from +1 ° C to +45 ° C. The
device belongs to the electrical systems of class II.
11

ARIAWiFi
FAN CONTROL
The fan is controlled via the app on the mobile device. Use the link or QR code below to download the app.
Link to download the apps in App Store Link to download the apps in Play Market
After installing the app, connect the mobile device to the fan as a WiFi access point with
the name (FAN: + 16 characters of the ID number), as indicated on the control board
and the housing of the fan.
Password of the WLAN access point: 11111111.
Call up the installed app on the mobile device that is connected to the fan. If the app is
started on a device that is not connected to the fan, a message about the missing
connection to the fan is displayed.
12th

ARIAWiFi
Select the type of connection you want:
1. Call up the menu of the app.
2. Select the menu item Connection - connection list.
3. If the fan is running in wireless access point mode, select the default connection. The connection will be established
automatically.
4. If the fan is connected to the WLAN home network, search for devices in the network.
5. The connection is displayed in the list with the ID number of the fan. Highlight this.
6. Change the connection name if necessary.
7. Save the entered data.
1
3
5
2
7th
4th 6th
13th

ARIAWiFi
WIFI SETTING
Go to the application menu on your mobile device Menu connection WLAN setting. Then press Receive. The current
settings of the WLAN parameters are displayed on the screen. Choose one of the WiFi modesAccess point
or Client out.
Access point: Access point without a home router. In
this mode, up to 8 mobile devices can be connected to
the fan to control it.
Client: the fan runs in the network of the home router.
Choose for Access point-Mode off the desired security
mode:
Enter the details of the home router for the Client-Mode on:
•Enter the name of the wireless access point of the home
router.
Enter the password of the WiFi access point of the
home router. Press the buttonApply.
•
•
Open: the WiFi network is not password protected.
WPAPSK: password protected. Based onWPA
encrypted. This technology does not guarantee
complete security.
WPA2 PSK: Encryption technology for modern
network devices.
WPA / WPA2 PSK: password protected
(recommended). Combined encryption technology
that enables WPA and WPA2. Compatible with any
device. Enter the password for the access point and
press the buttonApply.
•
•
•
2
3
1
14th

ARIAWiFi
SPECIAL SETUP MODE «SETUP MODE / RESET»
To reset the WiFi password or to connect to the fan, the SetupMode used to edit the settings. To get into the
SetupMode to switch, press and hold the button under the cover of the ventilation system for 5 seconds until the LED
flashes blue. The system is in this mode for 3 minutes, after which it automatically returns to the previous settings. To
exit setting mode immediately, press and hold the button again for 4 seconds until the LED stops flashing blue and
starts glowing red. Connect the fan in theSetup mode with a mobile device:
WiFi name: Setup mode
WiFi password: 11111111
To reset the settings to the factory settings, press and hold the button for 14 seconds until the LED flashes red and an
acoustic signal sounds.
ACCESS BUTTON
The LED can have the following indications
•
•
Switched off. Normal operation of the device.
Lights up blue. Warning that the device is in the SetupMode
is switched.
Flashes blue. The device is in SetupMode.
Lights up red. Warning that the device will be reset to the
factory settings or the SetupMode is left.
Flashes red. Factory reset completed successfully.
•
•
•
LED
button
15th

ARIAWiFi
HOME PAGE
Show:
business of Overrun switch
Switch-on delay.
or the
Moisture value exceeded.
Temperature rise
t
Warning indicator (battery needs to be replaced).
Operation of the external switch
Motion sensor
Operating mode Interval ventilation
Operating mode Do not bother
Switching the valve on / off.
Sensor values:
Switching the BOOST mode.
BOOST The timer becomes in the menu Settings timer
menu Settings operating modes (Max. Ventilation level)
Current temperature
Current humidity
14:59 (Overrun switch) set. The Ventilation level is in %
set.
16

ARIAWiFi
CLOCK WITH CURRENT TIME DISPLAY
To set the current time of the control unit, go to the Settings
menu - Current time. The current time is used to indicate
the time and operation of some modes on a schedule (see
Modes of operation). When the fan is disconnected from the
power supply, the clock continues to run from an external
power source.
17th

ARIAWiFi
RESET TO WINDOW SETTINGS
To reset the device to the factory settings,
go to the menu Reset settings. Then press Reset factory
settings. After this
Resetting the connection with the device can be lost due
to the resetting of the Wi-Fi settings. If necessary, set up
the WLAN connection again.
You can also change the settings with the button SetupMode/
Reset reset to default.
2
1
FIRMWARE
To view the firmware version, go to the Menu firmware.
This menu shows the current version and the firmware
date.
18th

ARIAWiFi
SETTING OF SENSOR CONTROLLED OPERATION
When setting the sensors to operate, it should be noted that operation can be selected via the temperature sensor or
any other sensor (humidity, motion, light sensor and external switch).
Operating setting of the temperature sensor
Go to the E menusettings - sensors, set the temperature sensor and activate it. It is not possible to set the other
sensors. Then set the temperature setpoint.
If the temperature setpoint is exceeded for longer than the switch-on delay, the fan switches to the high ventilation level
MAX, to dissipate the excess heat. After the room temperature has dropped 4 ° C below the set target value, the fan
switches to the previous mode.
1
2
19th

ARIAWiFi
Operation setting of the humidity sensor
Go to the menu Settings - sensors, deactivate the temperature sensor and select one of the modes of the humidity
sensor. There are three modes of operation:
Turn off: the humidity sensor is deactivated.
Automobile: intelligent humidity control. This mode offers the option of changing the humidity setpoint and the
ventilation level in automatic mode, regardless of which the optimal setpoint for the room in which the fan is located is
selected. The choice of how the fan works is determined by analyzing the statistical data on humidity.
Manually: manual mode that allows you to set the setpoint in the range of 40% to 80%. If the setpoint is exceeded for
longer than the switch-on delay of the fan, the fan switches to the high ventilation levelMAX.
1
2
3
20th
Table of contents
Other Vlano Fan manuals
Popular Fan manuals by other brands

Triangle Engineering of Arkansas
Triangle Engineering of Arkansas Master Breeze AMB2421 owner's manual
Taurus
Taurus ALPATEC PONENT 16CR ELEGANCE quick start guide
Infiniton
Infiniton IF-40M instruction manual
Coltech
Coltech BEL-9B Original instructions
ATD Tools
ATD Tools ATD-30336 owner's manual

Canarm
Canarm DUAL MOUNT SERIES installation instructions
