R
R
R-
-
-G
G
G-
-
-B
B
B
/
/
/
Z
Z
Zo
o
oo
o
om
m
m
GLP German Light Products GmbH
(Instruction version 1.6 / from software version 1.06)
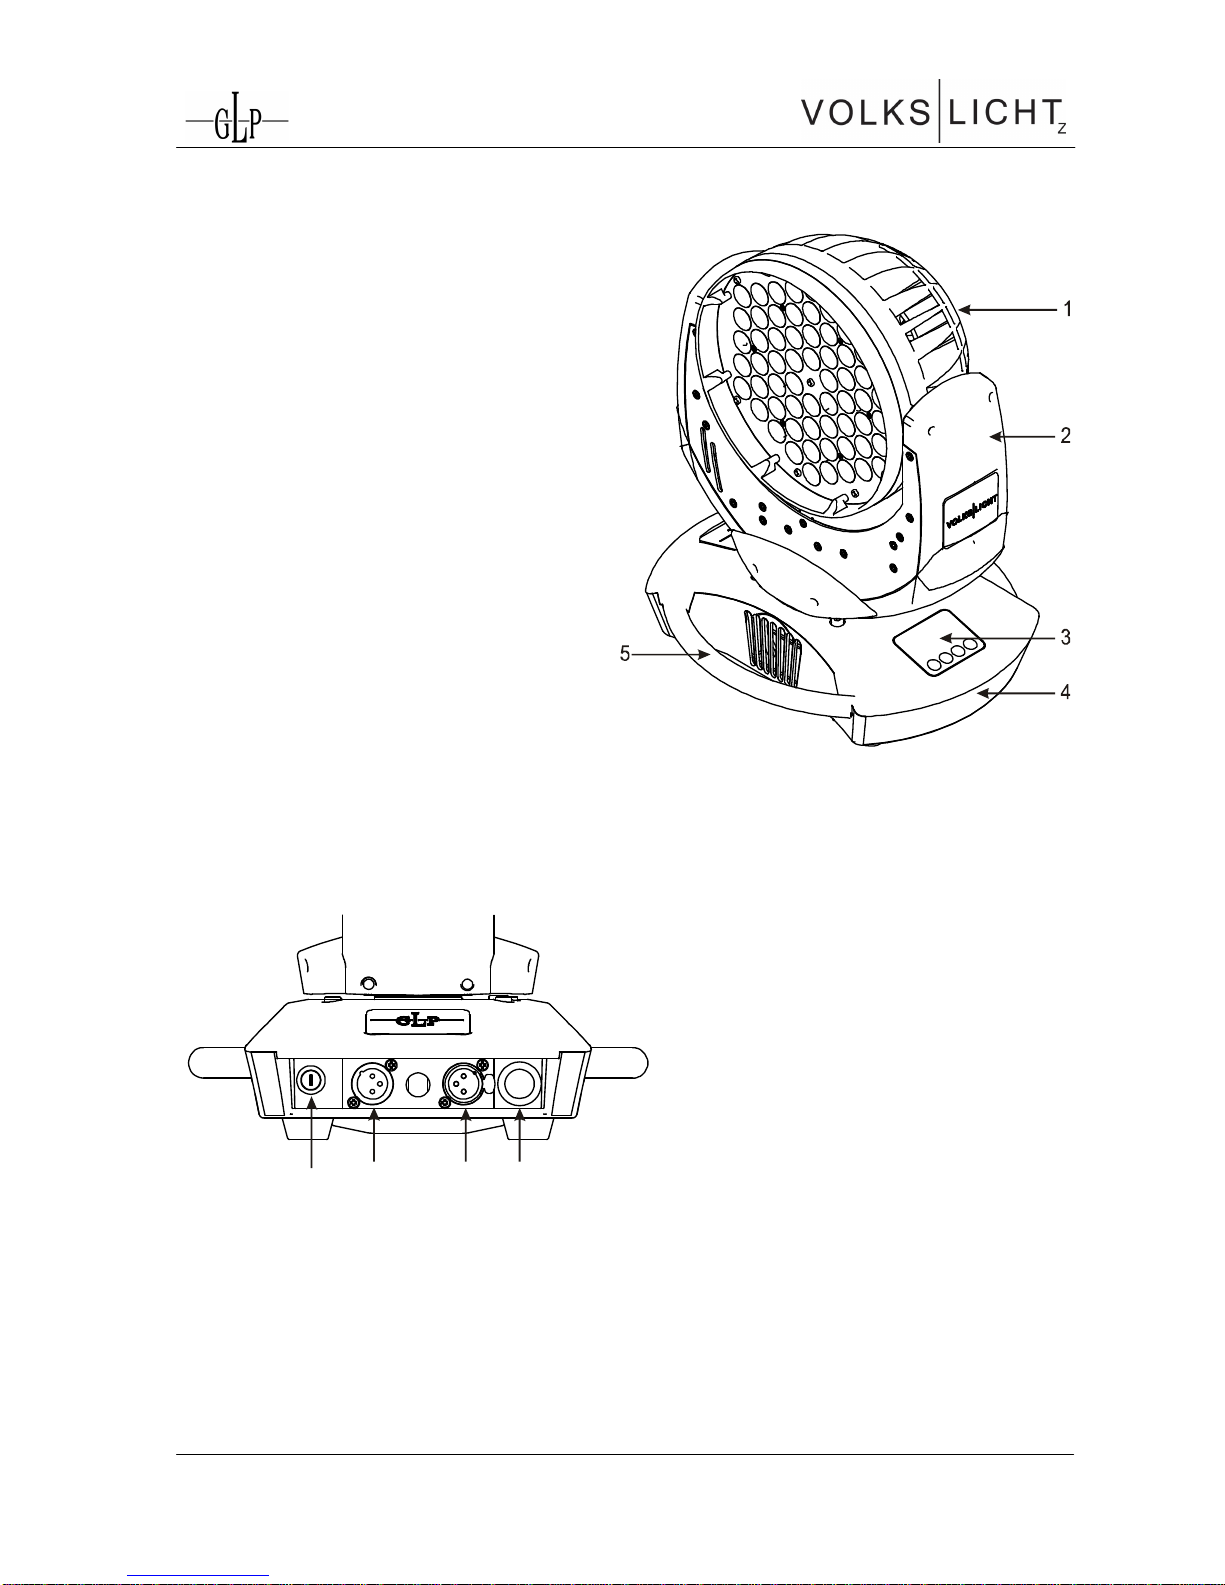
5
1.1 Safety Instructions
The
V
VO
OL
LK
KS
SL
LI
IC
CH
HT
T
Z
ZO
OO
OM
M
is an advanced technology product.
To guarantee smooth operation, it is necessary to follow the
following instructions.
The manufacturer of this device will not take responsibility of
damages through any disregard of the information in this user
manual. Warranty claims will also be cancelled in the event of
the system casing being opened.
If the external cable of this lighting is damaged, it should be
replaced by the manufacturer or its service agent or a qualified
person, to avoid danger.
1. Make sure that before powering up the fixture, the fans and air inlets are
clean and not blocked by anything.
2. Before powering up the fixture, ensure that the moving head part of the
fixture can rotate unhindered through its full range of movement.
3. A safety distance of at least 0.5 m to any easily flammable material (e.g.
decoration material) must be adhered to.
4. Attention! Don’t touch the device during operation. Parts of the fixture can
become hot and can cause injuries and / or damages.
5. The system doesn’t contain any user serviceable parts. Opening the fixture
will void the manufacturers warranty.
6. Danger of burning. Wait at least 15 minutes after disconnecting the AC
power before changing the optical carrier on the fixture. Pay attention to
possible hot parts of the system.
7. Never look directly into the beam of light or one of the LEDs. Never use
optical apertures with a distance less than 0.5 m to observe the beam of
light. LED Class 2M. Not following these precautions can result in serious
injury to your eyes and in particular, your retina.
Attention: LED Class 2M can c