manuals.online logo
Brands
  1. Home
  2. •
  3. Brands
  4. •
  5. VOLTA
  6. •
  7. Vacuum Cleaner
  8. •
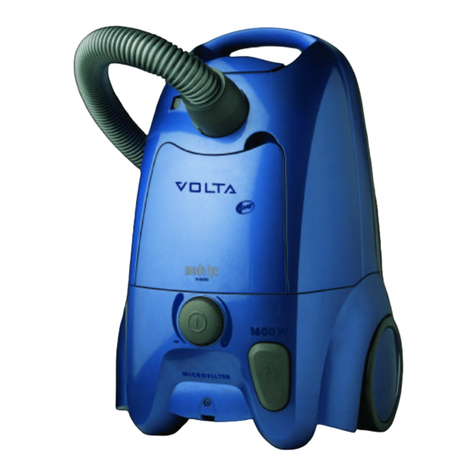
  9. VOLTA Modelys U6205 User manual

VOLTA Modelys U6205 User manual

English 2
Dansk 10
Svenska 12
Norsk 14
Suomi 16
U6200
U6205
U6210
U6215
U6220
U6230
English
Volta supply a range of cleaners with different accessories, all of which are covered
in this manual. Please refer to your specific model and its accessories.
Keep both cover flaps open and cross-reference the text with pictures where
necessary.
Modelys Accessories (all models)
s-bagTM
Swivel hose and handle with manual suction control
Combination carpet/hard floor nozzle
Narrow crevice nozzle
Upholstery nozzle
Modelys Accessories (some models)
Extension tubes (x2)
Telescopic tube
Hard floor nozzle
Ensuring your safety
The cleaner is for domestic use only and has been designed to ensure maximum
safety and performance. Please follow these simple precautions:
The cleaner is double insulated so it must not be earthed
The cleaner is only to be used by adults
Do not pick up very fine dust (plaster, cement, cold cinders...)
Always store in a dry place
Do not use to pick up liquids
Avoid sharp objects
Do not pick up hot cinders or lighted cigarette ends
Do not use near flammable gases
Avoid tugging on the mains cable and check cable regularly for damage
Note: Do not use cleaner with a damaged cable.
If the cable is damaged, it should be replaced at a service centre
The plug must be removed from the socket outlet before cleaning or
maintaining the appliance
All service and repairs must be carried out by authorised service staff
Getting Started
1 Check that the s-bagTM is in place.
2 Insert the hose until the catches click to engage
(press catches inwards to release).
3 Attach extension tubes or telescopic tube (some models) to the hose
handle and floor nozzle and twisting them together (twist and pull
apart to dismantle).
4 Extend the cable and connect to mains, ensuring the cable is not
twisted before use (Press cable rewind button to rewind cable. Please
hold the plug to prevent it striking you).
5 Press the on/off button to start the cleaner.
6 To increase/decrease suction, adjust the rolling wheel control. Suction
can also be regulated on the hose handle by opening/closing the vent.
Features of the Modelys range
A Mains cable
B Cable rewind button
C Mechanical s-bagTM full indicator
D Hose connection
E Carrying handle
F Cover release catch for s-bagTM compartment
G Cover release for accessory compartment
H On/off button
I Parking position for tube and nozzle when in use
J Storage slot for tube and nozzle when not in use
K Suction control regulator
Getting the best results
Carpets: Use floor nozzle with lever in this position.
Hard floors: Use floor nozzle with lever in this position.
Loose rugs/curtains/lightweight fabrics: Reduce the suction power. Use
the floor nozzle for loose rugs and the upholstery nozzle for curtains,
cushions etc.
Confined areas: Use the crevice nozzle for tight corners and radiators etc.
Hard floor/Parquetry: use the hard floor nozzle to avoid scratching (some
models).
3
s-bagTM indicator and changing the s-bagTM
For peak performance the s-bagTM should be changed when full. The
mechanical s-bagTM indicator window will gradually turn red when filling
and completely red when full.
If the dust bag should get broken in the cleaner, take cleaner to service
centre for cleaning. This is not covered by the guarantee.
The s-bagTM full indicator may signify that the bag is blocked
(occasionally caused by finer dust) which will cause loss of suction and
may result in overheating. If this occurs change the bag even if it is not
full. DO NOT VACUUM VERY FINE DUST (PLASTER, CEMENT, COLD CINDERS...).
To check the dustbag, the cleaner must be switched on, with all
attachments connected but the nozzle does not have to be placed on the
floor.
To change the s-bagTM:
7 Open the cleaner cover.
8 Remove the s-bagTM holder and pull the sliding tab to remove the s-
bagTM from its holder.
9 Insert the new s-bagTM by sliding the bag slots into the holder. Close
cover.
10 Make sure that the dustbag (s-bagTM) is not overlapping with the
rubber sealing. (Push downwards before inserting the dustbag holder
into the dustbag compartment)
We recommend the s-bagTM is changed after using a carpet cleaning
powder or if there is a bad smell from the cleaner.
Note: Only use original s-bagsTM and filters
s-bagTM (ref. s-bagTM)
Motor protection filter (ref. D55)
Exhaust filter/Micro filter (ref. D09)
s-bagTM safety device
To avoid damaging the cleaner, do not use it without a dustbag. A safety
device is fitted which prevents the cover closing without a dustbag in
place. Do not attempt to force cover shut.
Changing/cleaning the filters
Never use the cleaner without the filters in place.
The filters should be changed/cleaned approximately every fifth dustbag.
To maintain Motor Protection filter:
7 Open the cleaner cover.
11 Remove the filter unit, rinse the filter under warm tap water only and
dry the filter completely (14). The original filtering performance is
now restored. Replace the unit back into the cleaner and close cover
ensuring it is securely in place and the cover is properly closed.
Latest every second year replace the old filter with a new one.
To maintain Exhaust filter/Micro filter (some models):
12 Press the catch to open the filter cover.
13 Remove the filter unit, rinse the filter under warm tap water only and
dry the filter completely (14). The original filtering performance is
now restored. Replace the unit back into the cleaner and close cover
ensuring it is properly fastened.
Latest every second year replace the old filter with a new one.
Troubleshooting
Dustbag: please check that the dustbag is placed correctly and ensure
that it is not jammed. (10)
Power: if the electric power does not come on, disconnect from mains
and check plugs, cable and fuses where appropriate.
The cleaner may switch itself off in event of severe blockage or
excessively dirty filters. In such cases, disconnect from mains and allow
to cool for 30 minutes. Clear blockage and/or replace filter(s) and restart.
The clearing of blocked hoses is not covered by the guarantee. To avoid
blockages and maintain suction efficiency, the floor nozzles should be
cleaned regularly using the hose handle.
Please see additional Volta information towards the back of this booklet.
Water: if water is sucked into the cleaner the motor must be changed at a
service centre. This is not covered by the guarantee.
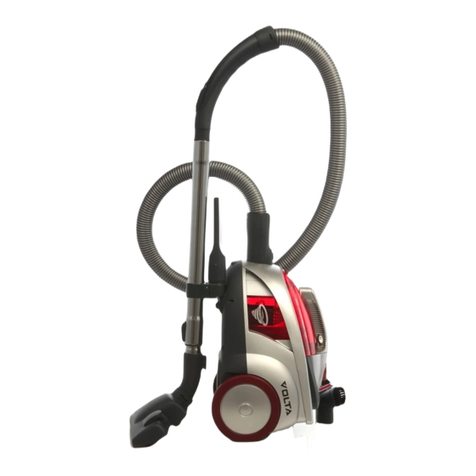
This manual suits for next models

5

Other VOLTA Vacuum Cleaner manuals

VOLTA U2120 User manual

VOLTA

VOLTA U2120 User manual

VOLTA U505 User manual

VOLTA

VOLTA U505 User manual

VOLTA U4502 User manual

VOLTA

VOLTA U4502 User manual

VOLTA Gemini Gen3 U4510 User manual

VOLTA

VOLTA Gemini Gen3 U4510 User manual

VOLTA Vortex U4015 User manual

VOLTA

VOLTA Vortex U4015 User manual

VOLTA Contour Gen 3 U4210 User manual

VOLTA

VOLTA Contour Gen 3 U4210 User manual

VOLTA MobiONE UMO1540 User manual

VOLTA

VOLTA MobiONE UMO1540 User manual

VOLTA Salsa U1650 User manual

VOLTA

VOLTA Salsa U1650 User manual

VOLTA Modelys U6210 User manual

VOLTA

VOLTA Modelys U6210 User manual

VOLTA VORTEX U4015F User manual

VOLTA

VOLTA VORTEX U4015F User manual

VOLTA Campus U4700 User manual

VOLTA

VOLTA Campus U4700 User manual

VOLTA U 416 User manual

VOLTA

VOLTA U 416 User manual

VOLTA U4220 User manual

VOLTA

VOLTA U4220 User manual

VOLTA U7440 User manual

VOLTA

VOLTA U7440 User manual

VOLTA U144 User manual

VOLTA

VOLTA U144 User manual

VOLTA U2140 User manual

VOLTA

VOLTA U2140 User manual

VOLTA Mega Gen 3 U5010 User manual

VOLTA

VOLTA Mega Gen 3 U5010 User manual

VOLTA UB158 User manual

VOLTA

VOLTA UB158 User manual

VOLTA 4510 PRIMEROSE YELLO User manual

VOLTA

VOLTA 4510 PRIMEROSE YELLO User manual

VOLTA Rolfy User manual

VOLTA

VOLTA Rolfy User manual

VOLTA U2950 Series User manual

VOLTA

VOLTA U2950 Series User manual

VOLTA U3410 Manual

VOLTA

VOLTA U3410 Manual

VOLTA Sierra U4020 User manual

VOLTA

VOLTA Sierra U4020 User manual

VOLTA U4401 User manual

VOLTA

VOLTA U4401 User manual

Popular Vacuum Cleaner manuals by other brands

Metabo AS 20 L Original instructions

Metabo

Metabo AS 20 L Original instructions

Thomas PET & FAMILY Aqua+ Instructions for use

Thomas

Thomas PET & FAMILY Aqua+ Instructions for use

Midea VCS38A13L Operation & instruction manual

Midea

Midea VCS38A13L Operation & instruction manual

CleanCraft flexCAT 16 H instruction manual

CleanCraft

CleanCraft flexCAT 16 H instruction manual

Zelmer 1600 Instructions for use

Zelmer

Zelmer 1600 Instructions for use

Parkside PAS 1200 B2 Translation of the original instructions

Parkside

Parkside PAS 1200 B2 Translation of the original instructions

Philips HR8374/02 user manual

Philips

Philips HR8374/02 user manual

BorMann Elite BVC3200 instruction manual

BorMann

BorMann Elite BVC3200 instruction manual

EINHELL TC-VC 1815 Original operating instructions

EINHELL

EINHELL TC-VC 1815 Original operating instructions

Lervia LERVIA KH 4421 operating instructions

Lervia

Lervia LERVIA KH 4421 operating instructions

SEVERIN HV 7153 Instructions for use

SEVERIN

SEVERIN HV 7153 Instructions for use

Bissell POWERGLIDE LIFT-OFF PET PLUS 2043 SERIES user guide

Bissell

Bissell POWERGLIDE LIFT-OFF PET PLUS 2043 SERIES user guide

EINHELL RT-VC 1600 E operating instructions

EINHELL

EINHELL RT-VC 1600 E operating instructions

Shark Powered Lift-Away NV620UKT instructions

Shark

Shark Powered Lift-Away NV620UKT instructions

Tesla AeroStar T300 manual

Tesla

Tesla AeroStar T300 manual

Kärcher VC 4i Cordless Plus manual

Kärcher

Kärcher VC 4i Cordless Plus manual

Nilfisk-Advance 3707 Instructions for use

Nilfisk-Advance

Nilfisk-Advance 3707 Instructions for use

tomado TVC2002B instruction manual

tomado

tomado TVC2002B instruction manual

manuals.online logo
manuals.online logoBrands
  • About & Mission
  • Contact us
  • Privacy Policy
  • Terms and Conditions

Copyright 2025 Manuals.Online. All Rights Reserved.