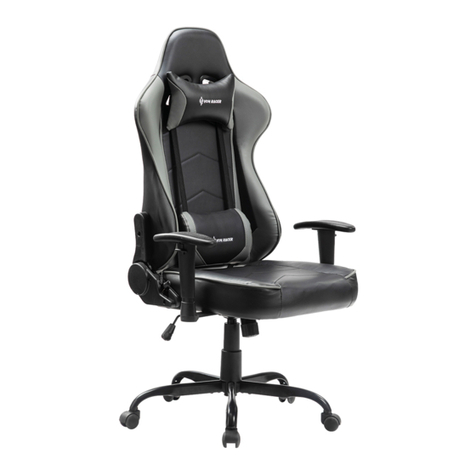
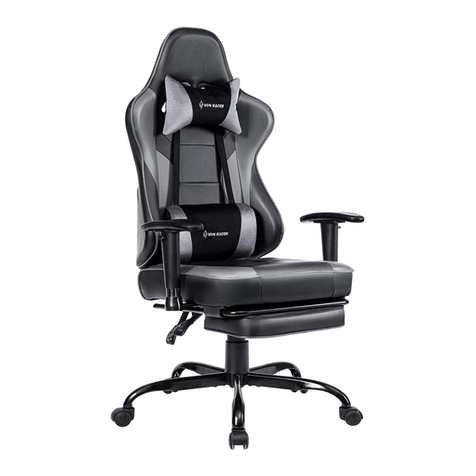
Von Racer 8675-1 User manual

Installation Instruction
Model:8675-1

Edition:20211224Z
Auflage:20211224Z

Web:www.vonracer.com
E-mail:[email protected]
CONTENTS
INHALT
..........................................1
Preface
Vorwort
Parts List
Stückliste ........................................2
Installation Steps
Installationsschritte
...............................3
Service
Dienst
Safety And Maintenance
Sicherheit und Wartung
.......................8
.......................11
Product Warranty
Produktgarantie
...............................9
.................................12
Limited Warranty
Eingeschränkte Garantie
.................................10
......................13

Preface
1
Congratulations,you now have a brandnew chair!Before enjoying one of the comfortable
chairs,you have to assemble it together.This guide will take you through the basic
assembly process.To ensure smooth installation,please follow the assembly instructions,
especially the important safety information.
For more detailed and visual instructions,we have video which can help you better
understand the assembly process.Besides,although you can assemble the chair yourself,
but there is a second person to help you make it more accommodating easy.Before you
start,check if there get some missing parts in thepackage.
If you have any questions,please do not hesitate to email us,we will help you as soon as
possible.If you encounter any difficulties during the assembly process,please remember
to check the assembly with the video,see if you missed something.If you can not solve
your problem,also email us and our team will help you.
English:
Deutsch:
Herzlichen Glückwunsch, Sie haben jetzt einen brandneuen Stuhl! Bevor Sie einen der
bequemen Stühle genießen, müssen Sie ihn zusammenbauen. Dieser Leitfaden führt
Sie durch den grundlegenden Montageprozess. Um eine reibungslose Installation zu
gewährleisten, befolgen Sie bitte die Montageanleitung, insbesondere die wichtigen
Sicherheitshinweise. Für detailliertere und visuelle Anweisungen haben wir ein Video,
das Ihnen helfen kann, den Montageprozess besser zu verstehen. Außerdem, obwohl
Sie den Stuhl selbst zusammenbauen können, aber es gibt eine zweite Person, die
Ihnen hilft, es bequemer zu machen. Bevor Sie beginnen, überprüfen Sie, ob einige
fehlende Teile im Paket vorhanden sind. Wenn Sie Fragen haben, zögern Sie bitte nicht,
uns eine E-Mail zu senden, wir werden Ihnen so schnell wie möglich helfen. Wenn Sie
während des Montageprozesses auf Schwierigkeiten stoßen, denken Sie bitte daran,
die Montage mit dem Video zu überprüfen, um zu sehen, ob Sie etwas verpasst haben.
Wenn Sie Ihr Problem nicht lösen können, senden Sie uns auch eine E-Mail und unser
Team wird Ihnen helfen.
Vorwort

2
x5 x1 x1
x1 x1
ABC
DEF
G
2
M6*25 X7
J
3
M6*30 X5
45
M6*10 X10
7
6
+
1
x2
x2
x1
++
M6*20 X8
Stückliste

3
2
G
BC
J
1
D
1
Installation Steps
E
2
2
1
1
G
G
G
3
1
A
B
C
4
++
A
F
+
23
4 5
J
Installationsschritte

4
3
Installation Steps
4
F
D
E
5
5
5
Installationsschritte
1. Assemble the back of the chair with ②screws, fix the T frame on the back of the chair with ③
screws, the recess of the T-shaped iron faces outward,put the leather cover on the back of the
chair, and install the plastic case on the back of the chair.
2. Use ④screws to assemble the chair foot, insert the wheel into the hole in the middle of each
chair foot, and vertically put the air rod into the hole in the center of the chair foot.
3. Install the handrail and tray on the bottom of the cushion using ⑤screws.
4. Install the hole at the bottom of the cushion vertically on the air rod.
English:
Deutsch:
1. Montieren Sie die Rückenlehne des Stuhls mit (2) Schrauben, befestigen Sie den T-Rahmen
auf der Rückenlehne des Stuhls mit (3) Schrauben, die Aussparung des T-förmigen
Bügeleisens zeigt nach außen, legen Sie den Lederbezug auf die Rückenlehne des Stuhls und
installieren Sie den Kunststoffkoffer auf der Rückenlehne des Stuhls.
2. Verwenden Sie (4) Schrauben, um den Stuhlfuß zu montieren, stecken Sie das Rad in das
Loch in der Mitte jedes Stuhlfußes und stecken Sie die Luftstange vertikal in das Loch in der
Mitte des Stuhlfußes.
3. Befestigen Sie den Handlauf und das Tablett mit (5) Schrauben auf der Unterseite des Kissens.
4. Installieren Sie das Loch an der Unterseite des Kissens vertikal auf der Luftstange.

5
6
6
7
5
Installation Steps
Installationsschritte

6
7
Installation Steps
8
6
7
Installationsschritte
English:
English:
5. Insert the t-shaped iron rack of the backrest vertically into the hole behind the tray.
6. Tighten the knob at the rear of the tray.
7. Attach headrest and Fanny pack to backrest.
8. Congratulations, you have a new e-sports chair!
Deutsch:
Deutsch:
5. Stecken Sie das T-förmige Eisengestell der Rückenlehne senkrecht in das Loch hinter dem
Tablett.
6. Ziehen Sie den Knopf an der Rückseite des Fachs fest.
7. Befestigen Sie die Kopfstütze und den Fanny-Rucksack an der Rückenlehne.
8. Herzlichen Glückwunsch, Sie haben einen neuen E-Sport-Stuhl!
work in 5V (Overload
may cause malfunction )
Arbeit in 5V (Überlast
kann Fehlfunktionen
verursachen)

7
Raise:
Transfer the weight from the chair and lift up the
right handle.
Lowering:
Transfer the weight to the chair and lift up the right
handle.
Instructions For Use
By moving the plastic handle, the backrest can
be reclined and recovered.
Gebrauchsanweisung
Erhöhung:
Übertragen Sie das Gewicht vom Stuhl und heben Sie die
richtiger Griff.
Absenkung:
Übertragen Sie das Gewicht auf den Stuhl und heben
Sie den rechten Auftrieb Griff.
English:
Deutsch:
English:
Deutsch:
Durch Bewegen des Kunststoffgriffs kann die
Rückenlehne zurückgelehnt und geborgen werden.


Do not stand on a chair, and do not use a chair as a stepladder.
Use this product for seating one person at a time.
Do not use the chair unless all bolts and screws are firmly secured.
Avoid contact with sharp objects to prevent puncturing the fabric.
Every 6 months, check all bolts and screws to ensure they are
tight.
To clean, spot clean only using a damp towel and mild cleaner, first
test on a small, obscure area of fabric.
Chair weight limit not to exceed 400 lbs.
SAFETY INFORMATION
Safety And Maintenance
8
English:

Product Warranty
EXCLUSIONS:
This warranty does not apply and no other warranty applies to:
Normal wear and tear, which are to be expected over the course of ownership.
Misuse, abuse or excessive use of the product.
Products that were not installed, used, or maintained in accordance with
product instructions and warnings.
Products used for rental or commercial purposes.
Damage caused by the carrier in-transit is handled under separate terms.
:
VON RACER promises to repair or replace any VON RACER chair that is found to be
defective in material or workmanship within one (1) and year from the date of original
purchase so long as you, the original purchaser, still owns it. This is your sole and
exclusive remedy. This warranty is subject to the provisions below.
Modifications or attachments to the product that are not approved by VON RACER.
9
English:

Limited Warranty
:
10
English:


Sicherheit und Wartung
Deutsch:
11

Produktgarantie
VON RACER verspricht, jeden VON RACER-Stuhl, der Material- oder
Verarbeitungsfehler aufweist, innerhalb eines (1) Jahres ab dem Datum des
ursprünglichen Kaufs zu reparieren oder zu ersetzen, solange Sie, der
ursprüngliche Käufer, ihn noch besitzen. Dies ist Ihr einziges und ausschließliches
Rechtsmittel. Diese Garantie unterliegt den nachstehenden Bestimmungen.
Normaler Verschleiß, der im Laufe des Eigentums zu erwarten ist.
Missbrauch, Missbrauch oder übermäßige Verwendung des Produkts.
VON RACER nicht freigegebene Modifikationen oder Anbauten am Produkt.
Produkte, die nicht gemäß den Produktanweisungen und Warnungen installiert,
verwendet oder gewartet wurden.
Produkte, die für Vermietung oder kommerzielle Zwecke verwendet werden.
Transportschäden durch den Spediteur werden unter gesonderten Bedingungen
gehandhabt.
Deutsch:
12

Eingeschränkte Garantie
13
Deutsch:


Table of contents
Other Von Racer Indoor Furnishing manuals
Popular Indoor Furnishing manuals by other brands

Adler Europe
Adler Europe AD 2159 user manual

daltile
daltile One Quartz Series installation manual

Seconique
Seconique Amelia 4'6" Bed Assembly instructions

Homelegance
Homelegance 2042-16 Assembly instruction

IKEA
IKEA GREVBACK TV UNIT 35 7/8X18 1/2" instructions

VECELO
VECELO KHD-BTJ-MBT04-RBN installation manual