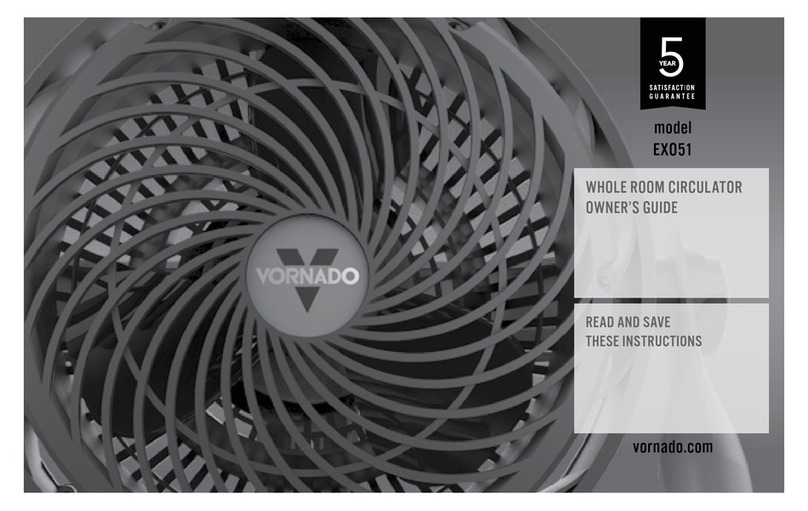
Vornado EXO5 User manual

model
EXO5
vornado.com
WHOLE ROOM CIRCULATOR
OWNER’S GUIDE
READ AND SAVE
THESE INSTRUCTIONS

2English
vornado.com
800-234-0604
help@vornado.com
We expect this
product to be
perfect.
If it is not, we
will make it
right.

3
English
Important Safety Instructions ............................................................. 4
Features .............................................................................................. 7
Controls............................................................................................... 8
How to Use ......................................................................................... 9
Assembly........................................................................................... 10
Cleaning ............................................................................................ 13
Troubleshooting ............................................................................... 15
Warranty............................................................................................ 16
CONTENTS

4English
READ AND SAVE THESE INSTRUCTIONS
IMPORTANT SAFETY INSTRUCTIONS
This owner’s guide and any additional inserts are considered part of
the product. They contain important information about safety, use and
disposal. Before using the product, please familiarize yourself with all
operating and safety instructions. Please keep all documents for future
reference and pass these documents on, together with the product, to
any future owner. See www.vornado.com/circulators-manuals to view,
download and print the most current version of these instructions.
INTENDED USE: This product is intended to circulate the air in indoor
living spaces only in the United States and Canada. This product is not
intended for commercial or industrial use. The manufacturer assumes
no responsibility for damage or injury due to unauthorized use or
product modication. Failure to follow these directions will void the
product warranty.
WARNING: Risk to Children and Impaired Persons
Supervision is required during the installation, operation, cleaning and
maintenance of this product by children 12 years of age and younger
and anyone with reduced physical, sensory or mental capabilities.
Children should be supervised to ensure that they do not play with the
appliance, its parts and packaging material.
INSTALLATION WARNING—To reduce risk of re, electrical shock
and injury to persons, observe the following:
- Place this product away from curtains, draperies, tablecloths and
other fabrics, since they may be drawn into the product, damage the
motor and/or cause a re.
- No part of this product (the appliance, power cord, plug, packaging,
etc.) should be placed near furnaces, replaces, stoves or other high
temperature heat sources. Do not use this product in a window, on
an uneven or unstable surface, or
near water.
- The appliance, power supply, power cord and plug cannot come
into contact with water. Do not use this product on wet surfaces.
Do not use this product in a bathtub or shower or position product
where it may fall into a bathtub, laundry, swimming pool or other
water container. Do not use this product outdoors or expose it to
weather or elements.
- Do not run cord under carpeting. Do not cover cord with throw
rugs, runners, or similar coverings. Do not route cord under furniture
or appliances. Arrange cord away from trafc area and where it
will not be tripped over. The cord should not hang over edges of
counters or be placed where it can be crimped or closed in doors.
Place appliance near an easily accessible outlet so the product can
be unplugged quickly during an emergency.
SAFE USE WARNING—To reduce risk of re, electrical shock and
injury to persons, observe the following:
- WARNING: To reduce likelihood of circuit overload, re and electric
shock, do not operate with a solid state speed device, such as a
dimmer control switch.
- Do not operate any fan with a damaged cord or plug. Discard fan or
return to an authorized service facility for examination and/or repair.
- Do not operate unit if the unit has been dropped or damaged. Do
not use this product if it has a damaged power cord or plug. To avoid
risk of electrical shock, do not attempt to repair or replace parts.
Only original replacement parts may be used. If the power cord
is damaged, it must be replaced by the manufacturer, its service
agent, or similarly qualied persons in order to avoid a hazard.
Contact Vornado Consumer Service at 1-800-234-0604 (phone) or
5
English
replacement and repair.
- Before plugging power cord into electrical outlet, be sure that
all electrical information on the rating label, including voltage, is
compatible with your outlet’s power supply.
- Do not sit or stand on product.
- Never use the cord as a handle or otherwise yank, strain or stretch
the power cord.
- While the product is plugged in, do not insert or allow foreign
objects to enter any input or output opening as this may cause risk
of electric shock or re, or damage the product.
- A loose t between wall outlet (receptacle) and plug may cause
overheating and distortion of the plug. Discontinue use of the
product in this outlet. Contact a qualied electrician to replace
loose or worn outlets.
- This product's power cord is equipped with a three-prong,
grounded plug that must be inserted into a grounded receptacle.
- Before moving, repositioning, servicing, cleaning and when not in
use, use the product controls to turn off the power and then unplug.
To disconnect from outlet, grasp and pull only the plug. Also, power
off and unplug if the product will be left unattended for an extended
period of time or during electrical storms.
SERVICING WARNING—To reduce risk of re, electrical shock
and injury to persons, observe the following:
- Clean your product regularly, only as is instructed in this manual.
Prior to cleaning, turn off the power on your product and unplug. Do
not use gasoline, thinners, solvents, ammonias or other chemicals
for cleaning. Refer to the CLEANING instructions provided.
- Do not open appliance housing while product is plugged in. To
avoid risk of shock, all service and/or repairs must be done by a
Vornado Authorized service Center.
- This product employs overload protection (fuse). A blown fuse
indicates an overload or short-circuit situation. If the fuse blows,
unplug the product from the outlet. Replace the fuse as per the user
servicing instructions (follow product marking for proper fuse rating)
and check the product. If the replacement fuse blows, a short-circuit
may be present and the product should be discarded or returned to
an authorized service facility for examination and/or repair.
User Servicing Instructions
1. Using the product controls, turn off the appliance.
2. Grasp the plug (not the cord) and disconnect from the outlet.
3. Risk of Fire. Replace fuse only with 5 Amp, 125 Volt fuse as
approved by Vornado Consumer Service. For an authorized
replacement fuse, please contact Vornado Consumer Service.
4. Once the replacement is received, use a small at-head
screwdriver to slide open the fuse cover (located on the plug)
(See next page, Fig. A).
5. Remove fuse by using the screwdriver to gently lift each end of
the fuse (See next page, Fig. B).
6. Install the replacement fuse by using the screwdriver to gently
push each metal end of the fuse into the receptacle one at a
time. Do not push on the center of the fuse—it is fragile and
may break (See next page, Fig. C).
7. Slide the fuse cover closed using the screwdriver. When
closed, the cover should t completely in the plug. No part of
the cover should stick out (See next page, Fig. D).
8. Plug your appliance into the outlet and turn the power on.
9. If the replacement fuse blows, a short-circuit may be present
and the product should be discarded or returned to an
authorized service facility for examination
and/or repair.

6English
Risk of re. Do not replace attachment plug. Contains a safety device
(fuse, AFCI, LCDI) that should not be removed. Discard product if the
attachment plug is damaged.
SAVE THESE INSTRUCTIONS

7
English
FEATURES
REMOVABLE GRILLE
For easy cleaning.
FINGER FRIENDLY
DESIGN
Resists curious ngers.
POWERFUL IP-54 RATED MOTOR
Dust proof, long life motor that will
endure the rigors of the job site.
SWIVEL HEAD
360° pivoting head
to direct air where
needed
TOGGLE SWITCH
Oversized glove-friendly double
toggle switch
WALL MOUNTABLE
Wall-mount option
for added versatility
NON-SLIP FEET
Product will stay
where you put it.
EXTRA LONG 8’
GROUNDED POWER CORD
Ample cord length plus a fully
secure wall connection
COLLAPSIBLE
TRIPOD BASE
Quick and easy setup,
takedown & storage
TOOL FREE ASSEMBLY

8English
CONTROLS
POWER ON/OFF
Select High (III),
Medium (II), Low (I) fan
speed or power off (O)

9
English
HOW TO USE
The EXO5 can be used in one of three different ways.
1. TRIPOD BASE 2. CLAMP 3. WALL MOUNT

10 English
ASSEMBLY
The EXO5 can be used in one of three different ways.
1. Connect the Locking Socket Joint (B) to the
EXO5 Fan Head (A) at any at location along
the Roll Cage (C). Before proceeding, ensure
that the knob is properly tightened and the
Locking Socket Joint (B) is fully secured to the
Fan Head (A). Do not pinch the power cord
between the Locking Socket Joint (B) and the
Fan Head (A).
2. To connect the Fan Head/Locking Socket Joint
assembly to either the to the Clamp (E) or the
Tripod Base (F), simply insert into the under side
of the Locking Socket Joint (D) and twist
until secured.
3. To remove Clamp (E) or the Tripod Base (F),
simply twist until loosened.
A
B
C
D
E
F

11
English
Note: DO NOT
attach to slick or
oily surfaces as
this may allow
product to come
loose. Make sure
solid surface can
support the weight
of the product.
Note: Product
should be used
with Tripod
Base (B) in
fully extended
position and
fully secured to
Fan Head (A).
Note: For both attachment options, keep the electrical cord safely routed to avoid being tripped over or pulled. Avoid placing the
product where it could be easily bumped.
HOW TO USE
TRIPOD BASE ATTACHMENT CLAMP ATTACHMENT
1. After product assembly, position unit on at and level surface
as shown below.
2. To adjust angle of head tilt, simply loosen the connection
between the Fan Head (A) and the Tripod Base (B) with a twist,
adjust to desired angle and then twist to retighten.
1. After product assembly, twist the Clamp Knob (C) to
open the Clamp (D).
2. Position the Clamp (D) over a solid surface up to 2” thick.
3. Twist the Clamp Knob (C) to tighten. Take care Clamp (D)
is fully engaged on solid surface before releasing.
A
B
DC

12 English
Note: Hang product from sturdy location using large screws that will
support product. Be careful not to hang the product in such a way
that it prevents normal fan operation or damages the cord. Keep the
electrical cord safely routed to avoid being tripped over or pulled.
Avoid placing the product where it could be easily bumped.
HOW TO USE
WALL MOUNT INSTALLATION
1. Locate the Key Holes (A) on the back of the product.
2. Find and mark two circles on the wall where the product
will be mounted. The circles need to be 5” apart from
center to center.
NOTE: Is it recommended to mount the EXO5 on a solid
surface or wall stud. Do NOT hang the product on the
ceiling. Use drywall anchors if a stud is not available.
3. Drill 2 #10 panhead screws into the wall (screws not
included). Screws should be weight rated for 10 lb
vertical load each.
4. Leave about ¼” of each screw exposed.
5. Place the wide portions of the Key Holes over the heads
of the 2 screws.
6. Slide the product down until the screws are inside the
narrow portion of the key holes and the product is
secured to surface.
A

13
English
CLEANING
GRILLE REMOVAL Screwdriver recommended.
1. Remove the 6 screws located on the front of
the grille.
2. Dust or wash the Front Grille with a mild
dishwashing soap. Do not place grille in the
dishwasher. The excessiveheat can distort the
plastic.
3. To reattach - align the 6 screw holes and
replace all the screws.
Use the brush attachment on your household
vacuum cleaner to vacuum any accumulated
dust off the Front Grille and Air Inlets.
Note: The motor is permanently lubricated
and requires no oiling.
Screw
Screw
Screw
Screw
Screw
Screw
WARNING: To reduce the risk of electrical shock and injury to persons, unplug the circulator before removing grille.

14 English
BLADE REMOVAL Pliers recommended.
1. First, remove the nut from the shaft by turning the
nut clockwise to loosen. Remove the washer. Pull the
blade straight out from the shaft.
2. Wipe the Blade with a damp cloth. If your circulator
is used in a greasy environment, such as a kitchen,
mild soap or a common household cleaner may be
necessary. Do not use solvents. Do not place blade
in the dishwasher. The excessive heat can distort the
plastic.
3. To reattach - be certain the at side of the shaft
aligns directly with the corresponding at side on
the blade’s socket. Push the blade all the way on
the shaft until it bottoms out. Do not use a hammer
as this could result in bearing damage. Reinstall
washer and nut.
WARNING: To reduce the risk of electrical shock and injury to
persons, unplug the circulator before removing blade.
Nut
CLEANING

15
English
TROUBLESHOOTING
POSSIBLE CAUSE AND SOLUTIONPROBLEM
Unit is not plugged in. Plug Power Cord into electrical outlet.
Ensure unit fan speed setting is selected.
Plug fuse has blown. Replace fuse (See USER SERVICING INSTRUCTIONS).
Unit is damaged or in need of repair. Cease usage and unplug. Contact Consumer Service for assistance.
The outlet is worn or damaged. Try another outlet or contact a qualied electrician.
Unit set to a low speed setting. Adjust to a higher speed setting.
Airow is blocked. Remove obstruction.
Adjust direction of airow towards the user.
Under certain conditions, it is possible for a reset GFCI (Ground Fault Circuit Interrupter) outlet to trip
when the user is changing speeds on a Vornado circulator. In this event, change to an outlet that is not
connected to a GFCI device. It could also indicate a weak or defective GFCI outlet. Contact a qualied
electrician to check the GFCI outlet.
The unit fails to power on.
Airow is weak or slow.
GFCI has tripped.
Other manuals for EXO5
1
Table of contents
Other Vornado Fan manuals

Vornado
Vornado flippi V10 User manual

Vornado
Vornado 160 User manual

Vornado
Vornado 279TR User manual

Vornado
Vornado 500 Series User manual

Vornado
Vornado 160 User manual

Vornado
Vornado PIVOT-EU User manual

Vornado
Vornado Energy Smart 533DC User manual

Vornado
Vornado PIVOT User manual

Vornado
Vornado TRANSOM User manual

Vornado
Vornado 693DC User manual

Vornado
Vornado PIVOT-AU User manual

Vornado
Vornado 270 Series User manual

Vornado
Vornado TRANSOM AE User manual

Vornado
Vornado 293 User manual

Vornado
Vornado 723 User manual

Vornado
Vornado Breesi LS User manual

Vornado
Vornado NGT335 User manual

Vornado
Vornado EXO5 HD User manual

Vornado
Vornado 733DC User manual

Vornado
Vornado Duo User manual