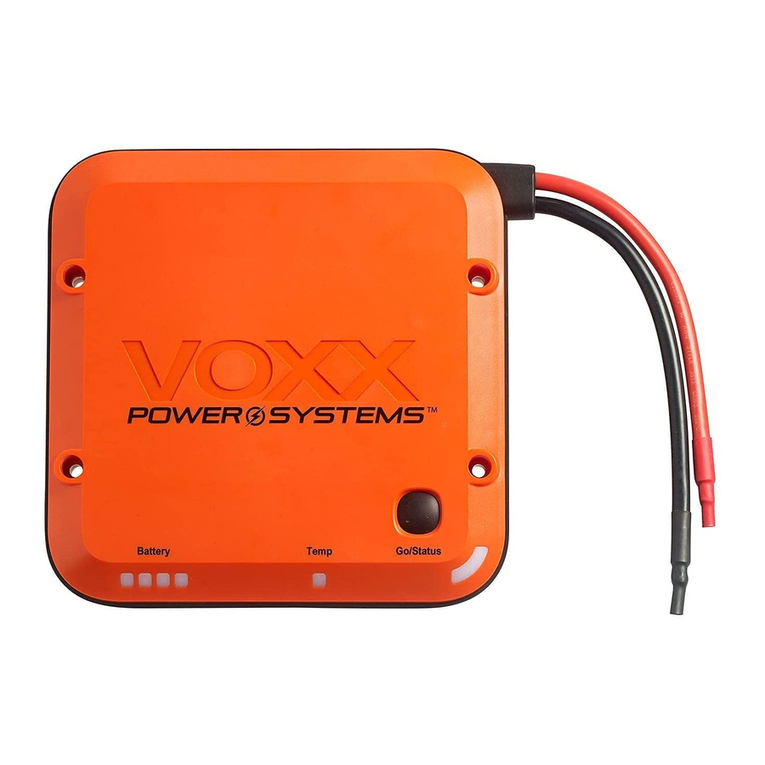
Voxx Code Alarm CA 1155 User manual

12017 Voxx Electronics Corporation. All rights reserved.
PROFESSIONAL
SERIES
Owner’s Guide
For Model:
CA 1155
IMPORTANT NOTE: The operation of the Security and Convenience System as described in this manual is
DSSOLFDEOHWRPRVWYHKLFOHV+RZHYHUGXHWRWKHFRQ¿JXUDWLRQRIVRPHYHKLFOHVVRPHIXQFWLRQV$1'25
6$)(7<35(&$87,216PD\QRWDSSO\3OHDVHVHH\RXULQVWDOOLQJGHDOHUIRUPRUHLQIRUPDWLRQ
Vehicle Security and
Keyless Entry System

2 ca1155 Owners revA
Table of Contents
Using Your Remote Control.................................................................... 3
$UPLQJWKH6HFXULW\6\VWHP .............................................................. 3
%\SDVVLQJWKH6KRFN6HQVRU ............................................................ 3
'LVDUPLQJWKH6HFXULW\6\VWHP ......................................................... 3
7ZR6WDJH'RRU8QORFNRSWLRQDO..................................................... 3
$FWLYDWLQJ7UXQN5HOHDVHRSWLRQDO................................................... 3
$FWLYDWLQJ$8;RSWLRQDO................................................................ 4
8VLQJWKH3URJUHVVLYH&DU)LQGHU)HDWXUH........................................ 4
8VLQJWKH3HUVRQDO3URWHFWLRQ$ODUP................................................. 4
Valet Mode ........................................................................................ 4
8VHU6HOHFWDEOH1RWL¿FDWLRQ&KLUSV................................................... 4
8VHU6HOHFWDEOH/(' ......................................................................... 5
0DQXDOO\2YHUULGLQJWKH6HFXULW\6\VWHP ......................................... 5
&DUMDFN0RGH .................................................................................... 5
Status LED, Light Flashes and Siren/Horn Indications ....................... 6
Remote Control Buttons & Functions ...................................................7
Replacing Remote Control Batteries.....................................................7
Warranty Information .............................................................................. 8

32017 Voxx Electronics Corporation. All rights reserved.
Arming the Security System
To arm the system, exit the vehicle, close all doors, then press the button. The
SDUNLQJOLJKWVZLOOÀDVKWLPHVLQGLFDWLQJWKHV\VWHPLVDUPHGKDVORFNHGWKHGRRUV
LIHTXLSSHGDQGFRQQHFWHGDQGDFWLYDWHGWKHVWDUWHUGLVDEOHIHDWXUH7KH/('VWDWXV
LQGLFDWRUZLOOEOLQNVWHDGLO\RQFHSHUVHFRQG
127(7KHV\VWHPLVHTXLSSHGZLWKDIHDWXUHFDOOHG6LOHQW&KRLFH,IHQDEOHGWKH
V\VWHPUHTXLUHVDVHFRQGSUHVVRIWKH EXWWRQWRDFWLYDWHDQDXGLEOHDUPLQJ
response from the vehicle.
Bypassing The Shock Sensor
7RDUPWKHV\VWHPDQGLJQRUHWKHVKRFNVHQVRUSUHVV button, then within 5
seconds press + WKHV\VWHPZLOOUHVSRQGZLWKORQJFKLUS
NOTE:7KHV\VWHPZLOORQO\FKDQJHWKHVKRFNVHQVRUVHWWLQJIRURQHDUPF\FOHDQG
ZLOOEHGHIDXOWHGEDFNWRQRUPDORSHUDWLRQWKHQH[WWLPHWKHV\VWHPLVDUPHG
Disarming the Security System
To disarm the system press the EXWWRQ7KHSDUNLQJOLJKWVZLOOÀDVKWLPH
LQGLFDWLQJWKHV\VWHPLVGLVDUPHGDQGKDVXQORFNHGWKHGRRUVLIHTXLSSHGDQG
FRQQHFWHG
127(7KHV\VWHPLVHTXLSSHGZLWKDIHDWXUHFDOOHG6LOHQW&KRLFH,IHQDEOHGWKH
V\VWHPUHTXLUHVDVHFRQGSUHVVRIWKH EXWWRQWRDFWLYDWHDQDXGLEOHGLVDUPLQJ
UHVSRQVHIURPWKHYHKLFOH,I\RXUV\VWHPLVVHWXSIRUVWHSXQORFNDWKLUGSUHVVRI
XQORFNZLOODFWLYDWHWKHDXGLEOHUHVSRQVH
Two Stage Door Unlock (Optional)
,IWKLVIHDWXUHLVHQDEOHGRQ\RXUV\VWHPSUHVVLQJWKH EXWWRQRQHWLPHZLOOXQORFN
RQO\WKHGULYHU¶VGRRU3UHVV DJDLQZLWKLQWKUHHVHFRQGVWRXQORFNWKHUHPDLQLQJ
doors.
Activating the Trunk Release Feature (Optional)
,IWKLVIHDWXUHLVHQDEOHGRQ\RXUV\VWHPSUHVVLQJDQGKROGLQJWKH button for 3
VHFRQGVZLOORSHQWKHYHKLFOH¶VWUXQNRUKDWFK
7KURXJKRXWWKLVPDQXDOµSUHVV¶UHIHUVWRSUHVVLQJIRUOHVVWKDQVHFRQGµSUHVVDQGKROG¶UHIHUVWRSUHVVLQJIRUPRUH
than 2 seconds.
Using Your Remote Control

4 ca1155 Owners revA
Activating the AUX 1 Output (Optional)
,IWKLVIHDWXUHLVHQDEOHGRQ\RXUV\VWHPSUHVVLQJWKH and buttons
VLPXOWDQHRXVO\ZLOODFWLYDWHDQRSWLRQDOIHDWXUH7KLVIHDWXUHFDQEHSURJUDPPHGIRUD
ZLGHUDQJHRIIXQFWLRQVOLNHSRZHUZLQGRZRUVXQURRIDXWRPDWLRQSOHDVHFRQVXOW\RXU
LQVWDOOLQJGHDOHUWRGHWHUPLQHWKHIXQFWLRQDOLW\RI\RXUV\VWHP
Using the Progressive Car Finder Feature
3UHVVWKH EXWWRQWRORFDWH\RXUYHKLFOH7KHV\VWHPZLOOÀDVKWKHSDUNLQJOLJKWV
DQGVRXQGWLPHVDWORZYROXPHLQFUHDVLQJLQYROXPHHDFKWLPHWKHEXWWRQLV
pressed.
Using the Personal Protection Alarm (Panic)
3UHVVDQGKROGWKH button for 3 seconds to activate the personal protection alarm.
'XULQJSDQLFPRGHWKHQRUPDOIXQFWLRQRIWKHWUDQVPLWWHUEXWWRQVZLOOEHVXVSHQGHG
The transmitter’s and EXWWRQVFDQEHXVHGWRORFNDQGXQORFNWKHGRRULIWKH
RSWLRQLVLQVWDOOHG7RVWRSWKHDODUPSUHVVDQGKROGWKH button on the transmitter
DJDLQIRUVHFRQGV7KHV\VWHPZLOODXWRPDWLFDOO\VWRSDIWHUVHFRQGV
Valet Mode
:KHQYDOHWPRGHLVDFWLYDWHGWKHVWDWXV/('ZLOOOLJKWVROLGDQGDOOVHFXULW\IXQFWLRQV
ZLOOEHGLVDEOHG7RHQWHURUH[LWYDOHWPRGHVLPSO\IROORZWKHVWHSVRXWOLQHGEHORZ
7XUQWKHYHKLFOH¶VLJQLWLRQ21
3XVKDQGKROGWKHSURJUDPPLQJYDOHWEXWWRQ
7KH/('ZLOOWXUQRQVROLGZKHQYDOHWPRGHLVDFWLYH
5HOHDVHWKHSURJUDPPLQJYDOHWEXWWRQ
8VHU6HOHFWDEOH1RWL¿FDWLRQ&KLUSV
6\VWHP$50',6$50FKLUSVFDQEHWRJJOHG21RU2))ZLWKRXWHQWHULQJWKH
SURJUDPPLQJIHDWXUHEDQNV
7XUQWKHLJQLWLRQ21WKHQ2))
3UHVVDQGUHOHDVHWKHYDOHWSURJUDPPLQJEXWWRQWLPHV7KHV\VWHP
ZLOOUHVSRQGZLWKFKLUSIRU21RUFKLUSVIRU2))

52017 Voxx Electronics Corporation. All rights reserved.
Carjack Mode (Anti-Hijack Mode)
7KLVIHDWXUHPXVWEHWXUQHGRQLQV\VWHPSURJUDPPLQJSOHDVHFRQVXOW\RXULQVWDOOLQJ
dealer.
7ULJJHULQJ&DUMDFNPRGH:KLOHWKHLJQLWLRQLV21DQGSUHVVDQGKROG + for 2
VHFRQGVWKHSDUNLQJOLJKWVZLOOÀDVKWLPHDQGWKHV\VWHPZLOODFWDVIROORZV
VHFRQGVDIWHUEHLQJWULJJHUHGWKHVLUHQZLOOFKLUSIRUVHFRQGV
GXULQJWKLVVHFRQGV\RXZLOOEHDOHUWHGWRSXVKWKHYDOHWEXWWRQWR
WXUQRII&DUMDFNPRGH,I&DUMDFNPRGHLVQRWWXUQHGRIIDWWKLVWLPHLW
will advance to the next step.
)ROORZLQJWKHVHFRQGFKLUSVWRWDOWLPHQRZVHFRQGVWKHVLUHQ
ZLOOJRLQWRIXOOVRXQGDQGWKHSDUNLQJOLJKWVZLOOVWDUWÀDVKLQJ
VHFRQGVDIWHUWULJJHULQDGGLWLRQWRWKHVLUHQDQGSDUNLQJOLJKWVWKH
V\VWHPZLOODFWLYDWHWKHVWDUWHUNLOO7+(6<67(0:,//5(0$,1,17+,6
67$7(817,/7+(%$77(5<,6'(3/(7('
29(55,'(7+(6<67(07278512))&$5-$&.02'(7XUQWKHLJQLWLRQ2))
WKHQ2QDQGSUHVVWKHYDOHWEXWWRQZLWKLQVHFRQGV
Manually Overriding the Security System
<RXUV\VWHPFDQEHGLVDUPHGZLWKRXWWKHXVHRIWKHWUDQVPLWWHU7KLVLVQHFHVVDU\
since you will need the ability to operate your vehicle if the transmitter is lost or its
EDWWHU\IDLOV7RE\SDVVWKHDODUPV\VWHP
2SHQWKHYHKLFOHGRRU7KHDODUPZLOOVRXQG
7XUQWKHLJQLWLRQNH\WRWKH21SRVLWLRQ
:LWKLQVHFRQGVSUHVVDQGUHOHDVHWKHYDOHWSXVKEXWWRQVZLWFK
7KHDODUPV\VWHPZLOOVWRSVRXQGLQJDQGHQWHUWKHE\SDVVHGPRGH<RXFDQQRZ
start and operate the vehicle normally.
User Selectable LED
7KLVIHDWXUHZLOOFRQWUROZKHWKHUWKH/('LV21RU2))ZKHQWKHV\VWHPLV$UPHG
/RFNHGDQGFDQEHWRJJOHG21RU2))ZLWKRXWHQWHULQJWKHSURJUDPPLQJIHDWXUH
EDQNV
7XUQWKHLJQLWLRQ212))212))
3UHVVDQGUHOHDVHWKHYDOHWSURJUDPPLQJEXWWRQWLPHV7KHV\VWHP
ZLOOUHVSRQGZLWKFKLUSIRU21RUFKLUSVIRU2))

ca1155 Owners revA
Status LED, Light Flashes, and Siren/Horn Indications
Status LED Flash Indications
LED Flashes Function
2)) 'LVDUPHG
6ORZ)ODVK $UPHG
)DVW)ODVK 3DVVLYH$UPLQJ&RXQWGRZQ
216ROLG 9DOHW0RGH
)ODVKHV =RQH7ULJJHU+RRG7UXQN
)ODVKHV =RQH7ULJJHU'RRU
)ODVKHV =RQH7ULJJHU6KRFN6HQVRU
)ODVKHV =RQH7ULJJHU,JQLWLRQ
Siren/Horn Chirp Indications
Chirps Function
'LVDUP
$UP
'RRU$MDU8SRQ$UPLQJ
'LVDUP7ULJJHUHG
&DU)LQG
Parking Light Flash Indications
Flashes Function
'LVDUP
$UP
'LVDUP7ULJJHUHG
&DU)LQG

72017 Voxx Electronics Corporation. All rights reserved.
Remote Control Buttons & Functions
4-Button
Transmitter Lock Unlock Trunk Car Find /
Panic Operation Method
Lock X Press and Release
Unlock X Press and Release
Trunk X Push and Hold (3 Sec)
Car FinderX
Press and Release
PanicX
Push and Hold (3 Sec)
AUX 1 X X Push and Hold (3 Sec)
Shock Bypass X X Press and Release Lock then Press
Lock + Car Find (within 5 Sec)
Replacing Remote Control Batteries
4-Button Remote Control (part # CAT4P)
7KHEDWWHU\PRGHO&5LQVLGHHDFKUHPRWHFRQWUROVKRXOGODVWDSSUR[LPDWHO\
\HDUXQGHUQRUPDOXVH:KHQWKHEDWWHU\EHFRPHVZHDN\RXZLOOQRWLFHWKHUHPRWH
FRQWUROUDQJHWKHGLVWDQFHIURPWKHYHKLFOHWKHUHPRWHFRQWUROZLOOZRUNGHWHULRUDWH
DQGWKHVPDOO/('RQWKHUHPRWHFRQWUROZLOOGLP7RUHSODFHWKHUHPRWHFRQWURO
EDWWHU\
8QVQDSDQGGLVDVVHPEOHWKHKDOYHVRIWKHUHPRWHFRQWURO
5HPRYHWKHROGEDWWHU\REVHUYLQJWKHV\PEROVRQWKHEDWWHU\
DQGUHSODFHZLWKDQHZ&5EDWWHU\
5HDVVHPEOHWKHKDOYHVRIWKHUHPRWHFRQWURO
4. Test operation of the remote control.

8 ca1155 Owners revA
LIMITED LIFETIME WARRANTY
Applies to Code Alarm Series Control Modules, Sirens, Sensors, and Relays.
9R[[(OHFWURQLFV&RUSRUDWLRQWKH&RPSDQ\ZDUUDQWVWRWKHRULJLQDOSXUFKDVHURIWKLV
SURGXFWWKDWVKRXOGWKLVSURGXFWRUDQ\SDUWWKHUHRIRWKHUWKDQWUDQVPLWWHUVXQGHUQRU-
PDOXVHDQGFRQGLWLRQVEHSURYHQGHIHFWLYHLQPDWHULDORUZRUNPDQVKLSGXULQJWKHOLIH-
WLPHRIWKHYHKLFOHLQZKLFKLWZDVRULJLQDOO\LQVWDOOHGIURPWKHGDWHRIRULJLQDOSXUFKDVH
VXFKGHIHFWVZLOOEHUHSDLUHGRUUHSODFHGZLWKQHZRUUHFRQGLWLRQHGSURGXFWDWWKH
&RPSDQ\¶VRSWLRQZLWKRXWFKDUJHIRUSDUWVRUUHSDLUODERU$WUDQVPLWWHULVZDUUDQWHGIRU
PRQWKVIURPWKHGDWHRIRULJLQDOSXUFKDVH
To obtain repair or replacement within the terms of this Warranty, the product is to
EHGHOLYHUHGZLWKSURRIRIZDUUDQW\FRYHUDJHHJGDWHGELOORIVDOHVSHFL¿FDWLRQRI
GHIHFWVWUDQVSRUWDWLRQSUHSDLGWRDQDSSURYHGZDUUDQW\VWDWLRQ7KLV:DUUDQW\LVQRW
transferable.
7KLV:DUUDQW\GRHVQRWFRYHUGDPDJHWRWKHYHKLFOH¶VHOHFWULFDOV\VWHPRUFRVWV
incurred for removal or reinstallation of the product. This Warranty does not cover bat-
WHULHVEURNHQ/&'RU2/('GLVSOD\VFUHHQVQRUDSSO\WRDQ\SURGXFWRUSDUWWKHUHRI
ZKLFKLQWKHRSLQLRQRIWKH&RPSDQ\KDVVXIIHUHGRUEHHQGDPDJHGWKURXJKDOWHUDWLRQ
LPSURSHULQVWDOODWLRQPLVKDQGOLQJPLVXVHDEXVHQHJOHFWDFFLGHQWRUE\UHPRYDORU
GHIDFHPHQWRIWKHIDFWRU\VHULDOQXPEHUEDUFRGHODEHOV
7KLV:DUUDQW\LVLQOLHXRIDOORWKHUH[SUHVVZDUUDQWLHVRUOLDELOLWLHV$1<,03/,(':$5-
5$17,(6,1&/8',1*$1<,03/,(':$55$17<2)0(5&+$17$%,/,7<6+$//
%(/,0,7('727+('85$7,212)7+,6:5,77(1:$55$17<,112&$6(
6+$//7+(&203$1<%(/,$%/()25$1<&216(48(17,$/25,1&,'(17$/
'$0$*(6)25%5($&+2)7+,625$1<27+(5:$55$17<1RSHUVRQRUUHS-
resentative is authorized to assume for the Company any liability other than expressed
herein in connection with the sale of this product.
The company does not warrant that this product cannot be compromised or circum-
YHQWHG7+((;7(172)7+(&203$1<¶6/,$%,/,7<81'(57+,6:$55$17<
,6/,0,7('727+(5(3$,5255(3/$&(0(173529,'('$%29($1',112
(9(176+$//7+(&203$1<¶6/,$%,/,7<(;&(('7+(385&+$6(35,&(3$,'
%<385&+$6(5)257+(352'8&7:,7+287&2672),167$//$7,21
6RPHVWDWHVGRQRWDOORZOLPLWDWLRQVRQKRZORQJDQLPSOLHGZDUUDQW\ODVWVRUWKH
H[FOXVLRQRUOLPLWDWLRQRILQFLGHQWDORUFRQVHTXHQWLDOGDPDJHVRWKHDERYHOLPLWDWLRQVRU
H[FOXVLRQVPD\QRWDSSO\WR\RX7KLV:DUUDQW\JLYHV\RXVSHFL¿FOHJDOULJKWVDQG\RX
PD\DOVRKDYHRWKHUULJKWVZKLFKYDU\IURPVWDWHWRVWDWH
9R[[(OHFWURQLFV&RUSRUDWLRQ0DUFXV%OYG+DXSSDXJH1HZ<RUN
128-9445

92017 Voxx Electronics Corporation. All rights reserved.

ca1155 Owners revA

112017 Voxx Electronics Corporation. All rights reserved.

12 ca1155 Owners revA
9R[[(OHFWURQLFV&RUSRUDWLRQ
&XVWRPHU6HUYLFH
:::&2'($/$50&20
FCC COMPLIANCE
7KLVGHYLFHFRPSOLHVZLWK3DUWRIWKH)&&UXOHVDQGZLWK566RI
,QGXVWU\&DQDGD2SHUDWLRQLVVXEMHFWWRWKHIROORZLQJWZRFRQGLWLRQV
1. This device may not cause harmful interference, and
7KLVGHYLFHPXVWDFFHSWDQ\LQWHUIHUHQFHUHFHLYHGLQFOXGLQJDQ\LQWHUIHUHQFHWKDW
may cause undesired operation.
Warning!
&KDQJHVRUPRGL¿FDWLRQVQRWH[SUHVVO\DSSURYHGE\WKHSDUW\UHVSRQVLEOHIRU
FRPSOLDQFHFRXOGYRLGWKHXVHU¶VDXWKRULW\WRRSHUDWHWKHHTXLSPHQW
3$7(17('ZZZYR[[LQWOFRPFRPSDQ\SDWHQWV

87
I 87a I
86 I 85
30
# 4120402
# 1024363
# 4120403
# 1024389
STARTER INTERUPT RELAY & HARNESS
#1024405
ORANGE
RED
BLACK
WHITE I BLACK
OPEN
86
-ARMED
OUTPUT ( - )
85 -IGNITION ( + )
87
A-
STARTER
OUTPUT-
MOTOR SIDE
30 -STARTER
INPUT-
KEY SIDE
87
-OPEN
BROWN
RED
BLACK
BROWN/BLACK
VIOLET/BLACK
VIOLET
GREEN/BLACK
WHITE
WHITE/RED
WHITE
WHITE/BLACK
BLUE/BLACK
SHOCK SENSOR PORT
LED PORT
PURPLE
GREEN/BLACK
OPEN
SIREN OUTPUT ( + )
BATTERY 12V (
+)
GROUND
UNLOCK SWITCH (
87A)
UNLOCK POLARITY ( 87 )
LOCK POLARITY ( 87 )
LOCK MOTOR (
30
)
PARKING LIGHT OUTPUT
PARKING LIGHT INPUT
PARKING LIGHT OUTPUT
LOCK SWITCH (
87
A )
UNLOCK MOTOR ( 30 )
DOOR TRIGGER INPUT ( + )
FACTORY DISARM OUTPUT
(-
)
DOOR TRIGGER INPUT ( - )
ARMED OUTPUT ( - )
HORN OUTPUT ( - )
I Adjusting the Shock Sensor I
1.
Inc
re
ase s
en
s
iti
v
ity
by
turning
th
e
adjustment
dial
cl
oc
kw
is
e.
2. Dec
rea
se
s
ensiti
v
ity
by
turning
th
e a
dju
s
tm
e
nt
dial
counter
cl
oc
kwi
se
.
I Testing the Shock Sensor I
Arm
th
e sys
tem
and
wait
6
seco
nds
for
the
zone
to
s
tabiliz
e,
then
firml
y
strike
the
ve
hicles
bumper
.
I Security TriggerZones I
If
the
sec
urity
sys
tem
h
as
be
en
trig
g
ered
the
LED
w
ill
fl
a
sh
o
ne
of
the
patterns
below
indicating
the
zon
e.
LED
FLASHES TRIGGER ZONE
2
Fla
s
he
s
3
Flashes
4
Fla
sh
es
Hood
I
Trunk
Input
Door
Input
Shock
Sensor
5
Fl
as
he
s
Ignition
Input
GREEN
ORANGE
BROWN/BLACK
VIOLET/BLACK
GRAY
AUX10UTPUT(-)
r-
00
-WAI
A~rn
HOOD PIN INPUT
(-)
....
C
rl.,.j
IJ"'.,.j
~
YELLOW
RED/WHITE IGNITION INPUT ( + )
TRUNK RELEASE OUTPUT ( - )
PROGRAMMING I VALET PORT
DBI PORT
DD
SHOCK SENSOR & HARNESS
#4700023
RED
BLACK
BLUE
GREEN
BATTERY 12V (
+)
GROUND WHEN ARMED ( - )
FULL TRIGGER ( - )
WARN AWAY TRIGGER ( - )
~r:lOFESSIONAL
SEr:liES
Security and Keyless Entry
Installation Quick Reference
Guide
for model:
ca1155
Complete guides also available at
www.voxxuniversity.com
2017
Voxx
E
lect
ro n
ics
Co
r
po
r
ation
.
Al
l
ri
g
hts
r
ese
r
ved
4280774

Future
Bank
1
-3Chi
i'J)$
Trl'ln9TiilterProgramming
Refer to transmitter programming.
Featur
e
8ank2·4Chirps
SecurilyCon
trol
1 ISileniChok:e
J.
..
t
~s
l\eArm\rQ
4 ISiren I
Hom
ARM/DISARM Chirps
A<dw
3
LED
Fla
sh
I•
LEO
Flash IS
LEO
Ftnh
16
LED
Fla$h
s
·
ls;~mo.ni'
!Oo
30Seconcfe
I60 Second8
6IS
ecunly Compati
bi
lity
7!Anli-Hi~
.
~
8 IOrang
e·
GroundwiAnnedO
ul
pu
t
GroundWhile
iGroundWhile
9
!DBIPOI'IProloCoi
···~:(
}oe.Protocol
IAOSProtoool
10 !Arm/Disa
rm
C
hirpiPa
rkl
ng
lightPau
em
r:;
Sl.llndard:
,...,
1
l,
f~E
.
D
.
Output
ot.tlon
Almed
I Locke!! I
ON
.
·.
~
·.,
· .
~·.
·;
~
f
~Park'
. .
1
·
·
~
.
'
..
:
~
,
.
·
..
ongUgt\1
l
OFF
':,,· .
AF'JE~I.J:ick
f
lkllock
Park
o
nglig
h
tRol
ay fTrunk Oupuls
14IUs
eP.l.J
ghtRe
l
ay
for
Tru
nk
UseT
runk
Oulpula
sP
Li
gh
ts(·)
F
eature
8ank3·5ChlfP$
,utC
ontro
l
1
IExllllliedLoc~F>.he
2 IF
ac
l
oryDi
sann
3 lig:'itionCQnlrol
ledL
ocks
4 1
r
ru
nk0
utpu1Timi
ng
Red I While Output
5 IHomOutputT1mlng
7
~~::IBI&ckOutpul
-
Factory
Disarm
Pu.W.and
Hold
PU!ihand
....
i
ON
·Lock
Oot
y
i~
!!.~
A
rm
&
!
"''
""'"
""·
1
30SP
.Ught
I~SecondP
.
lightOulpul
OulpotAIIet
li{lhtOo.dt'NI
Al
erLock&
Unlocl<.
AfterLock Unlock
2LEDF1
aih
~~~e
~~
·~
!econd
Second Unlock
"'"
"'
""'
L.od;,
Double
llock
,Double
Pulse Unlock
500mS
Dou
ble F
ac
tory
Disa
rm
Factory Disarm Usi
Un
lock
'""'"""
~
!
. I .
!'
""
"
""~
Pulse 350mS Pulse
SOC:m
S
Pu
lse
Tim~
""'""'
""""'
Loc
kOnly lllnloc
kOnly
:;::
until
!Z::
Lql
l
unli
iB
ullon
P=•
Set
Up
&
Programming
1 Transmitter Programming -Feature Bank 1 -
·~
1. Turn the ignition ON.
2. Press
and
hold
th
e valeVoverride button.
3. Within 10 seconds the syst
em
will chirp (3) thr
ee
times.
4. Press 1 button
of
eac
h transmitter you wish to program.
5.
The
system will respond with 1 chirp for
each
accepted transmitter.
6.
Pr
essing the override button at anytime during programming will advance
to
the next bank.
NOTE:
The
system will exit transmitter programming after
15
seconds
of
inactivity.
NOTE
: This
sys
t
em
has 1 button programming
whic
h programs all channels
of
the
system.
NOTE
:
The
system will hold up to 4 transmitters in
mem
ory
, programming a 5th
transmitter wi
ll
erase
the ol
des
t transmitter in
memory
.
NOTE
: This system has PTN -Programmed Transmitter Notification. Each time the
ignition is turned ON,
th
e LED will flash the
number
of
transmitters programmed
to
the
system.
1 Manual Feature Programming -Feature Bank 2 - 5 1
1.
Turn the ignition ON.
2.
Pr
ess
and hold the valeUoverride button.
3. Within 10 seconds the system will chirp (3) three times.
4. Use the valeUoverride button
to
advance through
eac
h
opt
ion bank.
For
feature programming advance to Feature Bank 2,
or
3, which is (
4)
four, and (5) five chirps.
5. Use the tr
ans
mitt
er
tJ
button to scro
ll
through the selections in each
feature bank, the system will chirp to match the feature number.
6. Press the transmitter
G)
button to change the desired feature.
The
LED will
f
la
sh indicating the changed feature.
Defaulting
All
Features:
Pr
essing
th
e
tJ
button anytime while in
any
of
t
he
feature
banks will default all features and return you to feature bank
2-
4 chirps.
NOTE:
The
syst
em
will r
ema
in
in
feature programming m
ode
as long as the ignition is
on, there is
no
time limit. To exit programming turn t
he
IGNITION
OFF
.
I Chirp Delete -UserAccessible I
SystemARM/DISARM chirps can be t
ogg
l
ed
ON
or
OFF
without entering the
programming feature
banks
.
1. Turn the ignition ON then OFF.
2. Press and release the valeVprogramming button 3 times.
The
system
will respond with 1 chirp for ON
or
2 chirps for OFF.
[ User Selectable LED I
This feature will control
whether
the LED
is
ON
or
OFF when the system
is
Armed/
Locked. This will be selectable in feature programming
OR
on-the-fly without en
te
ring
the programming feature banks.
1. Turn the ignition
ON,
OFF, ON,
OFF
.
2.
Pr
ess and release the valeUprogramming button 3 times.
The
system
will respond with 1 chirp for ON
or
2 chirps for OFF.
I Dome
Light
Delay I Theater Dimming ·
----]
The
system can be programed
to
delay arming
after
the lock button is pressed
(60 second
max
) for vehicles with a
dome
light delay
or
theater dimming feature.
Once
programed the system will 'learn' the timing
of
the
dome
light delay and add 2
seconds before arming.
1. Close all doors with ignition off.
2. Using the transmitter press
LOCK
,
UNLOCK
,
LOCK
,
UNLOCK
,
LOCK
,
UNLOCK
,
LOCK
. The LED will li
ght
solid to indicate the system has
entered
DOME
DELAY LEARN MODE.
3. Immediately
OPEN
then
CLOSE
the
door
W
ITHOUT
disarming the
syst
em
.
Th
e system will th
en
monitor the door trigg
er
wire.
Once
the
dome
light turns off, the syst
em
will then add 2 seconds and then
ex
it
the learning
mod
e.
4.
The
LED will begin to flash indicating the system has exited the
learning
mode
and
is
now
armed.
Defaulting
the
Dome
Light
Delay:
Turn the ignition ON then
OFF
3 times then
press and hold
th
e valet button for 5 seconds, the system will chirp 1 time indicating
th
e lea
rn
ed
de
lay time has been cleared.
PC
Based
Feature
Programming
I
Firmware
Updates
When
using
the
NEW
Code
Alarm
Utility
App
along
with
a
VEPROG
Programming
tool
you
may
program
selectable
features
or
update
the
firmwar
e
of
this
module
.
1. To download the
Code
Alarm Utility App visit the Voxx University website
at
voxxuni
ve
rsity.com.
2. Select
VOXX
TECH and locate the utility app under the headi
ng
Software D
ow
nloads.
-Technical
Support
(BOO)
421-3209
or
visit
www.voxxuniversity.com
R4
10
-192-890
Table of contents
Other Voxx Remote Starter manuals