10
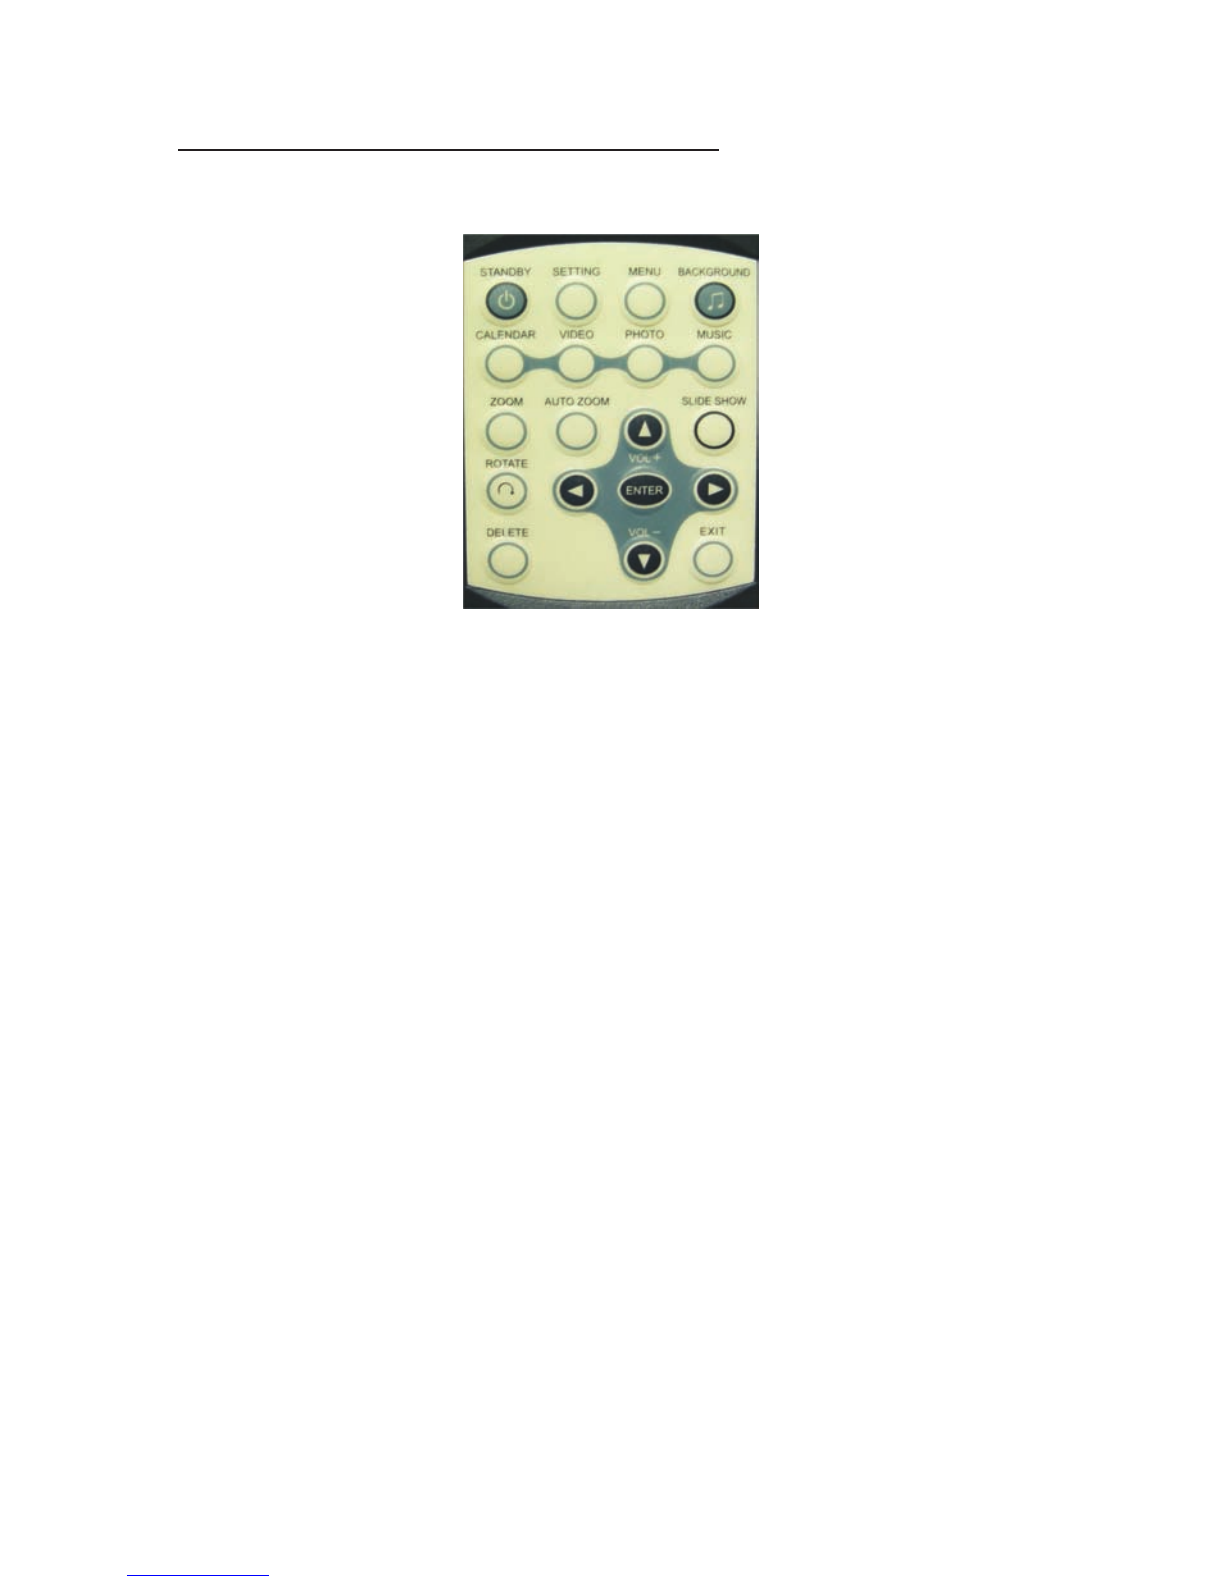
Key Pad Control Buttons
1. STANDBY: Put the Frame in standby mode by turning off the
back-lighting.
2. SETTING: Goes to the Setup menu.
3. MENU: Goes to the main OSD Menu.
4. BACKGROUND: Plays background music while playing a slideshow.
(Note: You must have MP3 files saved on the media card, along with
your picture files.)
5. CALENDAR: Displays the Calendar/Clock on screen.
6. VIDEO: Plays the video files in your storage device.
7. PHOTO: Displays the photos in your storage device.
8. MUSIC: Plays the music files in your storage device.
9. ZOOM: Zoom in Photos.
10. AUTO ZOOM: Select between full screen and original size.
11. UP/ VOL+: Moves the cursor/highlight upward when making a
selection. Increases the volume.
12. SLIDESHOW: Allows you to set the slideshow duration.
13. ROTATE: Rotates the photo in 90° clockwise intervals.
(Note: This does not permanently alter your picture.)
14. LEFT: Moves the cursor/highlight left when making a selection.
To display the previous photo, music or video.
15. ENTER: Access the function selected and plays the picture show,
music or video.
16. RIGHT: Moves the cursor/highlight right when making a selection.
To display the next photo, music or video.
17. DELETE: Deletes the file selected.
18. DOWN / VOL - : Moves the cursor/highlight downward when
Making a selection. Decreases the volume.
19. EXIT: Exit to the previous menu.