The vibration level value given refers to basic application of the tool. If the
tool is used for other applications or with other tools, or if it is not
maintained properly, the vibration level may differ from the values given.
The above-mentioned causes may lead to higher exposure to vibrations
during the whole work time.
One must implement additional safety measures to protect the operators
from exposure to vibrations, such as maintenance of the electric tool and
work tools, assurance of proper hand temperature, or determination of
the sequence of work operations.
The declared total vibrations and declared noise emissions were
measured in accordance with a standard test method and may be used
for tool comparison.
The declared total vibrations and noise emissions can be used in
preliminary exposure assessment.
Warnings:
The vibrations and noise emissions during the actual use of the power
tool may differ from the declared values depending on how the tool is
used and on the type of the workpiece in particular.
Determine safeguards to protect the operator. They should be based on
the estimated exposure under actual operational conditions (taking into
account all parts of the operating cycle such as when the tool is switched
off or idle except the start time).
BEFORE WORKING:
Prior to each use of the tool one has to check whether moving parts of the
device are in operating conditions, not seized, cracked or damaged that
may affect proper operation of the tool. Damaged tools must be handed
over for repairs before they can be used again.
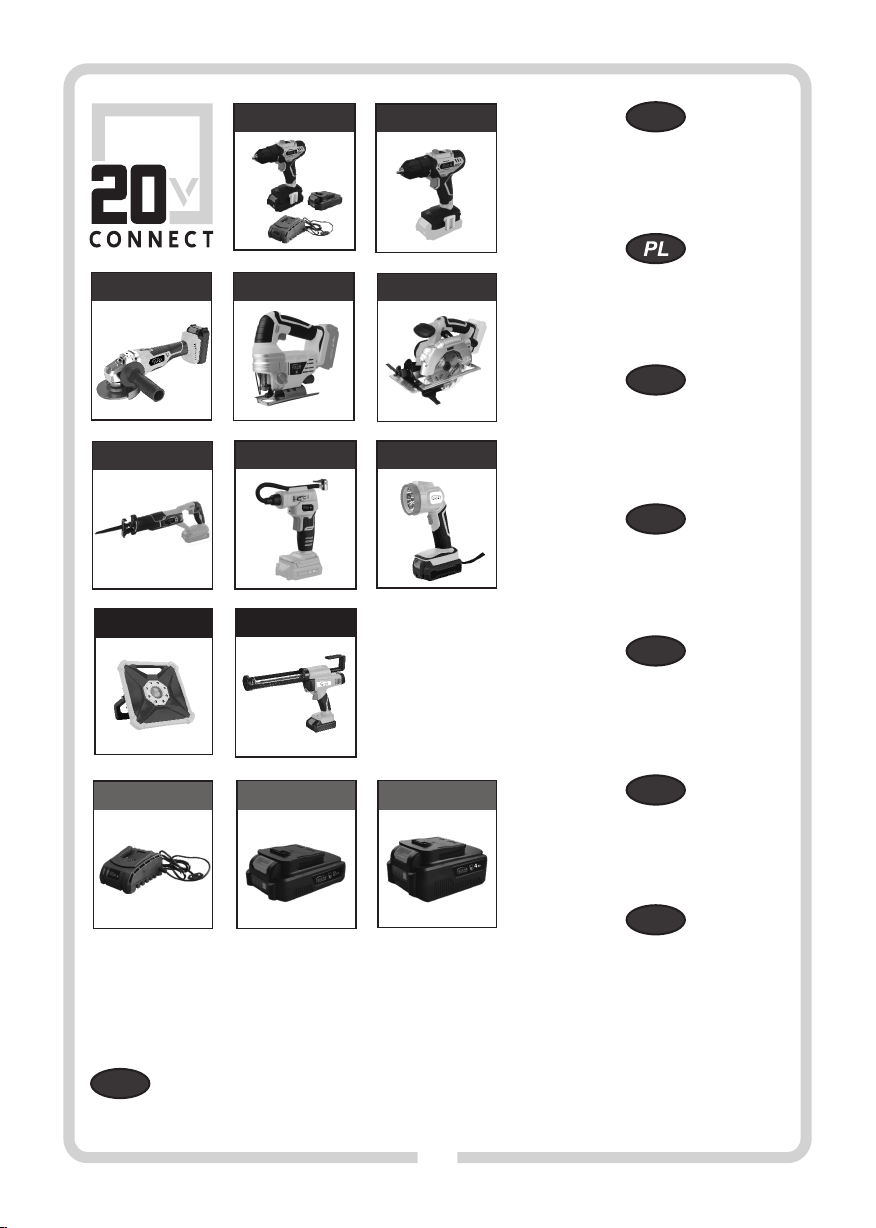
n Charging the battery
NOTE! Battery and charger are not part of the delivery. Depending on your
needs, you can purchase a 2.0 Ah battery VJ2AK or 4.0Ah VJ4AK and a
compatible charger VJ1LD (charging time 1-2 hours).
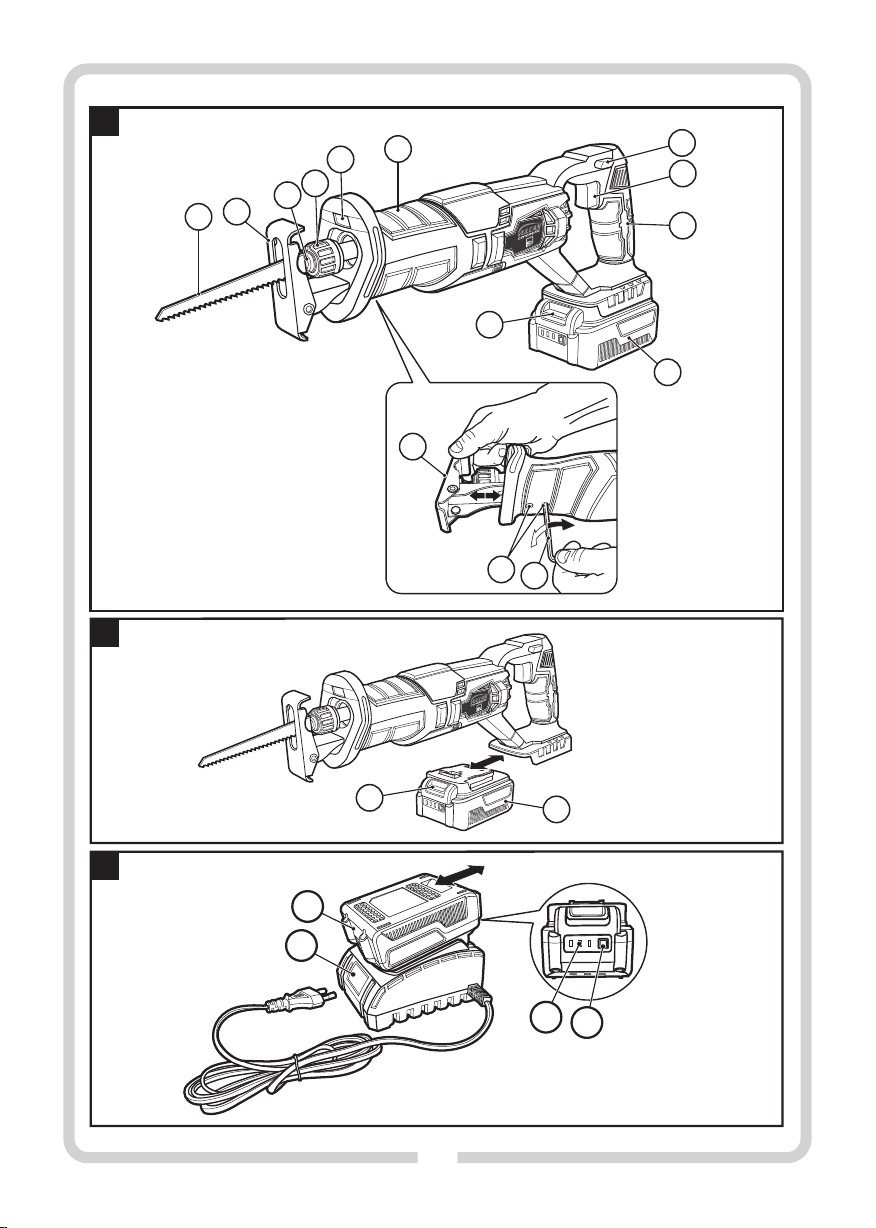
You can check the battery level with the battery level indicator button
(15). A single LED means the battery level is low, two LEDs mean medium
level, and three LEDs mean full battery. Charge the battery fully before
use.
Charger VJ1LD
The first charging procedure using VJ1LD should last at least 1 hour
(2.0Ah VJ2AK battery), or 2 hours (4.0Ah VJ4AK battery).
1. Press the battery lock button (11) and remove the battery (10) from
the saw (see Fig. B).
2. (10) (14) (see Fig. C).Connect the battery to the charger
3. Connect the charger plug to a mains socket (220–240 V, 50 Hz).
n Battery charging indicator
A green LED light indicates that the charger is connected to a power
source. After the battery is connected, the red LED is on to indicate
charging.
When the battery is fully charged, the red LED goes off and the green LED
is on.
After charging, disconnect the charger and remove the battery.
NOTE! The battery may get slightly hot when charging. This is not a
malfunction.
The lithium-ion battery can be charged at any moment, without
detriment to its life. Interrupting the charging process does not entail a
risk of damaging the battery cells.
PREPARATION FOR WORK:
Before cutting wood, particle boards, building materials, etc., check
them for foreign objects, such as nails, screws etc., and then use a
suitable blade.
n Blade installation (see Fig. D)
The sabre saw can be used with any commercially available saw blades
with a ½" universal shank.
Blades offered by manufacturers are most often available as sets and,
depending on the purpose, may differ in the size and type of cutting
teeth. The manufacturer usually provides information regarding the
purpose of individual blades on the packaging of a set of blades or in the
attached leaflet. The blades themselves can also be colour-coded, with
different colours for different materials to be cut.
The saw blade should not be longer than required by the planned cut. Use
narrow blades to cut curves with small radii.
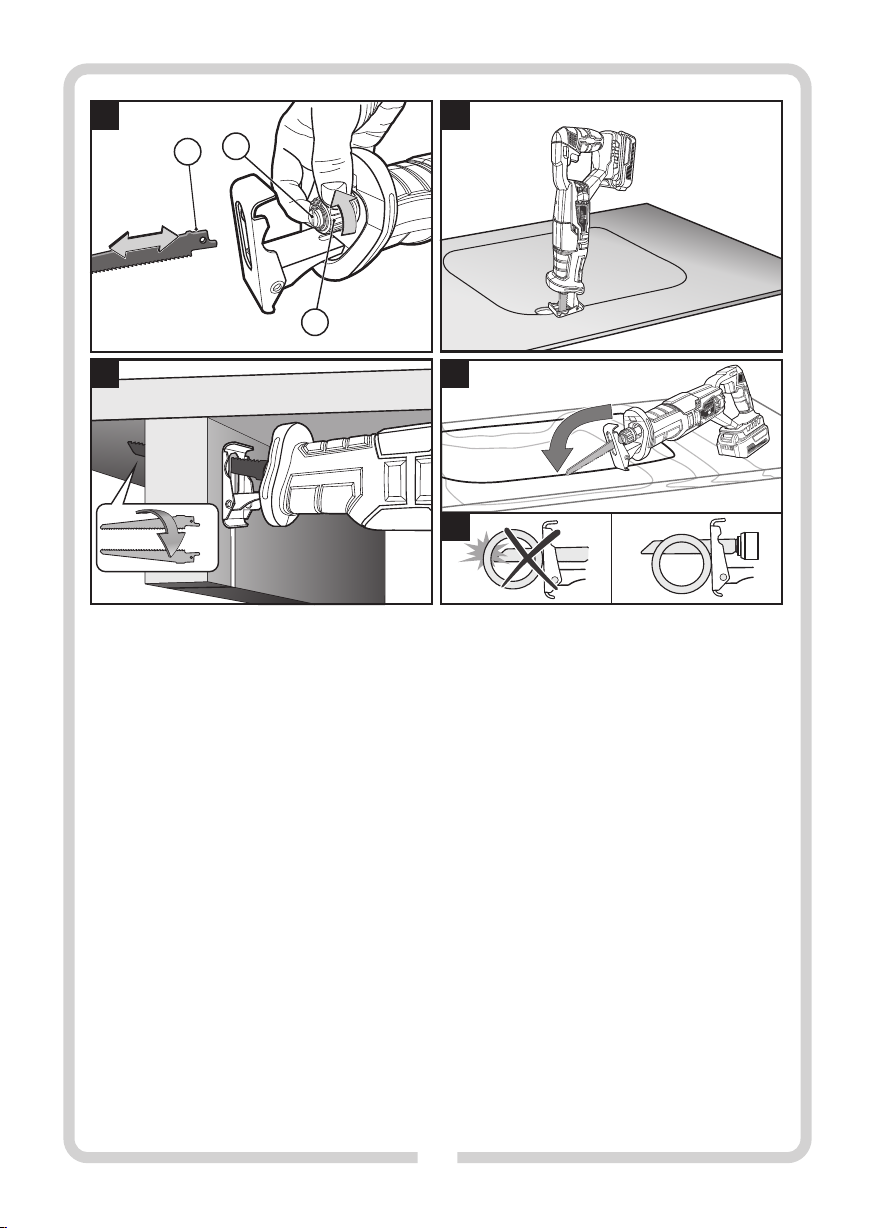
CAUTION! Before installing the blade and performing any
maintenance work, disconnect the battery from the device.
Wear protective gloves when installing the blade. There is a
risk of injury when touching the blade.
ź Rotate the mount collar (4) approx. 45° in the direction of the arrow
and keep it in this position.
ź Insert the selected saw blade (1) into the mount (3). Release the
mount collar (4), which will automatically lock the saw blade.
CAUTION! Check whether the blade is well seated. A loose blade can fall out
and hurt the user.
ź Depending on the application, it is possible to mount a blade rotated
by 180° (teeth up) (see Fig.E).
n Removal of the saw blade
CAUTION! Disconnect the tool from its power source.
ź To remove the blade, pull it out while turning the mount collar (4) in
the direction of the arrow (see Fig.D). Handle hot saw blades with
care.
A broken saw blade can be removed in the manner shown below:
ź Aim the tool down, turn the collar (4) and shake the tool up and down.
The shank of the broken blade should fall out of the mount.
n Working foot
The working foot (2) can be adapted to the saw blade used and the type
of processing, by moving it in a seamless manner to the appropriate
length see Fig. ( A).
CAUTION! Disconnect the tool from its power source.
ź Loosen the foot mounting screws (13) using the provided hex key
(12) (the key is in the storage compartment on the right side of the
main mount) and set the foot (2) in the desired position.
ź Re-tighten the screws (13) and check that the foot (2) is properly
fastened.
OPERATION:
n Turning on/off
To turn on the power tool, first press the safety button (7) on the left or
right side of the handle (9) and then press the switch (8).
To switch off the power tool, release the switch (8).
n Auxiliary lighting
The sabre saw is equipped with auxiliary lighting (5) for the cutting
point, which is turned on when the switch (8) is pressed.
8