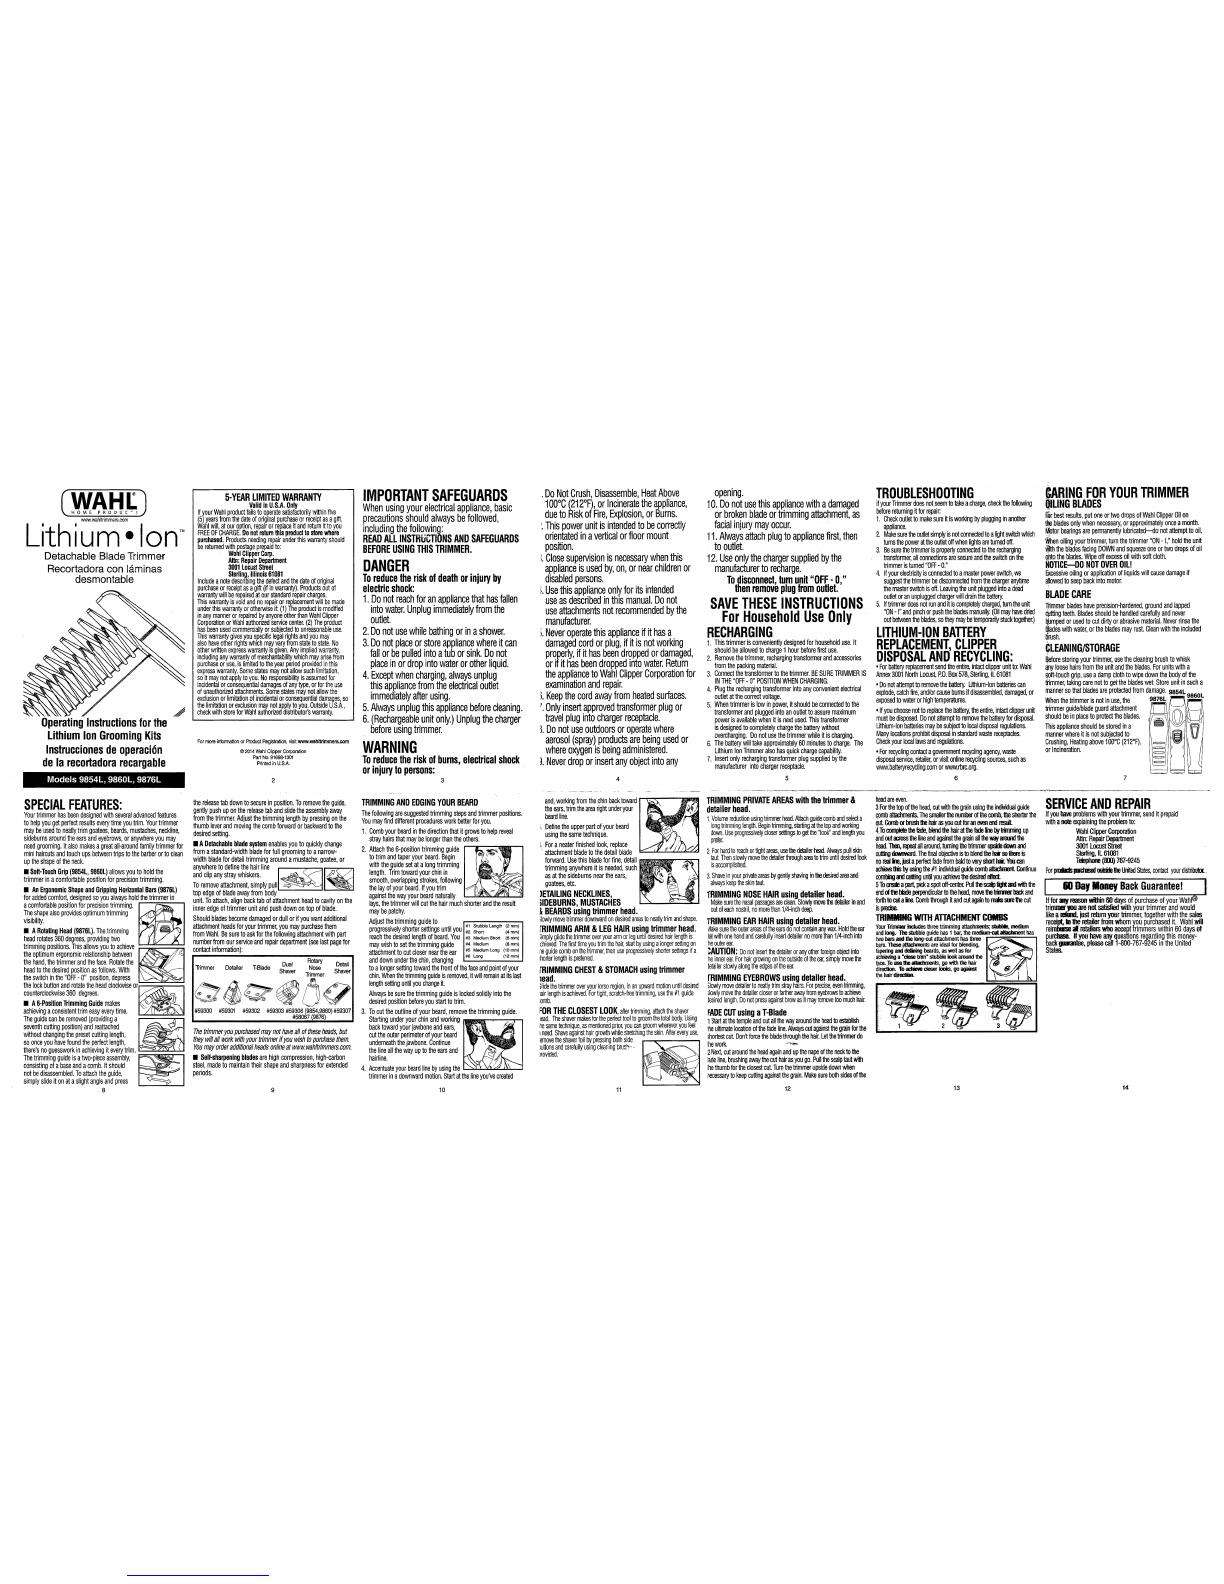
Wahl 9854L 9860L, 9876L User manual

WAH[
HOME PRODuc- ,
www.wahltrimmera.com
Lithium•Ion™
Detachable Blade Trimmer
Recortadora con laminas
desmontable
OperatingInstructionsforthe
LithiumIonGroomingKits
lnstruccionesdeoperaci6n
delarecortadorarecargable
Models 9854L, 9860L, 9876L
SPECIALFEATURES:
Yourtrimmerhasbeendesignedwithseveraladvancedfeatures
tohelpyougetperfectresultseverytimeyoutrim.Yourtrimmer
maybeusedtoneatlytrimgoatees,beards,mustaches,neckline,
sideburnsaroundtheearsandeyebrows,oranywhereyoumay
needgrooming. Italsomakesagreatall-aroundfamilytrimmerfor
minihaircutsandtouchupsbetweentripstothebarberortoclean
uptheshapeoftheneck.
• Soll-TouchGrip(9854L,986DL)allowsyoutoholdthe
trimmerinacomfortablepositionforprecisiontrimming.
• AnErgonomicShapeandGrippingHorizontalBars(9876L)
foraddedcomfort,designedsoyoualwaysholdthetrimmerin
acomfortablepositionforprecisiontrimming.
Theshapealsoprovidesoptimumtrimming •1
visibility. ·
• ARotatingHead(9876L).Thetrimming
headrotates360degrees,providingtwo i
theoptimumergonomicrelationshipbetween
thehand,thetrimmerandtheface.Rotatethe
headtothedesiredpositionasfollows.With
theswitchinthe"OFF-O" position,depress
thelockbuttonandrotatetheheadclockwiseor~
counterclockwise360degrees. ffi
• A6-PosilionTrimmingGuidemakes
~
achievingaconsistenttrimeasyeverytime. • ,
Theguidecanberemoved(providinga
~
seventhcuttingposition)andreattached
withoutchangingthepresetcuttinglength,
soonceyouhavefoundtheperfectlength, ..
there'snoguessworkinachievingiteverytrim.
Thetrimmingguideisatwo-pieceassembly,
~
consistingofabaseandacomb.Itshould ,,
notbedisassembled.Toattachtheguide,
simplyslideitonataslightangleandpress
~
8
5-YEARLIMITEDWARRANTY
ValidinU.S.A.Only
IfyourWahlproductfailstooperatesatisfactorilywithinfive
(5)yearsfromthedateoforiginalpurchaseorreceiptasagift,
Wahlwill,atouroption,repairorreplace
itandreturnIttoyou
FREEOFCHARGE.Donotrel!Jmthisproducttostorewhere
purchased.
Productsneedingrepairunderthiswarrantyshould
bereturnedwithpostageprepaidto:
WahlClipperCorp.
Attn:RepairDepartment
3001LocustStreet
Sterling, Illinois61081
Includeanotedesclibingthedefectandthedateoforiginal
purchaseorreceiptasagift
(ifinwarranty).Productsoutof
warrantywillberepairedatourstandardrepaircharges.
Thiswarrantyisvoidandnorepairorreplacementwillbemade
underthiswarrantyorotherwiseif:(1)Theproductismodified
inanymannerorrepairedbyanyoneotherthanWahlClipper
CorporationorWahlauthorizedservicecenter.(2)Theproduct
hasbeenusedcommerciallyorsubjectedtounreasonableuse.
Thiswarrantygivesyouspecificlegalrightsandyoumay
alsohaveotherrightswhichmayvaryfromstatetostate.No
otherwrittenexpresswarrantyisgiven.Anyimpliedwarranty,
includinganywarrantyofmerchantabilitywhichmayarisefrom
purchaseoruse,islimitedtotheyearperiodprovidedinthis
expresswarranty.Somestatesmaynotallowsuchlimitation,
soitmaynotapplytoyou.Noresponsibilityisassumedfor
incidentalorconsequentialdamagesofanytype,orfortheuse
ofunauthorizedattachments.Somestatesmaynotallowthe
exclusionorlimitationofincidentalorconsequentialdamages,so
thelimitationorexclusionmaynotapplytoyou.OutsideU.S.A.,
checkwithstoreforWahlauthorizeddistributor'swarranty.
Formoreinformaliooor ProductRegistration, visit www.wahltrimmers.com
C2014WahlClipperCorporation
PartNo.91668·1301
PrintedinU.S.A.
2
thereleasetabdowntosecureinposition.Toremovetheguide,
gentiypushuponthereleasetabandslidetheassemblyaway
fromthetrimmer.Adjustthetrimminglengthbypressingonthe
thumbleverandmovingthecombforwardorbackwardtothe
desiredsetting.
• ADetachablebladesystemenablesyoutoquicklychange
fromastandard-widthbladeforfullgroomingtoanarrow-
widthbladefordetailtrimmingaroundamustache,goatee,or
anywheretodefinethehairline
andclipanystraywhiskers.
~
_,,fl""""",.,,
Toremoveattachment,simplypull~
topedgeofbladeawayfrombody
unit.Toattach,alignbacktabofattachmentheadtocavityonthe
inneredgeoftrimmerunitandpushdownontopofblade.
Shouldbladesbecomedamagedordullorifyouwantadditional
attachmentheadsforyourtrimmer,youmaypurchasethem
fromWahl.Besuretoaskforthefollowingattachmentwithpart
numberfromourserviceandrepairdepartment(seelastpagefor
contactinformation):
Trimmer Detailer T-Blade Dual
Shaver Rotary Detail
Nose
Trimmer Shaver
OQ
#59300 #59301 #59302 #59303#59306(9854,9860)#59307
#58067(9876)
Thetrimmeryoupurchasedmaynothavealloftheseheads,but
theywillallworkwithyourtrimmerifyouwishtopurchasethem.
Youmayorderadditionalheadsonlineatwww.wahltrimmers.com.
• Sell-sharpeningbladesarehighcompression,high-carbon
steel,madetomaintaintheirshapeandsharpnessforextended
periods.
9
IMPORTANTSAFEGUARDS
Whenusingyourelectricalappliance,basic
precautionsshouldalwaysbefollowed,
includingthefollowing:
READALLINSTRui:TIONSANDSAFEGUARDS
BEFOREUSINGTHISTRIMMER.
DANGER
Toreducetheriskofdeathorinjuryby
electricshock:
1.Donotreachforanappliancethathasfallen
intowater.Unplugimmediatelyfromthe
outlet.
2.Donotusewhilebathingorinashower.
3.Donotplaceorstoreappliancewhereitcan
fallorbepulledintoatuborsink.Donot
placeinordropintowaterorotherliquid.
4.Exceptwhencharging,alwaysunplug
thisappliancefromtheelectricaloutlet
immediatelyafterusing.
5.Alwaysunplugthisappliancebeforecleaning.
6.(Rechargeableunitonly.)Unplugthecharger
. beforeusingtrimmer.
WARNING
Toreducetheriskofburns,electricalshock
orinjurytopersons:
3
TRIMMINGANDEDGINGYOURBEARD
Thefollowingaresuggestedtrimmingstepsandtrimmerpositions.
Youmayfinddifferentproceduresworkbetterforyou.
1. Combyourbeardinthedirectionthatitgrowstohelpreveal
strayhairsthatmaybelongerthantheothers.
2. Attachthe6-positiontrimmingguide
r--..---"'1\11
totrimandtaperyourbeard.Begin
withtheguidesetatalongtrimming
length.Trimtowardyourchinin
smooth,overlappingstrokes,following
thelayofyourbeard.Ifyoutrim
againstthewayyourbeardnaturally
lays,thetrimmerwillcutthehairmuchshorterandtheresult
maybepatchy.
Adjustthetrimmingguideto ...-- .-----.
, I h rt , .1 #1 StubbleLength (2 mm)
progressiveys o ersettmgsunt1you#2 short ,4 mm)
reachthedesiredlengthofbeard.You #3 MediumShort (6 mm)
mayWiShtOSetthetrimmingguide #4 Medium (Bmm)
attachmenttOCUtCIOSerneartheear #S MediumLong (10 mm)
. , #6 Long (12 mm)
anddownunderthechm,changing
toalongersettingtowardthefrontofthefaceandpointofyour
chin.Whenthetrimmingguideisremoved,
itwillremainatitslast
lengthsettinguntilyouchangeit.
Alwaysbesurethetrimmingguideislockedsolidlyintothe
desiredpositionbeforeyoustarttotrim.
3.Tocuttheoutlineofyourbeard,removethetrimmingguide.
Startingunderyourchinandworking
11111111111111r-,--,-,...,
backtowardyourjawboneandears,
cuttheouterperimeterofyourbeard
underneaththejawbone.Continue
thelineallthewayuptotheearsand
hairline.
4.Accentuateyourbeardlinebyusingthe.....................
~
........---
trimmerinadownwardmotion.Startatthelineyou'vecreated
10
.DoNotCrush,Disassemble,HeatAbove
100°c(212°F),orIncineratetheappliance,
duetoRiskofFire,Explosion,orBums.
:.Thispowerunitisintendedtobecorrectly
orientatedinaverticalorfloormount
position.
i.Closesupervisionisnecessaiywhenthis
applianceisusedby,on,ornearchildrenor
disabledpersons.
LUsethisapplianceonlyforitsintended
useasdescribedinthismanual.Donot
useattachmentsnotrecommendedbythe
manufacturer.
,.Neveroperatethisappliance
rtithasa
damagedcordorplug,ifitisnotworking
properly,
rtithasbeendroppedordamaged,
orifithasbeendroppedintowater.Return
theappliancetoWahlClipperCorporationfor
examinationandrepair.
,.Keepthecordawayfromheatedsurfaces.
'·Onlyinsertapprovedtransformerplugor
travelplugintochargerreceptacle.
t Donotuseoutdoorsoroperatewhere
aerosol(spray)productsarebeingusedor
whereoxygenisbeingadministered.
).Neverdroporinsertanyobjectintoany
4
and,workingfromthechinbacktoward
theears,trimthearearightunderyour
beardline.
i. Definetheupperpartofyourbeard
usingthesametechnique.
i. Foraneaterfinishedlook,replace
' attachmentbladetothedetailblade
forward.Usethisbladeforfine,detail
trimminganywhereitisneeded,such
asatthesideburnsneartheears,
goatees,etc.
>ETAILINGNECKLINES,
>IDEBURNS,MUSTACHES
~
BEARDSusingtrimmerhead.
,lowlymovetrimmerdownwardondesiredareastoneatlytrimandshape.
fRIMMINGARM&LEGHAIRusingtrimmerhead.
,implyglidethetrimmeroveryourarmorleguntildesiredhairlengthis
:ehieved.Thefirsttimeyoutrimthehair,startbyusingalongersettingon
,1eguidecombonthetrimmer,thenuseprogressivelyshortersettingsifa
horterlengthispreferred.
fRIMMINGCHEST&STOMACHusingtrimmer
1ead.
;1idethetrimmeroveryourtorsoregion,inanupwardmotionuntildesired
1airlengthisachieved.Fortight,scratch-freetrimming,usethe
#1guide
:omb.
FORTHECLOSESTLOOK,aftertrimming,attachtheshaver
1ead. Theshaver
makesfortheperfecttooltogroomthetotalbody.Using
hesametechnique,asmentionedprior,youcangroomwhereveryoufeel
1need.Shaveagainsthairgrowthwhilestretchingtheskin.Aftereveryuse,
emove
theshaverfoilbypressingbothside
iuttonsandcarefullyusingcleaningbru~ -
irovided.
11
opening.
10.Donotusethisappliancewithadamaged
orbrokenbladeortrimmingattachment,·as
facialinjuiymayoccur.
11.Alwaysattachplugtoappliancefirst,then
tooutlet.
12.Useonlythechargersuppliedbythe
manufacturertorecharge.
Todisconnect,tumunit"OFF-0,"
thenremoveplugfromoutlet.
SAVETHESEINSTRUCTIONS
ForHouseholdUseOnly
RECHARGING
1. Thistrimmerisconvenientlydesignedforhouseholduse.It
shouldbeallowedtocharge1hourbeforefirstuse.
2. Removethetrimmer,rechargingtransformerandaccessories
fromthepackingmaterial.
3. Connectthetransformertothetrimmer.BESURETRIMMERIS
INTHE"OFF·
O"POSITIONWHENCHARGING.
4. Plugtherechargingtransformerintoanyconvenientelectrical
outletatthecorrectvoltage.
5. Whentrimmerislowinpower,itshouldbeconnectedtothe
transformerandpluggedintoanoutlettoassuremaximum
powerisavailablewh.en
itisnextused.Thistransformer
isdesigned.tocompletelychargethebatterywithout
overcharging. Donotusethetrimmerwhileitischarging.
6. Thebatterywilltakeapproximately60minutestocharge. The
LithiumIonTrimmeralsohasquickchargecapability.
7.Insertonlyrechargingtransformerplugsuppliedbythe
manufacturerintochargerreceptacle.
5
---·---- ·-- --- -- ------- - -
TRIMMINGPRIVATEAREASwiththetrimmer&
detailerhead.
1.Volumereductionusingtrimmerhead.Attachguidecombandselecta
longtrimminglength.Begintrimming,startingat
thetopandworking
down.Useprogressivelyclosersettingsto
getthe"look"andlengthyou
prefer.
2.Forhardtoreachortightareas,.usethedelailerhead.Alwayspullskin
taut.Thenslowlymovethedetailerthroughareatotlimuntildesiredlook
isaccomplished.
3,Shaveinyourprivateareasbygentlyshavinginthedesiredareaand
alwayskeeptheskintaut.
TRIMMINGNOSEHAIRusingdetailerhead.
Makesurethenasalpassagesareclean.Slowlymovethedelailerinand
outofeachnostril,nomorethan1/4-inchdeep.
TRIMMINGEARHAIRusingdetailerhead.
v1akesuretheouterareasoftheearsdonotcontainanywax.Holdtheear
latwithonehandandcarefullyinsertdetailernomorethan1/4-inchinto
heouterear.
~AUTION:Donotinsertthedetaileroranyotherforeignobjectinto
heinnerear.Forhairgrowingontheoutsideoftheear,simplymovethe
letailerslowlyalongtheedgesoftheear.
rRIMMINGEYEBROWSusingdetailerhead.
;1owlymovedetailertoneatlytrimstrayhairs.Forprecise,eventrimming,
;lowlymovethedetailercloserorfartherawayfromeyebrowstoachieve
lesiredlength.Donotpressagainstbrow
asitmayremovetoomuchhair.
FADECUTusingaT-Blade
1Startatthetempleandcutallthewayaroundtheheadtoeslablish
fieultimatelocationofthefadeline.AJwayscutagainstthegrainforthe,
shortest
cut.Don'tforcethebladethroughthehair.Letthetrimmerdo
!hework. ---,,.,..
2Next,cutaroundtheheadagainandupthenapeoftheneck
tothe
ladeline,brushingawaythecuthairasyougo.Pullthescalptautwith
lhethumbfortheclosestcut.Tumthetlimmerupsidedownwhen·
necessarytokeepcuttingagainstthegrain.Makesurebothsidesofthe
12
TROUBLESHOOTING
IfyourTrimmerdoesnotseemtotakeacharge,checkthefollowing
beforereturningitforrepair:
1. Checkoutlettomakesureitiswor1<ingbyplugginginanother
appliance.
2. Makesuretheoutletsimplyisnotconnectedtoalight
switchwhich
turnsthepowerattheoutletoffwhenlights
areturnedoff.
3. Besurethetrimmerisproperlyconnectedtotherecharging
transformer,allconnectionsaresecureandtheswitchonthe
trimmeristurned"OFF-O."
4. Ifyourelectricityisconnectedtoamasterpowerswitch,we
suggestthetrimmerbedisconnectedfromthechargeranytime
themasterswitchisoff.Leavingtheunitpluggedintoadead
outletoranunpluggedcharger
willdrainthebattery.
5. tttlimmerdoesnotrunanditiscompletelycharged,tumtheunit
"ON-I"andpinchorpushthebladesmanually.(Oilmayhavedlied
outbetweentheblades,sotheymay
betemporarilystucktogether.)
LITHIUM-IONBATTERY
crt~~1r1~11~tw:c1~NG:
•Forbatteryreplacementsendtheentire,intactclipperunitto:Wahl
Annex3001NorthLocust,P.O.Box578,Sterling,IL61081
•Donotattempttoremovethebattery. Lithium-Ionbatteriescan
explode,catchfire,and/orcausebumsifdisassembled,damaged,or
exposedtowaterorhightemperatures.
•Ifyouchoosenottoreplacethebattery,theentire,intactclipperunit
mustbedisposed.Donotattempttoremovethebatteryfordisposal.
Lithium-Ionbatteriesmaybesubjecttolocaldisposalregulations.
Manylocationsprohibitdisposalinstandardwastereceptacles.
Checkyourlocallawsandregulations.
•Forrecyclingcontactagovernmentrecyclingagency,waste
disposalservice,retailer,orvisttonlinerecyclingsources,.suchas
www.batteryrecycling.comorwww.rbrc.org.
6
IARINGFORYOURTRIMMER
lfLINGBLADES
~r bestresults;putoneortwodropsofWahlClipperOilon
~
bladesonlywhennecessary,orapproximatelyonceamonth.
~tor bearingsarepermanentlylubricated-<lonotattempttooil.
Whenoilingyourtrimmer,turnthetrimmer"ON-1," holdtheunit
\IOfhthebladesfacingDOWNandsqueezeoneortwodropsofoil
q_motheblades.Wipeoffexcessoilwithsoftcloth.
NOTICE-DONOTOVEROIL!
F;xcessiveoilingorapplicationofliquidswillcausedamageif
~lowedtoseepbackintomotor.
BLADECARE
Trimmerbladeshaveprecision-hardened,groundandlapped
djltlingteeth.Bladesshouldbehandledcarefullyandnever
~mpedorusedtocutdirtyorabrasivematerial.Neverrinsethe
!Rdeswithwater,orthebladesmayrust.Cleanwiththeincluded
rirush.
CLEANING/STORAGE
r
l)eforestoringyourtrimmer,usethecleaningbrushtowhisk
<lf!Yloosehairsfromtheunitandtheblades.Forunitswitha
~fl-touchgrip,useadampclothtowipedownthebodyofthe
tlimmer,takingcarenottogetthebladeswet.Storeunitinsucha
mannersothatbladesareprotectedfromdamage. 9854L
Whenthetrimmerisnotinuse,the 9876L ss&oL
trimmerguide/bladeguardattachment
shouldbeinplacetoprotecttheblades.
Thisapplianceshouldbestoredina
mannerwhereitisnotsubjectedto
Crushing,Heatingabove100°c(212°F),
orIncineration.
7
_____,,.,..._______ _
headareeven.
3.forthetopofthehead,cutwiththegrainusingtheiooividualguide
1;9mb
atlachments.ThesmaHerthenumberofthecomb,theshorterthe
qut.CorooorbrushthehairasyoucutforanEMllleooresiil.
Uocornplelethefade,blendthehairalthefadelinebylmllTiingup
andoutEms the600andagainstthegrainalltheWi1Jil1llDIthe
head.Then,repeatallaround,turningthetrimmerupsiledovffland
cullingda.vrrtvard.Thefinalobjectiveistoblendthehai'so11Erei.5
n9realn, p;taperfectfadefrombaldtoveryshortllili:Yoocan
achievettis byusingthe#1indMdualguidecombattmJBt. Continue
comlq andcuttinguntilyouacllievethedesiredeffllct
5Tocrealeapart,pickaspotoff~ Pullthe~tijtand withthe
end
ofthel8le perpendiculartothehead,mowthetrimlerla:lcand
fQrthtoata lile.CombthroughitandcutagaintollliRSllethecut
isprecise.
TRIMMINGWITHATTACHMENTCOMBS
V()urTrimlllerincludesthree!Iimmingattachments;slltiE. medum
andlong, Theslubbleguidehas 1 bar, the medil»n-allaliaclanenthas
t.·.~.·~·F.h~~1~-J
direclic>1tToac11ie,e c1oserlooks,go aoauast
~
, \
t~ehaird_irecliln. \ i
13
SERVICEANDREPAIR
Ifyouhaveproblemswithyourtrimmer,senditprepaid
witll
anoteexplainingtheproblemto:
WahlClipperCorporation
Attn:RepairDepartment
3001LocustStreet
Slerling,IL61081
Telephooo(!DI) 767-9245
Forprlilii:ISflldlml009letheUnitedStates,contactyourdistlibuloc.,
I &ODayMoneyBackGuarantee!
lfforanyreasonwithin00daysofpurchaseofyourWahl®
trimmer
youarenotsatisfiedwithyourtrimmerandwould
like
aldlnl, justreturnyourtrimmer,togetherwiththesales
receiPI.ID1heretailerfromwhomyoupurchasedit. Wahtwil
reim&meal relailerawhoaccepttrimmerswithin60daysof
purthase.Hyouhaveanyquestionsregardingthismoney-
backpiriee ,pleasecall1-800-767-9245intheUnited
States.
14

PRECAUCIONES
IMPORTANTES
ftJ
usarunaparatoeléctrico,sedeben
~marsiempre
precaucionesbásica
1JCluidas
las
siguientes:LEATODAS
LAS
INSTRUCCIONES
ANTESDEUSAR.
PELIGRO
Parareducirelriesgodemuerteolesiones
por
electrocución:
1.
Notratedesacarunaparatoquese
hayacaídoalagua.Desenchúfelo
inmediatamentedelatomadecorriente.
2.Nolousemientrasestébañándoseoen
la
ducha.
3.Nopongaelaparatoniloguardeen
lugaresdedondesepueda
caer
a
unbaño
olavabo.Nolosumerjanilodejecaer.al
aguauotrolíquido.
4.Exceptocuandoestécargándose,
desenchufesiempreesteaparatode
latornadecorrienteinmediatamente
despuésdeusarlo.
5.
Desenchufesiempreesteaparatoantesde
limpiarlo.
6.(Unidadrecargablesolamente.)
Desenchufeelcargadorantesdeusarla
detalladoalrededordelbigoteolabarbadechivo,definiendo
elmargendelabarbay recortandotodopelosuelto.
Paraquitarelaccesorio,simplementehaleelbordesuperior
delacuchilla. Paraponer,alinear
~~
detráslalengüetadelacuchilla //"
conlacavidadenelbordeinterno ·
de
larecortadorayaprieteel
superiordelacuchilla.
Silashojassedañano
se
desafilan,puedescomprarun
nuevoconjuntodehojaenWahl.Asegúresedepedirlo
siguiente:
Recortadora
Detalladora
CuchillaT AfeitadoraCiléhillaAfeitadora
-5a
#59300
#59301 #59302 #59303#59306
(9854,9860)
#59307
#58067(9876
Larecortadora
que
usted
compró
nopuedetenertodas
estas
cabezas
incluidas,perotodaslascabezastrabajanconsu
recortadora
si
deseacomprarlas.Puedehacerpedidosdecabezales
adicionalesenlínea,enwww.wahltrimmers.com.
• Lascuchillasautoafilantessondeaceroalcarbonoamolado
aprecisión,hechasparaconservarsu
fonna
yagudezadurante
períodosprolongados.
RECORTEYDESBASTADODELA
BARBA
Lossiguientessonpasosderecortey
posicionesdelarecortadorasugeridas.Tal ~ <
vez.
encuentredistintosprocedimientosque ' \
leresultenmásútiles.
1. Peinelabarbaenladireccióndél -
crecimientoparaexponerpelossueltosy ....-; _ .. .
8
recortadora.
ADVERTENCIA
Parareducirelriesgodequemaduras,
'incendios,electrocuciónolesionesa
personas:
1.Noaplaste,desarme,calienteamásde
1OOºC(212ºF)oincinereelaparato,
debidoalriesgodefuego,explosióno
quemaduras.
2.Estaunidadelectricaldebedeserusada
correctamenteenunaposicionverticalo
unaposicióndelmontajedel
piso.
3.Esnecesariaunasupervisiónrigurosa ,
cuando
esteaparatoseausadoporniños.,
oenlosalrededoresdeniñosopersonas.:
inválidas.
4.Useesteaparatosóloparaeltipode
aplicacionesalasquehayasido
destinado,'
según
sedescribeenestemanual.
No·
use
accesoriosnorecomendadosporel
fabricante.
5.Nohagafuncionarnuncaesteaparatosi
tieneuncordónoenchufedañado,sino
funcionabien,sisehadejadocaeroseha
dañadoosehadejadocaeralagua.Envíe,
esteaparatoaWahlClipperCorporation:
para
suexamenyreparación.
2
máslargOSqueIOSdemás.
No.
1 Cerdosa (2mm)
2. Conectelaguíaderecortede6
~~
; ~:
media
)!
;;\
posicionespararecortar
ysesgarla
No.4 -
,s
nvn>
barbaEmpiececonlaguíapuestaen
No.
5 LalllS.- \\~ :\
unalongituddecortelargaRecorte
L.No"'"'.-
6
1.arya____
...,j
hacialabarbillaconrecorridosunifonnesysobrepuestos,
siguiendo
el
crecimientodelabarba.Sirecortaencontradel
crecimiento
de
la
barba,larecortadoracorta
más
corto
yel
resultadopuedeserdisparejo.
Ajustelaguíaderecorteenposicionesprogresivamentecortas
hastallegaralalongituddebarbadeseada.Alsacarlaguía
derecorte,elajustedelaúltimalongitudseconservahasta
cambiarlo.
Cercióresedequelaguíaderecortesiempreestébloqueada
firmementeenlaposicióndeseada,antes
de
empezar
arecortar.
3. Quitelaguíaderecorteparacortarlasiluetadela
barba.
Empezandopordebajodelabarbilla,recorriendohaciaatrás,
hacia
la
mandíbulaylasorejas,corteelperírnetroexterno
de
la
barba,pordebajodelamandíbulaSiga
~ · .
la
líneacompletamentehastalasorejas
y
~~
\
elmargendelcabello. \
4.Acentúeelmargendelabarbaalusar
la
recortadoraconunmovimiento . ..,
descendente.
Empiecedondecreóla "
·1ínea
yconmovimientosdelabarbilla ~-
hacia
lasorejas,recorteeláreajusto - · ./,,,
debajo
delmargendelabarba. 1
5. Defina
lapartesuperiordelabarba D .
siguiendolamismatécnica.
~
/
r
6.
Para
unacabadoimpecable,cambie
el
cabezal
y
ponga
el
cabezalconla
fU
cuchillapequeña.Useesacuchilla ..
~~
¡_::.
pararecortefino
ydetalladoen
cualquierlugarquesenecesite,tal
9
6.Noacerqueelcordónasuper1icies
calientes.
7.Introduzcasolamenteeltransformadorde
recargaenelreceptáculodelcargador.
8.NolousealaireIHJ.Lnioperecon
productosdeaerosol(pulverizador)oen
lugaresdondese
administre
oxígeno.
9.
Nuncadejecaeroinsertecualquierobjeto
encualquierabertura.
1O.Nouseesteaparatocon.unahojao
accesorioderecortedañado
o
roto,yaque
sepuedenproducirlesionesfaciales.
11.Conectesiempreprimeroelenchufeal
aparatoydespúesalatomadecorriente.
12.Utilicesolamenteelcargador
suministradoporelfabricante.
Para
desconectar,a,Paguela
unidad
"OFF-O"ydespuescresconecteel
enchufe
lfe
la
tomadecorriente.
GUARDEESTASINSTRUCCIONES
SolamenteParaUsoResidencial
INSTRUCCIONESDERECARGA
1.Estarecortadoraestádiseñadaconvenientementepara
usocasero.Debedejarque
se
carguedeunahora
para
otroantesde
usarse.
2.
Saquelarecortadora,transfonnadorderecarga
y
accesoriosdelmaterialdeempacado.
3.Conecteeltransfonnadoralarecortadora.ASEGÚRESE
DEQUE
LA
RECORTADORAESTÉEN
LA
POSICIÓNDE
3
comolaspatillas,cercadelasorejas,labarbadechivo,
etc.
DETALLADODELCUELLO,LASPATILLAS,BIGOTES
Y
BARBAS
utilazandolarecortadoragiratoria
Muevala
recor1adora
lentamentehaciaabajosobre
la.5
áreas
para
recortar
y
dar
forma
con
nitidez.
RECORTEDELOSPELOSDELOSBRAZOSYLAS
PIERNAS
utllazandolarecortadoragiratoria
simplementedeslicelarecortadorasobreelbrazoo
1a
pierna
hasta
conseguir
la
longitud
qoo
quiera.
La
primera
vez
querecorte
del
pelo,
~iece
con
una
guía
más
larga,luego
use
posicionesprogresivamente
más
cortassiquiere
unamenorlongitud.
RECORTEDELOSPELOSDELPECHOYEL
ESTOMAGO
utilazandolarecortadoragiratoria
Deslicelarecortadorasobreeltorsoenmovimientosascendenteshasta
con-
seguirlalongitudquequiera.
La
primera
Vffl
querecortedelpelo,empiece
conunaguía
más
larga,luego
use
posicionesprogresivamente
más
cortas
si
(1.Jiereuna
menor
longitud.
Paraunamiradaexclusiva,
silll)letm1te
corecte
el
campara
afeitar.
La
afeiladora
es
la
herramienta
pertocta
para
el
a:ica;:;lam=:;:;ient~o==:..:;:...-
tu
ClJ811lO. Utilizandoelmismoprocedimiento
comomencionadoanteriormente,
acirale
tu
cuerpo
dondeseanecesario.Puedesafeitaren
contradelcrecimientodelpelomientrasestiras
tupiel.Alfinalde
rada
usoaprietelosbotones
deambosladosdelarecortadorayremuevala
láminademetaldelaafeitadora
y
límpielacon
labrochaincluida.
RECORTEDELASPARTESPRIVADAS
utllazandola
recortadora
y
ladetalladoragiratoria.
1.
Reducción
oo
volurrenutilazando
la
recortadoragiratoria
Corroe
la
peinetadeguía
y
escojaunalongituddecortelarga.Empieceacortar
de
lapartesuperior
ha::iaabajo.
Use
ajustesprogresivamenterrenores
para
conseguir
elaspecto
y
lalongitud
qoo
quiera.
10
APAGADO"OFF- O"CUANDOESTÉCARGÁNDOSE.
.
f
4.Enchufeeltransformadorderecargaacualquiertoma
de•..
corriente
eléctricaconvenientealvoltajecorrecto.
haberse
quedado
ataseádastemporalmente.)
CAMBIODELAPILADELITIOION,
DESECHODELARECORTADORAY
RECICLAJE:
5.Cuando
lá
recortadora
seestá
agotando,
conectar
el
transformadoryenchufarseenunatomadecorriente
paraasegurarsededisponerdeunamáximacorriente
cuandoseuselasiguientevez. E1.tetransformador
estádiseñadoparacargarcontinuamentelapilasin
, •Paracambiarlapila,envíeletodalarecortadoraintactaa:Wahl
sobrecargarla. Noutiliceladesbastadoramientrasse :
estácargando.
6.Lacargadelapilasedemoraaproximadamente60
minutos.Ladesbastadoraconpiladelitioiontambién
e.s
de
cargarápida.
, .. , ·
LOCALIZACIONYREPARACION
DEFALLAS .
Sisurecortadoranoparececargarse,compruebelo
siguienteantesdeenviarlapara
sureparación. •
1.Compruebelacorrientedelenchufe,enchufandootro
aparato.¡
2.
Asegúresedequelatomanoestésimplemente _
conectadaaun
interruptordeluzquedes.conectela
corrientecuandoseapaguenlas
luctis.
3.
Asegúresedequelarecortadoraestébienconectada :
al
transformadorderecarga,todaslasconéxionessean
..,
buenas
yelinterruptordelarecortadoraestéapagado.,
"OFF-O".
4.Silaelectricidadestáconectada
auninterruptorde
corrienteprincipal,sugerimosquesedesconectela
recortadoradel
cargador
encualquier
ni.omentoen
queel
J
interruptorprincipalestéenlaposiciónde
apagado.Al
deja~
la
unidadenchufadaenunatoma
desconectada
ocargadora
desenchufado
sedrenarálapila.
5.Si
larecortadoranofunciona
Y.
está.compl!)tamente···
cargada,pongalaunidadenlaposiciónde·encendido
"OÑ
-I"
ypellizqueoempujelashojasrnanualmente.
(Puede".
haber
aceite
secoentrelashojas,porloquepueden
4
2.
Utilizaelcabezalparadetallarlasáreas
másdifícilesderecortar.Estire
:·
el
pielycuidadosamentemuevelarecortadoraparadetallarel
área
hasta··
lograr
su
mirada
deseada.
3.
Cuidadosamenteafeitesuáreadeseadaensu
área
privada.
RECORTEDELOSPELOSDE
LÁ
NARIZ
utilazando
la.
detalladoragiratoria. ·· •
Limpielosconductosnasales.Muevalentamenteladetalladorahaciaadentro
yhaciafueradecadafosa,sinpasar
de_
de
pulgada
de
profundidad. _.
RECORTEDELOSPELOSDELASOREJAS
utilazando
ladetalladoragiratoria.
Compruebequenohayaceraenlaspartes
e~ernas
de
lasoreja.5.
Sostenga::.
planalaoreja
conunamanoeinserte
cuidadbSamellte
la
oolalladorano
más::
de
_
enlaoreja. ,
ADVERTENCIA:
Noinserteladetalladoraniningúnobjetoextrañoen~·
eloídointerno.Simplemente
muevadespaciola
delalladora
alolargodelos;
bordes
de
la
oreja,paracortarlospelosquecrezcan
afuera '.i
RECORTEDECEJAS
utilazandoladetalladoragira-:
toria. .~
Muevadespacioladetalladorapararecortarconnitidezlos
~los
salidos. ,
1
Pararecortarconprecisiónyuniformidad,
mueva
despacioladetalladora
~
cercaomásretiradadelascejas,paraconseguiílalongitudque
quiera.
,¡
ELCORTEBALOFADE
1Comienceacortaralaalturadelasién,siguiendodespuéstodo
alrededordela
cabez.a,paraestablecerla
linea
desombraCortesiempre/
enladireccióncontrariaalcrecimientonaturaldelcabello
para
conseguir
·
elestilodecabellomáscorto.Nofuercelahojaatravésdelcabello.·Deje
1,'.
quelarecortadorahagaeltrabajo. .;
2
Seguidamente,cortealrededordela
cabeza
otravez
y
desde
la
nuca
haciaarriba,hastalalineade
sombra,el1~do el
cabello
yacortado,al
:
mismo
tiempo. Estireelcuerocabelludoconsusdedosparaconseguir
un.
corte
decabello
máscerrado.Virelarecortadoracuandoseanecesario
·
realizarelcorte
enladireccióncontrariaalcrecimientonaturaldel
cabello.
Asegúrese
dequeambosladosdelacabezaesténiguales.
11
Annex3001Northlocust,P.O.Box578,Sterfhig,IL61081
•Nointentesacarla
pila, Laspilasdelitioionpuedenexplotar,
incendiarseocausarquemadurassisedesarman,sedañanolas
exponenalaguaoaltastemperaturas.
•Sidecidfnocambiarlapila,debedesechartodalarecortadora:
Nointentesacarlapila
par,ages.echarla.
Las
pilasdelitioion
estánsujetasareglamentosdedesechoslocales.Muchoslugares
prohíbeneldesechoenrecipientesdebasuracorrientes.Consulte
lasleyesyreglamentoslocales.
•Paraelreciclaje,contacte
a
la.ag,encia
de
reciclajegubernamental,
elserviciodebasuras,elcomercianteminoristaolasfuentesde
reciclajeenlínea,talcomowww.batteryrecycling.comowww.
rbrc.org. .
CUIDADO
DE
LARECORTADORA
LUBRICACIO.N
DE
LASHOJAS
Para
obtenerips
mejoresresul~dos,
ponga
unaodosgotasde
aceiteWahlClipper
en
lashojassólocuandoseanecesario,o
aproximadamenteunavezalmes.Loscojinetesdelmotorestán
lubricadospermanentemente.Notratedelubricarlos.
Allubricarsurecortadora,enciéndala"ON
-1" ysujételaconlas
hojasapuntandoHACIAABAJOyexprimaunaodosgotasde
aceiteenlashojas.Limpieelexce.sodeaceiteconunpañosuave.
AVISO:
¡NOLUBRIQUE
EXCESIVAMENTE!
Lalubricaciónoaplicaciónde
líqUidosexcesiva
causará
dañossi
se
d~ quesefiltre
Y.
lleQ!Jealmotor.
CUIUAD0DE
LA~
HOJAS
Lashojasdelarecortadoratienendientesdecorte
endureciddi,- .
con
precisión,rectificadosypulidos.Las.
hoi,as
deben
manipu)¡¡rse
concuidadoyno
golpearse
nunca
niusarse
paracortar
materiales
suciosoabrasivos.Noenjuagarlacuchillaconagua,o
las
hojas
5
3
Paraelcorteenlapartesuperior
d~
la
ca!Jeza,
i.cirteenladireccióndel
crecimientonaturaldelcabello
utli~dolos
peines
guías. Cuantomás
pequeño
es
elnúmerodelpeine,máscortoes
el
corte.Vaya
peinando
ocepillandoalmismotiempoquevaustedcortando,
para
conseguirun
res.ultadoproporcionado.
4Para
completarelresultado,
mezcle
el
cabello
de
la
nnea
elesombra,
cortandolaspuntashaciaarriba
y
hacia
fuera
dela
Unea,
y
en
dirección
contraria
al
crecimientonaturaldelcabello,
todO
álredooor
de
la
cabeza
Después,repitaelcorteotravezalrededorde
fa
cabeza,
pero
dándolela
vueltaa
la
recortadora''T-Pro",
y
cortandohacia
abajo.
Puedes
alcanz.ar
estousandoelaccesorioindividualdelpeinedelaguía
11. Continue
peinando
y
cortandohastaconseguirel
resultado
desealo.
5Para
crearlarayaounadivisión,selecc.ione.una
ZO!lél
fueredel
centro
delacabeza.Estiresucabellera,yconlaparte
del
finalde
la
hoja,
perpendicularala
cabeza,muevalacortadorade
atráshacia
adelanate,
paracrearunalinea.Peinelazona
y
corteotra
vez,
asegur.mose
deque
elcorte
es
precíso. ·
12
LIM,iEWMr
lcENlrmii~r~ido.
Antes
deguardarla recortadora,useel cepillo de
limpiezapara
retirarlospelos
sueltosde 9854L
9860L
launidadyhojas.Paralasunidadescon 9876L
.
~
~
unagarresuavealtacto,utiliceunpaño
!'·
i~ .
húmedoparalimpiarelcuerpodelrecotador,~ .
¡
1
fl¡
1
1
teniendocuidadoparaquenoobtenga
1m
·~ u fJ
lashojasmojadas.Guardelaunidadde
~
1
talmaneraqu_elashojasesténprotegidas = ¡
~
u
contralosdanos.
=
Cuandonoseuselarecortadora,el
~
/
accesoriodeguíaderecortadora/protector
l=:J
dehojasdebeestarcolocadoparaproteger l=:;
lashojas.
Esteaparatosedebeguardardemaneraquenoseasometido
aaplastamiento,calentamientoamásde1OOºC(212ºF)o
incineración.
CUALIDADESESPECIALES:
Larecortadorafuehechaconvariascualidadesavanzadaspara
ayudarleaobtenerresultadosperfectoscadavezquerecorte.La
recortadoratambiénsepuedeusarpararecortarelmargendel
cuello,laspatillas,alrededordelasorejasylascejas.Tambiénes
unaversátilrecortadorafamiliarparaminicortesdepelo
yretoques
entrelasidasalapeluqueríaoparalimpiarlanuca.
• Larecortadoracontieneun
agarresuave(9854L,986DL)
'"' • pe,müe
i.re, "' recorte
cómodoycon
p~
6
SERVICIOYREPARACIÓN
Sitieneproblemasconlarecortadora,envíelaconfranqueo
prepagadoy unanotaexplicandoelproblemaa:
WahlClipperCorporation
Attn: RepairDepartment
3001LocustStreet• P.O.Box578
Sterling, IL
61081
Teléfono(800)767-9245
ParaproductoscompradosfueradeEstadosUnidos,
póngaseencontactoconsudistribuidor.
1
GARNATÍA60DIASPARADEVOLUCIÓNDESUDINERO
1
Siporcualquierrazónentrelos60díasdelacompradesu
recortadoradeWahlnoestasatisfechoconsucompray
deseaunadevolucióndesudinero,regreselarecortadora
juntoconsurecibodecomprasalatiendadondelo
compro.Wahlreembolsaraalastiendasquienesacepta
lasrecortadorasentrelos60díasdesucompra.Sitiene
preguntastocantesestaGarantía,porfavorllamanosal
1-800-767-9245enlosEstadosUnidos.
ParamasinformacionoAegistraciondeProducto
visite
www.wahllrimmers.com
13
• Formaergonómica
ybarras
horizontalesdeasirsuaves(9876L)
para
mayorcomodidad,diseñadasparapoder
sujetarsiemprelarecortadoraenuna
posicióncómodaylograrunrecortede
precisión.Suformatambiénproporciona
unavisibilidadderecorteóptima.
• Cabezagiratoria(9876L).
Lacabeza
giratoriagira360gradosproporcionando
dosposicionesderecorte.Estopermite
lograrlarelaciónergonómicaóptimaentre
lamano,larecortadoraylacara.Girela
cabezahastalaposicióndeseadadela
formasiguiente.Conelinterruptorenla
posicióndeapagado"OFF- O", pulseel
botóndetrabaygirelacabeza360ºhacia
laderechaohacialaizquierda.
• Guíade
6posiciones
quehaceque
siempreselogreconfacilidadunrecorteuniforme.
Laguíapuedequitarse(proporcionandounaséptima
posicióndecorte)yvolverseaconectarsincambiarla
longituddecorteprefijada,demodoqueunavezquehaya
encontradolalongitudperfecta,notengaqueadivinar
cuálesencadarecorte. Laguíaderecorteesunconjunto
de
dos
piezascompuestoporunabasey unpeine.
Nodebedesmontarse.Paraconectarlaguía,deslícela
simplementeformandounligeroánguloypulselalengüeta
dedesenganchehaciaabajoparasujetarenposición.Para
quitarlaguía,empujesuavementehaciaarribalalengüeta
dedesengancheydesliceelconjuntoalejándolodela
recortadora.Ajustelalongitudderecortehaciendofuerza
haciaabajosobrelapalancaymoviendoelpeinehacia
adelanteohaciaatráshastaelajustedeseado.
• Elsistemadesmontabledecuchillas
permiteel
cambiorápidodeunacuchilladelongitudestándarpara
acicaladocompleto,
a
unacuchillaangostapararecorte
7
GARANTÍALIMITADADECINCOAÑOS
VálidasoloenlosEstadosUnidos
SisuproductoWahldejadefuncionarsatisfactoriamentedurante
elperíododecinco
(5)añosapartirdelafechadecompraoriginal
odehaberlorecibidocomoregalo,Wahlrepararáoreemplazaráel
productoasucriterioy
se
lodevolverágratuitamente.
Nodewelva
esteproductoalatiendadóndeustedlohacomprado.
Los
productosquenecesitenserreparadosbajolostérminosde
esta
garantía,debenserenviados,confranqueopagadoa:
WahlClipperCorp.
Attn:RepairOepartment
3001LocustStreet
Sterling,lllinois61081
Incluyaunanotadescribiendoelproblemaylafechadelacompra
originalorecibodelregalo(siaúnestábajogarantía).Losproductos
fueradegarantíaseránreparadosanuestrospreciosregularesde
reparación.
Estagarantíaquedaráanuladaynoseefectuaráningunareparación
oreemplazoenelcasodeque:
(1)
Sielproductosemodifica
decualquiermaneraoesreparadoporcualquierotrapersona
conexcepcióndeWahlClipperCorporationocentrodeservicio
autorizadoWahl.(2)Elproductosehautilizadocomercialmenteose
hasujetadoalusodesrazonable.
Estagarantíaleotorgaderechoslegalesespecíficos
y
ustedpodrá
tenerotrosderechosquepuedenvariardeunestadoaotro.No
existeotrodocumentocomo
tal
y
nosedaráningúnotropor
escrito.Cualquier
otra
garantíaimplícita,incluyendocualquier
garantíamercantilquepuedasurgirdelacompradeesteproducto
odesuuso,estálimitadaalperíododeañosmencionadoenesta
garantíaexpresa.Esposiblequealgunosestadosnopermitan
dichaslimitaciones,
y
portantopuedequeestalimitaciónnosea
aplicableasucaso.Noseasumeningunaresponsabilidadpor
dañosincidentalesodañoscausadosporlautilizacióninadecuada,
oporelusodeaccesoriossinautorizacióndelfabricante.Puede
quealgunosestadosnopermitanlaexclusiónolalimitaciónde
dañosincidentalesopordañosdebidosalautilizacióninadecuada
deesteproducto,demodoque
la
exclusiónolimitaciónpuedano
seraplicableasucaso.EstagarantíaessoloválidaenlosEstados
Unidos.FueradelosEstadosUnidos,pregunteenla
tienda
por
la
garantíadeldistribuidorautorizadodeWahl.
14
Table of contents
Languages:
Other Wahl Grooming Kit manuals