• Dieses Gerät ist nicht für den Dauerbetrieb konzipiert.
• Das Gerät darf nicht in der Nähe von leicht entzündbaren Gasen oder Flüssigkeiten betrieben werden. Bei Nichtbeachtung
besteht erhebliche Brand- und Explosionsgefahr!
• Mit der Pumpe dürfen keine aggressiven, abschleifenden, ätzenden, brennbaren oder explosivenFlüssigkeiten wie z.B.
Salzwasser, Motorenöl, Heizöl, Benzin, Reinigungsmittel oder chemische Produkte gefördert werden!
• Die Pumpe darf auf keinen Fall trocken laufen! Überprüfen Sie daher in regelmäßigen Abständen die Funktionalität des
Schwimmschalters.
• Die Wassertemperatur darf keinesfalls mehr als 35 °C betragen.
• Die Pumpe darf nicht Frost ausgesetzt werden.
• Bewahren Sie die Pumpe an einem trockenen, nicht zu kalten Ort auf. Reinigen Sie sie vor längerer Lagerung.
• Verwenden Sie niemals die Pumpe innerhalb eines Teichs.
• Achten Sie darauf, dass während des Betriebs der Pumpe der Netzstecker immer erreichbar ist.
• Ziehen Sie nicht am Kabel, um den Stecker aus der Steckdose zu ziehen. Setzen Sie das Kabel nicht Hitze, Öl oder scharfen
Kanten aus.
• Stellen Sie vor jeder Benutzung sicher, dass das Netzanschlusskabel und das Verlängerungskabel keine Schäden haben.
Sollten die Kabel beschädigt sein, müssen diese durch den Hersteller, seinen Kundendienst oder eine ähnlich qualizierte
Person ersetzt werden, um Gefährdungen zu vermeiden.
• Achten Sie darauf, dass sämtliche verwendete Verlängerungskabel und Kabeltrommeln ausdrücklich spritzwassergeschützt
und für den Außenbereich bestimmt sind. Rollen Sie bei Verwendung einer Kabeltrommel das Kabel immer ganz ab und
überprüfen Sie es auf Schäden.
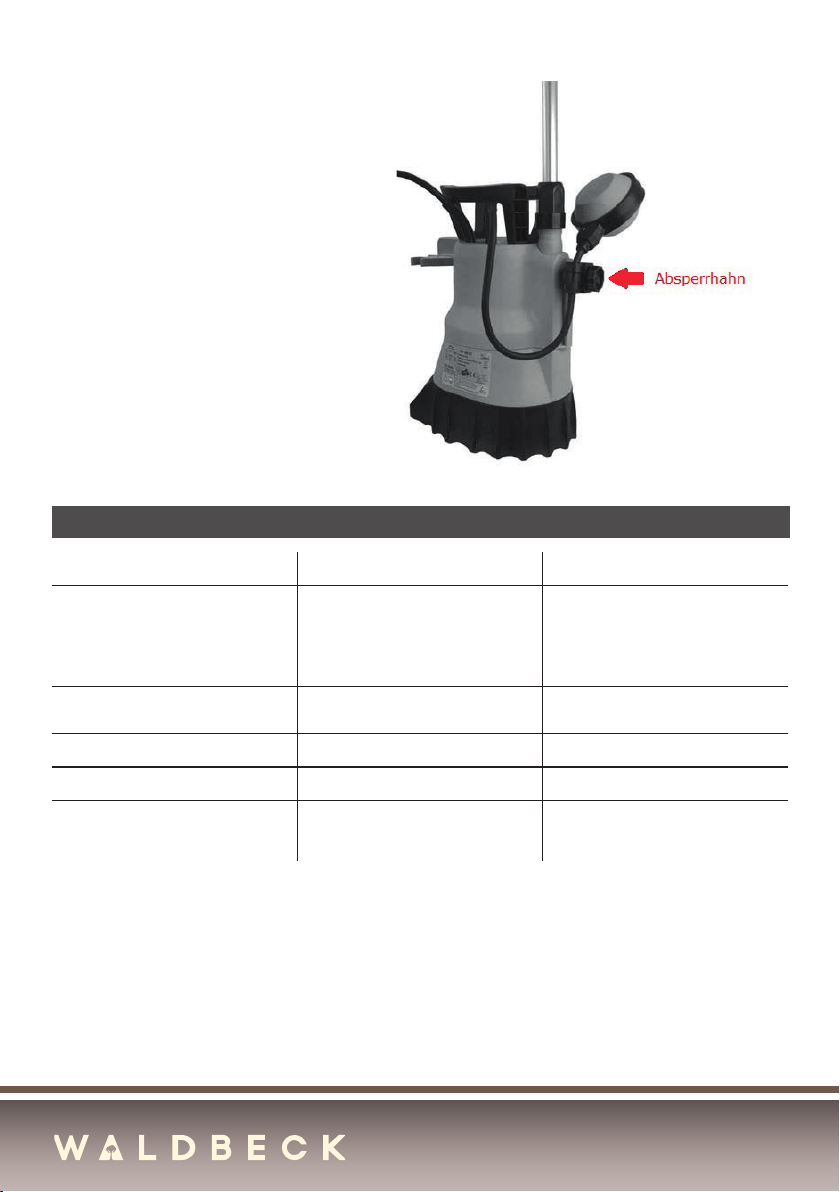
• Ziehen Sie vor Arbeiten am Gerät, bei Pausen und Nichtgebrauch den Netzstecker aus der Steckdose.
• Lassen Sie das Gerät während des Pumpvorgangs nicht unbeaufsichtigt, um automatisches Abschalten oder Trockenlaufen der
Pumpe zu verhindern! Beachten Sie diese Sicherheitswarnungnicht, erlöschen sämtliche Garantie- und Haftungsansprüche!
• Benutzen Sie nur originales, für das Gerät geeignetes Zubehör und nehmen Sie keine Veränderungen am Gerät vor. Lesen Sie
das Kapitel „Reinigung, Wartung und Lagerung“ gründlich durch, um eine fehlerfreie Funktion der Pumpe auch in der Zukunft
zu garantieren. Alle darüber hinaus gehenden Eingrie in das Gerät sind von einer qualizierten Elektrofachkraft auszuführen.
• Dieses Gerät kann von Kindern ab 8 Jahren und darüber sowie von Personen mit verringerten physischen, sensorischen
oder mentalen Fähigkeiten oder Mangel an Erfahrung und Wissen benutzt werden, wenn sie beaufsichtigt oder bezüglich des
sicheren Gebrauchs des Gerätes unterwiesen wurden und die daraus resultierenden Gefahren verstehen. Kinder dürfen nicht
mit dem Gerät spielen. Reinigung und Benutzerwartung dürfen nicht von Kindern ohne Beaufsichtigung durchgeführt werden.
Vor Inbetriebnahme
• Niemals die Pumpe in Betrieb nehmen, wenn Menschen oder Tiere im Regenfass sind.
• Die Pumpe darf nicht von Personen mit verminderten körperlichen, physischen und psychischenFähigkeiten und nicht von
Kindern verwendet werden. Diese sollten keinesfalls in Nähe der Pumpe alleine gelassen werden oder mit dieser spielen. Es
sollte immer eine Person anwesend sein, die mit dem Umgang des Geräts vertraut ist.
• Eine Benutzung durch unerfahrene Personen sollte erst nach einer sorgfältigen Unterweisung erfolgen.
• Die Pumpe darf nur mit Wasser und nicht mit anderen Flüssigkeiten verwendet werden.
• Nicht mit sandigem Wasser benutzen. Dies kann die Mechanik und die Dichtungen der Pumpe beschädigen.
• Die Pumpe darf niemals trocken laufen. Dies hätte eine sofortige Schädigung der Pumpe zur Folge, die nicht durch die
Gewährleistung abgedeckt wäre.
• Nehmen Sie keine Montagearbeiten vor, wenn der Netzstecker nicht gezogen wurde.
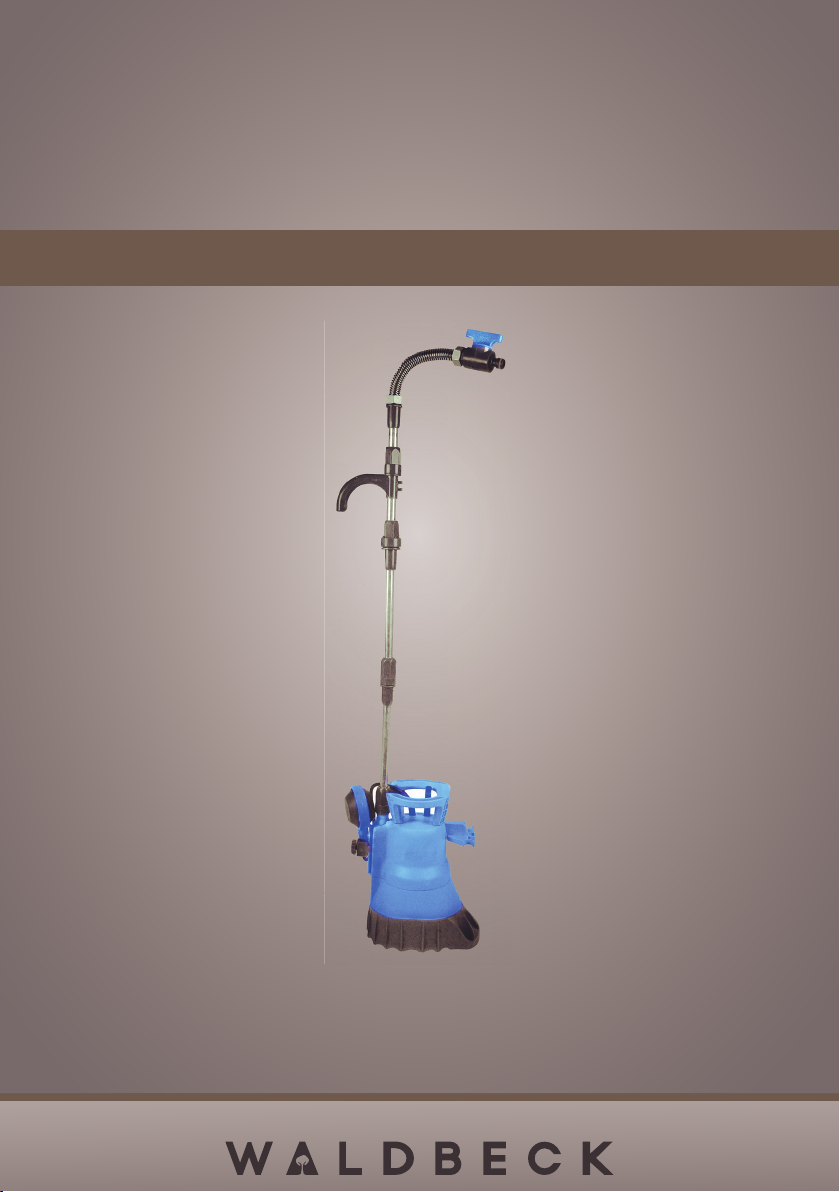
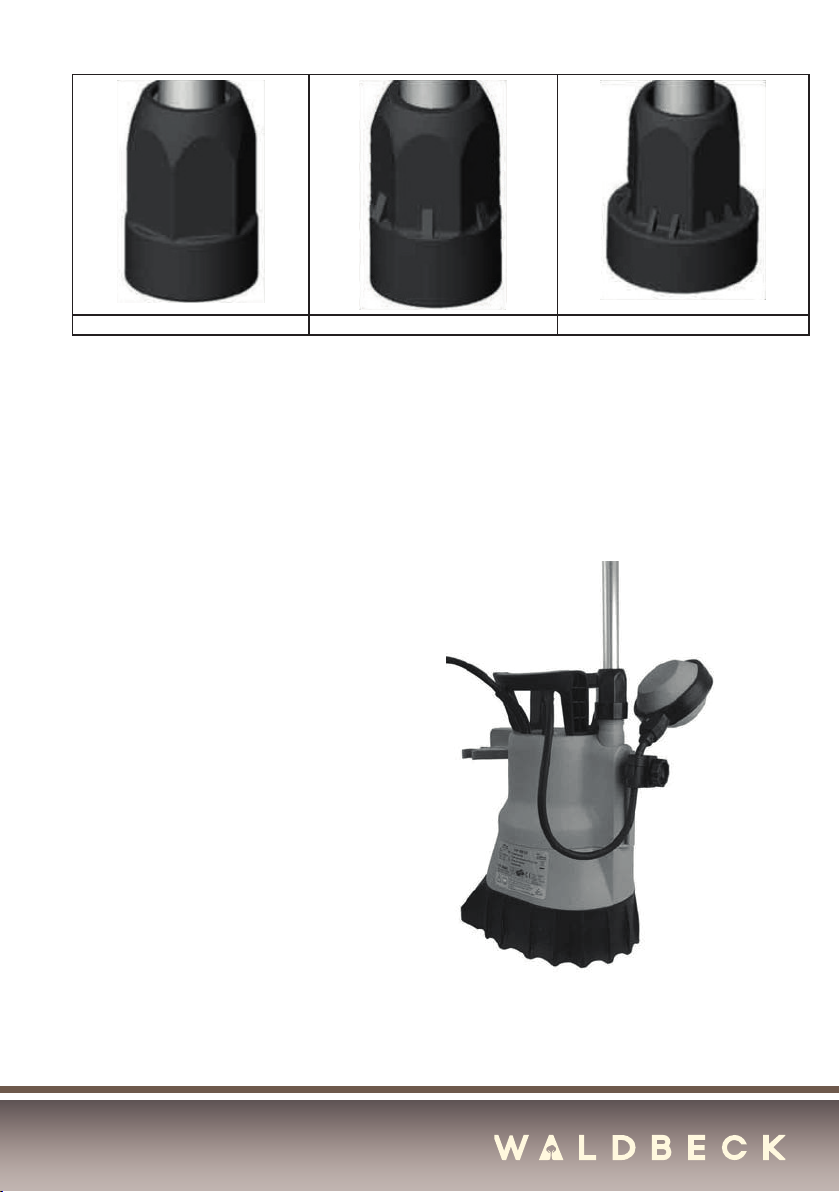
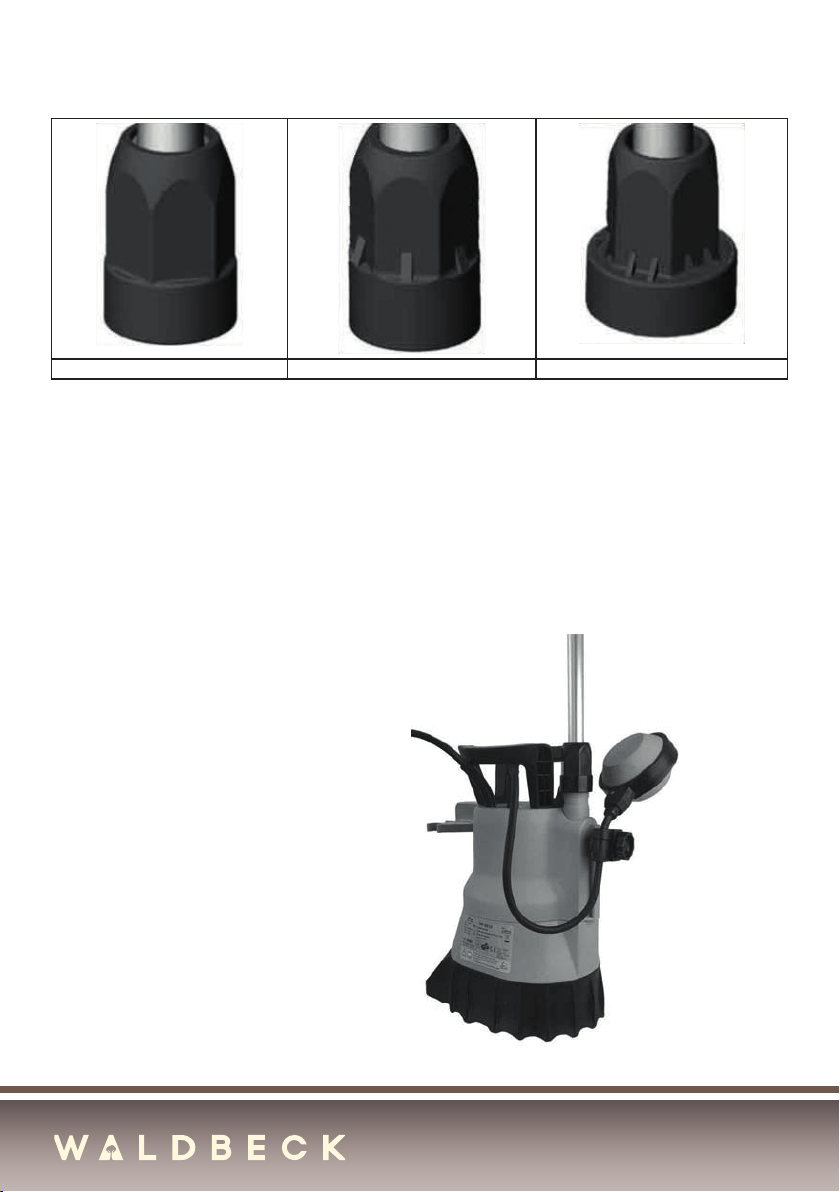
Montage und Inbetriebnahme
Einsetzen der O-Ringe/Gummidichtungen
Drücken Sie
• je einen kleinen Ring in einen Schraubsockel der Aluminiumstangen.
• die ache Gummidichtung in den Schraubsockel des exiblen Rohrs.
Verschrauben der Aluminiumstangen
4