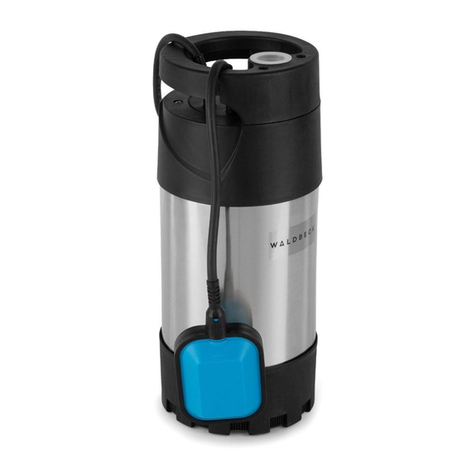
Waldbeck 10031571 User manual

10031571
Tauchpumpe

2
Sehr geehrter Kunde,
wir gratulieren Ihnen zum Erwerb Ihres Gerätes. Lesen Sie die folgenden Hinweise sorgfäl-
tig durch und befolgen Sie diese, um möglichen Schäden vorzubeugen. Für Schäden, die
durch Missachtung der Hinweise und unsachgemäßen Gebrauch entstehen, übernehmen
wir keine Haftung.
Technische Daten
Artikelnummer 10031571
Stromversorgung 230 V ~ 50 Hz
Leistung 400 W
Maximale Tauchtiefe 5 m
Maximale Förderhöhe 6 m
Minimale Einschalthöhe 8 mm
Maximale Absaugung bis 1 mm
Maximale Wassertemperatur 35 °C
Sicherheitshinweise
• Schließen Sie das Gerät nur an geerdete Steckdosen mit einer Spannung von 230 V ~
50 Hz an.
• Benutzen Sie die Pumpe nicht, solange sich Menschen im Wasser benden.
• Die Pumpe muss mit einem Fehlerstromschutzschalter betrieben werden. Der maximale
Fehlerstrom darf 30 mA nicht überschreiten.
• Falls das Netzkabel oder der Stecker beschädigt sind, müssen sie vom Hersteller, einem
autorisierten Fachbetrieb oder einer ähnlich qualizierten Person ersetzt werden.
• Lassen Sie die Pumpe in Anwesenheit von Kindern nicht unbeaufsichtigt und achten Sie
darauf, dass Kinder nicht damit spielen.
• Kinder ab 8 Jahren, physisch und körperlich eingeschränkte Menschen sollten das Gerät
nur benutzen, wenn sie vorher von einer für Sie verantwortlichen Aufsichtsperson aus-
führlich mit den Funktionen und den Sicherheitsvorkehrungen vertraut gemacht wurden
und die Gefahren und Risiken verstanden haben. Kinder dürfen nicht mit dem Gerät spie-
len. Kinder dürfen das Gerät nur unter Aufsicht reinigen und pegen.
• Falls sich die gefördete Flüssigkeit aufgrund eines Schmiersto-Lecks trübt, wenden Sie
sich zur Kontrolle und Reparatur an einen Fachbetrieb in Ihrer Nähe.
• Wenn Sie sich mit dem elektronischen Anschluss und den Schutzvorkehrungen unsicher
sind, ziehen Sie einen Elektriker zu Rate.

Geräteübersicht
1 Oberes Gehäuseteil
2 Sensorschalter
3 Unteres Gehäuseteil
4 Schlauchanschluss-Stutzen
5 Basis
Hinweis: es kann sein, dass das abge-
bildete Gerät leicht von Ihrem Gerät ab-
weicht, abhängig vom Modell.
Installation und Anschluss
1. Bestimmungsgemäßer Gebrauch
• Die Tauchpumpe ist für die Zirkulation von Wasser mit einer maximalen Temperatur von
35 °C bestimmt.
• Die Pumpe darf nicht für andere Flüssigkeiten, insbesondere Kraftstoe, Reinigungsüs-
sigkeiten und chemische Flüssigkeiten verwendet werden.
2. Installation
Sie können die Pumpe auf 2 Arten installieren:
• Stationär mit einem festen Rohr.
• Stationär mit einem exiblen Schlauch.
3

4
Wichtige Hinweise zur Installation:
• Installieren Sie die Pumpe nur wenn vorher ein Schlauch angebracht wurde.
• Die Pumpe darf nicht am Kabel befestigt werden. Hängen Sie sie immer am Gri auf oder
stellen Sie sie eben auf den Untergrund.
• Um sicherzustellen, dass die Pumpe ordnungsgemäß funktioniert, muss der Boden des
unterhalb der Pumpe frei von Schlamm und Schmutz aller Art gehalten werden.
• Wenn der Wasserstand zu schell sinkt, trocknet der Schlamm im Abpump-Schacht schnell
aus und bewirkt möglicherweise, dass die Pumpe nicht anspringt. Überprüfen Sie die
Pumpe daher in regelmäßigen Abständen und führen Sie einen Probe-Start durch.
• Der Schwimmer ist so eingestellt, dass die Pumpe umgehend gestartet werden kann.
WICHTIG: Falls Sie mit der Pumpe einen Schacht auspumpen, sollte dieser mindestens
40x40x50 cm groß sein, damit sich der Sensorschalter/Schwimmerschalter frei bewegen
kann.
3. Elektrischer Anschluss
• Die Tauchpumpe ist einem stoßfesten Stecker ausgestattet. Die Pumpe ist für den An-
schluss an eine 230 V ~ 50 Hz STeckdose ausgelegt.
• Vergewissern Sie sich, dass die Steckdose ausreichend gesichert ist (min. 6A) und sich in
einem gutem Zustand bendet. Sobald Sie den Stecker in die Steckdose stecken, startet
die Pumpe.
• Verwenden Sie die Pumpe niemals mit beschädigtem Stecker oder Steckdose.
WICHTIG: Reparaturen an den elektrischen Anschlüssen der Pumpe dürfen nur von einem
Elektrofachmann oder dem Kundendienst durchgeführt werden.
4. Einsatzbereiche
• Die Pumpe eignet sich vorrangig zum Auspumpen von Kellern. Wird die Pumpe in einem
Schacht installiert, kann sie vor Überlauf und Überschwemmung schützen.
• Daneben kann die Pumpe an allen orten eingesetzt werden, an denen Wasser von einem
Ort zum anderen transportiert werden muss, beispielsweise in Landwirtschaft, Garten-
bau, Sanitär und ähnlichen Bereichen.

5
Inbetriebnahme und Bedienung
Vor dem Betrieb
Nachdem Sie die Pumpe erfolgreich installiert haben, beachten Sie die folgenden Pumpe,
bevor Sie sie in Betrieb nehmen:
• Versichern Sie sich, dass die Basis eben auf dem Schachtuntergrund steht.
• Versichern Sie sich, dass das Kabel ordentlich verlegt wurde.
• Versichern Sie sich, dass die Steckdose über eine Spannung von 230 V ~ 50 Hz verfügt.
• Versichern Sie sich, dass sich die Steckdose in einem guten Zustand bendet.
• Versichern Sie sich, dass Stecker und Steckdose nicht nass werden können.
• Versichern Sie sich, dass die Pumpe nicht trocken läuft.
Sobald Sie das Gerät ordnungsgemäß platziert und überprüft haben, stecken Sie den Ste-
cker in die Steckdose und die Pumpe startet automatisch.
Auto-Betrieb
• Der Ein-/Ausschaltpunkt kann stufenlos eingestellt werden. Lösen Sie dazu zuerst die
Schraube, die seitlich an der Pumpe angebracht ist. Die der automatischen Ein-/Aus-
schaltpunkt wird durch Verstellen des Schwimmerschalters nach oben oder unten einge-
stellt.
Prüfen Sie vor dem Start der Pumpe folgendes:
• Der Schwimmerschalter muss so installiert werden, dass der Wasserpegel den Ein- und
Ausschaltpunkt erreicht und die Pumpe schnell reagiert. Um dies zu überprüfen, platzie-
ren Sie die Pumpe in ein mit Wasser gefülltes Gefäß und stecken Sie den Stecker ein.
Heben Sie den Schwimmerschalter vorsichtig von Hand an und senken Sie ihn wieder ab.
Achten Sie darauf, ob die Pumpe dabei an- und aus geht.
• Achten Sie auf ausreichenden Abstand zwischen Schwimmerschalter und Gri. Ein ord-
nungsgemäßer Betrieb ist nur gewährleistet wenn der Abstand groß genug ist.
• Wenn Sie den Schwimmerschalter einstellen, schalten Sie die Pumpe immer aus, indem
Sie den Stecker ziehen, andernfalls besteht die Gefahr, dass Sie trockenläuft.

6
Reinigung und Pege
• Ziehen Sie IMMER zuerst den Stecker aus der Steckdose, bevor Sie das Gerät reinigen.
• Falls die Pumpe öfter hin- und her transportiert wird, reinigen Sie sie nach jedem Ge-
brauch mit klarem Wasser.
• Falls Sie das Gerät stationär installieren, überprüfen und reinigen Sie das Gerät alle 3
Monate.
• Entfernen Sie Rückstände und Faserpartikel, die sich im Inneren des Pumpengehäuses
angesammelt haben, unter ießendem Wasser oder mit dem Gartenschlauch.
• Befreien Sie den Schachtuntergrund, auf dem die Pumpe steht, alle 3 Monate von
Schlamm, Schmutz und anderen Ablagerungen.
• Entfernen Sie Verschmutzungen am Schwimmerschalter mit klarem Wasser.
Fehlersuche und Fehlerbehebung
Problem Mögliche Ursache Lösungsvorschlag
Die Pumpe startet
nicht.
Das Gerät ist nicht
angeschlossen.
Stecken Sie den Stecker in die
Steckdose.
Der Schwimmerschalter
reagiert nicht.
Verändern Sie die Position des
Schwimmerschalters.
Es ießt kein Wasser. Das Wassereinlass-Sieb ist
verstopft.
Reinigen Sie das Einlass-Sieb.
Der Schlauch ist verbogen. Installieren Sie den Schlauch
richtig.
Die Pumpe geht nicht
aus.
De Schwimmer kann nicht
nach unten sinken.
Installieren Sie die Pumpe sicher
auf dem Schachtuntergrund.
Unzureichender
Wasseruss.
Das Wassereinlass-Sieb ist
verstopft.
Reinigen Sie das Einlass-Sieb.
Das Wasser enthält zu viele
Schmutzpartikel.
Reinigen Sie die Pumpe und den
Schachtuntergrund.
Die Pumpe geht nach
kurzer Zeit aus.
Der Thermoschutzschalter
springt aufgrund
schmutzigen Wassers an.
Ziehen Sie den Stecker und
reinigen Sie die Pumpe.
Das Wasser ist zu warm. Achten Sie darauf, dass die
Wassertemperatur unter 35 °C
liegt.

7
Hinweise zur Entsorgung
Be ndet sich die linke Abbildung (durchgestrichene Mülltonne auf Rädern)
auf dem Produkt, gilt die Europäische Richtlinie 2012/19/EU. Diese Produk-
te dürfen nicht mit dem normalen Hausmüll entsorgt werden. Informieren
Sie sich über die örtlichen Regelungen zur getrennten Sammlung elektri-
scher und elektronischer Gerätschaften. Richten Sie sich nach den örtlichen
Regelungen und entsorgen Sie Altgeräte nicht über den Hausmüll. Durch die
regelkonforme Entsorgung der Altgeräte werden Umwelt und die Gesund-
heit ihrer Mitmenschen vor möglichen negativen Konsequenzen geschützt.
Materialrecycling hilft, den Verbrauch von Rohsto en zu verringern.
Konformitätserklärung
Hersteller: Chal-Tec GmbH, Wallstraße 16, 10179 Berlin, Deutschland.
Dieses Produkt entspricht den folgenden Europäischen Richtlinien:
2014/30/EU (EMV)
2014/35/EU (LVD)
2011/65/EU (RoHS)

8
Dear Customer,
Congratulations on purchasing this equipment. Please read this manual carefully and take
care of the following hints to avoid damages. Any failure caused by ignoring the mentioned
items and cautions mentioned in the instruction manual are not covered by our warranty
and any liability.
Technical Data
Item number 10031571
Power supply 230 V ~ 50 Hz
Power consumption 400 W
Max immersion depth 5 m
Max delivery head 6 m
Min switch-on head 8 mm
Max suction up to 1 mm
Max water temperature 35 °C
Safety Instructions
• The pump can be connected any shock-proof plug which has been installed according to
regulations. The plug must have a supply voltage of 230 V~, 50 Hz.
• The pump must not be used when people are in the water;
• The pump must be supplied through a residual current device (RCD) having a rated resi-
dual operating current not exceeding 30mA
• If the supply cord is damaged, it must be replaced by the manufacturer, its service agent
or similarly qualied persons in order to avoid a hazard.
• Children should be under close supervision to prevent them from playing with the pump.
• This appliance can be used by children aged from 8 years and above and persons with re-
duced physical, sensory or mental capabilities or lack of experience and knowledge if they
have been given supervision or instruction concerning use of the appliance in a safe way
and understand the hazards involved. Children shall not play with the appliance. Cleaning
and user maintenance shall not be made by children without supervision.
• pollution of the liquid could occur due to leakage of lubricants
• Please contact your electrician!

Product Description
1 Upper housing
2 Switch
3 Lower housing
4 Output tie-in
5 Base
Remark: The image shown here is indi-
cative only. If there is inconsistency bet-
ween the image and the actual product,
the actual product shall govern.
Installation and Mains Supply
1. Consistency
• Your submersible pump is designated for the circulation of water with maximum tempe-
rature of 35 °C.
• This pump may not be used for other uids, especially motor fuels, cleaning uids, and
other chemical products!
2. Installation
The submersible motor pump is installed as follows:
• In a stationary position with xed pipeline or.
• In a stationary position with a exible Hose pipe.
9

10
Important Hints on Installation:
• You should never install the pump by suspending it unsupported from its delivery pipe or
power cable.
• The submersible motor pump must be suspended from the specially provided handle or
be placed on the bottom of the shaft.
• To guarantee that the pump works properly, the bottom of the shaft must be kept free of
sludge and dirt of all kinds.
• If the level of water sinks too far, any sludge in the shaft will dry out quickly and stop the
pump from starting up. It is necessary, therefore, to check the submersible motor pump
regularly (by carrying out start-up tests).
• The oater is adjusted in a way that the pump can immediately be started.
NOTE: The pump shaft should have minimum dimensions of 40x40X50cm, so that the oa-
ting switch can move freely.
3. Mains Supply
• Your new submersible pump is equipped with a shockproof plug according to regulations.
The pump is designed to be connected to a 230 V~, 50Hz safety socket.
• Make sure that the socket is suciently secured (min. 6 Amp.) and is in excellent condi-
tion. Introduce the plug into the socket and the pump is ready to go.
• If the mains cable or plug suers any damage from external action, repairs to the cable
are prohibited.
NOTE: This work may only be performed by a qualied electrician or customer service.
4. Areas of Use
• This pump is used primarily as cellar pump. When installed in a shaft, this pump provides
protection from ooding.
• They are also used wherever water has to be moved from one place to another, e.g. in the
home, agriculture, horticulture, plumbing and many other applications.

11
Use and Operation
Before Use
After having read these instructions carefully, you can set your pump to work, reconsidering
the following item:
• Check if the pump rests on the ground of the shaft.
• Check of pressure cord has been attached properly.
• Check if electrical connection is 230 V~, 50Hz.
• Check if socket is in good condition.
• Make sure that water and humidity can never come to the mains supply.
• Avoid pump running dry.
Once you have properly placed and inspected the unit, plug the plug into the socket and the
pump will automatically start.
Automatic Operation
• The ON/OFF switching point can be innitely adjustment facility. For this purpose you
must rst slacken the screw. The switching dierential can be innitely adjusted by ex-
tending or shortening the oating cable.
Before you put the pump into operation, please check the following:
• The oat switch must be installed so that the level of the ON operating point and the level
of the OFF operating point can be reached easily and with little force. To check this, place
the pump in a vessel lled with water, raise the oat switch carefully by hand and then
lower it again. As you do so, note whether the pump switches on and o.
• Make sure that the distance between the oat switch head and the latching holder is not
too small. Proper operation is not guaranteed if the gap is too small.
• When you set the oat switch, make sure that it does not touch the base before the pump
switches o. Caution! Risk of dry-running.

12
Cleaning and Care
• Remove the mains plug before all maintenance work.
• In the event that the pump is often transported in the course of operation, it should be
cleaned out with clear water after every use.
• In case of stationary installation, the function of the loading switch should be checked
every 3 months.
• All brous particles which may have built-up inside the pump housing should be removed
with a water jet.
• Every 3 months the shaft ground and as should be cleaned from mud.
• Remove deposits on the oater with clear water.
Troubleshooting
Problem Possible Cause Suggested Solution
Pump does not start. Power supply not
connected.
Check power supply.
Floater does not switch. Raise position of oating switch.
No ow. Inlet sieve is clogged. Clean inlet sieve.
Pressure hose in bent. Reset hose.
Pump does not switch
o.
Floater cannot sink down. Place pump properly on shaft
ground
Insucient ow. Inlet sieve is clogged. Clean inlet sieve.
Reduced pumping capacity
by dirty and abrasive water.
Clean pump and shaft bottom.
Pump switches of
after short operating
period.
Thermal cutout stops
pumps due to dirty water.
Remove mains plug. Clean pump
and shaft
Water too hot. Thermal
cutout stops pump.
Make sure that water temperature
of max. 35°C is not exceed

13
Hints on Disposal
According to the European waste regulation 2012/19/EU this symbol on the
product or on its packaging indicates that this product may not be treated
as household waste. Instead it should be taken to the appropriate collection
point for the recycling of electrical and electronic equipment. By ensuring
this product is disposed of correctly, you will help prevent potential nega-
tive consequences for the environment and human health, which could
otherwise be caused by inappropriate waste handling of this product. For
more detailled information about recycling of this product, please contact
your local council or your household waste disposial service.
Declaration of Conformity
Producer: Chal-Tec GmbH, Wallstraße 16, 10179 Berlin, Germany.
This product is conform to the following European Directives:
2014/30/EU (EMC)
2014/35/EU (LVD)
2011/65/EU (RoHS)

14
Estimado cliente:
Le felicitamos por la adquisición de este producto. Lea atentamente el siguiente manual y
siga cuidadosamente las instrucciones de uso con el n de evitar posibles daños. La empre-
sa no se responsabiliza de los daños ocasionados por un uso indebido del producto o por
haber desatendido las indicaciones de seguridad.
Datos técnicos
Número de artículo 10031571
Suministro eléctrico 230 V ~ 50 Hz
Potencia 400 W
Profundidad máxima de inmersión 5 m
Altura de extracción máxima 6 m
Altura mínima de activación 8 mm
Aspiración máxima hasta 1 mm
Temperatura máxima del agua 35 °C
Indicaciones de seguridad
• Conecte el aparato solamente a tomas de corriente con una tensión de 220 V ~ 50 Hz.
• No utilice la bomba mientras haya personas en el agua.
• La bomba debe ponerse en marcha por medio de un dispositivo de corriente residual. La
corriente residual máxima no debe superar los 30mA.
• Si el cable de alimentación o el enchufe están dañados, deberán ser sustituidos por el
fabricante, un servicio técnico autorizado o una persona igualmente cualicada.
• No deje la bomba desatendida en presencia de niños y asegúrese de que los niños no
juegan con ella.
• Los niños mayores de 8 años y las personas con discapacidades físicas o psíquicas
solamente podrán utilizar el aparato si han sido previamente instruidas sobre su uso y
conocen las indicaciones de seguridad y han entendido los riesgos y peligros de su uso.
Los niños no deben jugar con el aparato. Los niños solamente podrán limpiar el aparato
y realizar labores de mantenimiento si se encuentran bajo supervisión.
• Si el líquido bombeado se contamina con una fuga de lubricante, contacte con un servicio
técnico de su zona para que reparen y controlen la instalación.
• Si no está seguro de la conexión eléctrica y de las disposiciones de protección, pida
asesoramiento a un electricista.

Descripción del aparato
1 Cubierta
2 Interruptor del sensor /
Interruptor del otador
3 Bomba
4 Soportes de la conexión de la
manguera
5 Base
Advertencia: es posible que el dispo-
sitivo que se ilustra varíe ligeramente
con respecto a su aparato en función
del modelo.
Instalación y conexión
1. Uso apropiado
• La bomba de inmersión es adecuada para hacer circular el agua a una temperatura
máxima de 35 °C.
• La bomba no debe emplearse para otros líquidos, especialmente carburantes, productos
de limpieza ni químicos.
2. Instalación
Puede instalar la bomba de dos maneras:
• Fija con una tubería sólida.
• Fija con una tubería exible.
15

16
Indicaciones importantes de instalación:
• Instale la bomba solo cuando se haya montado previamente una manguera.
• La bomba no debe jarse al cable. Cuélguela siempre por su asa o colóquela en una
supercie plana.
• Para asegurarse de que la bomba funciona correctamente, el suelo bajo la bomba debe
estar libre de lodo y suciedad de todo tipo.
• Si el nivel del agua baja demasiado rápido, el lodo de secará en el oricio de drenaje
y provocará posiblemente que la bomba no arranque. Por ello, compruebe la bomba
regularmente y realice un arranque de prueba.
• El otador se ha ajustado para que la bomba pueda iniciarse inmediatamente.
IMPORTANTE: Si bombea un pozo con la bomba, este deberá tener unas dimensiones mí-
nimas de 40x40x50 cm para que el interruptor del sensor y del otador se muevan libre-
mente.
3. Conexión eléctrica
• La bomba de inmersión está equipada con un enchufe resistente a golpes. La bomba se
ha diseñado para su conexión a una toma de corriente 220 V ~ 50 Hz.
• Asegúrese de que la toma de corriente está lo sucientemente asegurada (mín. 6A) y
que se encuentra en buen estado. Cuando conecte el enchufe a la toma de corriente, la
bomba arrancará.
• Nunca utilice la bomba con un enchufe o una toma de corriente averiados.
IMPORTANTE: Las reparaciones en las conexiones eléctricas de la bomba deberán ser rea-
lizadas exclusivamente por electricistas o por el servicio de atención al cliente.
4. Áreas de uso
• La bomba está especialmente indicada para bombear sótanos. Si la bomba se instala en
un sótano, puede proteger de inundaciones y rebosamientos.
• Asimismo, la bomba puede utilizarse en todos aquellos lugares en los que deba
transportarse agua de un lado a otro, por ejemplo, en zonas agrícolas, de jardinería,
sanitarias o similares.

17
Puesta en marcha y uso
Antes de su uso
Después de haber instalado satisfactoriamente la bomba, siga estas indicaciones antes de
ponerla en marcha:
• Asegúrese de que la base se sitúa en el fondo del pozo.
• Asegúrese de que el cable esté colocado correctamente.
• Asegúrese de que la toma de corriente cuente con una tensión de 230 V ~ 50 Hz.
• Asegúrese de que la toma de corriente se encuentre en buen estado.
• Asegúrese de que el enchufe y la toma de corriente no se mojen.
• Asegúrese de que la bomba no funcione en seco.
Cuando haya colocado y comprobado el aparato, conecte el enchufe a la toma de corriente
y la bomba arrancará automáticamente.
Funcionamiento automático
• El punto de encendido y apagado puede regularse por etapas. Primero suelte los tornillos
instalados en el lateral de la bomba. El punto de encendido y apagado automático se
ajustará regulando el interruptor del otador hacia arriba o hacia abajo.
Antes de arrancar la bomba, compruebe lo siguiente:
• El interruptor del otador deberá instalarse de tal manera que el nivel del agua alcance el
punto de encendido y apagado y la bomba reaccione rápidamente.
• Para comprobarlo, coloque la bomba en un recipiente lleno de agua y enchúfela. Levante
con cuidado el interruptor del otador con la mano y vuelva a bajarlo. Compruebe si la
bomba se enciende y se apaga.
• Garantice suciente espacio entre el interruptor del otador y el asa. Solo se garantizará
un uso correcto con una distancia suciente.
• Si ajusta el interruptor del otador, la bomba siempre se apagará desconectando el
enchufe; de lo contrario, existe el riesgo de que funcione en seco.

18
Limpieza y cuidado
• Antes de limpiar el aparato, apáguelo y desconéctelo de la toma de corriente.
• Si la bomba debe transportarse con frecuencia de un lado a otro, límpiela tras cada uso
con agua limpia.
• Si instala el aparato de manera ja, compruebe y limpie el aparato cada 3 meses.
• Retire los restos y las partículas de polvo acumuladas en el interior de la carcasa de la
bomba lavándola bajo el grifo o con una manguera de jardín.
• Limpie el fondo del pozo donde coloque la bomba cada tres meses para retirar el lodo,
suciedad y otros sedimentos.
• Retire la suciedad del interruptor del otador con agua limpia.
Detección y resolución de problemas
Problema Posible causa Solución recomendada
La bomba no arranca. El aparato no está
enchufado.
Conecte el enchufe a la toma de
corriente.
El interruptor del otador
no reacciona.
Modique la posición del
interruptor del otador.
No corre agua. El ltro de entrada de agua
está obstruido.
Limpie el ltro de entrada.
La manguera está doblada. Instale la manguera
correctamente.
La bomba no se
apaga.
El interruptor no puede
bajarse.
Instale la bomba de manera
sólida en el fondo del pozo.
Flujo de agua
insuciente.
El ltro de entrada de agua
está obstruido.
Limpie el ltro de entrada.
El agua contiene demasiada
suciedad.
Limpie la bomba y el fondo del
pozo.
La bomba se apaga
transcurridos unos
momentos.
El interruptor de protección
térmica salta como
consecuencia del agua
sucia.
Desconecte el enchufe y limpie la
bomba.
El agua está demasiado
caliente.
Asegúrese de que la temperatura
del agua se sitúe por debajo de
los 35 °C.

19
Indicaciones para la retirada del aparato
Si el aparato lleva adherida la ilustración de la izquierda (el contenedor de
basura tachado) entonces rige la normativa europea, directiva 2012/19/
UE. Este producto no debe arrojarse a un contenedor de basura común.
Infórmese sobre las leyes territoriales que regulan la recogida separada de
aparatos eléctricos y electrónicos. Respete las leyes territoriales y no arroje
aparatos viejos al cubo de la basura doméstica. Una retirada de aparatos
conforme a las leyes contribuye a proteger el medio ambiente y a las per-
sonas a su alrededor frente a posibles consecuencias perjudiciales para la
salud. El reciclaje ayuda a reducir el consumo de materias primas.
Declaración de conformidad
Fabricante: Chal-Tec GmbH, Wallstraße 16, 10179 Berlín (Alemania).
Este producto cumple con las siguientes directivas europeas:
2014/30/UE (EMC)
2014/35/UE (baja tensión)
2011/65/UE (refundición RoHS)

20
Cher client,
Toutes nos félicitations pour l’acquisition de ce nouvel appareil. Veuillez lire attentivement
les instructions suivantes de branchement et d’utilisation an d’éviter d’éventuels dom-
mages. Le fabricant ne saurait être tenu pour responsable des dommages dus au non-
respect des consignes de sécurité et à la mauvaise utilisation de l’appareil.
Fiche technique
Numéro d’article 10031571
Alimentation 230 V ~ 50 Hz
Puissance 400 W
Profondeur maximale d’immersion 5 m
Elévation maximale 6 m
Niveau minimum d’utilisation 8 mm
Aspiration maximale Jusqu’à 1 mm
Température maximale de l’eau 35 °C
Consignes de sécurité
• Branchez l’appareil uniquement sur des prises fournissant une tension de 230 V ~ 50 Hz.
• N’utilisez pas la pompe tant que des personnes se trouvent dans l’eau.
• La pompe doit être utilisée avec un disjoncteur de protection. Le courant de défaut maxi-
mum ne doit pas dépasser 30 mA.
• Si le câble secteur ou la che sont endommagés, faites-les remplacer par le fabricant un
service professionnel agréé ou une personne de qualication équivalente.
• En présence d’enfants ne laissez pas la pompe sans surveillance et assurez-vous que les
enfants ne jouent pas avec.
• Les enfants à partir de 8 ans ainsi que les personnes dont les capacités physiques, men-
tales ou sensorielles sont réduites, ou qui présentent une expérience et/ou des connais-
sances insusantes, peuvent utiliser l’appareil uniquement s’ils sont surveillés par la
personne responsable de leur sécurité, ou s’ils ont assimilé les consignes d’utilisation
de l’appareil que cette personne leur a fournies. Les enfants ne doivent pas jouer avec
l’appareil. Le nettoyage et l’entretien ne peuvent être eectués par des enfants que sous
surveillance.
• Si le liquide pompé devient trouble par suite d’une fuite de lubriant, adressez-vous à un
service professionnel de proximité pour vérication et réparation.
• Si vous n’êtes pas certain des branchements électroniques et des dispositifs de protec-
tion, demandez conseil à un électricien.
Table of contents
Languages:
Other Waldbeck Water Pump manuals
Popular Water Pump manuals by other brands

FlowMotion
FlowMotion 2001V Series Installation and operation manual

Hydromatic
Hydromatic SKV50 Installation and service manual

Davey
Davey CD40-40 Installation and operating instructions

Pentair
Pentair 123343 owner's manual

Graco
Graco SaniForce 2150e Operation

Wilo
Wilo Helix2.0-VE Installation and operating instructions