Walker WP5209LCD User manual

COLOUR TELEVISION WITH REMOTE CONTROL
OPERATING INSTRUCTIONS
WP5209LCD

English - 1 -
Contents
Preparation .......................................................... 1
Features .......................................................... 1
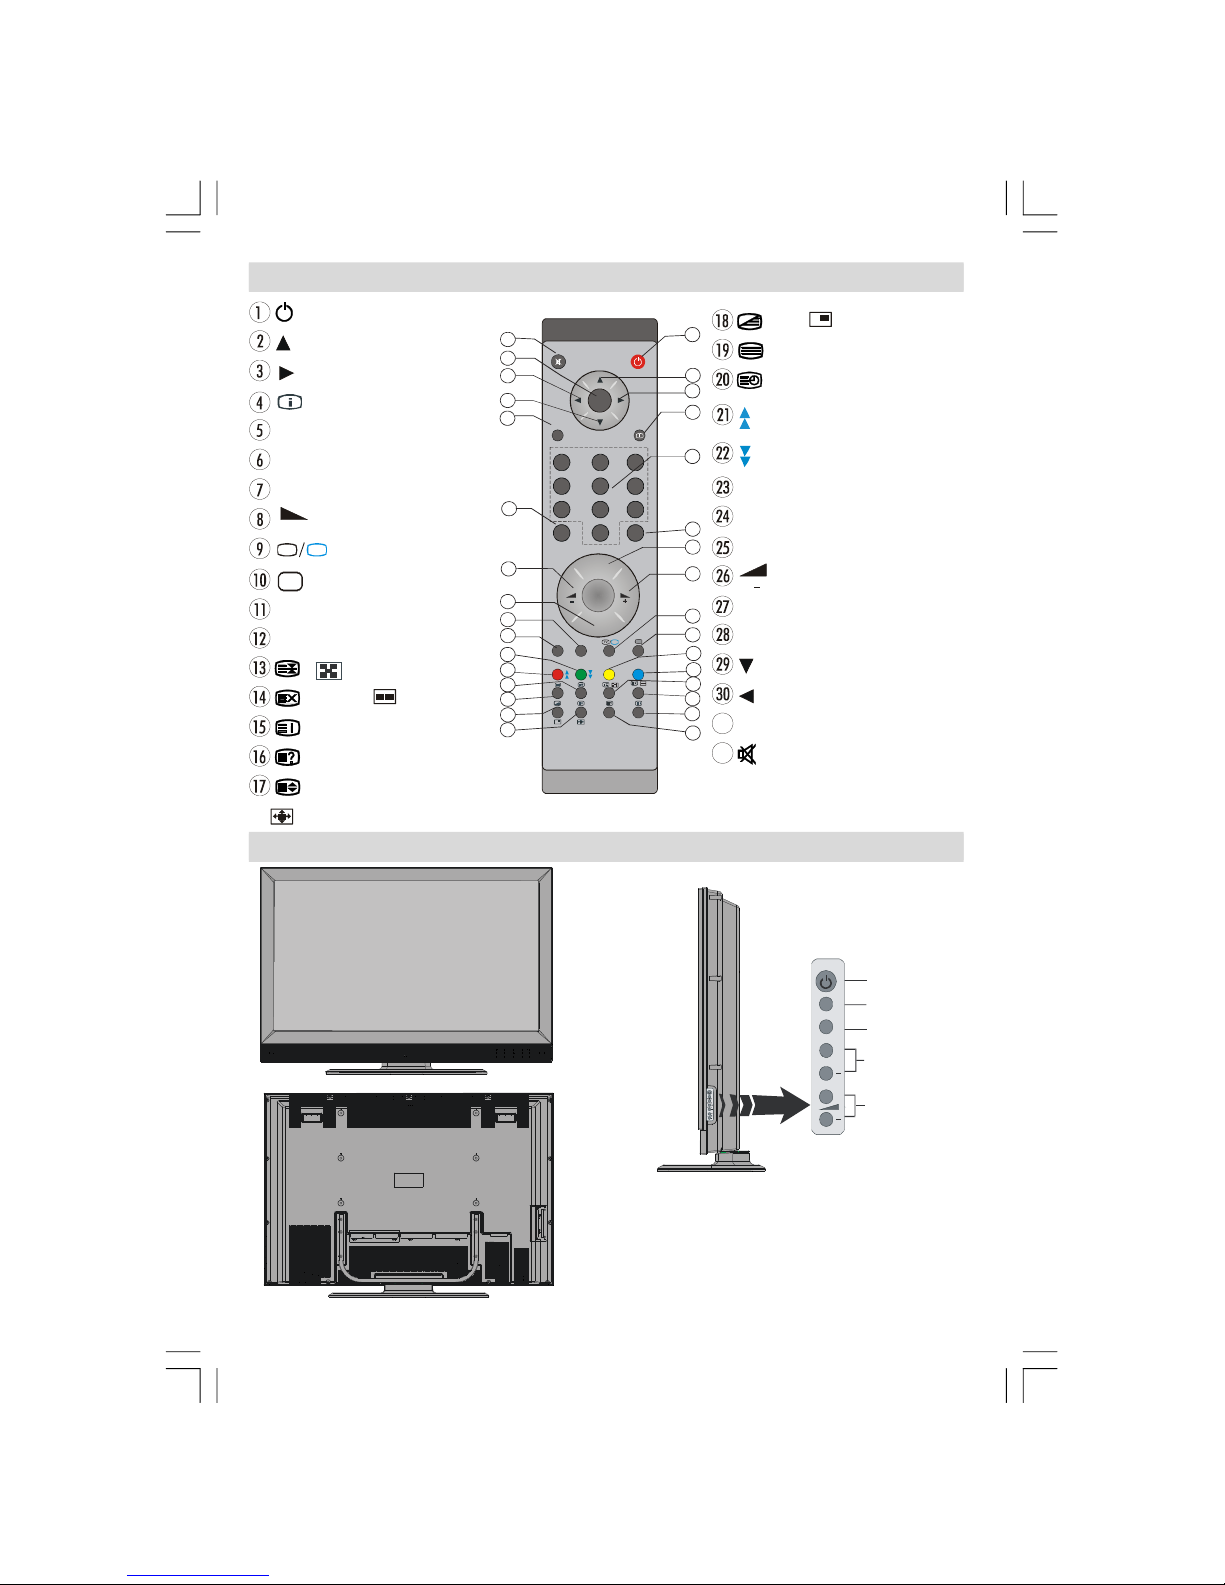
Remote Control Buttons ....................................... 2
LCD TV ................................................................ 2
Safety Precautions .............................................. 3
Before Switching On Your TV ............................. 4
Power Connection ........................................... 4
Connections To The Aerial Input Socket ........... 4
Inserting Batteries In The Remote Control
Handset ........................................................... 4
Switching The TV ON/OFF .................................. 4
To switch the TV on: ....................................... 4
To switch the TV off: ....................................... 4
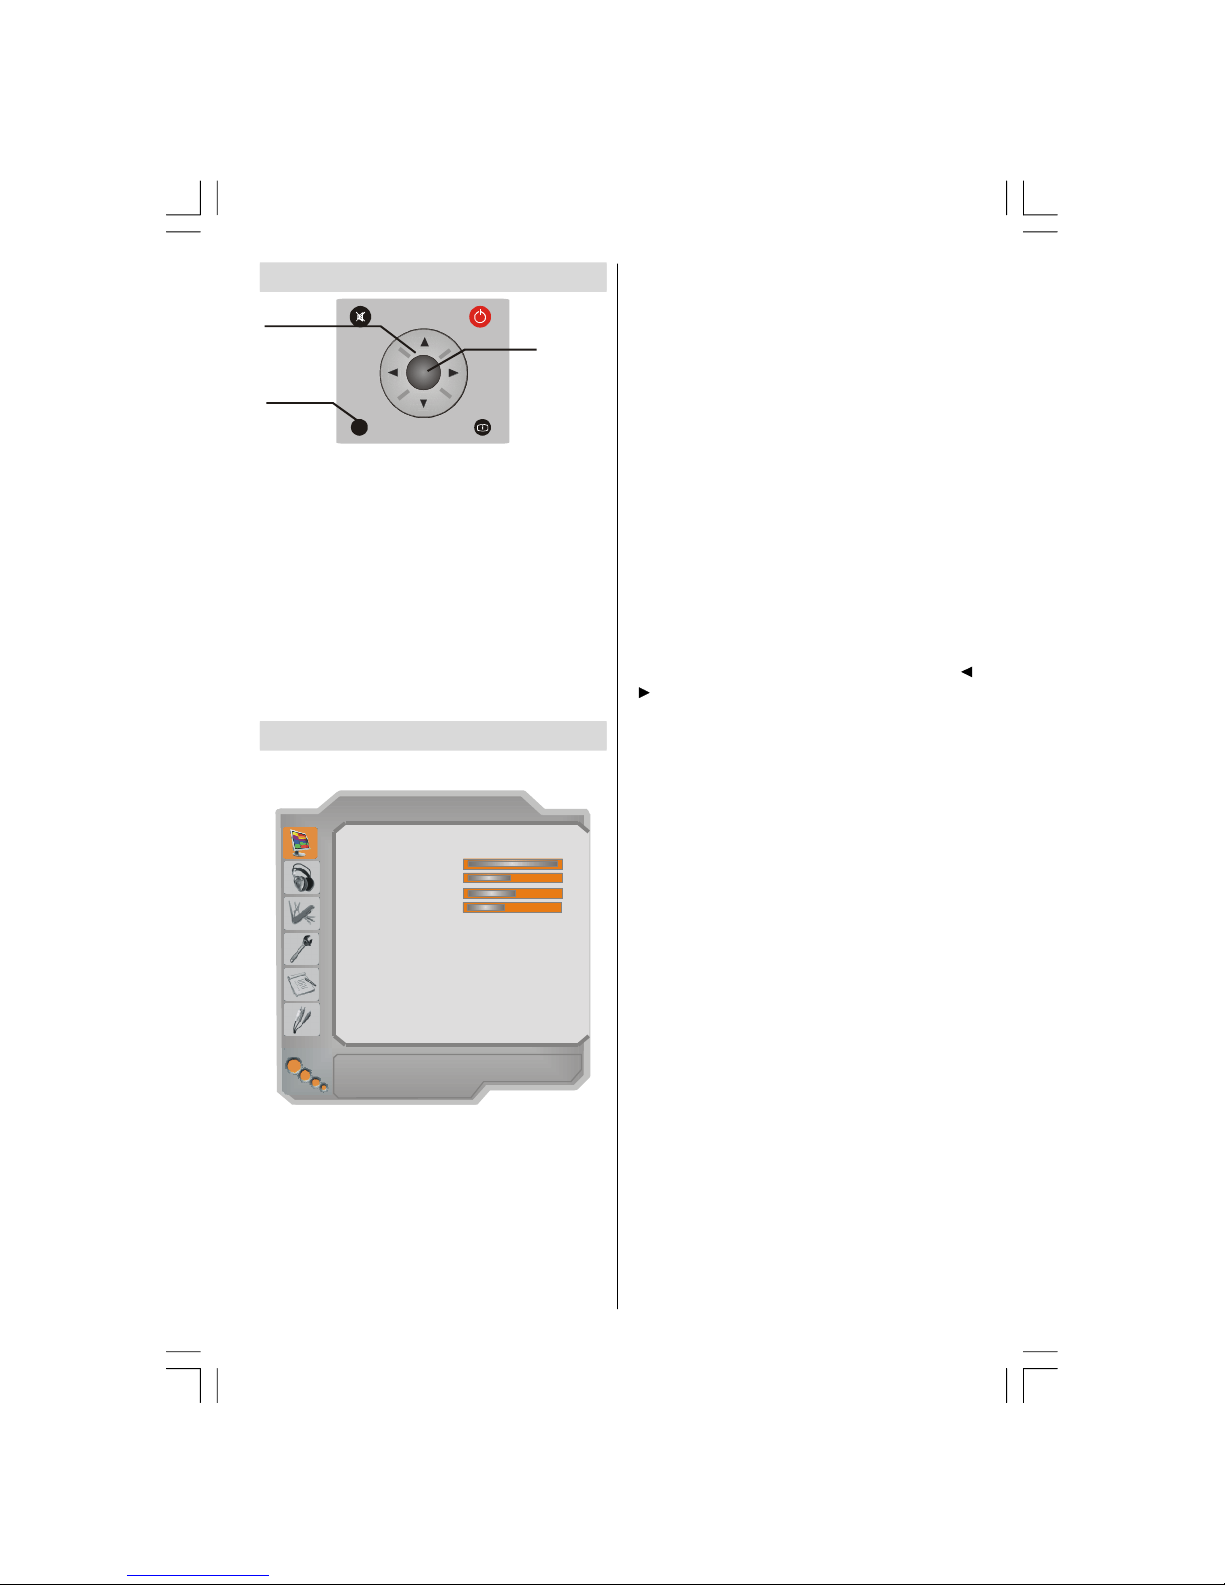
Navigating the Menu System ............................... 5
Menu System ....................................................... 5
Picture Menu .................................................... 5
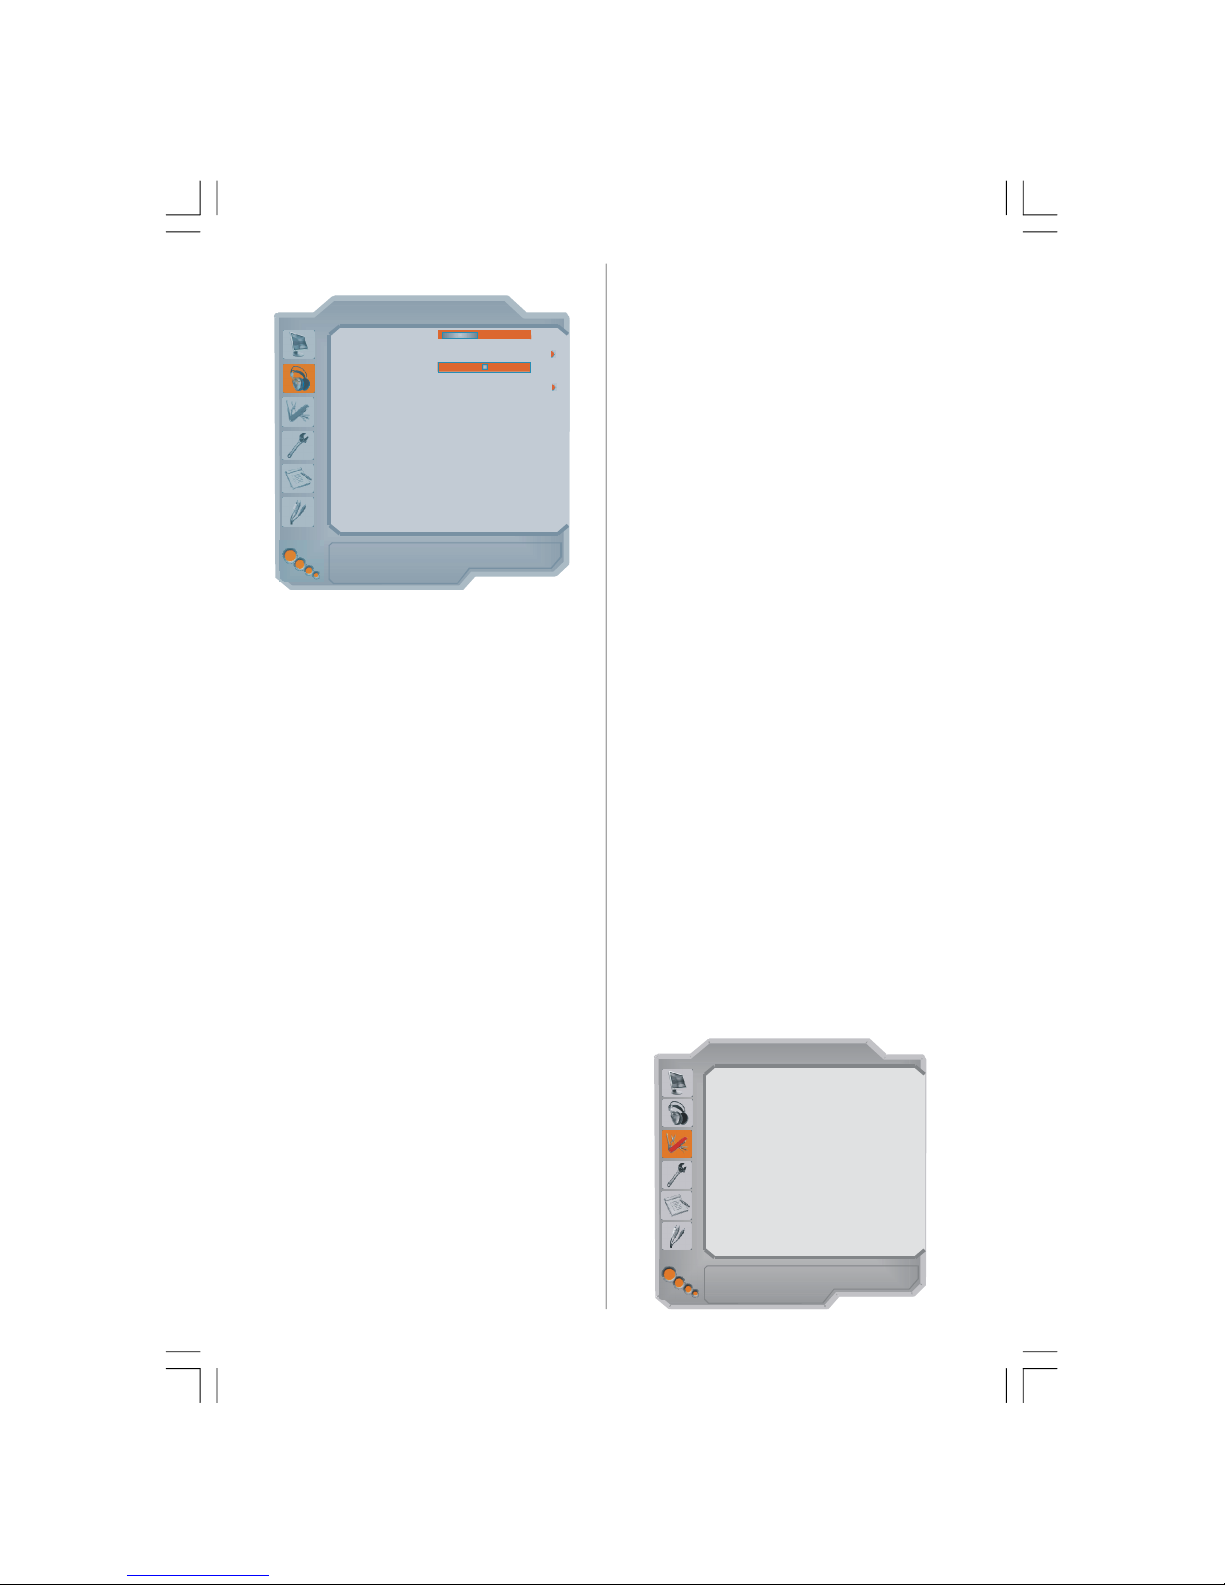
Sound Menu ..................................................... 6
Feature Menu ................................................... 6
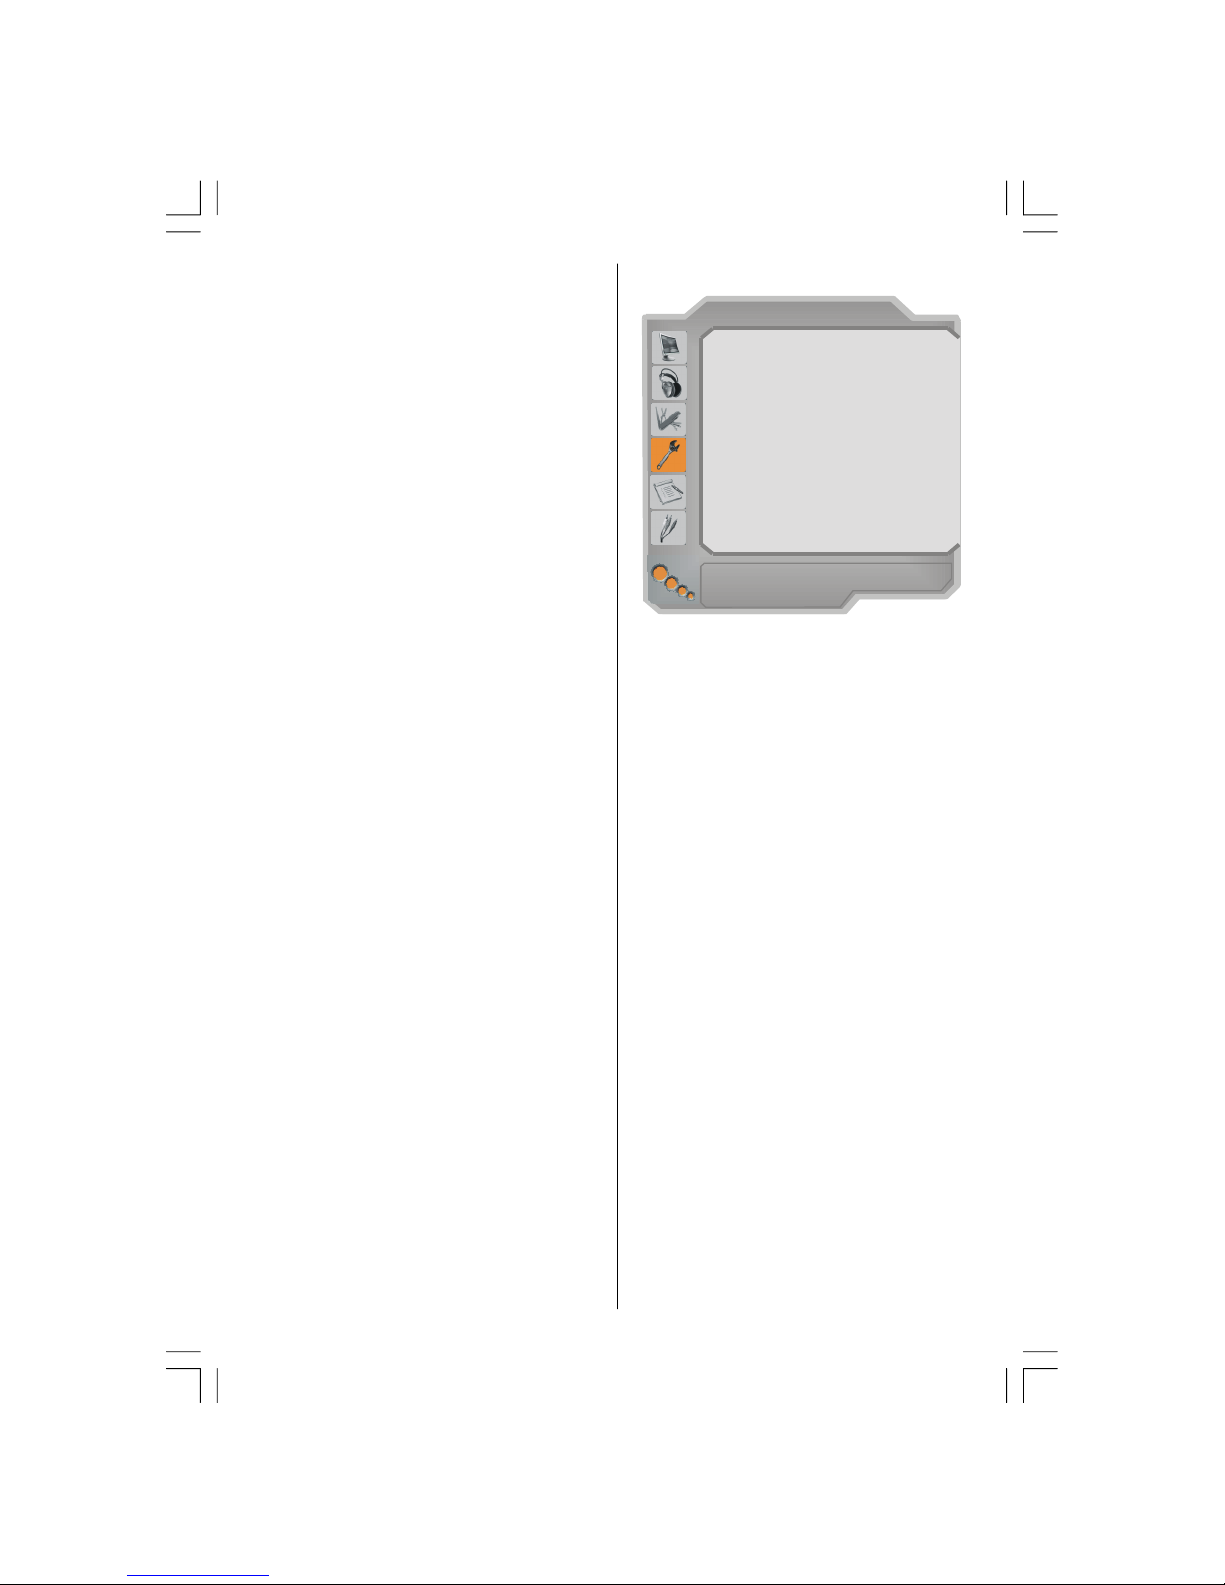
Install Menu ...................................................... 7
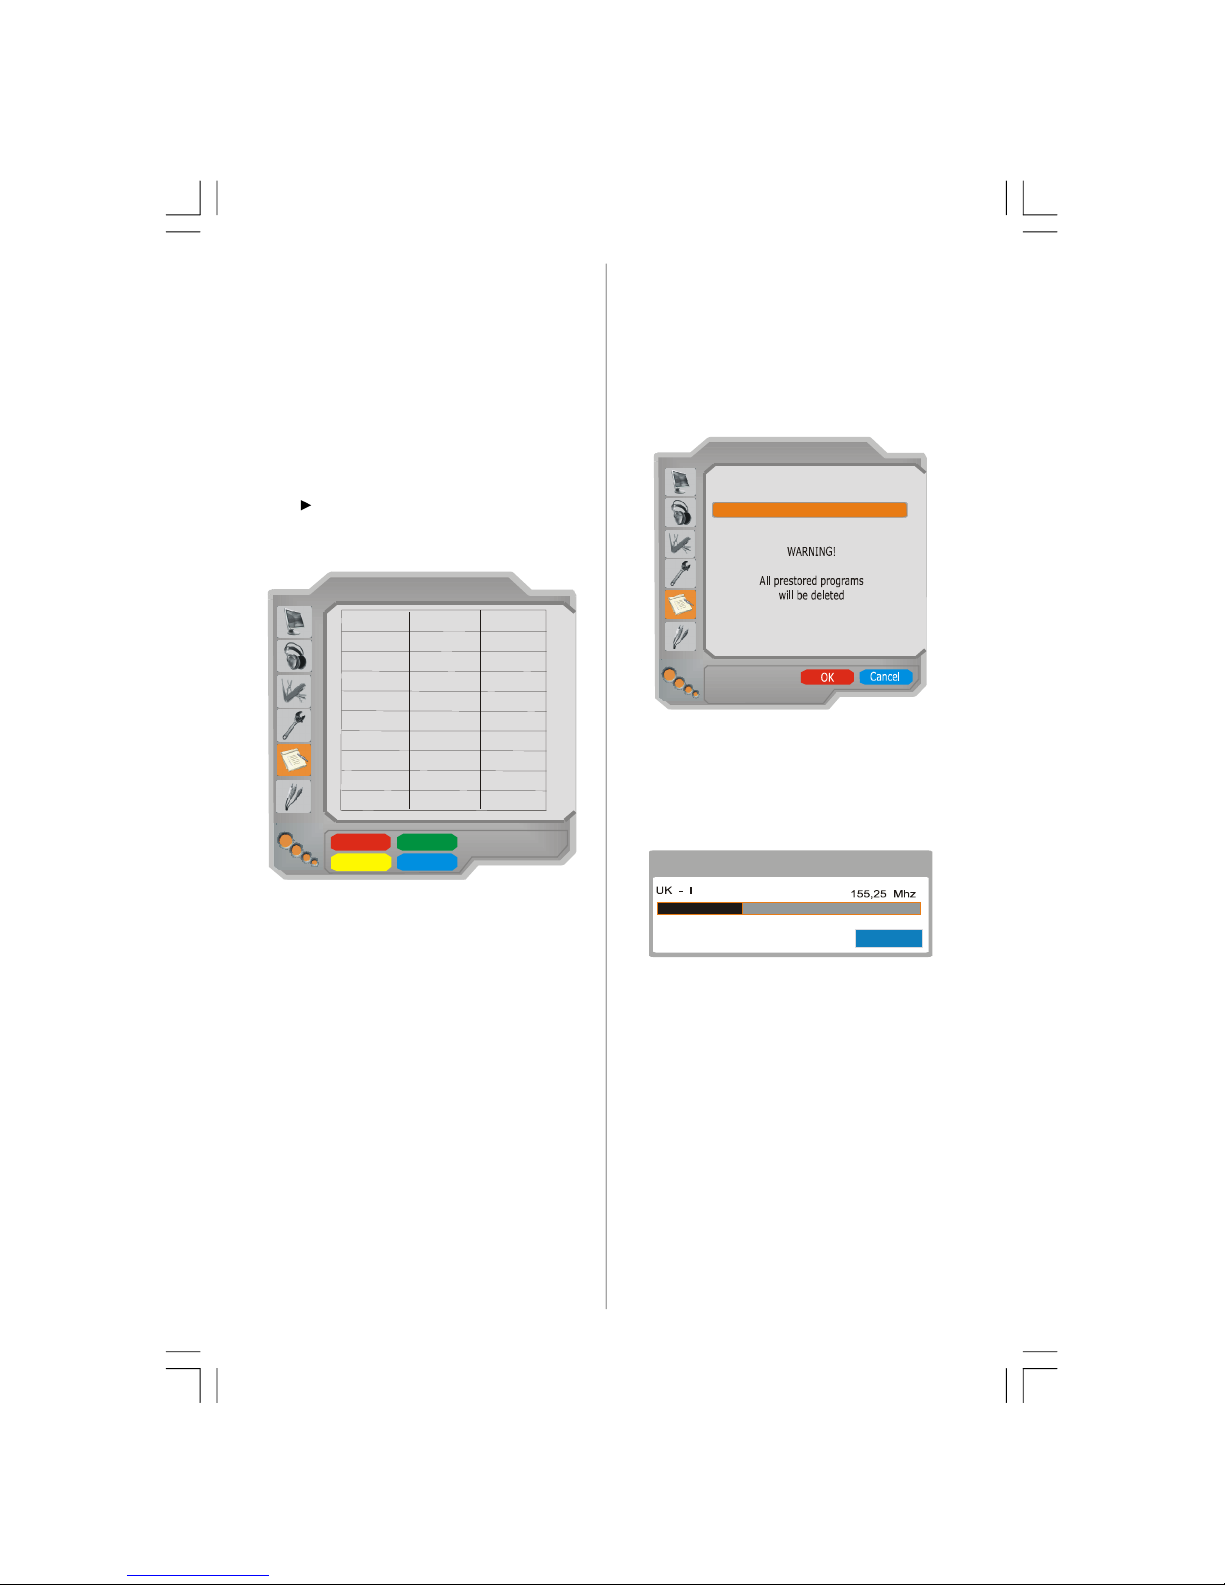
Program Menu .................................................. 8
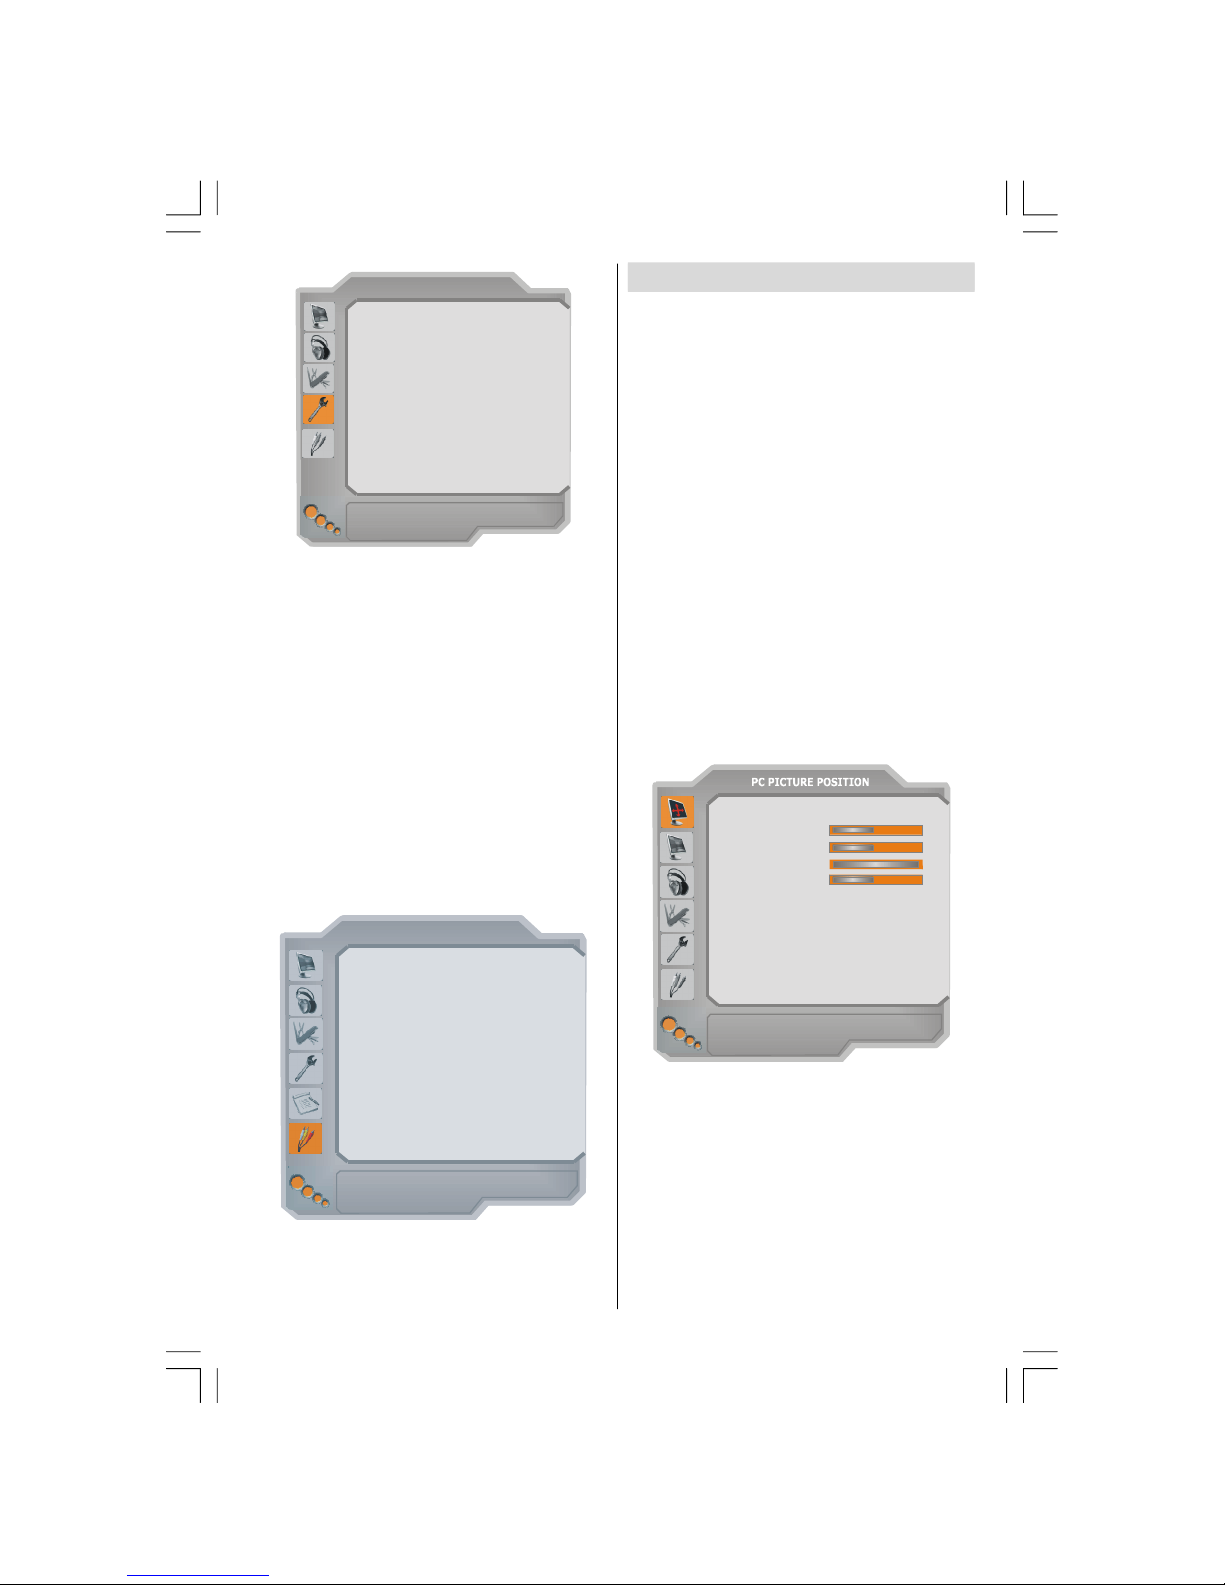
Source menu ................................................... 9
PC Mode .............................................................. 9
Installation ........................................................ 9
Menu System in PC mode ................................. 9
Other Features .................................................. 10
TV Status ....................................................... 10
Mute Indicator ................................................ 10
PIP and PAP modes ........................................ 10
AV Modes ...................................................... 10
Picture Mode Selection .................................. 10
Freeze Picture ............................................... 10
Zoom Modes .................................................. 10
Freeze Picture ................................................ 11
Teletext ............................................................... 11
Special Teletext Functions ............................... 11
Fastext .......................................................... 12
TOP text ......................................................... 12
Connect Peripheral Equipment ........................... 12
High Definition ................................................ 12
Via The Scart ................................................. 12
Via Aerial Input ............................................... 12
Decoder ......................................................... 12
TV And Video Recorder ................................ 12
Playback NTSC .............................................. 12
Copy Facility .................................................. 13
Camera And Camcorder ................................ 13
Connect The Decoder To The Video Recorder13
Connecting Headphones (optional) ................ 13
Audio Lineout ................................................. 13
Connecting Subwoofer ................................. 13
Tips ................................................................... 13
Appendix A: PC Input Typical Display Modes ..... 14
Appendix B: Aerial Connection .......................... 14
Appendix C: Connect Peripheral Equipment ....... 14
Peripheral Equipment Connections .................... 15
Specifications .................................................... 16
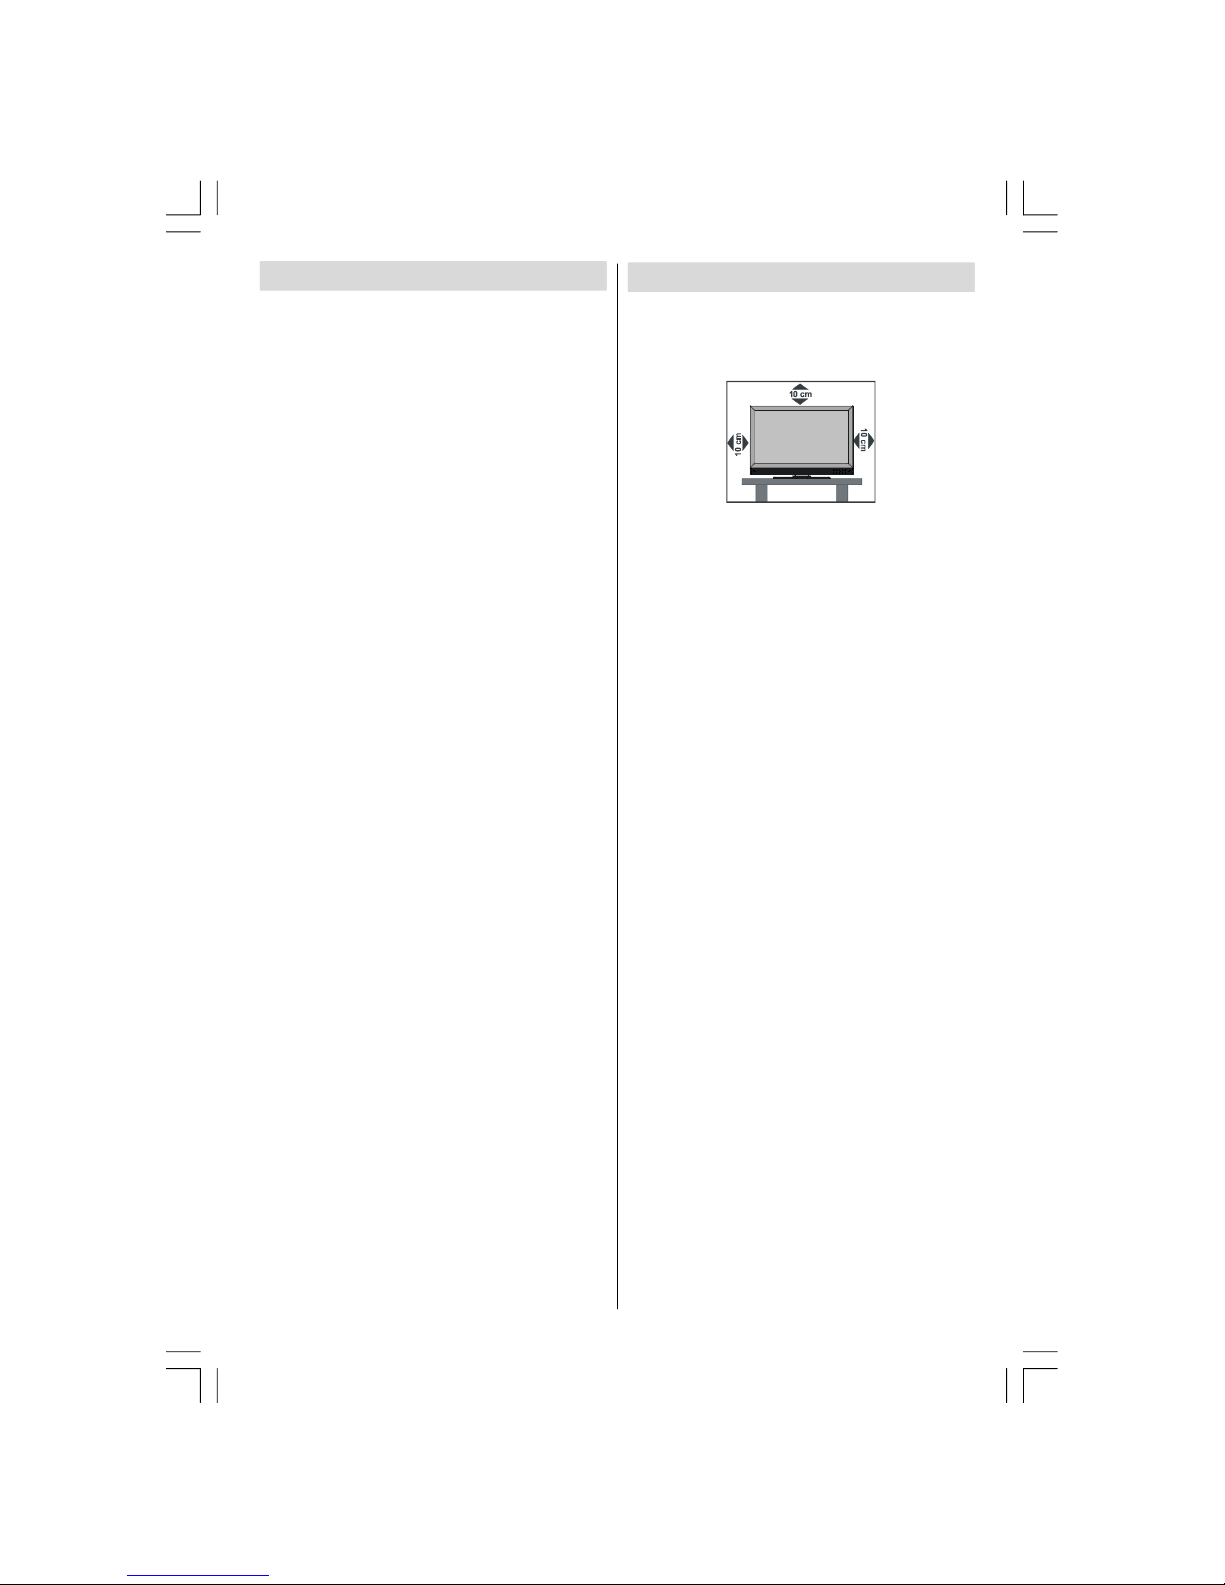
Preparation
For ventilation, leave a space of at least 10 cm free all
around the set. To prevent any fault and unsafe situa-
tions, please do not place any objects on top of the set.
Use this apparatus in moderate climates.
Features
• Remote controlled colour LCD TV.
• 100 programmes from VHF, UHF bands or cable
channels can be preset.
• It can tune cable channels.
• Controlling the TV is very easy by its menu driven system.
• It has 2 Scart sockets for external devices (such as
video, video games, audio set, etc.)
• Stereo sound system (3D Panorama).
• Full function Teletext.
• Fastext (1000 pages), TOP text.
• Headphone connection.
• A.P.S. (Automatic Programming System).
• All programmes can be named.
• Forward or backward automatic tuning.
• Sleep timer.
• Child Lock.
• Automatic sound mute when no transmission.
• NTSC Playback.
• AV in are available.
• It has VGA connector for external devices such as
computers.
• It has two HDMI connectors for Digital Video and
Audio. This connection is also designed to accept
High Definition signals.
• Full HD (1920x1080).
• It has PIP / PAP / PAT functions.
• AVL (Automatic Volume Limiting)
• When no valid signal is detected, after 5 minutes the
TV switches itself automatically to stand-by mode.
• PLL (Frequency Search)
• PC Input
• Plug&Play for Windows 98, ME, 2000, XP
• Audio Line Out
•Game Mode
ENG-52786W-MB26-1050UK-(W SUB-2SCRT)(3D PAN)(ECO PIP)(WO SVHS)(C2)-50133348.P6526.08.2008, 16:531

English - 2 -
LCD TV
Remote Control Buttons
+
P/CH
+
TV/AV
MENU
P/CH
TV/AV
VOLUME
MENU
STAND-BY
= Stand By
= Cursor Up
= Cursor Right
= Info
0 - 9 = Direct Programme
-/-- / EXIT = No function
P + = Programme Up
+
= Volume Up
TV
DTV
= TV / Quit Menu
AV
/SOURCE = External Source
Yellow button = Feature Menu
Blue button = Installation Menu
/ = Hold / PIP position
= Update, = PAP Mode
= Index Page
= Reveal / Switch from TV to PC
= Expand,
/WIDE = Image size
= Mix, = PIP mode
= Teletext
= Time
/ Red button = Page Up
/ Green button = Page Down
P<P/SWAP =Previous Programme
I-II = Mono/Stereo - Dual I-II
P - = Programme Down
= Volume Down
PP = Picture Mode Selection
OK/SELECT = Okay (Store)
= Cursor Down
= Cursor Left
31
M = Menu
32
= Mute
TV
DTV
INFO
1 2 3
45 6
7 8 9
0
-/--
EXIT
SWAP
P<P
I-II
SOURCE
AV
/
/
GUIDE
WIDE
PP
OK
SELECT
ABC DEF GHI
JKL MNO PQR
STU VWX YZ
1
2
3
4
5
6
7
8
9
10
11
12
13
14
15
16
17
18
19
20
21
22
23
24
25
26
27
28
29
30
31
32
P+
P -
M
ENG-52786W-MB26-1050UK-(W SUB-2SCRT)(3D PAN)(ECO PIP)(WO SVHS)(C2)-50133348.P6526.08.2008, 16:532

English - 3 -
specifications as the original one. Unauthorized sub-
stitutions may result in fire, electrical shock, or other
hazards.
9. Servicing
Please refer all servicing to qualified personnel. Do
not remove the cover yourself as this may result in an
electric shock.
10. Waste Disposal
Instructions for waste disposal:
•Packaging and packaging aids are recyclable and
should principally be recycled. Packaging materials,
such as foil bag, must be kept away from children.
•Battery, including those which are heavy metal-free,
should not be disposed of with household waste.
Please dispose of used battery in an environmentally
sound manner. Find out about the legal regulations
which apply in your area.
•Cold cathode fluoresant lamp in LCD PANEL contains
a small amount of mercury; please follow local ordi-
nates or regulations for disposal.
11. Disconnect Device
The mains plug is used to disconnect TV set from the
mains and therefore it shall remain readily operable.
12. Excessive sound pressure from earphones and
headphones can cause hearing loss.
13. To prevent injury, this device must be securely
attached to the wall in accordance with the installa-
tion instructions when mounted to the wall (if the
option is available).
“The LCD panel is very high technology product with
about a million thin film transistors, giving you fine
picture details. Occasionally, a few non-active pixels
may appear on the screen as a fixed point of blue,
green or red. Please note that this does not affect the
performance of your product.”
“DO NOT LEAVE YOUR TV AT STAND-BY OR OPER-
ATING WHEN YOU LEAVE YOUR HOUSE”
Safety Precautions
Please read the following recommended safety pre-
cautions carefully for your safety.
1.Power Source
The TV set should be operated only from a 220-240 V
AC, 50 Hz outlet. Ensure that you select the correct
voltage setting for your convenience.
2.Power Cord
Do not place the set, a piece of furniture, etc. on the
power cord (mains lead) or pinch the cord. Handle the
power cord by the plug. Do not pull out the plug by
tugging the cord and never touch the power cord when
your hands are wet as this could cause a short circuit
or electric shock. Never make a knot in the cord or tie it
with other cords. The power cords should be placed
in such a way that they are not likely to be stepped on.
A damaged power cord can cause fire or give you an
electric shock. When it is damaged and needs to be
changed, it should be done by qualified personnel.
3.Moisture and Water
Do not use this equipment in a humid and damp place
(avoid the bathroom, the sink in the kitchen, and near
the washing machine). Do not expose this equipment
to rain or water, as this may be dangerous and do not
place objects filled with liquids, such as flower vases,
on top. Avoid from dripping or splashing.
If any solid object or liquid falls into the cabinet, unplug
the TV and have it checked by qualified personnel
before operating it any further.
4.Cleaning
Before cleaning, unplug the TV set from the wall outlet. Do
not use liquid or aerosol cleaners. Use soft and dry cloth.
5. Ventilation
The slots and openings on the TV set are intended for
ventilation and to ensure reliable operation. To pre-
vent overheating, these openings must not be blocked
or covered in anyway.
6. Heat and Flames
The set should not be placed near to naked flames and
sources of intense heat, such as an electric heater. Ensure
that no naked flame sources, such as lighted candles, are
placed on top of the TV. Batteries shall not be exposed to
excessive heat such as sunshine, fire or the like.
7. Lightning
In case of storm and lightning or when going on holi-
day, disconnect the power cord from the wall outlet.
8. Replacement Parts
When replacement parts are required, be sure the
service technician has used replacement parts which
are specified by the manufacturer or have the same
ENG-52786W-MB26-1050UK-(W SUB-2SCRT)(3D PAN)(ECO PIP)(WO SVHS)(C2)-50133348.P6526.08.2008, 16:533

English - 4 -
Before Switching On Your TV
Power Connection
IMPORTANT: The TV set is designed to operate on
230-240V AC, 50 Hz.
• After unpacking, allow the TV set to reach the ambi-
ent room temperature before you connect the set to
the mains.
Connections To The Aerial Input Socket
• Connect the aerial or cable TV plug to theAerial input
socket located at the rear of the TV and connect the
cable plug coming out from the TV out socket lo-
cated on the devices (VCR, DVB etc.) to this socket
as well.
VHF/UHF
75
REAR OF THE TV
CABLE TV
Inserting Batteries In The Remote
Control Handset
WARNING : Remote control is battery included.A plas-
tic protector is used to disconnect the batteries in
order to prevent the battery life from reducing. Please
remove the plastic protector before the first use.
• Remove the battery cover located on the back of the
handset by gently pulling backwards from the indi-
cated part.
• Insert two AAA/R3 or equivalent type batteries in-
side. Place the batteries in the right directions and
replace the battery cover.
NOTE: Remove the battery from remote control hand-
set when it is not to be used for a long period.
Otherwise it can be damaged due to any leak-
age of battery.
Switching The TV ON/OFF
To switch the TV on:
Your TV will switch on in two steps:
1- Connect the power to 230-240V AC, 50Hz. Press
stand-by button.Then the TV switches itself to stand-
by mode (Optional).
2- To switch on the TV from stand-by mode either:
Press a digit button on the remote control so that a
channel number is selected, or Press the -P/CH or P/
CH+ button on the TV or press the Ch+ or Ch- button
on the remote control, so that last mode switched off
is selected.
By either method the TV will switch on. When the TV
is operated for the first time, the following screen
appears:
Language English
AUTO PROGRAM
Country Germany
Text language West
Select your Language, Country and Text language by
using
/
and
/
buttons. Press “OK” button to
continue. To cancel, press “BLUE” button.
For more information on this process, see “Install
Menu” section.
To switch the TV off:
Press stand-by button on the remote control or stand-
by button on the TV so the TV will switch to standby
mode. To power down the TV completely, unplug the
power cord from the mains socket.
ENG-52786W-MB26-1050UK-(W SUB-2SCRT)(3D PAN)(ECO PIP)(WO SVHS)(C2)-50133348.P6526.08.2008, 16:534

English - 5 -
Navigating the Menu System
M
INFO
OK
SELECT
For displaying
menu options
For navigation
To confirm
choices
1- Press “M” to display the menu.
2- Press “
” or “
” button to select an icon. Press
“
” or “OK” button for more options.
3- Use “
” or “
” button to highlight.
4- Press “
” or “
” buttons to change the settings.
Press OK to set as default.
5- To exit the menu or return from sub-menu screen,
press “M”.
These explanations are available for the navigation
of the whole Menu System. To select options that are
explained in the following parts, refer to “Navigating
The Menu System”.
Menu System
Picture Menu
Mode Dynamic
Contrast 63
Brightness 63
Sharpness 31
Colour 99
Colour Temp Normal
Noise Reduction Low
Film Mode Off
Store
Reset
PICTURE
NO SIGNAL
Game Mode
Mode
By pressing
/
button, select Mode. Press
/
button to choose from one of these options: Cinema,
Dynamic and Natural.
Contrast/Brightness/Sharpness/Colour/Hue
By pressing
/
button, select the desired Option.
Press
/
button to set the level.
Hint: Hue is displayed in picture menu when the TV
receives an NTSC signal.
Colour Temp
• By pressing
/
button select Colour Temp.
• Press
/
to choose from one of these options:
Cool, Normal and Warm.
Noise Reduction
By pressing
/
button select Noise Reduction.
Press
/
to choose from one of these options:
Low, Medium, High or Off.
Film Mode
Films are recorded at a different number offrames
per second to normal television programmes.
By pressing
/
button, select Film Mode.
Press
/
button to set this feature On or Off. Turn
this feature on when you are watchingfilms to see
the fast motion scenes clearly.
Game Mode
Select Game Mode by pressing
/
button. Use
/ button to set Game Mode as On or Off.
When Game Mode is set to On, specific game mode
settings, which are optimized for better video quality,
will be loaded.
Also; Picture Mode, Contrast, Brightness, Sharpness,
Colour and Colour Temp settings will be invisible and
disabled while Game Mode is on.
Note:
-Picture mode selection button on the remote control
will have no function while Game Mode is on.
Store
• By pressing
/
button select Store.
• Press
or “OK” button to store the adjustments.
“Stored” will be displayed on the screen.
Reset
By pressing
/
button, select Reset. Press
/
or “OK” button to reset the picture modes to factory
default settings.
ENG-52786W-MB26-1050UK-(W SUB-2SCRT)(3D PAN)(ECO PIP)(WO SVHS)(C2)-50133348.P6526.08.2008, 16:535

English - 6 -
Sound Menu
Volume 15
Equalizer
Balance 0
Headphone
Sound Mode Mono
AVL On
Effect Off
Dynamic Bass Off
3D Panorama Off
Store
SOUND
Subwoofer Off
Volume
By pressing
/
select Volume. Press
/
button to change the level of the Volume.
Equalizer
By pressing
/
button, select Equalizer.. Press
/
or “OK” button to enter equalizer menu.
In equalizer menu the sound mode can be changed to
User, Music, Movie, Speech, Flat and Concert
by pressing
/
button. Select the desired frequency
by
/
button and increase or decrease the fre-
quency gain by pressing
/
button.
Press the “M” button to return to the previous menu.
NOTE: Equalizer menu settings can be altered only
when the Equalizer Mode is in User.
Balance
By pressing
/
select Balance.Press
/
button
to change the level of the balance.Balance level can
be adjusted between -32 and + 32.
Headphone
By pressing
/
button, select Headphone. Press
button to enter hedphone menu.
volume
By pressing
/
button, select Volume. Press
button to increase hp volume level. Press
button to
decrease hp volume level. Headphone volume level
can be adjusted between 0 and 63.
balance
By pressing
/
button, select Balance. Press
button to increase balance to the right. Press
button
to decrease balance to the left. Balance level can be
adjusted between -32 and +32.
Press the “M” button to return to the previous menu.
Sound Mode
By pressing
/
select Sound Mode. Press
/
button, you can select Mono, Stereo, Dual I or Dual II
mode, only if the selected channel supports that mode.
AVL
By pressing
/
select AVLVL. Press
/
button to
set the AVL as on or off.
Effect
By pressing
/
select Effect. Press
button to
set Effect as on or off.
Dynamic Bass
Dynamic Bass is used to increase bass effect of the
TV set.
By pressing
/
button, select Dynamic Bass. By
pressing
/
button set Dynamic bass to Low, High
or Off. It is not recommended to select High if listening
at high volume levels.
3D Panoroma
This feature is used to create the impression that
sound is coming from around the room instead of the
set speakers. Pressing the
/
buttons will turn the
feature on or off.
Subwoofer
It is possible to connect an external, active subwoofer
to the set to give a much deeper bass effect.
By pressing
/
button, select Subwoofer..
Subwoofer can be set to On or Off.
Dynamic Bass is not available if Subwoofer is set to On.
Set Subwoofer to On when you connect an external
subwoofer to the set.
Store
• By pressing
/
button select Store.
• Press
or “OK” button to store the adjustments.
“Stored” will be displayed on the screen.
Feature Menu
Sleep Timer Off
Child Lock Off
Language English
Ext-2 Out TV
Default Zoom Full
Blue Background On
Menu Background Translucent
Menu Timeout 60 sec
Teletext Language West
FEATURE
ENG-52786W-MB26-1050UK-(W SUB-2SCRT)(3D PAN)(ECO PIP)(WO SVHS)(C2)-50133348.P6526.08.2008, 16:536

English - 7 -
Sleep Timer
By pressing
/
select “Sleep Timer”. Press
/
button to set the Sleep Timer..
The timer can be programmed between Off and 120
minutes in steps of 10 minutes.
Child Lock
By pressing
/
select Child Lock.
Press
/
button to set the Child Lock on or off.When
on is selected, the TV can only be controlled by the
remote control handset. In this case the control panel
buttons will not work. Hence, if one of these buttons
is pressed, “Child Lock On” will be displayed on the
screen when the Menu screen is not visible.
Language
By pressing
/
button, select Language.Use
/
button to select the language.
EXT2 Out
By pressing
/
select EXT2 Output. Use
/
button, to set Ext-2 Out to TV, EXT-1, EXT-3, EXT-
4,EXT-5, EXT-6 and PC.
NOTE: Only audio output is available for EXT-3,
EXT-5, EXT-6 and PC.The other options have
both audio and video outputs.
Default Zoom
By pressing
/
button, select Default Zoom.
You can set Default Zoom to Full, Panoramic, 4:3
or 14:9 Zoom by pressing
/
button.
Blue Background
By pressing
/
button, select Blue Background.
Press
/
button to set Blue Background as on or off.
Menu Background
By pressing
/
button, select Menu Back-
ground. You can change menu background to Trans-
lucent or Opaque by pressing
/
button.
Menu Timeout
By pressing
/
button, select Menu Timeout.
Press
/
button to change menu timeout to 15 sec,
30 sec or 60 sec.
Teletext Language
By pressing
/
button, select Teletext Language.
Press
/
button to change Teletext Language to
West, East, Turk/Gre,Cyrillic, or Arabic.
Install Menu
Program 1
Band S
Channel 36
Colour System AUTO
Sound System BG
Fine Tune 0
Search 423.25
VCR Off
Store Program
INSTALL
Program
By pressing
/
button, select Program. Press
/
button to select the program number. You can also
enter a number via digit buttons on the remote control.
There are 100 program storage between 0 and 99.
Band
Band can be selected either “C” or “S” by press
/
button.
Channel
Channel can be changed by
/
button or Digit But-
tons.
Colour System
By pressing
/
button, select Colour System.
Press
/
button to change the colour system to
PAL, SECAM or AUTO.
If Sound System is set to I, SECAM is not available for
the Colour System.
NOTE: In EXT mode, you can choose NTSC 3.58,
NTSC 4.43 or PAL60 as well.
Sound System
By pressing
/
button, select Sound System.
Press
/
button to change the sound system to BG,,
I, DK, L or LP.
Fine Tune
By pressing
/
button, select Fine Tune. Press
/
button to adjust the tuning.
Search
By pressing
/
button, select Search. Press
/
button to start program searching.You can also
enter the desired frequency via digit buttons when
search item is highlighted.
ENG-52786W-MB26-1050UK-(W SUB-2SCRT)(3D PAN)(ECO PIP)(WO SVHS)(C2)-50133348.P6526.08.2008, 16:537

English - 8 -
VCR
This item can be seen in all modes except YPbPr,
HDMI and PC.
If you want to watch a VCR source from one of these
modes, then it will be better to set VCR mode “on”.
For this, while the cursor is on this item press the
/
buttons to set it “On”.
If you want to watch a DVD, then you must set this
item “Off”.
Store Program
By pressing
/
button, select Store Program.
Press “ ”or “OK” button to store the adjustments.
“Program Stored” will be displayed on the screen.
Program Menu
PROGRAM
Name
Delete
Insert
APS
01 S-16
02 S-16
03 ARD
04 BBC1
05 D
06 CH4
07 BBC2
08 C06
09 C09
10 C10
11 C-12
12 C-21
13 C-23
14 C-43
15 C-55
16 C-57
17 C-64
18 C-68
19 S-20
20 S-20
21 S-20
22 S-33
23 S-34
24 S-35
25 S-36
26 S-40
27 -----
28 -----
29 -----
30 -----
By moving the cursor in four directions you can reach
20 programmes in the same page. You can scroll the
pages up or down by pressing the navigation buttons
to see all the programmes in TV mode (except the AV
mode). By cursor action, programme selection is done
automatically.
Name:
To change the name of a decided programme, select
the programme and press the “RED” button.
The first letter of the selected name will be highlighted.
Press
/
button to change that letter and
/
button to select the other letters. By pressing the
“RED” button, you can store the name.
Insert:
Select the programme which you want to insert by
navigation buttons. Press the “GREEN” button. By navi-
gation buttons move the selected programme to the
decided programme space and press the “GREEN”
button again.
Delete:
To delete a programme, press the “YELLOW” button.
Pressing the “YELLOW” button again erases the se-
lected programme from the programme list, and the
programmes below shift one up.
APS (Auto Programming System)
When you press the “BLUE” button for APS, Auto
Programming System Menu will appear on the Screen.
PROGRAM
Country Germany
A.P.S. (Auto Programming System) Country
Press
/
button to select your country. If you want
to exit from A.P.S. function, press the “BLUE” button.
When you press “OK” or “RED” button for starting
APS, all stored programs will be erased and the fol-
lowing screen will be displayed:
APS is running...
Cancel
Whenever you press the “BLUE” button, A.P.S. func-
tion stops and Program Table appears on the screen.
If you wait until the end of A.P.S., Program Table is
displayed with the programmes found and located.
Install menu in AV modes
The following screen appears in the install menu:
ENG-52786W-MB26-1050UK-(W SUB-2SCRT)(3D PAN)(ECO PIP)(WO SVHS)(C2)-50133348.P6526.08.2008, 16:538

English - 9 -
Colour System AUTO
VCR Off
Store Program
INSTALL
Colour System
By pressing
/
select Colour System. By press-
ing
/
button, you can change the colour system to
PAL, SECAM, PAL 60, NTSC 4,43, NTSC 3,58 or
AUTO.
VCR
By pressing
/
select VCR. By pressing
/
button, you can set the VCR to ON or OFF.
Store Program
By pressing
/
button, select Store Program.
Press
or “OK” button to store the adjustments. “Pro-
gram Stored” will be displayed on the screen.
Source menu
By pressing
/
button, select the sixth icon and
press
or “OK” button. Source menu appears on the
screen.
SOURCE : TV
TV
EXT - 1
EXT - 2
EXT - 4
EXT - 5
EXT - 6
TUNER
SCART
SCART
YPbPr
FAV
HDMI
PC
HDMI
EXT - 3
In source menu, highlight a source by pressing
/
button and switch to that mode by pressing “
” or
“OK” button. Source options are; TV, EXT-1, EXT-2,
EXT-3, EXT-4, EXT-5, EXT-6 and PC.
PC Mode
Installation
• Power off both Computer and Display before making
any connections.
• Set your PC’s resolution correctly before connect-
ing to the TV. See the table on Appendix page.
• Use 15-pin display cable to connect a PC to the LCD
TV.
Menu System in PC mode
Sound Menu/Feature Menu
The items in these menus are described at Sound &
Feature Menu explained in “Menu System”.
PC Picture Menu
By pressing
/
button, select the second icon. PC
Picture menu appears on the screen.
Brightness, Contrast and Colour Temperature adjust-
ments in this menu are identical to adjustments de-
fined in TV picture menu in “MENU SYSTEM”.
PC Picture Position Menu
By pressing
/
button, select the first icon and
press “
” or “OK” button. PC Picture Position menu
appears on the screen.
Autoposition
H Position 9
V Position 50
Dot Clock 100
Phase 31
Autoposition
If you shift the picture horizontally or vertically to an
unwanted position, use this item to put the picture into
correct place automatically.
• Select Autoposition item by using
/
buttons.
Press or “OK” button.
Warning: Auto position adjustment recommended to
be done with the full screen image for the proper
adjustment.
ENG-52786W-MB26-1050UK-(W SUB-2SCRT)(3D PAN)(ECO PIP)(WO SVHS)(C2)-50133348.P6526.08.2008, 16:539

English - 10 -
H (Horizontal) Position
This item shifts the image horizontally to right hand
side or left hand side of the screen.
• Select H Position item by using
/
button.
• Use
/
button to adjust the value.
V (Vertical) Position
This item shifts the image vertically towards the top or
bottom of the screen.
• Select V Position item by using
/
button.
• Use
/
button to adjust the value.
Dot Clock
Dot Clock adjustments correct interference that ap-
pear as vertical banding in dot intensive presentations
like spreadsheets or paragraphs or text in smaller fonts.
• Use
/
button to adjust the value.
Phase
Depending on the resolution and scan frequency that
you input to the TV Set, you may see a hazy or noisy
picture on the screen. In such a case you can use
this item to get a clear picture by trial and error method.
• Use
/
button to adjust the value.
Sound in PC mode
• Connect the PC’s Audio output to the TV’s PC Audio
In socket with an audio cable.
Other Features
TV Status
Programme Number, Programme Name,
Sound Indicator and Zoom Mode are displayed
on the screen when a new programme is entered or
“ ” button is pressed.
Mute Indicator
It is placed in the upper side of the screen when enabled.
To cancel mute, there are two alternatives; the first
one is pressing the button and the second one is
increasing the volume level.
PIP and PAP modes
Press the “ ” button to switch to PIP mode.
At PIP Mode, a small picture (PIP picture) is displayed
on the main picture. There are 1 size and 4 positions
(upper left, upper right, bottom left and bottom right)
available for the PIP window. You can use button
to change the PIP position. Aspect Ratio of the PIP
window is fixed and 4:3.
When PIP Mode is entered, the default active window
is PIP window and the active window is indicated by
a white frame around it. The active window can be
changed by pressing
/
button. The status info
OSD belongs to active window. The place of the sta-
tus OSDs are same for both windows.
Press the “ ” button again to switch PAP mode.
At PAP Mode, two pictures with equal sizes are dis-
played on the screen. Aspect Ratios of the windows
are fixed.
When you switch to PAP Mode, Main window in PIPMode
is displayed on the right side of the screen. The active
window can be changed by pressing
/
button.
Press the “ ” button again to exit the PAP mode.
NOTE: In all HDMI modes, Pip and PAP are not vis-
ible. In YPbPr 1080i, Pip is not visible.
PAT
In PAT (Picture and Text) mode, picture is splitted into
two and text is displayed near the main picture.
There are two ways available for switching to PAT mode:
• Pressing “ ” button while in teletext will switch the
TV to PAT mode.
• While the PAP function is off, pressing “ ” twice
will switch the TV to PAT mode.
AV Modes
By pressing the “
AV
”button you can switch your TV
to AV modes (except being in teletext). Pressing this
button consecutively will switch the TV in one of the
optional AV modes: TV, EXT-1, EXT-2, EXT-3, EXT-4,
EXT-5, EXT-6 and PC.
Picture Mode Selection
By pressing “PP” button, you may change Picture
Mode settings.
Freeze Picture
You can freeze the picture on the screen by pressing
the OK button. At PIP and PAP layouts, only the main
picture can be frozen.
Zoom Modes
Zoom mode can be changed by pressing the “ /
WIDE”button. You can change the screen size ac-
cording to the picture aspect ratio. Select the optimum
one from the following ZOOM modes.
NOTE: InYPBPR and HDMI modes,while in 720 and
1080 resolutions, Full 1 and Full 2 modes
will be visible.
NOTE: When in “Full 1” mode; if picture defects in top and
bottom lines occur because of the broadcast,
switch to “Full 2” mode to avoid. If such defects in
ENG-52786W-MB26-1050UK-(W SUB-2SCRT)(3D PAN)(ECO PIP)(WO SVHS)(C2)-50133348.P6526.08.2008, 16:5310

English - 11 -
the edges of picture are not experienced, it is
advised that you watch in “Full 1” mode.
NOTE: You can only choose 4:3 and FULL in PC mode.
Auto:
When a WSS (Wide Screen Signalling) signal,
which shows the aspect ratio of the picture, is in-
cluded in the broadcast signal or the signal from an
external device, the TV automatically changes the
ZOOM mode according to the WSS signal.
• When the AUTO mode does not function correctly
due to poor WSS signal quality or when you want to
change the ZOOM mode, change to another ZOOM
mode manually.
Full:
This uniformly stretches the left and right sides of a
normal picture (4:3 aspect ratio) to fill the wide TV screen.
• For16:9 aspect ratio pictures that have been squeezed
into a normal picture (4:3 aspect ratio), use the Full
mode to restore the picture to its original shape.
4:3
Use to view a normal picture (4:3 aspect ratio) as this
is its original shape.
Panoramic:
This stretches the left and right sides of a normal
picture (4:3 aspect ratio) to fill the screen, without
making the picture appear unnatural.
The top and bottom of the picture are slightly cut off.
14:9 Zoom:
This zooms up the wide picture (14:9 aspect ratio) to
the upper and lower limits of the screen.
Cinema:
This zooms up the wide picture (16:9 aspect ratio) to
the full screen.
16:9 Subtitle:
This zooms up the wide picture (16:9 aspect ratio)
with subtitles to the full screen.
Freeze Picture
You can freeze the picture on the screen by pressing
the “OK” button.
Teletext
You can display Teletext information on your TV. Each
channel which broadcasts teletext, transmits a page
with information on how to use its teletext system
(usually page 100). Depending on the TV channel,
teletext is transmitted in different systems.The colours
used in the options line correspond with the colour
buttons of your remote control.
• Ensure that the TV is receiving a good signal, or
some text errors may occur.
• When four coloured items appear at the bottom of
the text page,Fasttext is available.Fasttext allows
you to access pages quickly and easily.Press the
corresponding coloured button to access the page.
Special Teletext Functions
To Display a page of text.
To view text services press “ ”. Programmes can-
not be changed until text is cancelled.
• To select a page, press the number buttons or pro-
gram buttons (P+, P-).
• To select index page, press “ ” button.
• To select superimposed over the programme on the
screen, press “ ”.
• Press “ ” once to enlarge top half of the page,press
again to enlarge the bottom half of the page.Press
again to revert normal size.
• To discover solutions on quiz and games press “ ”
• At times it is convenient to hold a page of text.Press
“” to hold a page. The page will be held on screen
until the button pressed again.
• To select subcode pages press “ ”. Subcode pages
are subsections of long Teletext pages that can only
be displayed on the screen one section at a time.
• Time information will be displayed on screen after
pressing “ ” button.If the programme does not have
ENG-52786W-MB26-1050UK-(W SUB-2SCRT)(3D PAN)(ECO PIP)(WO SVHS)(C2)-50133348.P6526.08.2008, 16:5311

English - 12 -
teletext transmission, no information will be displayed.
• When “ ” button is pressed while in teletext mode,
the screen will be splitted into two windows, one
displaying the teletext and the other displaying the
current channel. Press “
TV
DTV
” button to exit from
teletext.
• Press “ ” button once to switch PAT mode. Press
again to exit.
Note: If the signal becomes insufficient, the teletext
mode will be quitted.
Fastext
Your TV supports the 1000 page Teletext system.
When the page number of any of the 1000 pages in
memory is entered, the system will not search for the
requested page; instead it will display the page auto-
matically. If the requested page is not in memory, the
system will search for the requested page number
and save the 1000 pages including the requested
page into memory after finding it.
• Press the
button to move the Teletext screen
forward one page at a time.
• Press the
button to move the Teletext screen
backward one page at a time.
For Fastext
The subject-heading for the information may have a
particular colour.
• Press an appropriate RED, GREEN, YELLOW or
BLUE button in order to reach the relevant page
quickly.
TOP text
TOP text mode of operation will be activated automati-
cally according to the transmission.
• If TOP text transmission is present, colour coded
buttons will appear in status row.
• If TOP text transmission is not present, status row
will not appear.
The subject-heading for information may be located in
colored box.
In Top mode the “-P” or “P+” commands will request
the next or previous page respectively. If TOP text
transmission is not available, in case of operation of
these commands, wraparound occurs. For example
page 100 appears to be one greater than page 199.
Connect Peripheral Equipment
High Definition
Your LCD Television is capable of displaying High Defi-
nition pictures from devices such as a High Definition
Satellite Receiver or DVD Player. These devices must
be connected via the HDMI sockets or Component
Socket. These sockets can accept either 720p or 1080i
signals. Also, only HDMI modes accept 1080p signals.
Via The Scart
The TV has 2 Scart sockets. If you want to connect
peripherals (e.g. video, decoder, etc.) which have
Scart sockets to the TV, you can use SCART socket
of the TV.
Note: If an external device is connected via the Scart
sockets, the TV will automatically switch to AV
mode. If both sockets are employed at the sime
time, SCART 1 becomes the preferential.
Via Aerial Input
If the device you want to connect does not have a
Scart socket, you should connect it to the Aerial input
of the TV.
If the VCR is connected via Aerial input, it is
suggested to use Programme 0.
Decoder
If you are subscribed to cable TV offers, the
organisation will supply you a corresponding decoder
unit to allow the programmes to be unscrambled.
For further information consult your dealer.
Connect a decoder with an aerial socket to
the TV
• Connect the aerial cable.
Connect a decoder without an aerial socket
to the TV
• Connect the decoder to the EXTERNAL socket of TV
with a RCA cable. Through the SCART/RCA socket
of the decoder, you may attain a better display reso-
lution.
TV And Video Recorder
• Connect the aerial cables.
Better picture quality can be obtained if you also con-
nect a Scart cable to SCART sockets.
Playback NTSC
• Connect NTSC VCR player to a Scart socket of the
TV.
Then, press the “
AV
” button to select EXT1 or EXT2.
ENG-52786W-MB26-1050UK-(W SUB-2SCRT)(3D PAN)(ECO PIP)(WO SVHS)(C2)-50133348.P6526.08.2008, 16:5312

English - 13 -
Copy Facility
Source selection for VCR recording.
• Select Feature menu.
• Select SCART 2 Out by pressing
/
button.
• For copying the picture that comes from the tuner,
select SCART 1.
Camera And Camcorder
To Connect To AV Input
Connect your camera or camcorder to AV input of the
TV.
• Connect your equipment to the TV via VIDEO (yel-
low), AUDIO R (red) and AUDIO L (white) inputs.
You must connect the jacks into the input with the
same colour.
Connect The Decoder To The Video
Recorder
Some video recorders have a special Scart socket
for decoder.
• Connect a Scart cable to the Scart socket of your
decoder and to the special Scart socket of your
video recorder. Refer to the booklet of your video
recorder.
Connecting Headphones (optional)
Use the stereo headphone socket of the TV, to con-
nect headphones.
Note: If you want to connect more equipment to your
TV, consult your dealer.
Audio Lineout
To connect the external speakers to your TV, use
Line Outs of the TV.
Note: While watching HDMI source, Lineout selec-
tion could only be the current source.
Connecting Subwoofer
Use Subwoofer Out socket to connect an
external, active subwoofer to the set to give a much
deeper bass effect.
Tips
Care Of The Screen
Clean the screen with a slightly damp, soft cloth. Do
not use abrasive solvents as they may damage the
TV screen coating layer.
Poor Picture
Have you selected the correct TV system? Is your TV
set or house aerial located too close to non-earthed
audio equipment or neon lights, etc.?
Mountains or high buildings can cause double pictures
or ghost images. Sometimes you can improve the pic-
ture quality by changing the direction of the aerial.
Is the picture or Teletext unrecognisable? Check if
you have entered the correct frequency.
The picture quality may degrade when two peripher-
als are connected to the TV at the same time. In such
a case, disconnect one of the peripherals.
No Picture
Is the aerial connected properly? Are the plugs con-
nected tightly to the aerial socket? Is the aerial cable
damaged? Are suitable plugs used to connect the
aerial? If you are in doubt, consult your dealer.
No Picture means that your TV is not receiving a
transmission. Have you selected the correct button
on the remote control?Try once more.
Sound
You can not hear any sound. Did you perhaps inter-
rupt the sound, pressing the button?
Sound is coming from only one of the speakers.Is the
balance set to one extreme? See Sound menu.
Remote Control
Your TV no longer responds to the remote control.
Perhaps the batteries are exhausted. If so you can
still use the local buttons at the bottom of the TV.
ENG-52786W-MB26-1050UK-(W SUB-2SCRT)(3D PAN)(ECO PIP)(WO SVHS)(C2)-50133348.P6526.08.2008, 16:5313

English - 14 -
Appendix C: Connect Peripheral Equipment
VHF/UHF
75
Round 75 ohm coaxial cable
Rear of TV
Outdoor Aerial Connection
Appendix B: Aerial Connection
Appendix A: PC Input Typical Display Modes
The display has a maximum resolution of 1360 x 768, frequency range of 56-85 Hz.
The following table is an illustration of some of the typical video display modes.
ANT.IN
AUDIO IN
(R)(L)
VIDEO IN
IN
OUT
IN
OUT
AUDIO
VIDEO
SATELLITE RECEIVER
ANTENNA
CAMCORDER
Mode Resolution Frequency
Horizontal Vertical Hor.(kHz) Ver.(Hz)
1640 480 31,5 60
2640 480 37,9 72
3640 480 37,5 75
4800 600 35,2 56
5800 600 37,9 60
6800 600 48,1 72
7800 600 46,9 75
8800 600 53,7 85
91024 768 48,4 60
10 1024 768 56,5 70
11 1024 768 60 75
12 1280 1024 64 60
13 1280 768 47,8 60
14 1360 768 47,7 60
*Only available in Full and PAP modes,not in 4:3 mode
ENG-52786W-MB26-1050UK-(W SUB-2SCRT)(3D PAN)(ECO PIP)(WO SVHS)(C2)-50133348.P6526.08.2008, 16:5314

English - 15 -
Peripheral Equipment Connections
Information for users applicable in European Union countries
This symbol on the product or on its packaging means that your electrical and
electronic equipment should be disposed at the end of life separately from your
household wastes. There are separate collection systems for recycling in EU. For
more information, please contact the local authority or the dealer where you
purchased the product.
O
H
I
J
K
L
M
N
G
EF
D
Video Input
Audio Inputss
Headphone
VGA Input
Subwoofer out
PC Audio Inputss
Audio Line Out
Component Audio Inputss
Component Video (YPbPr) Inputs
HDMI Inputs
Scart 2
Aerial
For service use only
Scart 1
Power Cable
B
C
ENG-52786W-MB26-1050UK-(W SUB-2SCRT)(3D PAN)(ECO PIP)(WO SVHS)(C2)-50133348.P6526.08.2008, 16:5315

English - 16 -
Specifications
TV BROADCASTING
PAL/SECAM B/G D/K K' I/I' L/L'
RECEIVING CHANNELS
VHF (BAND I/III)
UHF (BAND U)
HYPERBAND
CABLE TV (S1-S20 / S21-S41)
NUMBER OF PRESET CHANNELS
100
CHANNEL INDICATOR
On Screen Display
RF AERIAL INPUT
75 Ohm (unbalanced)
OPERATING VOLTAGE
220-240V AC, 50 Hz.
AUDIO
3D Panorama
AUDIO OUTPUT POWER (WRMS.) (%10 THD)
2 x 10 W
POWER CONSUMPTION (W)
375 W
<1 W (Stand-by)
PANEL
16:9 display, 52” Screen Size
DIMENSIONS (mm)
Weight (kg)
With foot
Without foot
D L H
DIMENSIONS (mm)
345
131
906
853
42,0
34,0
1282
ENG-52786W-MB26-1050UK-(W SUB-2SCRT)(3D PAN)(ECO PIP)(WO SVHS)(C2)-50133348.P6526.08.2008, 16:5316

English - 17 -
CAUTION
TO PREVENT ELECTRICSHOCK DISCONNECT FROM THE MAINS BEFORE REMOVING COVER. NO
USER SERVICEABLE PARTS INSIDE. REFER SERVICING TO QUALIFIED SERVICE PERSONNEL.
SAFETY PRECAUTION
THIS EQUIPMENT MUSTBE DISCONNECTED FROM THE MAINS WHEN NOT IN USE. DO NOTALLOW
THIS UNIT TO BE EXPOSED TO RAIN ORMOISTURE.
MAINS (AC) OPERATION
The wires in the mains lead are coloured in accordance with the following code :
IMPORTANT
As the colours of the wires in the mains lead of this appliance may not correspond with the coloured
markings identifying the terminals in your plug, proceed as follows:
The wire which is coloured green and yellow must be connected to the terminal which is marked with
the letter E, or by the earth symbol, or coloured green or green and yellow.
The wire which is coloured blue or black must be connected to the terminal which is marked with the
letter N or coloured Black.
The wire which is coloured brown or red must be connected to the terminal which is marked with the
letter L or coloured Red.
For continued protection against risk of fire, replace only with same type and rating of fuse (ASTA
approved 5A 250VAC fuse).
Important Instruction
For your own safety read following instruction carefully before attempting to connect this unit to the mains
supply.
BLUE
(Neutral)
BROWN
(Live)
FUSE
GREEN
&
YELLOW
(Earth)
(if there is
earth cable)
ENG-52786W-MB26-1050UK-(W SUB-2SCRT)(3D PAN)(ECO PIP)(WO SVHS)(C2)-50133348.P6526.08.2008, 16:5317

Table of contents
Other Walker LCD TV manuals